Advertisement

Before you use the System, review all the product instructions and the insert. The User Guide includes all safety information and instructions for use. Talk to your professional healthcare team about how you should use your sensor glucose information to help manage your diabetes.
Failure to use the System according to the instructions for use may result in you missing a severe low blood glucose or high blood glucose event and/or making a treatment decision that may result in injury. If your glucose alarms and readings from the System do not match symptoms or expectations, use a fingerstick blood glucose value from a blood glucose meter to make diabetes treatment decisions. Seek medical attention when appropriate.
The pictures and images shown in this guide are for illustration purpose only, and may differ in appearance from the actual product.
Getting to Know Your System
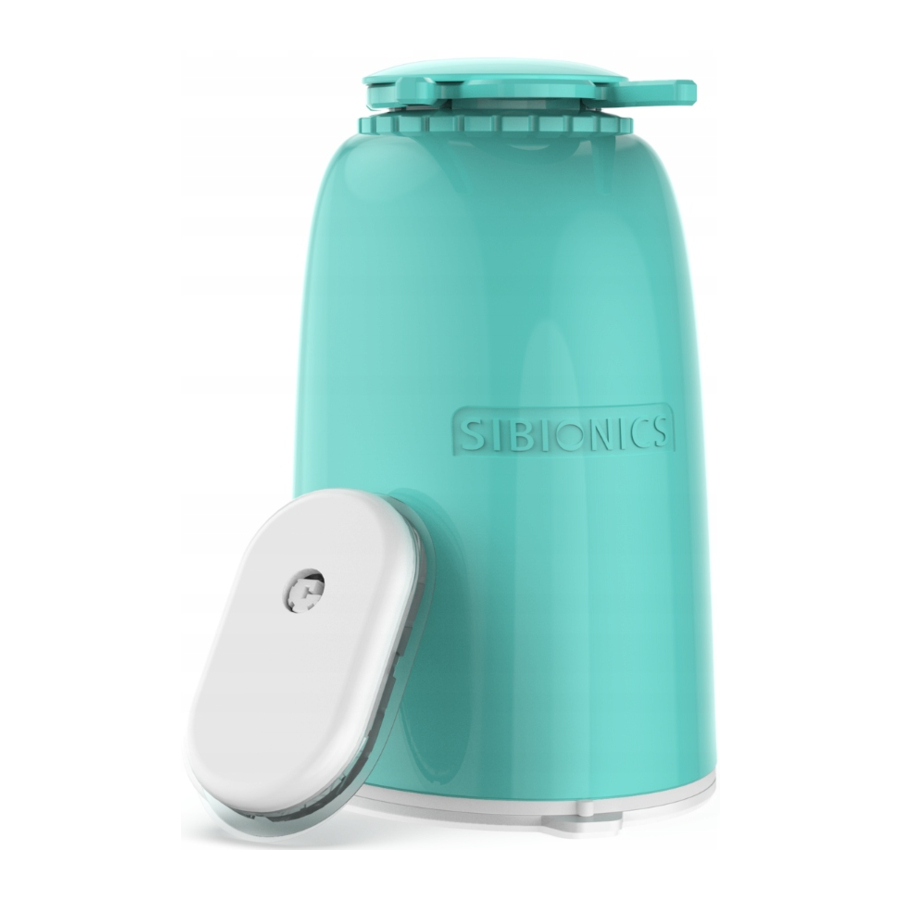
The GS1 CGM System comprises two main parts: a sensor kit and the SIBIONICS App (App). An additional overpatch is provided for additional adhesive strength to fix the Sensor to the skin.
You can use your smart phone (phone) to download and install the App.
The sensor kit and the SIBIONICS App can be used in the home environment. When opening the kit, check that all the contents are present and undamaged. If any parts are missing or damaged, contact the Customer Service at support@sibionics.com.
Sensor Kit
The sensor kit includes: Ÿ
- Sensor Pack
- ŸSensor Applicator

Sensor Applicator
Applies the Sensor to your body.

Sensor Pack
Used with the Sensor Applicator to prepare the Sensor for use.

Sensor (visible after application)

Read the following information before using the sensor kit.
- The Sensor includes two main parts; one part, the electrode module, is placed in the Sensor Pack, and the other part, the electronics that transmit the signal to the app, is placed in the Sensor Applicator. Follow the instructions of Using Your Sensor to prepare and apply the Sensor on the back of the upper arm.
- The Sensor has a small, flexible tip that is inserted just under the skin. The Sensor can be worn for up to 14 days.
- The Sensor automatically measures the glucose while placed on the body and stores the glucose data. It uses an amperometric electrochemical technique for glucose assay. Your phone configured with the SIBIONICS App receives the glucose readings and other information from the Sensor, via Bluetooth communication.
SIBIONICS App
The SIBIONICS App is installed by the user on the phone.
Overview
The SIBIONICS App is part of the GS1 CGM system. It retrieves glucose data from the Sensor to help monitoring the glucose levels. The App provides continuous, comprehensive, and reliable 24-hour glucose data, useful for glycemic control.
Expected Performance
The blood glucose reading is updated every 5 minutes in real-time monitoring.
Using Your Sensor
- Ÿ During the course of wearing the device, the Sensor can come loose or the Sensor tip can come out of the skin. This may occur, for example, during intense exercise, or if the Sensor is bumped.
- Ÿ In such cases, the displacement may cause the readings to be unreliable or fail to transmit. If you are experience data readings that do not match how you feel, check to make sure the Sensor has not come loose. If it has come loose, remove it, apply a new one. Do not attempt to reinsert the Sensor. If the problem continues contact your professional healthcare team.
- Ÿ Report these cases by contacting Customer Service at support@sibionics.com.
The GS1 CGM System can be used during a wide variety of activities.
| Activity | What You Need to Know |
| Sleeping | Keep the phone within 6 meters(20 feet)of the Sensor without any obstacles (such as walls or metal) or the communication may be compromised. To receive alarms or reminders while sleeping, make sure that the sound and/or vibration is turned on for your phone. |
| Bathing, Showering, and Swimming | The Sensor is water-resistant and can be worn while bathing, showering, or swimming. Note: DO NOT immerse the Sensor deeper than 1 meter (3 feet) or for longer than 1 hour. Note: DO NOT immerse the Sensor deeper than 1 meter (3 feet) or for longer than 1 hour. |
| Other Activities | Intense exercise can cause the Sensor to loosen. Protect the Sensor from collision when wearing it during exercise, for example by wearing the overpatch. Jogging will not affect the Sensor performance. |
Applying Your Sensor
| Step | Action | |
| 1 |  | Apply Sensors only on the back of the upper arm. Avoid areas with scars, moles, stretch marks, or lumps. If placed in other areas, the Sensor may not function properly and could give inaccurate readings.
|
| 2 |  | Clean the application site, for example with an alcohol wipe, prior to application. This will help remove any oily residue that may prevent the Sensor from sticking properly. Allow the site to air dry before proceeding.
|
| 3 |   | Open the Sensor Pack by peeling the lid off completely. Uncover the cap from the Sensor Applicator and set the cap aside.
|
| 4 |   | Line up the small white bulge on the Sensor Applicator with the concavity on the edge of Sensor Pack. On a hard surface, press firmly down on the Sensor Applicator until it comes to a stop.
|
| 5 |   | Lift the Sensor Applicator out of the Sensor Pack.
|
| 6 |  | Press the safety clip and pull it out from the Sensor Applicator. |
| 7 |  | Place the Sensor Applicator over the prepared site and push down firmly to apply the Sensor to your body. Precaution: DO NOT push down on the Sensor Applicator until placed over the prepared site to prevent unintended results or injury. Precaution: DO NOT push down on the Sensor Applicator until placed over the prepared site to prevent unintended results or injury.Make sure that the small white bulge on the Sensor Applicator is in the upward or downward direction. |
| 8 |  | Gently pull the Sensor Applicator away from your body. The Sensor should now be attached to your skin. Note: Applying the Sensor may cause bruising or bleeding. In case of persistent bleeding, remove the Sensor and contact your professional healthcare team. |
| 9 |  | Make sure the Sensor is secure after application. Note: Use your phone to communicate with the Sensor right after application. This will help prevent the built-in lithium battery running out of its power before the end of 14-day Sensor wear. |
Starting Your Sensor
After the application of a new Sensor, start the Sensor by using the App. For more details on how to start the Sensor, see section Pairing Your Sensor.
In the App, scan the QR code on the container box or manually enter the 8-digit code which is printed under the QR code so that the Sensor is started.
Note:
- Ÿ Once a new Sensor is started, the App will display a countdown until the end of warmup period and an alarm that the first glucose readings will be obtained within 60 minutes.
- Ÿ Turn on the Bluetooth on the phone so that the phone/App can communicate with the Sensor.
Removing Your Sensor
- Pull up the edge of the adhesive that keeps the Sensor attached to the skin. Slowly peel away from the skin in one motion. Rubbing alcohol around the adhesive can facilitate the removal of the Sensor. Note: Any adhesive residue on the skin can be removed with warm, soapy water or isopropyl alcohol.
- Discard the used Sensor following the directions from your healthcare provider. SeeCare, Maintenance and Disposal of GS1 System. When applying a new Sensor, follow the instructions in section Applying Your Sensor. If the last Sensor was removed after the 14-day wearing period, you will be prompted to start a new Sensor.
The Sensor can be worn for up to 14 days. At the end of the wear period, the Sensor will stop updating the glucose data and should be removed as instructed.
Replacing Your Sensor
The Sensor automatically stops working after the 14-day wear period and must be replaced.
Replace the Sensor in case of any irritation or discomfort at the application site.
If the Sensor becomes loosen or the Sensor tip is coming out of the skin, no readings or unreliable low readings may be obtained. Verify that the Sensor has not come loose. If it has come loose, remove it, and apply a new one.
See section Removing Your Sensor for Sensor removal.
Using the SIBIONICS App
Recommended System Configurations
| Harmony OS | iOS | Android OS | |
| Operating system | Harmony 3.0 | iOS 16.5 | Android 13 |
| CPU | Huawei Kirin990 | iPhone A15 | Snapdragon 8 Gen2 |
| RAM | 8 GB | 6 GB | 8 GB |
| ROM | 128 GB | 256 GB | |
| Bluetooth | 5.0 | 5.3 | |
| Network bandwidth | Not less than 5 Mbps | ||
| Display size | 16 centimeters (6.3 inches) | 15.5 centimeters (6.1 inches) | 17.22 centimeters (6.78 inches) |
| Display resolution | 2400*1176 | 2532*1170 | 3200*1440 |
| Maximum screen brightness | Greater than 150 cd/m2 | ||
| Ambient light | Ambient light detection, screen brightness correction, automatic and manual adjustment of screen brightness. | ||
| Battery capacity | 4560 mAh | 3095 mAh | 5000 mAh |
User Requirements
To use GS1 system safely, users should:
- Be capable of operating smart phones with Android operating system or iOS
- Be capable of reading local language
- Have no visual or hearing impairments
Downloading the App and Creating an Account
- Scan the App QR code below or provided elsewhere and follow the on-screen instructions to install the SIBIONICS App. When the installation is complete, make sure the App icon
![]() appears on the phone screen.
appears on the phone screen.
Note: To download the SIBIONICS App, your phone must be connected to the internet.
For iOS and android

- Launch the App on the phone. Tap
![]() on the phone.
on the phone. - Tap Register an account on the login screen. Follow the on-screen instructions to create the user account.
- Enter the requested settings on the Profile screen, such as diabetes type, unit, and target glucose range. Glucose alarms can be turned on by setting the alarm range and the way to receive alarms when glucose levels fall out of the alarm range.
- The App account is now set up and ready for use.
Note: If the App password is forgotten when you logging in, tap Forgot Password? on the login screen. Follow the App instructions for re-setting the user password.
PairingYour Sensor to Receive Glucose Readings
After applying the Sensor to your arm (Refer to Applying Your Sensor to learn how to apply the Sensor), the Sensor needs to be paired with the App so that it can receive glucose data. To do this perform the following steps:
- Launch the SIBIONICS App (Refer to Downloading App above to learn how to do this) and log in if prompted to do so.
- Tap Connect a Device on the top of the screen. This will open the phone's camera so that the Sensor code can be scanned.
![]()

Note: you may be prompted to allow the app to access your phone's camera. You must give this permission otherwise the Sensor code cannot be scanned and you will not be able to receive any glucose data.
- Scan the sensor QR code or manually enter the 8-digit code which is printed under the QR code on the packaging box to pair with the Sensor.

Scan this QR code with the app to sync the sensor and receive data 8-digit code for manual entry
NOTE: Only one Sensor can be paired at a time. For example, if a new Sensor is paired, the current Sensor is automatically unpaired.
| Turn on the Bluetooth on the phone so that the phone/App can pair and communicate with the Sensor. |
- Start the Sensor.
![]()
Wait. During the warmup period, the Sensor provides neither alarms nor glucose readings. Readings will start being performed after the 1-hour sensor warm-up has passed. Screen provides countdown to Sensor warm-up. - Check the glucose readings.
![]()
Sensor warm-up is complete. The phone displays the current glucose reading along with an arrow indicating the glucose trend. Current glucose reading is updated every 5 minutes.


Keep the Sensor and display device within 6 meters (20 feet) of each other with no obstacles (such as walls or metal) between them, otherwise communication may be compromised.
What to do if the phone and Sensor are unable to communicate
If the phone and Sensor are not properly communicating, the following figure will be displayed on the screen.

Follow the instructions to reconnect,:
- Check if you applied the Sensor properly. If no, refer to Applying Your Sensor to learn how to apply the Sensor, and re-connect your phone and Sensor. If the problem persists, proceed to the next steps.
- Check if the Bluetooth is turned on in the phone settings. Follow the prompts on the App to turn on Bluetooth and restore communication with the Sensor.
- Check if the distance is beyond 6 meters (20 feet) between the phone and Sensor. If yes, keep the phone within 6 meters (20 feet) of the Sensor.
- Check if there is another phone connected to the sensor (the sensor cannot be connected to more than one device at the same time). If so, turn off the Bluetooth of the original phone before connecting to the new phone.
- Try restarting the phone and connecting to the sensor again.
- Check if any event mentioned in section System Safety Statements occurred.
![information]() Note: If the problem still persists, contact our Customer Service at support@sibionics.com.
Note: If the problem still persists, contact our Customer Service at support@sibionics.com.

When the Sensor has completed the warm-up and restores communication, all the recorded glucose data will be communicated to the phone. After that, the current glucose level continues to be updated every 5 minutes and displayed on the phone until the end of the 14-day wear period.
Daily Use
Monitoring
The following figure shows the glucose trending graph of the App.

NOTES:
- The graph displays the sensor glucose readings above 450 mg/dL at 450 mg/dL.
- The target glucose range is not related to the glucose alarm settings.
![]()

Trend arrows show the speed and direction of the glucose trends based on recent GS1 readings.
 Rapidly rising (2 – 3 mg/dL each minute)
 Slowly rising (1 – 2 mg/dL each minute)
 Steady (Less than 1 mg/dL each minute)
 Falling slowly (1 – 2 mg/dL each minute)
 Rapidly falling (2 – 3 mg/dL each minute)
The sensor glucose graphs display the sensor readings in a 4-hour interval over the past 24 hours. The graphs include:
- Glucose data from the Sensor over the past 3 to 24 hours displayed as a trend line, ending with the most current glucose reading on the far right.
- Tap the graph at any glucose data point to highlight the associated value.
- Switch between a 3-hour, a 6-hour, a 12-hour and a 24-hour view of the glucose data by tapping on the desired view duration above the graph.
- View the graphs in full screen by tapping
![]() below the graph.
below the graph.
- Added notes appear as graphic symbols at the recorded time for each event. Tap any symbol to display detailed information about the event.
Glucose Alarm
Glucose alarms are notifications from the App when glucose levels fall out of the set alarm range.
To set or turn on glucose alarms, tap Profile > Setting Alarms. Select the alarm you want to turn on and set.
- Ÿ Make sure your display device is always within 6 meters (20 feet) around you and turn on alarms. You might not hear alarms if you are outside of range.
- Ÿ Avoid forcing the App to close. To receive alarms, the App needs to be operating in the background.
- Ÿ Turn the Override Do Not Disturb setting in the App ON for Urgent Low Glucose, Low Glucose, High Glucose, and Signal Loss Alarms to make sure you receive audible alarms if do not disturb or silent media volume of your device is ON.
- Ÿ You must grant permission to the Do Not Disturb feature to use the Override Do Not Disturb feature.
² For iOS: You must accept the App's permission request for Critical Alerts to use this feature. You can also enable the Critical Alerts setting directly from the App's notification settings.
² For Android: You must accept the App's permission request for Do Not Disturb access permission to use this feature. You can also enable the Do Not Disturb access setting directly from the App's notification settings.
- Urgent Low Glucose Alarm:
Tells you when your GS1 reading is at 55 mg/dL or below within 30 minutes. Tap OK to acknowledge this alarm.
![]()

You can customize this alarm:
- Tap Profile > Alarm Settings > Urgent Low Glucose Alarm.
- Choose eitherSound or Vibration & Sound for the alarm style.
- Choose the sound for this alarm. Volume will match your device settings.
- Tap Done to save the settings.
![]()

Notes:
- Ÿ Urgent Low Glucose Alarm will always play a sound even if your device is muted or Do Not Disturb is ON.
- Ÿ The Urgent Low Glucose Alarm level is 55 mg/dL, and the Snooze duration is 30 minutes. They are unmodifiable. After you acknowledge your first Urgent Low alarm, it will repeat if your GS1 reading stays below 55 mg/dL for 30 minutes.
- Low Glucose Alarm:
Tells you when the GS1 reading is at or below the level you set. Tap OK to acknowledge this alarm.
![]()

You can customize this alarm:
- Tap Profile > Alarm Settings > Low Glucose Alarm.
- Set the Low Glucose Alarm level between 60 mg/dL and 100 mg/dL.
- Set the Snooze duration for you Low Glucose Alarm as you need.
- Choose either Sound or Vibration & Sound for the alarm style.
- Choose the sound for this alarm. Volume will match your device settings.
- Tap Done to save the settings.
![]()

- High Glucose Alarm:
Tells you when the GS1 reading is at or above the set level. Tap OK to acknowledge the alarm.
![]()
You can customize this alarm:

- Tap Profile > Alarm Settings > High Glucose Alarm.
- Set the High Glucose Alarm level between 120 mg/dL and 400 mg/dL.
- Choose either Sound or Vibration & Sound for the alarm style.
- Set the Snooze duration for you High Glucose Alarm as you need.
- Choose the sound for this alarm. Volume will match your device settings.
- Tap Done to save the settings.
![]()

- Signal Loss Alarm:
Tells you when your Sensor has not communicated with the App temporarily and you are not receiving glucose readings or Low or High Glucose Alarms. Tap Try Again to re-communicate with you Sensor. If the problem continues, contact our Customer Service at support@sibionics.com
![]()

You can customize this alarm:
- Tap Profile > Alarm Settings > Signal Loss Alarm.
- Set a snooze duration for this alarm to notify you when your Sensor has not communicated with the App for longer than the specified duration.
- Choose either Sound or Vibration & Sound for the alarm style.
- Choose the sound for this alarm. Volume will match your device settings.
- Tap Done to save the settings.
![]()

Responding to alarms
When you receive an alarm, please acknowledge it on your display device by tapping OK on the alarm box.
Until you acknowledge the alarm, the alarm box will persistently display on your App screen. The sound and/or vibration will repeat when the system triggers the next alarm. The system analyzes your GS1 readings every 5 minutes.
Notes:
- For Urgent Low Glucose Alarm, the Snooze duration is fixed at 30 minutes and cannot be adjusted. If the alarm is not acknowledged, it will repeat if your GS1 reading remains at 55 mg/dL or below for this long.
- For Low/High Glucose Alarm and Signal Loss Alarm, you can customize the Snooze duration, and the alarm will repeat according to your selected duration.
If you are not getting alarms:
Check the following to identify possible causes:
- Ÿ Battery charge too low: If the phone battery is depleted, no GS1 readings or alarms will be obtained.
- Ÿ App turned off: check App setting to ensure it is turned on to receive GS1 readings or alarms.
- Ÿ Alarms turned off: Keep the alarm function in the App turned on to get alarms.
- Ÿ Volume not working: Keep the volume loud enough to hear the alarms.
- Ÿ Speaker and vibrations not working: you will not hear or feel your alarms, check if turned off or not functioning.
- Ÿ Out of range: Keep your display device no more than 6 meters (20 feet) from the sensor, with no obstacles between them, to ensure proper communication. If not in range, no GS1 readings or alarm will be obtained.
- Ÿ System errors: in the event of a system error indicated in the App – such as no readings, sensor error, or signal loss – no GS1 readings or alarms will be obtained.
- Ÿ During warm-up and after session ends: no alarms or GS1 readings will be obtained during the 1-hour warmup or after a sensor session ends.
Glucose Alarm Records
You can view the low and high glucose alarms records by tapping ![]() in the upper right corner of the Monitoring screen. Reviewing and understanding your glucose history can be an important tool for improving your glucose control. Work with your professional healthcare team to understand your glucose history.
in the upper right corner of the Monitoring screen. Reviewing and understanding your glucose history can be an important tool for improving your glucose control. Work with your professional healthcare team to understand your glucose history.
- If high/low glucose alarm do not match symptoms or expectations, use a fingerstick blood glucose value from a blood glucose meter. Seek medical attention when appropriate.
- The high/low glucose alarm is not applicable in case of pregnancy, dialysis, or critical illness. The high/low alarm levels in this clinical study are the recommended values for type I and type II diabetes patients, excluding the aforementioned populations.
Event Record
Record helps capturing information that may affect the glucose levels. The event feature on the App can be used to enter and save certain types of events.
| Record Icon | Description |
 | The meal time and what you ate. |
 | The type and duration of the exercise routine. |
 | The type, amount and time of taking medicine. |
 | The type, amount and delivery time of insulin. |
 | Blood glucose meter readings. These can be used to glycemic management. |
 | The time you go to sleep and get up. |
 | How you feel, for example, happy, anger, or unwell. |
Follow the steps below to add event records:
- Tap
![]() and select the record icon needs to be added.
and select the record icon needs to be added. - Select or enter the required information.
- Tap Done to save notes.
You can view event records by:
- Tapping the event symbol on the Glucose Trending graph to display detailed information about an event, or
- Tapping Profile > Events to review all the events that you have added.
Daily Reports
Daily reports show daily detailed information.
Daily Overall
Daily overall shows the average of sensor glucose readings, the percentage of time in which the sensor glucose readings were within and out of the target glucose range.
Daily Trending
Daily trending is a graph of sensor glucose readings by day. The symbols identifying notes are shown in the graph.
Select Date
- Tap Previous and Next on the top of the screen to see data of the previous and the next day respectively, or
- Tap the icon on the top middle to select the date you want to review.
AGP Reports
AGP reports show summaries of information over several days.
AGP shows the pattern and variability of the sensor glucose levels over a typical day.
- Viewing AGP Reports
The green part shows the target range of glucose readings.
![]()

NOTE: AGP needs at least 5 days of glucose data.
- Trending Comparison
Select days to compare the glucose trending. - Exporting AGP Report
Perform the following steps:
- Tap AGP Reports.
- Select time range on the top of the screen.
- Tap Report on the upper right to generate the report of the targeted time range.
Profile
| Button Name | Description |
| Edit profile | Edit the account information and set the target glucose range. |
| Events | Displays a history of events, including time and user added information. |
| Devices |
|
| Alarm Settings | Set the high and low sensor glucose alarm targets, and alarm style. Toggle the alarm settings on to set the alarm style and alarm targets. The alarm style is classified as shaking, sound, shaking & sound. Sound has ten types to choose. Tap Done to save your settings. |
| Remote View | Invite a friend to view your sensor glucose readings and trending graphs. Follow the on-screen instructions for data sharing. |
| Help | Seek for helps in application and connection. |
Settings
Tap ![]() in the upper right corner of Profile tab to configure settings.
in the upper right corner of Profile tab to configure settings.
| Button Name | Description |
| Clear all data | Delete all the sensor glucose data stored in the phone.
|
| Reset Password | Reset the login password. Follow the on-screen instructions to reset the password. |
| Unit | Select the unit displayed on the App. |
| Language | Select the language of the App. |
| Country | Select the country in the list or enter country name in the search box to search the target country. |
| About Us | Display version of SIBIONICS App, terms of use and privacy policy. Allows to upgrade the SIBIONICS App if a new version is available. |
| Legal Documents | View the Terms of Use and the Privacy Policy. |
| Remove the Account | Delete the current account and all the data.
|
Uninstalling the SIBIONICS App
Tap and hold the icon on the desktop of the phone. Select Remove App from the popup menu.
Alternatively, select Settings > App > App Manager, select the SIBIONICS App
Troubleshooting
| Problem | Possible Cause(s) | Solution |
| The Sensor is not sticking to the skin. | The site is not free of dirt, oil, hair, or sweat |
|
| Skin irritation at the sensor application site. | Seams or other constrictive clothing or accessories causing friction at the site. | Ensure that nothing rubs on the site. |
| You may be sensitive to the adhesive material. | If the irritation is where the adhesive touches the skin, contact your professional healthcare team to identify the best solution. | |
| Glucose reading is not updating. | The phone is not held close enough to the Sensor. | Make sure the phone is within 6 meters (20 feet) of the Sensor and try pairing the Sensor to get a glucose reading. |
| The Sensor is too hot or too cold. | Move to a location where the temperature is between 5°C (41℉) and 40°C (104℉) and pair the Sensor again in a few minutes. |
Care, Maintenance and Disposal of GS1 System
Storage
Storing the GS1 CGM system correctly helps prevent system failures.
Sensor
- Ÿ Keep the Sensor in its sterile packaging until ready to be used.
- Ÿ Store at temperatures ranging between 4°C (39.2℉) and 25°C (77℉).
- Ÿ Store between 10% and 90% relative humidity.
- Ÿ Storage outside the recommended range may result in inaccurate GS1 readings. Ÿ May store Sensor in refrigerator if within the recommended temperature range.
- Ÿ Store Sensors in a cool, dry place. Do not store in a parked car on a hot day or in the freezer.
Maintenance
The System has no serviceable parts. Software maintenance is provided through software upgrade.
System Disposal
Different regions have different requirements for disposal of electronics (Sensor) and parts that have been in contact with bodily fluids or blood (Applicator and Sensor). Sensor must not be disposed of via municipal waste collection. Separate collection of electrical and electronic equipment waste is mandated in the European Union by Directive 2012/19/EU.
Before disposing of the Sensor Applicator, perform the following steps:
- Ÿ Pull the internal structure of the Sensor Applicator backward using the bulge of the cap until it clicks into place. Cover the Sensor Applicator with the cap and put back the safety clip.
- Ÿ Consult your local waste management authority for instructions on how to dispose of Sensor Applicators at a designated sharps collection site.
- The Sensor used contains a disposable Sensor probe, which is in contact with interstitial fluid during use. The Sensor is for single use only. Reuse of the Sensor may result in damage to the probe, inaccurate glucose readings, and irritation or infection at the application site.
- The Sensor contains a lithium battery that should not be incinerated. Battery may explode upon incineration.
- Sensor Applicator is also for single use only. It contains a guide needle inside after application. DO NOT attempt to remove the guide needle from applicator or clean or sterilize the guide needle. Otherwise, unintended results or injury may occur.
Customer Service
Shenzhen SiSensing offers technical support for the GS1 Continuous Glucose Monitoring System. If you have any questions about the GS1 system, please contact our customer service team at support@sibionics.com.
Labelling Symbols
 | Refer to instruction manual/booklet |  | Manufacturer |
 | Temperature limit |  | Serial number |
 | Date of manufacture |  | Keep dry |
 | MR unsafe |  | Non-ionizing electromagnetic radiation |
 | Type BF Applied Part | | Caution |
 | Reference Number |  | Sterilized using irradiation |
 | Do not re-use |  | General symbol for recovery/recyclable |
 | Use-by date |  | Humidity limitation |
 | Do not use if package is damaged and consult instructions for use |  | Waste Electrical and Electronic Equipment (WEEE)—Follow the Directive 2012/19/EU in the European Union for product disposal. |
 | Medical device |  | Single sterile barrier system |
 | Unique device identifier |  | CE mark |
 | Authorized representative in the European Community |  | Indicates the degree of protection provided by enclosure according to IEC 60601-1 |
 | Authorised representative for Switzerland |  | Importer |
Electromagnetic Compatibility (EMC)
Guidance and manufacturer's declaration – electromagnetic emissions
The System is intended for use in the electromagnetic environment as described in the following table. It is the responsibility of the customer or user to ensure that the System is used in this environment.
| Emissions test | Compliance | Electromagnetic environment – guidance |
| RF emissions CISPR 11 | Group 1 | The System uses RF energy only for its internal function. Therefore, its RF emissions are very low and are not likely to cause any interference in nearby electronic equipment. |
| RF emissions CISPR 11 | Class B | The System is suitable for use in all establishments other than domestic and those directly connected to the public low voltage power supply network that supplies buildings used for domestic purposes. |
| Harmonic emissions IEC 61000-3-2 | Not applicable | |
| Voltage fluctuations / flicker emissions IEC 61000-3-3 | Not applicable |
Guidance and manufacturer's declaration – electromagnetic immunity
The System is intended for use in the electromagnetic environment as described in the following table. It is the responsibility of the customer or user to ensure that the System is used in this environment.
| IMMUNITY test | IEC/EN 60601 test level | Compliance Level | Electromagnetic environment – guidance |
| Electrostatic discharge (ESD) IEC 61000-4-2 | ±8 kV contact ±2 kV, ±4 kV; ±8 kV, ±15 kV air | ±8 kV contact ±2 kV, ±4 kV; ±8 kV, ±15 kV air | Floors should be wood, concrete or ceramic tile. If floors are covered with synthetic material, the relative humidity should be of at least 30%. |
| Electrical fast transient IEC 61000-4-4 | ±2 kV for power supply lines ±1 kV for input/ output lines | Not applicable | Not applicable |
| Surge IEC 61000-4-5 | ±0.5 kV, ±1 kV line to line ±0.5 kV, ±1 kV, ±2 kV line to ground | Not applicable | Not applicable |
| Voltage dips and interruptions IEC 61000-4-11 | 0%, 70%, 0% of UT | Not applicable | Not applicable |
| Power frequency (50/60 Hz) magnetic field IEC 61000-4-8 | 30 A/m | 30 A/m | Power frequency magnetic fields should be at levels characteristic of a typical location in a typical domestic, commercial or hospital environment. |
NOTE: UT is the AC Mains voltage prior to application of the test level.
| IMMUNITY test | IEC/EN 60601 test level | Compliance level | Electromagnetic environment – guidance |
| Conducted RF IEC 61000-4-6 | 150 kHz to 80 MHz 3V ISM and amateur radio bands between 150 kHz to 80 MHz 6V | Not applicable | Not applicable |
| Radiated RF IEC 61000-4-3 | 80MHz to 2700MHz 10V/m 385MHz 27V/m 450MHz 28V/m 710MHz, 745MHz, 780MHz 9V/m 810MHz, 870MHz, 910MHz 28V/m 1720MHz, 1845MHz, 1970MHz 28V/m 2450MHz 28V/m 5240MHz, 5500MHz, 5785MHz 9V/m | 10V/m, 80% Am at 1kHz 27V/m PM at 18Hz 28V/m FM ± 5 kHz deviation at 1kHz sine 9V/m PM at 217Hz 28V/m PM at 18Hz 28V/m PM at 217Hz 28V/m PM at 217Hz 9V/m PM at 217Hz | d = 1.2 √𝑃 d = 2.3 √𝑃 |
P is the maximum output power rating of the transmitter in watts (W) according to the transmitter manufacturer and d is the recommended separation distance in meters (m). Field strengths from fixed RF transmitters, as determined by an electromagnetic site survey, should be less than the compliance level in each frequency range.
Interference may occur in the vicinity of equipment marked with the following symbol: ![]()
NOTE 1 At 80 MHz and 800 MHz, the higher frequency range applies.
NOTE 2 These guidelines may not apply in all situations. Electromagnetic propagation is affected by absorption and reflection from structures, objects and people.
Recommended separation distances between portable and mobile RF communications equipment and the System
The System is intended for use in an electromagnetic environment in which radiated RF disturbances are controlled. The customer or the user of the System can help prevent electromagnetic interference by maintaining a minimum distance between portable and mobile RF communications equipment (transmitters) and the System as recommended below, according to the maximum output power of the communications equipment.
| Rated maximum output power of transmitter (W) | Separation distance according to frequency of transmitter (m) | ||
| 150 kHz to 80 MHz Not Applicable | 80 MHz to 800 MHz d = 1.2 √𝑃 | 800 MHz to 2.7 GHz d = 2.3 √𝑃 | |
| 0.01 | Not Applicable | 0.12 | 0.23 |
| 0.1 | Not Applicable | 0.38 | 0.73 |
| 1 | Not Applicable | 1.2 | 2.3 |
| 10 | Not Applicable | 3.8 | 7.3 |
| 100 | Not Applicable | 12 | 23 |
For transmitters rated at a maximum output power not listed above, the recommended separation distance d in meters (m) can be estimated using the equation applicable to the frequency of the transmitter, where P is the maximum output power rating of the transmitter in watts (W) according to the transmitter manufacturer.
NOTE 1 At 80 MHz and 800 MHz, the separation distance for the higher frequency range applies.
NOTE 2 These guidelines may not apply in all situations. Electromagnetic propagation is affected by absorption and reflection from structures, objects and people.
Technical Specification
Classification
As defined by IEC 60601-1, the device is classified as follows:
- Internally powered.
- Type BF applied parts.
- Ordinary equipment.
- Equipment not suitable for use in the presence of a flammable anesthetic mixture.
- Continuous operation.
- IP28
Sensor Specifications
| Sensor Useful Life | 14 days | |
| Sensor glucose assay method | Amperometric electrochemical sensor | |
| Accuracy |  100 mg/dL 100 mg/dL | ± 15 mg/dL |
| <100 mg/dL | within ± 15% at glucose concentrations | |
| Sensor glucose reading range | 40 to 450 mg/dL | |
| Sensor size | 33.5 mm × 20.0 mm × 5.3 mm | |
| Sensor weight | 3.84g | |
| Sensor power source | One lithium battery DC 3.0V | |
| Sensor memory | Up to 14 days | |
| Operating temperature | 5℃ (41℉) to 40℃ (104℉) | |
| Sensor Pack and Applicator shelf life | 12 months | |
| Sensor Pack and Applicator storage, transport temperature | 4℃ (39.2℉) to 25℃ (77℉) | |
| Operating and storage relative humidity | 10% to 90%, non-condensing | |
| Operating and storage atmospheric pressure | 70 kPa to 106 kPa | |
| Sensor water resistance and ingress protection | IP28: Protected against insertion of large objects in not less than 12.5 mm diameter and the effects of continuous immersion in water over an hour | |
| Sensor Pack and Applicator transport relative humidity | 10% to 90%, non-condensing | |
| Sensor Pack sterilization | Sterile by radiation | |
| Frequency band | 2.402 – 2.480 GHz BLE |
| Bandwidth | 1M&2M |
| Maximum output power | -1.03dBm (0.79 mW) |
| Modulation | GFSK |
| Data communication range | 6 meters (20 feet) |
Quality of service (QoS)
Sensor wireless communication
The Sensor and App connect via a BLE network. The sensor sends glucose data and system related alarms to the App. The Sensor and the App verify the integrity of received data after wireless transmission. Quality of the connection is in accordance with the Bluetooth Specification v5.0. The App is designed to only accept radio frequency (RF) communications from recognized and paired Sensors.
Security Measures
Unless disabled, the SIBIONICS App regularly communicates with cloud server. Both the SIBIONICS App and communication between the SIBIONICS App and cloud server are protected by a number of mechanisms designed to safeguard data integrity and data confidentiality.
Important Safety Information
General Description
The Continuous Glucose Monitoring (CGM) System is indicated for the continuous monitoring of interstitial fluid glucose levels in patients with diabetes mellitus. The system provides realtime glucose levels, detects glucose trends, fluctuations and TIR (time in range). Glucose levels are monitored by an electrochemical sensor which is factory calibrated, not requiring fingerstick calibration. The Sensor is a single-use device that can be worn for up to 14 days by a single user.
Intended Use/Purpose
The CGM System is intended for the continuous monitoring of interstitial fluid glucose levels.
Indication for Use
The CGM System is indicated for use in patients with diabetes mellitus type 1 or 2. The GS1 CGM System is a real-time continuous glucose monitoring device for single-use only.
Intended Users
The CGM System is intended to be used by patients 18 years and older with Type 1 or Type 2 Diabetes Mellitus.
Target Population
The System is intended for patients with Type 1 or Type 2 Diabetes Mellitus, 18 years and older.
Clinical Benefits
The expected clinical benefits of using the GS1 CGM System include:
- Improved quality of life by increasing hypoglycemic awareness.
Contraindications
- Ÿ The system must be removed prior to Magnetic Resonance Imaging (MRI) or computed tomography (CT) scan.
- Ÿ The system must not be used with automated insulin dosing (AID) systems, including closed loop and insulin suspend systems, or used with software to guide the dosing of insulin.
- Ÿ The Sensor should not be inserted at a site where severe skin scald, burns, sunburns, wounds, ulcers, or surgical scars are present.
- Ÿ The system is not intended for patients with severe skin lesions on the whole body, such as extensive eczema, extensive scars, extensive tattoos, herpetic dermatitis, severe edema, and psoriasis.
MODIFICATION: Any changes or modifications not expressly approved by the grantee of this device could void the user's authority to operate the device.
Cautions and Limitations
What to know before using the System:
- Ÿ Review all product information before use.
- Ÿ The Sensor Pack and Sensor Applicator are packaged as a set and have the same serial number. Check that the serial numbers match before using the Sensor Pack and Sensor Applicator. Do not use Sensor Packs and Sensor Applicators with different serial numbers as this will result in incorrect glucose readings.
- Ÿ Take standard precautions for transmission of blood borne pathogens, for example by wiping the insertion site with an alcohol swab, to avoid contamination.
- In rare cases, insertion of the Sensor may cause insertion site pain, bleeding or Sensor probe breakage. Seek help from your professional healthcare team if the Sensor tip breaks.
- Ÿ Wearing the adhesive patch may cause inflammation, skin irritation and skin allergy. Some individuals may be sensitive to the adhesive that keeps the Sensor attached to the skin. If you notice significant skin irritation around or under your Sensor, remove the Sensor and contact your professional healthcare team before continuing usage.
- Ÿ Do not modify the GS1 system without authorization of the manufacturer.
- Ÿ Do not use the GS1 system if you are under the age of 18, pregnant, on dialysis, or critically ill. It is not known how health conditions or medications common to these populations may affect performance of the system.
- Ÿ Performance of the system when used with other implanted medical devices, such as pacemakers, has not been evaluated.
When not to use the system:
- Ÿ Do not use the Sensor if its sterile package has been damaged or opened, as it may cause an infection. Contact our Customer Service at support@sibionics.com.
- Ÿ Do not use expired Sensor or Applicator.
- Ÿ The Sensor automatically stops working after the 14-day wear period and must be replaced.
- Ÿ The system must be removed prior to Magnetic Resonance Imaging (MRI), X-ray examination, Computed Tomography (CT) scan, or high-frequency electrical heat (diathermy) treatment. The effect of MRI, X-ray, CT scans, or diathermy on the performance of the system has not been evaluated.
For proper product storage:
- Ÿ Transport and store the Sensor Pack and Applicator at temperatures ranging between 4°C (39.2℉) and 25°C (77℉). Do not store in freezer. If transported and stored out of this temperature range, the performance may be affected or devices may become completely ineffective.
- Ÿ Make sure that your Sensor Pack and Applicator are kept in a safe place. Prevent anyone from accessing or tampering with the System.
- Ÿ The system contains small parts that may be dangerous if swallowed. Keep it out of reach of children.
How to interpret the GS1 CGM System results:
- The glucose readings and glucose reports generated by the App are used for glycemic management. Interpretation of the GS1 CGM System results should be based on the glucose trends and several sequential readings.
- Check your glucose levels with blood glucose meter or consult your professional healthcare team for treatment decision and therapy adjustment when symptoms do not match readings, or readings are suspected to be inaccurate, use fingerstick blood glucose values obtained from a blood glucose meter to make diabetes treatment-related decisions.
Seek medical attention when appropriate. Replace the Sensor if needed.
What may affect the GS1 CGM System:
- Interfering Substances
Studies show that taking ascorbic acid (vitamin C) or acetylsalicylic acid containing substances while wearing the Sensor may falsely raise sensor glucose readings. Ascorbic acid or acetylsalicylic acid are oxidized on the surface of the sensing electrode and generate a certain interference current, potentially causing inaccurate sensor readings. The level of inaccuracy depends on the amount of substances present in the body. If symptoms do not match the sensor glucose readings after taking ascorbic acid or acetylsalicylic acid, perform a blood glucose test. - Ÿ The GS1 CGM System has not been tested in populations using anti-coagulant therapy, and individuals on these therapies may have sensor glucose readings that are inaccurate. Follow your professional healthcare team's advice on the use of anticoagulants when you are wearing the Sensor.
- Ÿ Physiological differences between the interstitial fluid and capillary blood may result in differences in glucose readings between the System and results from a fingerstick test using a blood glucose meter. Differences in glucose readings between interstitial fluid and capillary blood may also be observed during times of rapid change in blood glucose, such as after eating, dosing insulin, or exercising.
- Ÿ Severe dehydration (excessive water loss) may cause false low sensor results. In the presence of symptoms that may lead to suspicion of dehydration, immediately consult a professional healthcare team.
Physical displacement:
- During the course of wearing the device, the Sensor can come loose or the Sensor tip can come out of the skin. This may occur, for example, during intense exercise, or if the Sensor is bumped.
- In such cases, the displacement may cause the readings to be unreliable or fail to transmit. If you are experience data readings that do not match how you feel, check to make sure the Sensor has not come loose. If it has come loose, remove it, apply a new one. Do not attempt to reinsert the Sensor. If the problem continues contact your professional healthcare team.
- Report these cases by contacting Customer Service at support@sibionics.com.
What to know about Glucose Alarms:
- To prevent missed alarms, make sure your phone has sufficient battery power and that sound and/or vibration are turned on.
- In the event that an App or OS update causes your previously compatible phone to become incompatible, contact Customer Service at support@sibionics.com.
- Your phone must have a Bluetooth connection with your Sensor to receive glucose readings and glucose alarms. In the phone settings, keep Bluetooth ON. For iPhones, in the phone settings for the App, allow the App to access Bluetooth.
- To turn on Critical Alarms (iPhone) / Do Not Disturb Permission (Android Phone), follow the instructions in the App.
- If you adjust the phone ringer volume (iPhone) or Media volume (Android Phone) to silent or use the phone Do Not Disturb setting, keep 'Override Do Not Disturb' setting in the App ON for glucose alarms and signal loss alarms to ensure you receive audible alarms.
- You should disconnect headphones or speakers from your phone if you are not using them as you may not hear audio for alarms.
To ensure proper App operation:
- Ÿ Do not let the phone shut down due to low battery, otherwise no sensor glucose alarms will be obtained from the Sensor. Make sure to have an available charger to charge the phone if needed.
- Ÿ It takes about 200MB storage for the App to run on your phone. Insufficient phone storage may cause suboptimal operation. Clear the cache to allow the App to run smoothly.
- Ÿ For proper App operation, you should explicitly give permission to SIBIONICS to access camera and location from your device's privacy settings.
- Ÿ If you restart your phone, open your App to make sure it's working properly.
- Ÿ If the phone shuts off when running the App, glucose data may be lost.
- Ÿ If any error or exception occurs to the App, relaunch the App and no data will be lost.
- Ÿ The user is responsible for keeping the phone secure, for example by using a strong password, installing updates when appropriate, and only using secure WiFi networks. If you suspect an adverse cybersecurity event related to the GS1 System, contact Customer Service at support@sibionics.com.
- Ÿ Set the date and time correctly on the phone before using the App. Manual change to these values while the App is running may cause abnormalities to the stored sensor data.
- Ÿ Regularly logging in and running the App will help minimize the risk of data loss.
- Ÿ To run the App, the phone should meet the system requirements as specified in Using the SIBIONICS APP, otherwise the App performance may be affected.
- Ÿ The user account and password need to be provided before operating the App. The user account is the email address you used for registration. And password can be 8 to 20 letters, numbers, special characters, or combination of them.
Reporting of Serious Incidents:
- Ÿ Report any serious incident that has occurred in relation to this device to the manufacturer and local distributor or service provider. Please contact Customer Service at support@sibionics.com.
- Ÿ In European Union Member States, serious incidents should also be reported to the competent authority (the government department responsible for medical devices) in your country. Please refer to your government website for details of how to contact your competent authority.
- Ÿ Users in the UK can also report suspected side effects electronically via the Yellow Card website (https://yellowcard.mhra.gov.uk/).
- Ÿ A 'serious incident' means any incident that directly or indirectly led, might have led or might lead to:
² The death of a patient, user or other person,
² The temporary or permanent serious deterioration of a patient's, user's or other persons' state of health.
How to Use this Guide
The following table describes terms and conventions used in this guide.
| Convention | Description |
| Bold | Bold indicates an item on the screen that you select with your finger or tap to open. |
| > | > is a shorthand to indicate a series of selections you make on the screen. For example, Alarm Settings > Alarm Target means that you need to tap Alarm Settings, and then on the next screen tap Alarm Target. |
| Note | A note provides additional helpful information |
| | A caution notifies you of a potential hazard which, if not avoided, may result in minor or moderate injury or damage to the equipment. |
| | A warning notifies you of a potential hazard which, if not avoided, could result in death or serious injury. It may also describe potential serious adverse reactions and safety hazards. |
 Shenzhen SiSensing Co., Ltd.
Room 901, Building No.3, Tinwe Business Park, No.6 Liufang Road, Xingdong Community, Xinan Street, Baoan District, 518101 Shenzhen,
Guangdong, PEOPLE'S REPUBLIC of CHINA
support@sibionics.com

Shanghai International Holding Corp. GmbH (Europe)
Eiffestrasse 80, 20537 Hamburg, Germany
+49-40-2513175
shholding@hotmail.com

Share Info Suisse GmbH
St. Leonhard-Strasse 35, 9000 St. Gallen, Switzerland
0041 79 836 8120
![]() Umedwings Netherlands B.V.
Umedwings Netherlands B.V.
Treubstraat 1, 2288EG, Rijswijk,
The Netherlands
SRN: NL- IM-000000454
Documents / Resources
References
Download manual
Here you can download full pdf version of manual, it may contain additional safety instructions, warranty information, FCC rules, etc.
Advertisement
Need help?
Do you have a question about the GS1 and is the answer not in the manual?
Questions and answers