Advertisement
- 1 Product overview
- 2 Product installation diagram
- 3 Accessory
- 4 Measuring door dimensions
- 5 Door opening direction
- 6 Installation
- 7 Tips and parameters
- 8 Operation Instructions of Tuya APP
- 9 Documents / Resources
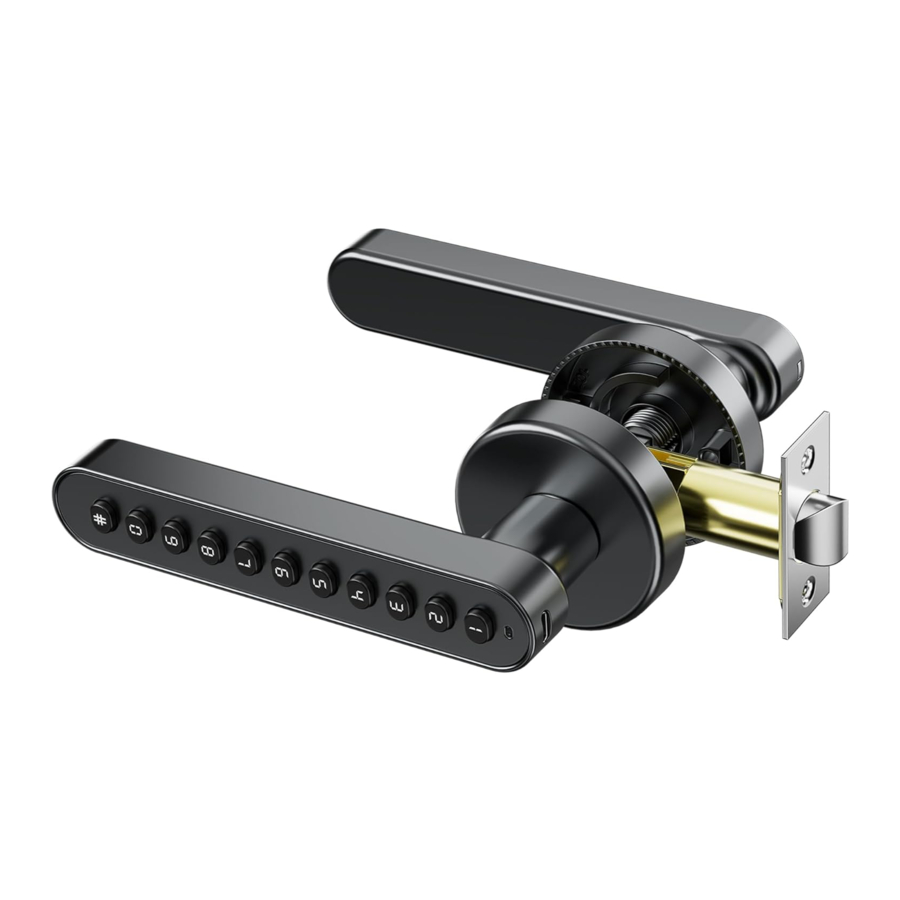
Product overview

Product installation diagram

TIPS:
- Install the spinddle into the latch, and get the cables through the middle of spindle.
- Fix the rear fixing plate, front handle with two screws on the door.
Accessory

Open the product package. Check that the following accessories are included
Measuring door dimensions
- As Figure 1:
Fix the strike plate with 2 screws on the door frame.

- As Figure 2:
"Reset" button.(Press and hold for 5 seconds)


- Measure the Door Size
Make sure door thickness is 30mm-50mm, door hole diameter is Ф54mm, measure backset size is 60/70mm with the deadbolt.


TIPS:
- Available door thickness 30mm-50mm. If the door is over this range. Please contact us for more information.
- Please select the correct accessories according to your door thickness.
Door opening direction
- Right handle opening

- Left handle opening


Adjusting handle
Adjust the direction of the handle according to the opening direction of the door. If necessary, adjust as shown in the figure Figure 1; Turn the handle 180 degrees.
Installation
Please follow the below steps to install the lock
- As Figure 1:
Adjust the back distance of the lock body as required (60 or 70mm).When adjusting the back distance, hold the square hole on the lock lever with your hand and push it to the edge of the lock lever, front and rear the hole must be horizontal.

- As Figure2:
Fix the latch with 2 screws.

- Put the front handle wire through the middle of the 100 square cylinder;

- Door thickness 41-50mm with screw tube A
- Door thickness 30-40mm with screw tube B
- Screw the stud into the front hand full tooth screw and tighten it with pliers;

- Use a screwdriver to remove the screws on the rear handle cover.

- Put four alkaline LR03 AAA batteries into the battery compartment;

- Aligh the front handle with the door hole and pass through the lock hole;

- Fasten the front and rear handle connections with screws and tighten the screws;

- Insert the wire terminal into the circuit board slot;

- Put the handle cover into the back handle;

- Tighten the screws securing the rear handle cover.


Tips and parameters
 Check Points After Installation
- The smart lock is horizontal with the door.
- The latch bolt must works smoothly and flexibly!
- Please make sure the cable will not be pressed.
- Fix the handle with two screws, and check if it works fine.
- Please choose a good quality Lr03 alkaline battery, and ensure that all 4 batteries are new, and cover the battery cover.
TIPS:
- This lock is equipped with mechanical keys for manual unlocking. Remove mechanical keys from the package and keep them in a safe place and always have access to them.
- Please replace the batteries as soon as you heard the low voltage alarm, Don't mix old and new batteries or different battery types.
- This lock is not designed to be exposed to direct sunlight or rain. It is not water proof IP rated.
- Keep your fingers clean when using this lock.
| Parameters | |
| Unlocking Methods | Bluetooth/Passcode/Mechanical Key |
| Direction of Door Opening | Left/Right(Universal) |
| Power Supply | 4*LR03 AAA Batteries/External USB Power Supply (for Emergency) |
| Number of Users | Passcode: max. 100 |
| The number of virtual passwords | ≤ 26 |
| Emergency power supply | 5V(DC) |
| Low voltage alarm | 4.8V±0.2V(When the battery is low, the red light prompts five times) |
| Operating temperature | -25℃ - 65 ℃ |
Operation Instructions of Tuya APP
Brief Introduction and Download of Tuya APP
Tuya Smart APP is the smart device management APP provided by Tuya to end consumers, through which you can conveniently configure and control your purchased whole-house intellectual products, configure your favorite scenarios and automation programs, share your smart devices with your family and friends, and enjoy the fun of a smart home.
Download APP: Search "Tuya Smart" in mobile application market or "App Store" or scan the following QR code to download.
This document takes Smart Life APP as an example and explains Tuya APP & Door Lock Panel Function in detail.

Registration and Login

APP Registration: If you don't have an APP account, you can either register an account or log in via SMS authentication code.
Click "Create a New Account" to enter the account registration page. Follow the instructions to get the SMS authentication code and set the password.
If you already have an account, you can click "Login with Existing Account", which supports password, authentication code or social account login.
Append the Device
(Bluetooth on cell phone must be on)
- Click the "Add Device" icon on the APP homepage.

- Press the digital keyboard to wake up the device. Wait for the mobile phone to scan the device and click "Next" to complete the device added.


Home Page

- The lower side of the homepage contains, "opening records and equipment alerts", "temporary password", "member management", "intelligent application", "setting", the display door lock name and current power condition on the upper side of the homepage.
- In the center of the homepage, the connection status of the Bluetooth will be displayed. If it is connected, you can unlock the right → slide and turn on the door lock directly. Slide "Guan Lock" to the left. (Please make sure that the mobile phone Bluetooth has been opened, and the mobile phone and the door lock are recommended within 5-10 meters within a reasonable distance.) If the Bluetooth is not connected, it shows "cannot connect to Bluetooth" and cannot open the Bluetooth door lock directly through the APP. Essence
Administrator password management
- Homepage "Member Management" Entrance → Select "Family Member Account" with corresponding permissions: The affiliate administrator will have administrators permissions, and ordinary members are just ordinary user permissions;

- Click "Password Add" to enter 6-10-digit passwords;


Member Management
Adding Administrators
- "Member Management" entrance click "+" in the upper right corner, select "Add Member", enter the member name and graffiti account, select the permissions and click to save it to add the administrator user; (add the administrator account number must have been already Register the smart account of graffiti, otherwise it will not be added)

- After the additional account opens the mobile phone graffiti APP, the invitation information will be received.
- All key information added to this account entrance will default to the authority of the administrator;

Adding Ordinary Members
- "Member Management" entrance click "+" in the upper right corner, select "Add Member", enter the member name, no need to enter the account, click to save, you can add ordinary member users.


- All key information added to this account entrance will be defined as ordinary user permissions;


Deletion of Family Members
- Click your "Family Management" at the bottom right corner of the App, select "Family", you can delete the added family members or change the permission to use the app;


Door Opening Records and Device Alarms
- Click the "Alarm" icon to view the door opening record and trial and error alarms and other information;
Note: When the door lock is connected to the cell phone Bluetooth, the door opening records and alarms will be displayed on the APP in real time, otherwise, the records will be cached in the door lock local file, awaiting transmission when the door lock is connected to the cell phone Bluetooth and opened in the next time.


Restore Factory Settings

Click the icon in the upper right corner, find the "Remove Equipment" after entering the interface, select "Unbutton and Clear Data"
- When the mobile APP and the door lock are in a Bluetooth connection state, use the "Remove Device" to set the operation. All the door locks of the door lock will be deleted, and the door locks are restored to the default state when they first leave the factory. Other users can re-add the door lock through the app.
- When the mobile phone does not perform the Bluetooth connection status with the door lock, the door lock is restored to the factory setting operation at the mobile app, and the door lock on the door lock is still not affected. Other users can re-match the door locks through the APP to match the door lock on the back door lock. The original unlocking data will be invalid.
- You can restore the factory settings through the local mechanical button of the door lock; long press the settings key for 5 seconds, all the door locks will be deleted, the door lock is restored to the default state when the factory is just left. Other users can re -add the door through the app to re -add the door. Lock.


Note: When the door lock is not activated, the experience password "123456" can be used to experience the unlocking.

Scan the QR code to watch the settings video

Scan the QR code to watch the installation video
Documents / ResourcesDownload manual
Here you can download full pdf version of manual, it may contain additional safety instructions, warranty information, FCC rules, etc.
Advertisement


Need help?
Do you have a question about the SMART LOCK and is the answer not in the manual?
Questions and answers