Advertisement
Safety Warnings

Must REMOVE the front plate PRIOR to entering an automated car wash or DAMAGE will occur!
 Notice: Parking stops, high curbs, speed bumps, potholes, steep driveways, and other road abnormalities can cause damage to your STO N SHO and vehicle. STO N SHO LLC is not responsible for any damages that may occur to the STO N SHO bracket or vehicle itself due to improper installation, road conditions, driving, or care. Warranty only covers manufacture defects and STO N SHO LLC is not responsible for damages as a result of driving your vehicle.
Please read directions completely before starting. If you have any questions, please contact STO N SHO, LLC before beginning your installation.
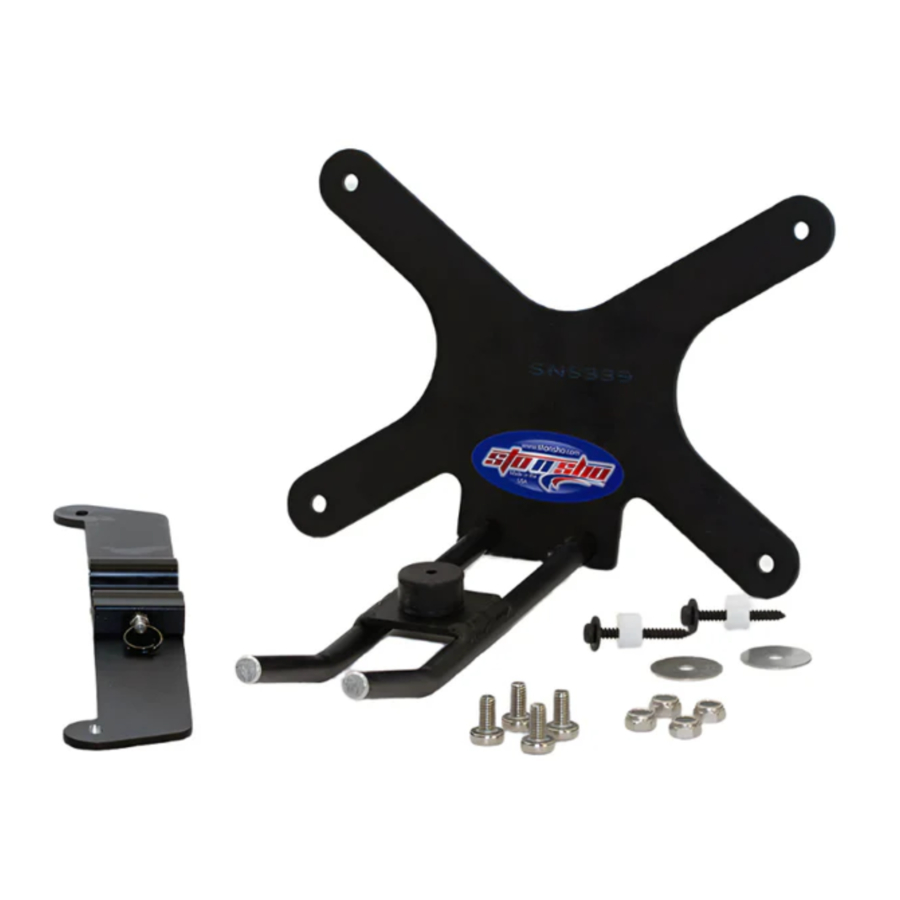
| Parts Included: | License Plate mounting bracket Assembly. Includes Base Plate and License Plate Holder License Plate mounting Screws: (4) 6mm X 12mm (Phillips head) and 6mm nuts (10mm wrench size) Base plate mounting screws: (2) 4.2mm X 35mm, (2) #10 Fender Washers & (2) 5/16" nylon spacers |
| Tools Needed: | 8mm & 10mm socket with ratchet Note: 1/4-inch drive preferred but 3/8 will work but extra caution will be needed when tightening bolts Phillips screwdriver, and 10mm wrench |
Installation
Installation video

Step 1:
Ensure all parts listed above are accounted for.
Note: If at any time during the installation process you need assistance please call (408) 776-4080.
Step 2:
Separate the license plate holder from the base by simply pulling the pull pin ring outward and sliding apart.
Step 3:
Remove the two center screws as shown in figure 1.

Fig 1
Position the base mount over the holes where the two factory screws were just removed. See figure 2.

Fig 2
Step 4:
Using the two 4.2mm X 35mm screws, fender washers and 5/16 spacers secure the base plate to the vehicle. See figure 3.

Fig 3
Note: Screw will be inserted into the base plate, spacer over screw with fender washer on top. See figure 2a.

Fig 2a
Step 5:
Secure the license plate and frame (optional) to the license plate bracket using the screws and nuts provided. Requires the Phillips screwdriver and 10mm wrench (Not included).
Step 6:
Slide the license plate rods into the two tubes located on the base plate. Slide the rods into the tubes until the rods hit the pull pin. Simply pull the ring on the pull pin and advance the rods. Release ring and continue to advance rods until the pull pin locks into place.

Fig 4
Note: The rods and spring-loaded pull pin are required to be sprayed periodically with WD-40 or any other silicone type spray lube. Failure to do so could result in either the failure of the pull pin or the rods becoming difficult to remove or reinsert.
Note: In harsh environments, such as areas where roads are either salted or sanded in the winter, spraying of the rods and pull pin should be performed on a regular basis. Failure to provide this maintenance may void your warranty. See figure 5.

Fig 5
On some occasions the license plate may require a little adjustment to level. Simply pull pin and slide plate out approximately two inches, grab frame at arrows (See figure 6) and rotate. If the plate is high on left or right side, rotate high side down slightly and release. Verify alignment and repeat as necessary. Once leveled plate will remain level.
Congratulations! You have just installed the STO N SHOTM (Patented) front license plate mounting system.

- Bracket lowers ground clearance by approx. 1/2 inch
- Remove prior to entering automated car wash
- Exercise care when entering or exiting steep driveways or damage will occur
- Parking Stops or high curbs stop well before or damage will occur
- Remove prior to running on track or racing
Medium skill level required. If unsure, have bracket installed by your local Dealer or Body shop.
Warranty only covers manufacture defects and STO N SHO LLC is not responsible for damages as a result of driving your vehicle. Exercise caution and avoid roadways that will cause damage to your vehicle.
For the name of your nearest authorized STO N SHO dealer, contact: STO N SHO, LLC at (408)776-4080 or go to www.stonsho.com.
Documents / Resources
References
Download manual
Here you can download full pdf version of manual, it may contain additional safety instructions, warranty information, FCC rules, etc.
Advertisement


Need help?
Do you have a question about the SNS 339 and is the answer not in the manual?
Questions and answers