Advertisement
- 1 About this product
- 2 Package Contents
- 3 Product Illustration
- 4 Accessories Available for Purchase
- 5 Installation Instructions
- 6 Using Battery power
- 7 Flash Mode - TTL Automatic Flash Mode
- 8 Flash Mode - M Manual Flash Mode
- 9 Flash Mode - Multi Flash Mode
- 10 Wireless Flash Shooting: Wireless (2.4G) Transmission
- 11 C.Fn: Set Customized Function
- 12 Modeling Lamp
- 13 Protection System
- 14 Troubleshooting guide
- 15 Care and Maintenance
- 16 Sync Jack
- 17 Firmware Upgrade
- 18 Notes
- 19 Specifications
- 20 Documents / Resources
About this product
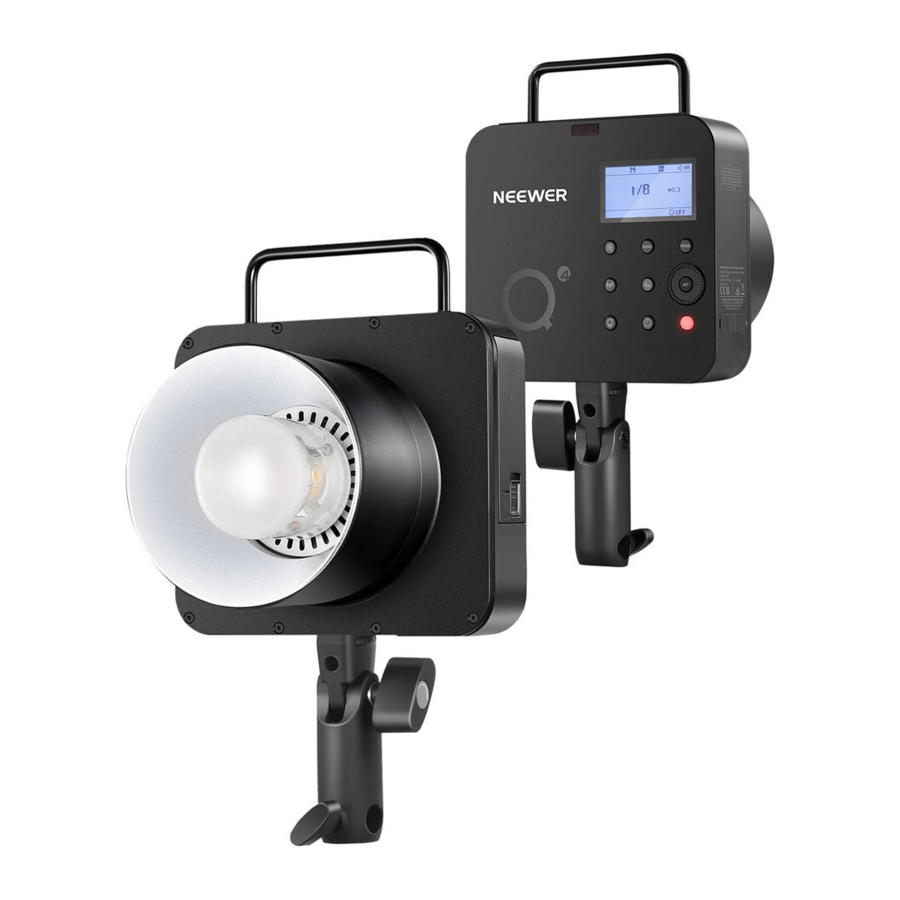
The Q4 flash is a portable powerful strobe light powered by a large-capacity lithium battery and supports 1/8000 HSS. The exposed modeling lamp and reflector provide a top-level light quality for outdoor and indoor shooting. What sets it apart from many other powerful speedlites on the market, is its compact design and smaller size without compromising features such as standard accessory mounts for a wider compatibility. With an impressive built-in 2.4G wireless Q system, the Q4 device supports TTL, wireless triggering, high-speed sync, front-curtain sync, rear curtain sync and more.
Package Contents

Product Illustration


Accessories Available for Purchase
The Q4 flash can be used with the following photographic accessories to achieve the very best shooting results and experience: QPro flash trigger, Bowens mount soft umbrella, reflector, snoot, beauty dish, light stand, etc.
Installation Instructions
- Installing the Flash Tube
When installing the flash tube, please note that the red dot on the inner part of the flash tube should be aligned with the red dot on the bayonet, and then insert the pins into the pin holes to secure the flash tube.
![]()
Insert the three copper pins of the flash tube into the three pin holes of the flash body and push them inward until they are secure.
※The device should not be powered on when installing/removing the flash tube.
![]()
- Removing the Flash Tube
Simply pull the lamp outwards in the direction shown..
※When removing the lamp, be mindful that the bulb could still be hot.
![]()


- Installing the Reflector
When installing the reflector, please note that the red dot on the reflector should be aligned with the blue dot on the bayonet, and then slotted into the connecting piece.
![]()
Push the reflector into the tab holes and then rotate the reflector clockwise to secure it.
![]()
- Removing the Reflector
Press the reflector removal button and then rotate the reflector counterclockwise and pull it outward.
※Exercise caution to prevent burns when removing it.
![]()


- Installing the Handle
Insert the screws at the top of the handle and the two positioning points as shown. Turn the locking knob until the handle is secure.
![]()
- Installing the Tripod
Insert the top of the tripod into the bottom of the handle, tighten the locking knob until the light stand is securely attached.
※This product does not include a tripod (separate purchase required).
![]()
- Adjusting the Angle of the Flash
Loosen the Angle Locking Knob of the support bracket, adjust the angle of the flash to a suitable angle and then re-tighten.
![]()


Using Battery power
- Installation of the Lithium Battery
Simply insert the battery into the battery slot in the direction shown until the battery latch locks into place.
![]()
- Removing the Lithium Battery
Slide the battery release tab upward, the battery can be removed after it automatically pops out.
![]()
- Battery Management
Long press the power button for 1 second to control the power of the product. The device has an automatic shutdown function. It is recommended that you turn off the power when not to be used for a long period of time.
The flash will automatically turn off when there is no operation within the time set in C.Fn-STANDBY (30-120min). - Battery Features


- The product uses a lithium battery, with a long service life, which can be recharged up to 300 times.
- Safe and reliable, built-in circuit with protection against overheating, overcharge, overdischarge, overcurrent and short-circuiting.
- Use the DC charging port to charge the battery via the included power adapter. A full charge takes approx. 3 hours.
- Battery Power Indication
After correctly installing the battery to power the flash, the on-screen battery icon displays the remaining power which you can check in an instant.Battery Power Icon On LCD display LED Indicators on the Battery Equivalent Power Percentage (Power indication and management for the entire flash system.) (Battery level management when battery not discharging) 4 Bars ![]()
4 Blue Lights On 75% ~ 100% 3 Bars ![]()
3 Blue Lights On 50% ~ 75% 2 Bars ![]()
2 Blue Lights On 25% ~ 50% 1 Bars ![]()
1 Blue Lights On 3% ~ 25% Low remaining power alert
![]()
2% - Flashing Blue Light
1% - No indicators litThe flash will cease to work when the power is <2%. You will have a one minute advance warning before the device shuts down after 3 minutes.
Note: Please charge as soon as possible (within 10 days) before using or storing the light away.


Note: The indicator bars are purely indicative and should be used as a guide of battery power remaining.
- Battery Precautions
- Avoid short-circuiting the positive and negative terminals.
- The battery is not waterproof and should not be exposed to high levels of humidity or immersed in water.
- Keep out of the reach of children.
- Do not charge the battery for more than 24 hours. Only a compatible, original charger should be used. Store in a cool dry place.
- Do not leave the battery unused long periods of time (more than 6 months). Recharging a battery that has been left unused for too long is a safety hazard.
Do not charge the battery when the voltage of the battery cell is below 9V. - Do not place the battery near or in a fire.
- Dispose of the battery in accordance with local regulations after use.
- When not in use for a long period of time, please charge to approximately 60% before storing away.
- When not in use for a long period of time, store the battery in good condition and leave it half-charged.
- The battery must not be used while it is being charged.
- The battery is equipped with an over-temperature protection function. If the internal temperature of the battery reaches 131°F/55℃, this function will activate automatically. The battery will need to cool down before normal operation is resumed.
Flash Mode - TTL Automatic Flash Mode
The flash has three modes: TTL Auto Flash, M Manual Flash, and Multi Flash. In TTL mode, the camera's metering system detects the flash lighting reflected back from the subject and automatically adjusts the flash output so that the subject and background are equally exposed.
※Press the < MODE > button. Three flash modes will appear on the LCD screen in order.
- Power On/Off / Unlock Screen
![]()
- Short press the power button "
![]() ". The screen will light up. Turn the adjustment knob clockwise three times and then the screen will be unlocked when the arrow pointing downwards appears.
". The screen will light up. Turn the adjustment knob clockwise three times and then the screen will be unlocked when the arrow pointing downwards appears. - Short press the power button "
![]() " to turn off the light.
" to turn off the light.
- Short press the power button "
- TTL Mode
Short press the mode button "MODE". When the word "TTL" appears on the screen, the flash has entered TTL mode.
※ TTL mode is only available when the wireless function is enabled.
![]()
- Flash Exposure Compensation(FEC)
Rotate the adjustment knob to set the exposure compensation value. Press the "SET" button to confirm and exit the setting.
※Users can adjust the flash exposure compensation in 1/3-stop increments between ±3 stops. "0.3" equates to 1/3 stop, "0.7"equates to 2/3 stop. Set the flash exposure compensation to "+0" to cancel the flash exposure compensation.
![]()
- High Speed Sync (HSS)
Press the button "![]() " briefly to display the "
" briefly to display the " ![]() " symbol on the screen. This feature requires the use of a wireless transmitter for high-speed synchronization, such as QProC/N/S.
" symbol on the screen. This feature requires the use of a wireless transmitter for high-speed synchronization, such as QProC/N/S.
With High Speed Sync (FP Flash), users can use the flash synchronously at all shutter speeds. High speed sync mode is particularly well adapted when using aperture priority for fill flash on portraits.
![]()


 " briefly to display the "
Notes
If the shutter speed is set equal to, or slower than, the maximum flash sync speed of the camera, the ""![]() "" icon will not be displayed in the viewfinder. With High Speed Sync, the higher the shutter speed, the smaller the effective flash range.
"" icon will not be displayed in the viewfinder. With High Speed Sync, the higher the shutter speed, the smaller the effective flash range.
To resume normal flash, press the High Speed Sync button again. The ""![]() "" icon will disappear.
"" icon will disappear.
High speed sync flash is not available in Multi Flash mode.
The flash features an overheat protection function which will kick in after 50 consecutive high speed synchronized flashes.
Flash Mode - M Manual Flash Mode
M Mode allows you to set the flash output in 0.1-stop increments from 1/256 power to 1/1 full power. To obtain the correct flash exposure, please use a handheld flash meter to determine the required flash output.
- Setting the Flash Power to M mode
Short press the mode button "MODE". When "M" appears on the screen, the flash has been set to M mode.
The flash output can be set by turning the adjustment wheel. Press the "SET" setting button again to confirm the flash output.
![]()
- Setting the S1 Optical Unit
In M Manual Flash Mode, press the <MENU> button to enter the C.Fn - SLAVE and select S1. The flash can be used as a secondary light to create a variety of lighting effects, suitable for a manual flash environment. It will trigger the flash synchronously with the first flash of the master flash which is the effect consistent with the use of wireless flash triggers.
![]()
- Setting the S2 Optical Unit
Press the <MENU> button to enter C.Fn - SLAVE and select S2. The flash can be used as a secondary light for TTL flash environments. With the anti-pre-flash function, the camera with a pre-flash function can be used to synchronize shooting with the optic slave. It will trigger the flash synchronously with the second flash of the main flash, that is, a two light-controlled flash.
※ The S1/S2 optical slave flash mode is supported only in M mode when the wireless function is turned off.
![]()


- Displaying the Flash Duration
Flash duration is the time from the start of the flash to reach the half-peak of light. Half-peak is expressed as t = 0.5. In order to provide photographers with more detailed shooting t values, this product uses t = 0.1. The difference between t=0.5 and t=0.1 is shown on the left.
![]()
※ Flash Duration is displayed only in M mode.
![]()


Flash Mode - Multi Flash Mode
The Multi Flash Mode emits a series of rapid flashes. It allows users to take multiple images of moving objects in a single picture. You can set the flash frequency (the number of flashes per second, expressed in Hz), the flash times and the flash output power.
- Setting the Multi Flash Mode
When the word "MULTI" appears on the screen, the flash is now set in strobe mode. The flash output can be set by rotating the wheel.
Press the "SET" button again to set the number of flashes and rotate the dial to set the value. Press the "SET" button again to set the flash frequency and rotate the dial to set the value. Finally press the "SET" button again to set all values.
![]()
- Calculating the Shutter Speed
In Multi Flash Mode, the shutter should remain open until the flash stops. Use the following formula to calculate the shutter speed, and then set the camera.
Shutter Speed = Flash Times/Flash Frequency
For example, if the Flash Times is 10 and the Flash Frequency is 5Hz, the shutter speed should be at least 2 seconds.
![warning]() To prevent overheating and damage to the flash, do not perform multi strobes/flashes of more than 10 consecutive flashes. After 10 flashes, let the flash cool down for at least 15 minutes. If you try to perform more than 10 consecutive multi strobes/flashes, the flash may stop automatically to prevent the flash head from overheating. If this happens, let the flash cool down for at least 15 minutes.
To prevent overheating and damage to the flash, do not perform multi strobes/flashes of more than 10 consecutive flashes. After 10 flashes, let the flash cool down for at least 15 minutes. If you try to perform more than 10 consecutive multi strobes/flashes, the flash may stop automatically to prevent the flash head from overheating. If this happens, let the flash cool down for at least 15 minutes.


Notes
- Very reflective subjects are more effective with strobe flashes in front of a dark background.
- The use of a tripod and remote is recommended.
- Multi Flash Mode cannot be set when the flash output is 1/1 and 1/2.
- Multi Flash Mode can also be used with "buLb".
- If the flash time is displayed as --, the light will flash continuously until the shutter or battery is exhausted.
The flash times will be limited as shown in the table below.
Full Power Flash TimesFlash Output\Hz 1 2 3 4 5 6~7 8~9 10 11 12~14 15~19 20~50 60~100 1/4 8 6 4 3 3 2 2 2 2 2 2 2 2 1/8 14 14 12 10 8 6 5 4 4 4 4 4 4 1/46 30 30 30 20 20 20 10 8 8 8 8 8 8 1/32 60 60 60 50 50 40 30 20 20 20 18 16 12 1/64 90 90 90 80 80 70 60 50 40 40 35 30 20 1/128 100 100 100 100 100 90 80 70 70 60 50 40 40 1/256 100 100 100 100 100 90 80 70 70 60 50 40 40
Wireless Flash Shooting: Wireless (2.4G) Transmission
The Q4 uses the 2.4G wireless Q system and can be used in perfect combination with some of our other models. Used as a slave unit, it is compatible with cameras such as Canon E-TTL II, Nikon i-TTL and Sony and switches automatically according to the master unit. No manual setting is required.
※Q4 as a slave unit can be controlled by the master unit with wireless transmission function, such as the models: NW420, QPro series, Z1 series, and some others.
- Setting 2.4G Wireless Transmission
Short press the Wireless button "![]() ". The "
". The " ![]() " icon will appear on the screen.
" icon will appear on the screen.
![]()
- Setting Channels
Press and hold the "![]() " button for 2 seconds to select channel number. Rotate the adjustment knob to set the channel value (1~32), then press "SET" to set the channel.
" button for 2 seconds to select channel number. Rotate the adjustment knob to set the channel value (1~32), then press "SET" to set the channel.
![]()
- Setting the ID NO.
Press the "MENU" button to enter the menu mode, rotate the adjustment knob to select the ID (01~99), and press the "SET" button to set it.
(※Only when the Master unit has this function.)
![]()

 " button for 2 seconds to select channel number. Rotate the adjustment knob to set the channel value (1~32), then press "SET" to set the channel.

- Setting Groups
Short press the "![]() " button to select a group (A~E).
" button to select a group (A~E).
![]()
- Wireless Flash Shooting
Positioning and Operating Range (Example of wireless Flash Shooting)

- Automatic flash shooting using a slave unit.
- Use a master unit with wireless transmitter function as the transmitter.
- You should test the flash by taking a test shot before shooting.
- The transmission distance may be shorter depending on the location, surrounding environment, weather conditions, etc.
Wireless Multi Flash Shooting: Users can split the slave unit into two or three groups and use TTL auto flash while changing the flash ratio (magnification). In addition, the flash user can set and shoot with different flash modes for each flash group.
- Automatic flash shooting with two slave groups
![]()
- Automatic flash shooting with three slave groups.
![]()
- Automatic flash shooting using a slave unit.


- Causes and Solutions of 2.4G Wireless Flash Leakage
- The external environment 2.4G signal interference (such as wireless base stations, 2.4G Wi-fi routing, Bluetooth devices, etc.).
Please adjust the channel CH setting of the flash trigger (recommended +10), find a channel without interference to use, or turn off other 2.4G devices whilst working. - Please confirm whether the flash has been recycled or the recycling time has kept up with the continuous shooting speed (flash ready indicator has been lit), and is not in the overheat protection or other abnormal state. You can try to adjust the flash power setting, such as TTL mode. Please try to change to M mode (since TTL mode requires a single pre-flash).
- The distance between the trigger and flash is too close (distance <0.5m). Please turn on the flash trigger "close to wireless mode": Qpro series: Set C.Fn-DIST for 0-30m.
- The flash and the trigger are both low on power. Please replace the battery (recommended to use 1.5V disposable alkaline type batteries for the trigger).
- The external environment 2.4G signal interference (such as wireless base stations, 2.4G Wi-fi routing, Bluetooth devices, etc.).
C.Fn: Set Customized Function
- Menu Mode (C.Fn: Sett Customized Function)
![]()
- Press the "MENU" button to enter the C.Fn menu. "Ver x.x" in the lower right corner indicates the software version number.
- Turn the adjustment knob to select the custom function icon. Press the "SET" button to highlight the custom function number.
- Rotate the adjustment knob to set the required number. Press the "SET" button to confirm and press "SET" again to exit the selection.
- Press the "MENU" button to exit the setting.

C.Fn: Set Customized Function
| Customized Functions Icons | Functions | Set an Icon | Settings and Instructions | NOT Supported |
| SLAVE | S1/S2 Optic Mode Selection | OFF | OFF | M Mode |
| S1 | S1 Mode | |||
| S2 | S2 Mode | |||
| MODEL | Modeling Lamp | CONT | Always ON | |
| INTER | Automatically turns off when recycled. | |||
| STANDBY | Auto Power Off | OFF | OFF | |
| 30min | Automatic shutdown without any operation | |||
| 60min | ||||
| 90min | ||||
| 120min | ||||
| LIGHT | Backlight illumination Duration | 15sec | Turns off automatically after 15 seconds | |
| OFF | Always OFF | |||
| ON | Always ON | |||
| DELAY | Flash Delay | OFF,0.01~30S | Rear Curtain Flash Available | M/Multi Mode |
| UNITS | Flash Times | 2~4 | UNITS and ALT must be used in combination: UNITS sets the total number of lights; ALT sets how many times the light is triggered | M Mode |
| ALT | Set the number of triggers required to fire the flash | 1~4 | M Mode | |
| LCD | LCD Contrast | -3~+3 | 7 Levels | |
| ID | Wireless ID | OFF | OFF | Wireless Mode |
| 01-99 | 01-99 | |||
| BEEP | Buzz Alert | ON | ON | |
| OFF | OFF | |||
| RESET | Reset Parameters | NO | ||
| YES | Reset |
Modeling Lamp

 Flash Mode
- Modeling Lamp Mode
- Short press the modelling light button "
![]() ". The modeling light and the word "PROP" will appear in the bottom right corner of the screen. You can now change the output power by rotating the dial to adjust the brightness of the modeling light. The higher the power setting, the brighter the modelling light.
". The modeling light and the word "PROP" will appear in the bottom right corner of the screen. You can now change the output power by rotating the dial to adjust the brightness of the modeling light. The higher the power setting, the brighter the modelling light.
![]()
- Short press the modelling light button "
![]() ". The modeling light and the word "PROP" will appear in the bottom right corner of the screen. Press and hold the modeling lamp switch button "
". The modeling light and the word "PROP" will appear in the bottom right corner of the screen. Press and hold the modeling lamp switch button " ![]() " again for 2 seconds. The bottom right corner of the screen will show a highlighted percentage which will alter by rotating the adjustment knob to change the brightness percentage (10% ~ 100%).
" again for 2 seconds. The bottom right corner of the screen will show a highlighted percentage which will alter by rotating the adjustment knob to change the brightness percentage (10% ~ 100%).
![]()
- Short press the modeling lamp switch button "
![]() " When the modeling lamp and the word "OFF" appear in the lower right corner of the screen, the modeling lamp is off.
" When the modeling lamp and the word "OFF" appear in the lower right corner of the screen, the modeling lamp is off.
![]()
- Short press the modelling light button "


Protection System
- Overheat Protection
- To prevent the flash head from overheating and becoming damaged, do not perform more than 75 rapid successive flashes at 1/1 power. After 75 successive flashes, allow the flash to cool down for at least 5 minutes.
- If you continue to fire more than 75 consecutive flashes immediately afterwards, the internal anti-overheating function may activate resulting in the charging time increasing to more than 6 seconds. If this happens, allow the flash to cool down for about 5 minutes and the flash will resume normal operation. 3. When the thermal protection is activated, the "
![]() " symbol will appear on the display.
" symbol will appear on the display.
 " symbol will appear on the display.
Number of consecutive flashes to activate the thermal protection function.
| Power | Times |
| 1/1 | 75 |
| 1/2(+0.7~+0.9) | 100 |
| 1/2(+0.3~+0.6) | 120 |
| 1/2(+0.0~+0.2) | 150 |
| 1/4(+0.0~+0.9) | 200 |
| 1/8(+0.0~+0.9) | 300 |
| 1/16(+0.0~+0.9) | 400 |
| 1/32(+0.0~+0.9) | 500 |
| 1/64(+0.0~+0.9) | 1000 |
| 1/128(+0.0~+0.9) | |
| 1/256(+0.0~+0.9) |
Number of consecutive flashes to activate the overheating protection in HSS mode:
| Power | Times |
| 1/1 | 50 |
| 1/2(+0.0~+0.9) | 60 |
| 1/4(+0.0~+0.9) | 75 |
| 1/8(+0.0~+0.9) | 100 |
| 1/16(+0.0~+0.9) | 150 |
| 1/32(+0.0~+0.9) | 200 |
| 1/64(+0.0~+0.9) | |
| 1/128(+0.0~+0.9) | 300 |
| 1/256(+0.0~+0.9) |
Additional Protection Features
To ensure the safe operation of the equipment, the system always carries out preventive protection. The following icons are for your reference.
| LCD Display | Warnings |
| Error 1 | Flash recycling system not operational, please restart the device. If this fails to resolve itself, the device will require repair. |
| Error 5 | Fan Error |
| Error 6 | Sensor Error |
Troubleshooting guide
Flash underexposure or overexposure
Using HSS mode.
The effective flash range is smaller when using High Speed Sync, so make sure the subject is within the effective flash range.
- Using M mode.
Please try to change to TTL mode or modify the flash output power.
Care and Maintenance
- If the flash starts to malfunction, the power should be turned off immediately to identify the cause.
- The flash body should not be subjected to excessive vibration and kept dust free.
- It is normal for the lamp body to heat up slightly during use. Do not trigger the flash continuously if it isn't necessary.
- If the product fails or is wet, please seek assistance from a qualified professional.
- Changes to the technical specifications of the product may be made without prior notice.
Sync Jack
The sync jack is Φ3.5mm and can be plugged into a sync cable or trigger plug to synchronise the flash.
※ When using the sync port to trigger the flash, the wireless 2.4G mode and S1/S2 modes must be deactivated.
※ The synchronization speed should not exceed 1/200 when using the sync port.
Firmware Upgrade
This product supports firmware upgrades via the USB port. The latest software announcements and instructions will be posted on the official website.
- This product does not come with a USB upgrade cable. Please purchase separately. The USB port of this product is a Type-C port.
- Refer to "Neewer_Firmware_Update" program software to upgrade the firmware. Please download and install "Q4 firmware upgrade software" EN and select the corresponding firmware file before upgrading the firmware.
- Please refer to the latest e-manual for updated information whilst the product is being upgraded with firmware.
Notes
- Do not place the product in an environment where the temperature is higher than 50℃.
- The operating temperature of the product should not be higher than 40℃.
- Do not subject the product to a strong physical impact. Dropping the device may result in irreperable damage.
- Please do not flash directly into the eyes (especially the eyes of infants), otherwise it may result in short term visual impairment.
- This product is not waterproof and should be kept out of the rain and humid environments.
- Please do not disassemble the product. It should only be repaired by a qualified professional.
- Do not use near a fire. If a bulge develops in the battery or housing, the flash should not be used.
- If the device malfunctions in any way please turn off the flash power immediately.
- Do not use the flash in the vicinity of chemicals, flammable gases or other special substances, which in special circumstances may be sensitive to the instantaneous glare emitted by the flash and may lead to fire or electromagnetic interference. Particular attention should be given to any relevant warning signs.
Specifications
| Model | Q4 |
| Wireless Slave Unit Mode | Compatible with Canon E-TTL II, Nikon i-TTL and Sony TTL automatic flash system |
| Power | 400Ws |
| Flash Duration | 1/209s to 1/10989s |
| Flash Modes | M/Multi (Wireless Off) |
| TTL/M/MUTIL (Receiver unit for radio transmission) | |
| Power Output | 9 steps 1/256-1/1 |
| Stroboscopic Flash | Provided (up to 100 times, 100Hz) |
| Flash Exposure Compensation(FEC) | Manual. FEB: +/-3 stops in 1/3 stop increments |
| Sync Modes | HSS (up to 1/8000s), first/ curtain sync, second curtain sync |
| Delay Flash | 0.01-30s |
| Masking Function |  |
| Built in Silent Fan | |
| Built in Buzzer | |
| Display Flash Duration | |
| Modelling Lamp (LED) | 30W/5600K/CRI:95+ |
| Trigger Modes | 2.4G, S1/S2, 3.5mm Synchronous Cord, Flash Test |
| Display | Dot Matrix Screen |
| Color Temperature | 5600±200K |
| Wireless Function | Slave Unit, Wireless Off |
| Wireless 2.4G Q System | 32 Channels, 5 Groups (A, B, C, D, E) 2.4G Transmission Range: 328'/100m Wireless ID: The user can change the wireless transmission channel and wireless ID of the master and slave unit for seamless operation without signal interference before triggering. |
| Rechargeable Li ion Battery | 21.6V/2800mAh |
| Full Power Flash | 400 |
| Recycling Time | Approx. 0.01-1.2s |
| Battery Power Indication | |
| Energy Saving | The flash can be set to automatically power off without operation for 30-120 minutes. |
Documents / ResourcesDownload manual
Here you can download full pdf version of manual, it may contain additional safety instructions, warranty information, FCC rules, etc.
Advertisement


Need help?
Do you have a question about the Q4 and is the answer not in the manual?
Questions and answers