Advertisement
- 1 General information
- 2 Assembly Instructions
- 3 Remove and install the battery
- 4 Specifications
- 5 Use steps
- 6 Cruise Control
- 7 Your First Ride
- 8 Battery Pack
- 9 How to charge your battery/batteries
- 10 Pre-ride safety checklist
- 11 Service and Maintenance
- 12 Troubleshooting
- 13 Link to assembly video and onl ine resources
- 14 Warnings
- 15 Important safety information
- 16 Documents / Resources
General information
What's in the box
Carefully check package contents, and make sure you have the following:

If anything is missing or is damaged, contact Luckeep immediately for assistance.
For a video about how to unbox and assemble your Luckeep ebike, visit our YouTube page: LuckeepBike.
What's in the accessory box
Carefully check package contents, and make sure you have the following:

If anything is missing or is damaged, contact Luckeep immediately for assistance.
For a video about how to unbox and assemble your Luckeep ebike, visit our YouTube page: LuckeepBike.
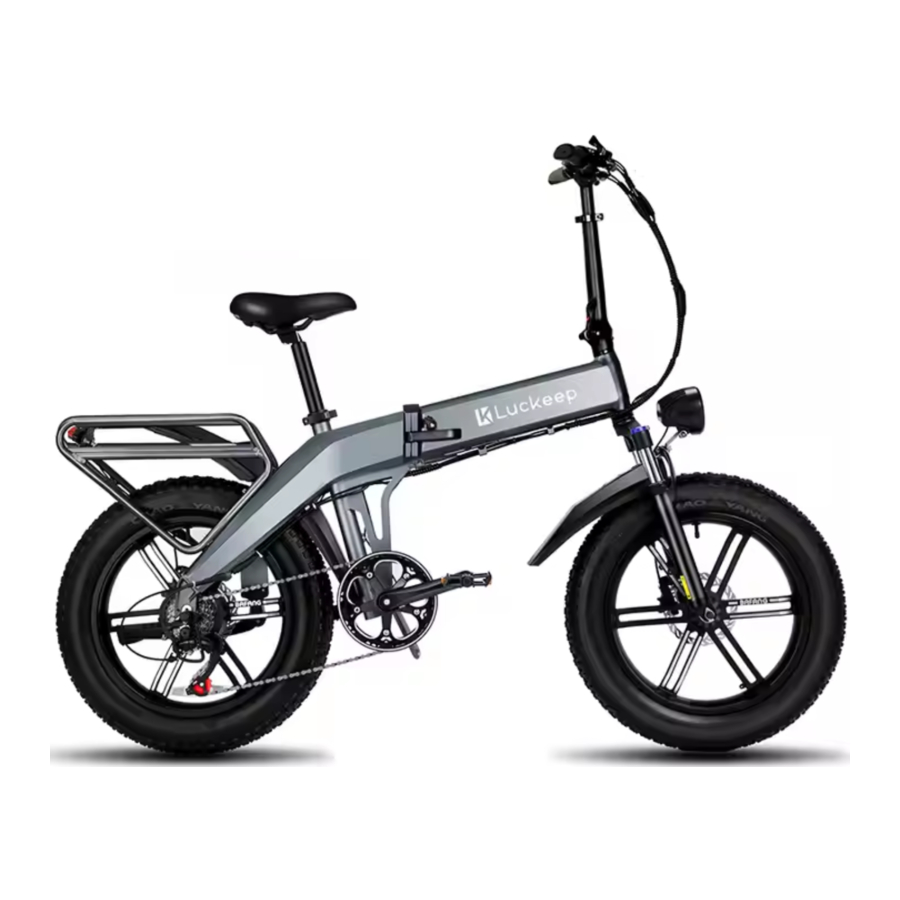
Product parts

- Saddle
- Taillight & Turn Signal 回
- Rear Bike Rack & Fender
- Seatpost Clamp
- Rear Brake Caliper
- Hub Motor
- 7-speed Freewheel
- Derailleur
- Chain
- Controller
- Chain Wheel
- Crank
- Pedal
- Tube Battery
- Front Brake Caliper
- LCD Display & Phone Holder with USB Charging Port
- Shifter
- Brake Lever
- Foldable Stem
- Cable Housing
- Front Fork
- Wheel
- Tire
- Headlight
- Rim
- Front Fender
Assembly Instructions
Unpack the product
Open the bike box. With the help of another person capable of safely lifting a heavy object, remove the e-bike from the bike box. Carefully remove the packaging material protecting the bike frame and components. Please recycle packaging materials especially cardboard and foam whenever possible.
Unfold handlebar
- Begin with handlebars in the folded position.
![]()
- Pull the handlebar stem to its upright position.
![]()
- Remove the plastic snap with one hand and the other hand push the latch in firmly until it locks in position.
![]()
- Pull on the latch to confirm it is locked and the handlebars cannot fold.
![]()
- Lift the handlebar, place it in the tube and lock the stem quick release
![]()


Front fender and headlight installation
First use a wrench to fix the nut at one end of the headlight installation position, use the other hand to unscrew the screw with an Allen wrench and remove the nut, then put the headlight and fender through the bolt and install the nut, then use a wrench to fix the nut at one end and use the other hand to tighten the screw with an Allen wrench

Remove the front fork light hole screw

Insert the M6 screw into the headlight and front fender
For the installation video, please click this link
(https://www.youtube.com/watch?v=KG7s8FDUTOg) or scan the following QR code

Front wheel installation
- Take out front wheel remove protective guard.
- Remove fork protective cover and take out plastic insert from front wheel brake caliper.

- Loosen the front axle nuts and place the front suspension fork onto the front Wheel. Ensure the brake rotor is between the brake pads of the brake caliper.


Insert the short cylinder and add a circular spacer

Put the hook spacer first and then put the round spacer, tighten the screws.

Insert the short cylinder and add a circular spacer
- Use open wrench to tighten front axle nut.

Never touch the brake rotor, especially when the wheel and/or bike is in motion, or serious injury could occur. Hand oils can cause squeaking and decrease brake performance

An improperly secured front wheel and/or handlebar stem can cause loss of control, accidents, serious injury, or death. Check that the front wheel and handlebar stem are properly secured to the bike during assembly and before each ride.
- After installing the front wheel, turn the front wheel and observe whether the front disc is rubbed or not, if there is any friction, please adjust the clearance between the brake caliper and the brake disc.
For adjustment steps, please click this link
(www.youtube.com/watch?v=2n5bvVXe0D4) or scan the following QR code

Remove and install the battery
- To unlock the ebike frame and fold the ebike, start by sliding the switch labeled "open" to the right. Pull the latch while still holding the switch to the "open" position. You may now fold the bike.

- Hold the ends of the frame with each hand, then bend the fold with your knees. Then hold the handlebars with your left hand, grip the rear rack with your right hand and push the rear wheel to maximize folding.
![]()


Hold the rear frame with your hand

The bike is folded up
- Insert the key into the battery lock, hold and pressing the key a bit until twist clockwise to the end (Note: You can only remove the battery when the lock lever is fully inside the lock).

- Hold the handle of the battery with one hand at all times, then pull out the battery key with the other hand, and then slowly remove the battery with both hands, please be sure to be careful to prevent the battery from falling down.

- If you want to put the battery back in, please insert the battery into the e-bike tube first, then hold the battery handle with one hand at all times then and insert the key into the battery lock with the other hand, twist it once counterclockwise, it will lock the battery. Finally, pull out the key.

- To unfold the bike frame, stand near the frame where the battery is exposed. Grab the stem and rear end of the bike. Lift the bike slightly off the ground and swing to the closed position. Push down the latch firmly until it locks into position. Pull on the latch to confirm that the latch has locked and that the frame cannot fold.


pull up the bike

expand it

the e-bike is fully unfolded
Pedal installation
Use wrench to install the pedals. Locate the pedal with a smooth pedal axle exterior and an "R" mark (1, below), which indicates it is the right pedal. The right pedal goes on the crank on the right side of the bike (which has the drivetrain gears and is the same as a rider's right side when riding ).
- The right pedal (pedal with "R" mark) is threaded so that it is tightened by turning clockwise.
Apply grease to the thread and carefully thread the right pedal onto the crank on the right side of the bike slowly and by hand. Do not cross thread or damage the threads.
![]()
![]()


Thread the right pedal onto the right crank gently by hand, turning clockwise
- The left pedal (pedal with "L" mark) is reverse-threaded and tightens counterclockwise.
Apply grease and carefully thread the pedal onto the left crank by hand slowly. Do not cross thread or damage the threads.
![]()

Identifying marks Right pedal (has a "R" mark) tightens clockwise, Left pedal (has a "L''mark) tightens counterclockwise

Adjust the seatpost and handlebar stem

Ensure both your seat post and handlebar stem are inserted past their minimum insertion points as indicated by the markings on them. These markings are shown above. Failure to insert past the minimum insertion point will place undue stress on these components increasing the risk of sudden failure potentially resulting in harm, injury, or death
Adjusting the Suspension Fork
The suspension fork can move up and down up to 70mm to cushion bumps in the riding surface, which can make riding on a rough road or trail smoother and more comfortable. Depending on a rider's preference the suspension fork can be locked out as a rigid fork, which will typically yield higher efficiency while pedaling

The lockout lever (1), located on top of the right side of the suspension fork, can be turned clockwise until it stops to completely lock out the suspension fork's travel. To unlock the lockout lever, turn the knob counterclockwise until it stops. When the lockout lever is unlocked, resist ance can be adjusted by turning
The preload adjustment knob (2), located on the top of the left side of the suspension fork. To soften the ride. subtract resistance by turning the preload adjustment knob counterclockwise, in the direction of the small the knob. To make the suspension stiffer when going over bumps, add resistance by turning the pre load adjustment knob clockwise, in the direction of the small "+" on the knob.
Specifications
MODEL: X2001
Motor: 750W BAFANG gear motor, Peak power 1130W
Battery: Removable 48V lSAH lithium-ion battery
Battery Charger Input Voltage: 110/220 volt AC
Battery Operational Temperature: 0° to 40°Celsius (32° to 104°Fahrenheit)
Frame: 6061 Aluminium-alloy folded frame 11
Tire: 20 x 4.0 Puncture resistant fat tire
Brake: F & R Hydraulic disc brakes
Gears: Shimano 7-speed
Suspension: Lockable front fork suspension
Estimated Max Range: 30 miles in pure electric mode, 50 miles in pedal assist mode {PAS mode)
Max Speed: 31 mph
Torque: 85NM
Max Slope: 35°
Light: High-luminance headlight and integrated taillight
Display: LCD smart display with backlight
Saddle: Memory foam saddle
3 Working modes: Pure electric mode, pedal assist mode (5 level), classic bike mode
Charger: 54.6V 3A, DC2.5, US standard charger
Charging time: 4-6h Max.
Load Capacity: 3301bs. / 150 kg (including cargo)
Recommended Torque Settings
| Standard Values | kgf.cm |
| B.B right | 350-450 |
| B.B left | 300-350 |
| Stem Bolt | 180-200 |
| Folding Stem Screw | 180-270 |
| Derailleur Bolt | 80-100 |
| Stand | 3/8" Screw: 250-300 |
| MG Screw: 70-90 | |
| Brake Disc Screw | MG Screw: 80-90 |
| Normal Srew MS | 20-30 |
| Head set Bolt | 350-500 |
| Front Wheel | 180-250 |
| Rear Wheel | 300-400 |
| Crank | Aluminum: 350-450; Iron: 450-600 |
| Pedal | 350-400 |
| Saddle | 180-220 |
Use steps
- Make sure the battery is charged and tire is filled with enough air (2 0 PS I max)
- Press the fourth button with the lightning mark on the anti-theft device twice, ebike make "Do-Re-Mi" sounds, then the motor will be started.
- Press the switch button next to the left handlebar to complete the start.
- Set the gears on the meter to 1-5, turn the throttle to ride. Select a Pedal Assist (PAS) level using the plus(+) and minus(-) buttons. PASO provides no motor assist. PAS 1 is the lowest level of assist and PAS 5 is the highest level of assist.
- After riding, press the lock button on the anti-theft device will turn off the motor. At this time, if someone touches our e-bike, an alarm will sound, and then press the second unlock button to release the alarm
- lf you want to find where the e-bike is, please press the third find button of the anti-theft device, and then the e-bike will beep.
- lf you want to ride again, press the second unlock button and the e-bike will start again
Cruise Control
Cruise Control on your Luckeep bike works similarly to cruise control on a car. The bike will try to maintain a speed based on the position of the throttle when cruise control was activated. For example, if the throttle is twisted all the way from its resting position (to a position that would normally maintain 20 mph), cruise control will be activated and set at 20 mph. Even if the bike is currently going slower than 20 mph, the bike will try to accelerate and maintain that speed because it was set based on that throttle position
To activate:
Press the minus(-) button twice, then slowly turn the throttle to the right speed and hold it for 5 seconds, it will open the cruise mode
To deactivate:
Pull either brake lever to disengage Cruise Control.
Your First Ride
The acceleration of your Luckeep eBike may be faster than anticipated, and may feel unusual at first. Before your first ride, you should use the lowest level of pedal assist (PAS 1) and become familiar with the operation of your Luckeep eBike by practicing starting, stopping, cornering, and navigating obstacles in a safe environment away from other bicycles, pedestrians, and/or vehicles. You should also pay particular attention to terrain conditions as you may approach obstacles faster than expected.
Battery Pack
The term battery pack refers to all original Luckeep eBikes battery packs.
The safety of both our customers and our products is important to us. Our eBike batteries are lithium ion batteries, which have been developed and manufactured in accordance with the latest technology. We comply with or exceed the requirements of all relevant safety standards. When charged, these lithium ion batteries contain a high level of energy.
 If a fault occurs (which may not be detectable from the outside), in very rare cases and under unfavorable conditions, lithium ion batteries can catch fire.
Take care when using and charging your battery. Failure to follow the guidelines below could result in damage to property and/or serious injury. Contact Luckeep eBikes immediately if you have any questions regarding battery safety.
Your Luckeep eBike battery must not be opened, even for repairs. There is a risk your eBike battery could catch fire, e.g. due to a short circuit. This risk increases if an eBike battery which has already been opened is reused at a later point in time. Do not attempt to repair an eBike battery in the event of a fault. Have it replaced with an original Luckeep eBike battery pack.
The battery is protected against deep discharge, overloading, overheating, and short-circuiting by Electronic Cell Protection {ECP). In the event of a fault, a protective circuit switches the battery pack off automatically.
Removing the Battery from thee-Bike
The battery is an important and costly part of the e-bike. It is designed to be locked into position with a key to preventing theft. You can take further precaution by removing the battery while the e-bike is parked unattended. You may also have a need to remove the battery from the e-bike to recharge it at a location where you cannot park your e-bike.
Note: If you lose the key of your battery lock, please provide us with the 5-digit code on the battery lock and we will send you a new key.
Maximizing the Riding Range
Many factors affect the rate of use of the electrical energy and the riding range.
- You should fully charge the battery before a long journey.
- Rough road conditions and hilly terrain will consume more energy.
- Frequent change of speed will consume more energy.
- Carrying more weight on the e-bike will consume more energy.
- Keeping the tires properly inflated and keeping the e-bike clean and well lubricated will save energy.
- Making sure that both wheels move freely when brakes are not applied will save energy. You should check brake adjustments frequently.
- Pedaling as you ride will consume less electrical energy and increase the riding range.
- When the battery is turned off, your e-bike functions as a regular bicycle.
If you embark on a very long journey, you might want to turn off the battery for long stretches where the road is level or downhill and pedal the e-bike as a regular bicycle so that you can conserve electrical energy stored in the battery.
How to charge your battery/batteries
Some instructions on battery maintenance and charging
- Please charge the battery for 1-2 hours after its energy is consumed for 50%-70% of its total energy, in this way, the battery life will be longer. If you leave the battery pack in your stock in less energy condition, it will sleep to die quickly. So please charge the battery pack full after each long-distance ride. Do not charge the battery over a long time (longer than 10 hours) in summer; in case the battery will be calorifacient and broken.
- Recharging the battery once a month during the period of storage.
- It is recommended that you store the battery at a temperature between 0-40 degrees Celsius which is 32-104 Fahrenheit.
- The battery pack might not be fully charged when the temperature is over low or over high. When the battery is charged, its temperature may become a little higher, it is expected under the temperature of 50°C. If the charger indicator is useless when the battery is fully charged or the battery is scorching (that exceeds 50°C), please come to the seller to find maintenance at once.
- Do not make the charger jolty in the rear box if there is one box attached, and the charger should be far away from water. The impact and shake should be at the lowest degree when the battery is moved.
![burn hazard]() It's also important that you only use the charger that the manufacturer supplied since it will have been specifically designed for the battery. Using a different charger runs the risk of causing a fire and could damage the battery.
It's also important that you only use the charger that the manufacturer supplied since it will have been specifically designed for the battery. Using a different charger runs the risk of causing a fire and could damage the battery. - You should also take measures to protect the battery from being water damaged. Even though electric bikes can be cycled in the rain it doesn't mean that they are waterproof, so you should take some precautions to ensure that the location where you store the battery in isn't at risk of flooding or high humidity.
- Please ensure no short-circuit in your wall socket for fear of burning out the battery and causing danger.
Pre-ride safety checklist
Notice: Before every ride, and after every 25-45 miles (40-72 km), we advise following the pre-ride safety checklist.
| Safety Check | Basic Steps |
| Ensure front and rear brakes work properly. Check brake pads for wear and ensure they are not overworn. Ensure brake pads are correctly positioned in relation to the rims. Ensure brake cables are lubricated, correctly adjusted, and display no obvious wear. Ensure brake levers are lubricated and tightly secured to the handlebar. Test that the brake levers are firm and that the brake, motor cutoff functions, and the brake light are functioning properly. |
| Ensure tires are inflated within the recommended limits posted on the tire sidewalls and hold air. Ensure tires have good tread, have no bulges or excessive wear, and are free from any other damage. Ensure rims run true and have no obvious wobbles, dents, or kinks. Ensure all wheel spokes are tight and not broken. Check axle nuts and front wheel quick release to ensure they are tight. Ensure the locking lever on the quick release skewer is correctly tensioned, fully closed, and secured. |
| Ensure the handlebar and stem are correctly adjusted, tightened, and allow proper steering. Perform a handlebar twist test (see assembly step 4) to ensure the stem riser clamp bolt security. Ensure the handlebar is set correctly in relation to the fork and the direction of travel. |
| Ensure the chain is clean, oiled, and runs smoothly. Extra care is required in wet, salty/otherwise corrosive, or dusty conditions. |
| Ensure all bearings are lubricated, run freely, and display no excess movement, grinding, or rattling. Check headset, wheel bearings, pedal bearings, and bottom bracket bearings. |
| Ensure pedals are securely tightened to the cranks. Ensure the cranks are securely tightened and are not bent. |
| Check that the derailleur is adjusted and functioning properly. Ensure shifter and brake levers are attached to the handlebar securely. Ensure all shifter and brake cables are properly lubricated. |
| Check that the frame and fork are not bent or broken. If either frame or fork are bent or broken, they should be replaced. Check that the folding joints are not bent or broken. Check that the seat is adjusted properly, and seat post clamp is securely tightened. |
| Ensure hub motor is spinning smoothly and motor bearings are in good working order. Ensure all power cables running to hub motor are secured and undamaged. Make sure the hub motor axle bolts are secured and all torque arm and torque washers are in place. |
| Ensure battery is charged before use. Ensure there is no damage to battery. Lock battery to frame and ensure that it is secured. Charge and store bike and battery in a dry location, between 50°F - 77°F (10°C - 25°C). Let bike dry completely before using again. |
| Look over connectors to make sure they are fully seated and free from debris or moisture. Check cables and cable housing for obvious signs of damage. Ensure headlight, taillight, and brake light are functioning, adjusted properly, and unobstructed. |
| Ensure all reflectors are properly fitted and not obscured. Ensure all other fittings on bike are properly secured and functioning. Inspect helmet and other safety gear for signs of damage. Ensure rider is wearing a helmet and other required riding safety gear. Ensure the mounting hardware is properly secured if fitted with a front rack, rear rack, basket, etc. Ensure the taillight and taillight power wire are properly secured if fitted with rear rack. Ensure fender mounting hardware is properly secured if fitted with fenders. Ensure there are no cracks or holes in fenders if fitted with fenders. |
Your cables, spokes, and chain will stretch after an initial break-in period of 50-100 mi (80-160 km), and bolted connections can loosen. Always have a certified, reputable bike mechanic perform a tune-up on your Luckeep ebike after your initial break-in period of 50-100 mi {80-160 km) (depending on riding conditions such as total weight, riding characteristics, and terrain). Regular inspections and tune-ups are particularly important for ensuring that your bike remains safe and fun to ride.
Service and Maintenance
Regular inspection and maintenance are key to ensure bikes by Luckeep function as intended, and to reduce wear and tear on their systems. Recommended service intervals are meant to be used as guidelines. Real world wear and tear, and the need for service, will vary with conditions of use. We generally recommend inspections, service, and necessary replacements be performed at the time or mileage interval that comes first in the following table.
| Interval | Inspect | Service | Replace |
| Weekly, 100- 200 miles (160-321 km) |
|
|
|
| Monthly, 250- 750 miles (402-1207 km) |
|
|
|
| Every 6 Months, 750- 1250 miles (1207-2011 km) |
|
|
|
Troubleshooting
Basic troubleshooting
| Symptoms | Possible Causes | Most Common Solutions |
The unit does not work |
|
|
Irregular acceleration and/or reduced top speed |
|
|
| The motor does not respond when the bike is powered on |
|
|
Reduced range |
|
|
The battery will not charge |
|
|
Wheel or motor makes strange noises |
|
|
Link to assembly video and onl ine resources
Assembly video
For information on how to install, use and repair our Luckeep ebike, please visit our Youtube page: www.youtube.com/@luckeepBike
Please visit the "Help Center" section of the Luckeep website (www.luckeepbike.com/unboxing) to view the official Luckeep Assembly video.
Online resources
For more information on best practices, please visit the Luckeep website (www.luckeepbike.com), or contact Luckeep Product Support with any questions.
Luckeep also recommends registering your Luckeep bicycle upon purchase at www.luckeepbike.com.
Warnings
Guard against rust, water damage, and corrosion
Like any vehicle used outdoors, your e-bike needs the care to ensure it isn't damaged by the elements. Follow these steps for a long, healthy life for your e-bike
- store under shelter and in an upright position; avoid leaving the bike in the rain or being exposed to corrosive substances such as water, salt, or de-icing. If exposed to rain, dry your bike afterward, and apply an anti-rust treatment to the chain and other unpainted steel surfaces.
- To clean your e-bike, turn the bike and battery off and wipe the frame with a clean, damp cloth. If needed, apply a mild, non-corrosive detergent mixture to the damp cloth and wipe the frame. Dry by wiping with a clean, dry cloth. Never use high-pressure water on your bike. Wipe down your bike frequently and wipe or spray all unpainted mechanical parts with anti-rust treatment.
- Use touch-up paint or nail polish to prevent rust if painted metal parts become scratched or chipped.
![burn hazard]() Never immerse or submerge the bike or any components in water or liquid, which can damage the electrical system. Avoid riding on the beach, coastal areas with high-salinity fog, or on surfaces treated with salt or de-icing compounds. Doing so exposes your bike to salt or other substances that are very corrosive. Corrosion of electrical components can lead to permanent, irreversible damage that can cause battery failure, electrical system failure, or electrical fire. Damage from corrosion is not covered under warranty
Never immerse or submerge the bike or any components in water or liquid, which can damage the electrical system. Avoid riding on the beach, coastal areas with high-salinity fog, or on surfaces treated with salt or de-icing compounds. Doing so exposes your bike to salt or other substances that are very corrosive. Corrosion of electrical components can lead to permanent, irreversible damage that can cause battery failure, electrical system failure, or electrical fire. Damage from corrosion is not covered under warranty
Damage to your e-bike's electrical system caused in any manner, including water intrusion, can lead to battery failure, electrical system malfunction, electrical fire, and consequent property damage, injury, or death. Follow all recommendations to minimize the chance of water damage. If you have any questions, contact Luckeep Product Support.
Additional precautions regarding electrical components

To redce the risk of fire, connect only to a circuit provided with 10 amperes maximum branch circuit over-current protection in accordance with the National Electrical Code, ANSI/NFPA 70.
Using a damaged battery or charger can create additional bike damage or a fire hazard. Stop using your battery and charger and contact Luckeep immediately if any of the following occur
- Your charger's fliexible power cord or output cable or any of the electrical cables on your bike is frayed, has broken insulation, or any other signs of damage,
- Your battery or charger is physically damaged, non-functional, or performing abnormally
- Your battery or charger experienced a significant impact from a fall or crash, with or without obvious signs of damage, or
- Your charger becomes too hot to touch (it's designed to get warm with normal use), makes a funny smell, or shows other signs of overheating.
Store any damaged battery or charger in a safe location and, as soon as possible recycle or otherwise dispose of it according to local rules. Contact Luckeep if you have any questions or to purchase a compatible replacement battery or charger.
Important safety information
Don't ride until you read this
Before riding your Luckeep ebike for the first time, and periodically there after, please pay close attention to the following:
- We recommend the use of an approved cycling helmet, even in countries where their use is not mandatory.
- Before riding your Luckeep ebike on open roads, please take time to familiarize yourself with the operation of the bicycle and electric assist system in a quiet place, away from traffic or hazards.
- Please fully charge the battery and inflate the tires before the first use.
- Read and follow e-bike regulations on and off road.
- Always keep both hands on the handlebar grips and the brake levers so they are within reach while riding.
- Do not ride distracted. Always remain alert to all riding conditions. Never use headphones or a cell phone to talk or text when riding.
- Always ride defensively. Watch out for potential obstacles that could force you to swerve suddenly or lose control. Braking while steering may reduce your ability to control your bicycle.
- Look ahead and brake sooner. You may be moving faster on your e-bike. Other road users may not expect you to be traveling at higher speeds. Riding faster may increase your risk of a crash.
- Stop pedaling well before approaching corners to avoid entering a corner too quickly. You should also pay particular attention to terrain conditions as you may approach obstacles faster than expected.
- Use caution when riding in wet conditions as it will take longer to brake and to stop. Your tires may slip when turning. Risk of a crash is dramatically increased in wet conditions.
- Your electric bicycle can withstand light rain and small splashes, but it is not designed to be subjected to inclement weather, extremely heavy showers, or submersion in water. The electric bike's components have an IP rating of 65. Water damage is not covered under the warranty.
- Riding at night comes with more risks than riding during the day due to decreased visibility; riders are encouraged to exercise increased caution in night time conditions.
- Riders should wear reflective clothing at night. Turn lights ON for safety. For increased visibility, ensure that the front headlight and rear taillight are turned ON and adjusted so that other people on the road can see them clearly. Also, check your front, rear, and wheel reflectors.

Ebike Assembly Video
Scan code above
Please read and understand this manual fully before assembling and riding your bike. If there is any problem please first contact us directly, we will give you a satisfactory solution, if through the Amazon reviews or feedback published problems we can not contact you and solve the problem, also do not need to contact Amazon customer service, Amazon customer service does not understand ebike's professional knowledge! Amazon customer service does not have any authority to help you with returns or exchanges!
Email: support@luckeepbike.com
Phone: + 1 (323) 448-7808
CONTACT INFORMATION
Email: support@Iuckeepbike.com
Website: www.luckeepbike.com
Phone: + 1 (323) 448-7808(available from 5:00 pm to 2:00 am the next day PST, other times please contact via SMS)
Youtube: www.youtube.com/@luckeepBike
lnstagram: www.instagram.com/luckeepebike
Pinterest: www.pinterest.com/luckeepbike1
Twitter: twitter.com/luckeepbike
WhatsApp: Technical Support Group

Luckeep Ebike Support
Documents / Resources
References
![www.youtube.com]() How To -- Install The Headlights And Fenders - YouTube
How To -- Install The Headlights And Fenders - YouTube![www.youtube.com]() How To -- If Brake Makes a Noise - YouTube
How To -- If Brake Makes a Noise - YouTube![www.youtube.com]() Luckeep - YouTube
Luckeep - YouTube![www.luckeepbike.com]() Luckeep Electric Bikes: Best Value Ebikes | Luckeep®
Luckeep Electric Bikes: Best Value Ebikes | Luckeep®![www.instagram.com]() Instagram
Instagram![www.pinterest.com]() Luckeep (luckeepbike) - Profile | Pinterest
Luckeep (luckeepbike) - Profile | Pinterest![twitter.com]() http://twitter.com/luckeepbike
http://twitter.com/luckeepbike
Download manual
Here you can download full pdf version of manual, it may contain additional safety instructions, warranty information, FCC rules, etc.
Advertisement
Need help?
Do you have a question about the X1 and is the answer not in the manual?
Questions and answers