Table of Contents
Advertisement
Quick Links
Advertisement
Table of Contents

Related Manuals for Home Leisure Direct ARCADE MAX Challenger


Summary of Contents for Home Leisure Direct ARCADE MAX Challenger
-
Page 2: Table Of Contents
Contents ● Contents ● Package Contents ● Get to Know Your Machine ● Powering Up and Powering Down ● Initial Set Up ● Connecting to the Internet ● Using the Main Menu ○ Basic Menu Controls ○ Selecting a Game to Play ○... -
Page 3: Package Contents
Package Contents When you’ve unpackaged the machine, check below to ensure you have everything listed before getting started. ArcadeMAX Challenger Machine Wireless Keyboard + Dongle Power Cable Access Keys (attached to joystick) Instruction Booklet SSD Card Reader + USB Cable... -
Page 4: Get To Know Your Machine
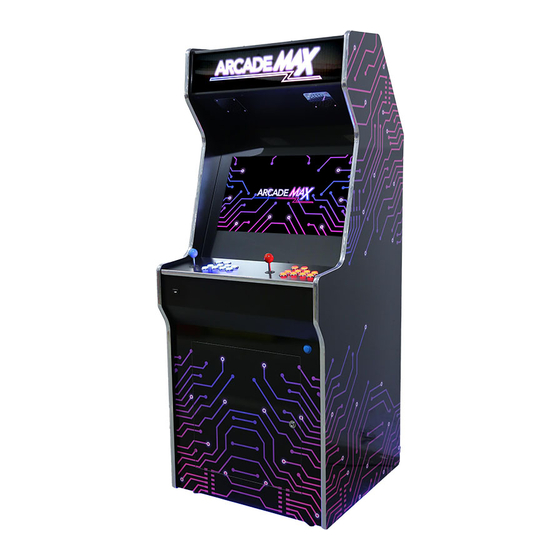
Get to Know Your Machine Your machine has several external controls and components to get familiar with. Front... - Page 5 Back...
- Page 6 Getting Inside If you need to access the interior components (for accessing settings or troubleshooting), there are 2 ways of getting access: Front Access Door Use the access keys to open the front access door (highlighted). Opening the front access door gives easy access ●...
- Page 7 Rear Access Door Use the access keys to open the rear access door (highlighted). Opening the rear access door gives access to: ● Main Board ● Electrical Connections...
- Page 8 Wheels and Feet Your ArcadeMAX system is on castor wheels that allow for easy moving of the machine and 4 retractable feet that can keep the machine in place. The retractable feet are on screw threads that can be turned either by hand or with a 22mm spanner.
-
Page 9: Powering Up And Powering Down
Powering Up and Powering Down The machine requires a single wall power socket to operate. Plug the power cable into the wall power socket, then into the power plug on the rear of the machine. - Page 10 Switch On Enable power to the machine by flipping both Master Power Switches to on. One switch is next to the power plug. The second is on the top of the machine. Both switches should glow when switched on.
- Page 11 Turning On the Internal PC Power the internal PC up by pressing the PC Power Button on the front of the machine. Power the internal PC down by pressing the Power Button once you have finished using the machine. WARNING - The internal PC MUST be powered down before flipping either master power switch.
-
Page 12: Controlling The Lights
Controlling the Lights: This ArcadeMAX machine includes lighting on the underside of the cabinet that can be turned on or off depending on your preference. Flip the lighting switch on the back of the machine to switch the lighting either on or off. The lighting can be switched and left on regardless of whether the machine’s internal PC is switched on or not allowing for games room ambience when the machine is not in use. -
Page 13: Volume Control
Volume Control Your machine’s sound amplifier controls are accessible inside the front access door of the cabinet. The sound can be switched on or off with the button on the left. The main volume dial will be illuminated when switched on. You have 3 dials to adjust the bass, treble and overall volume. - Page 14 Gameplay Controls...
-
Page 16: Initial Set Up
Initial Set Up Your system will load the main ArcadeMAX games menu once it is fully booted up. You will need to set up the machine’s internet connection and wireless keyboard before being able to proceed further. Connecting the Included Keyboard Whilst not necessary for most games, your ArcadeMAX machine includes a wireless keyboard with built-in trackpad. - Page 17 To set up, Remove the battery cover on the back of the keyboard and insert 1 AA battery. The Keyboard Dongle can be found within the battery compartment and can be stored here when not in use.
- Page 18 Plug the keyboard dongle into the front of the machine using the front USB port and switch on the keyboard using the on/off switch. It will automatically connect to the machine. You can verify a connection has been made by using the trackpad to move a mouse cursor around the screen.
-
Page 19: Connecting To The Internet
Connecting to the Internet To use the machine and download games to play, you must connect your machine to the internet. Your ArcadeMAX machine can get online in one of two ways: ● Wired ethernet connection (More stable and reliable) ●... -
Page 20: Connecting Via Ethernet Cable
Connecting via Ethernet Cable To connect the machine to the internet via a wired connection, plug a network-connected ethernet cable into the back of the machine into the Network Connector Port until it clicks. You’ll be online and ready to start downloading games. CAUTION Be aware of moving the machine when connected using a wired internet connection so as not to strain the cable. -
Page 21: Connecting Via Wi-Fi
Connecting Via Wi-Fi In order to connect the machine to a Wi-Fi network, you will need to use the machine’s included wireless keyboard (see above for details on use and how to connect) Access the machine’s Wi-Fi settings by hitting ESC on the keyboard to leave the main games menu and then click the Wi- Fi settings icon in the bottom right of the screen. -
Page 22: Using The Main Menu
Using The Main Menu When switched on, your machine will automatically load the main games menu. The main menu on the ArcadeMAX system is your home base for playing games on your system. Use it to look through the games list, search for games or even assign favourites. -
Page 23: Basic Menu Controls
Basic Menu Controls Up: Move up 1 selection Down: Move down 1 selection Left: Move back one page Right: Move forward one page Play current selection Player 1 A Button Add current selection to favourites Player 1 C Button Search Tab (Shortcut) Player 1 Start Button... -
Page 24: Selecting A Game To Play
Selecting A Game To Play Use the Player 1 joystick to navigate through the lists, then select your game with the Player 1 A button. The game will download to your system and then launch. The Main Games Menu is also split into different tabs for ease of navigation. -
Page 25: Search Functionality
Search Functionality The system includes a very useful search function that can help you find or narrow down your selection in seconds, without having to scroll through the entire games list. You can shortcut to this menu by pressing the Player 1 Start Button Or by navigating to the search tab (on the far right) at the top of the... -
Page 26: Using The Search Functionality
Using the Search Functionality In this menu, you can use the Player 1 Joystick Player 1 A Button to type what you want to search for with the on-screen keyboard. There is no need to input spaces. You can delete letters using the backspace key on the on-screen keyboard. -
Page 27: Background Download Mode
Background Download Mode This setting must be enabled in settings before it is available. Please refer to page 42 for details. Under default settings, the machine will load and delete each game individually. With the Background Download setting enabled, you have the option of downloading up to 5 games in the background whilst playing other games, which can then be started immediately once your current game has finished. -
Page 28: Background Download Mode Controls
Background Download Mode Controls Open Downloads List Coin Button (In Main Menu) Move Confirm Current Selection Player 1 A Button (In Downloads List) Go Back / Exit Player 1 Start Button (In Downloads List) -
Page 29: How To Use
Menu Buttons Pause the currently selected download. Cancel/Abor t the currently selected download Play the currently selected download How To Use Select a game from the main menu or your search results as normal and it will be added to your active download list. From here, you can check the progress of your download, pause the download or cancel the download. - Page 30 When the game is downloaded and ready to play, navigate to the game’s “open” option, and press the Player 1 A Button start the game. You also have the option of returning to the main menu to select another game to download (by pressing the Player 1 Start Button).
- Page 31 This page is intentionally left blank.
-
Page 32: In-Game Controls
In-Game Controls Insert virtual coin and start a 1-player game Player 1 Start Button Insert virtual coin and start a 2-player game Player 2 Start Button Insert additional virtual coins Coin Button Bring up Pause Menu Pause Button Up: Move up selection Down: Move down selection (In Pause Menu) - Page 33 Confirm selection (In Pause Menu) Player 1 A Button When a game is loaded, a 1 player game can be started with the Player 1 Start Button. A 2-player game can be started with the Player 2 Start Button. Pressing either of these buttons also acts as inserting a virtual coin, should the game you're playing require them.
-
Page 34: Pause Menu
Pause Menu A game can be paused or quit at any time by pressing the Pause Button, where you will be given the option to resume your current game, exit back to the main menu or save or load a game. -
Page 35: Saving And Loading A Game
Saving and Loading a Game Note: Only certain games will keep track of high scores. In most cases, every time a game is loaded, it is loaded ‘from fresh’ meaning that high scores are not saved between games unless saved manually by the player using the saving and loading system. -
Page 36: How To Use
How to use To access the save and load system, pause the game you’re currently playing using the Pause button, then save the state by scrolling to the “Save State” option and pressing the Player 1 A Button. To load the last state you saved, pause the game using the Pause button, then select the “Load State”... -
Page 37: System Settings
System Settings System settings are changed at a user’s own risk. It is recommended to perform the “Restore Factory Settings” function (see page 41) on the machine if performance becomes erratic. This machine has a range of different options that can be changed or modified to change the machine’s function to the user’s preference. -
Page 38: Accessing The Settings Menu
On the ArcadeMAX Challenger, the settings switch can be found inside the front access door. Press the settings button once to access the settings menu. -
Page 39: Basic Menu Controls
Basic Menu Controls Move Confirm Selection/Toggle Player 1 A Button Go Back / Exit Player 1 Start Button... -
Page 40: Outline Of Settings Menu Options
Outline of Settings Menu Options Key Setting • Keys Testing Use this mode to have a visual representation of how the machine responds to inputs. The relevant button will light up on the screen when it is pressed. • Key Definition Use this mode to remap any of the player buttons to different inputs. -
Page 41: Select Mode
Auto Exit Use these options to specify shortcuts or a timeout to exit a game. 3 Minutes Exit ● ○ Will exit the game automatically after 3 minutes of inactivity. Closed ● ○ No shortcuts or automatic timeout will be implemented. -
Page 42: Account Management
Game Setting Multiple options for changing numerous menu and game settings (see page 43 for more details) Account Management Change settings pertaining to various admin-related options and metrics. Clear Coins ● ○ Cancel out any virtual coins that have been applied to the system Change Password ●... - Page 43 Background Download Use this option to enable background downloading of games (refer to page 26 for details) Closed ● ○ Each game is loaded and deleted on an individual basis Open ● ○ Up to 5 games can be downloaded in the background.
-
Page 44: Game Setting Options
Game Setting Options The Game Setting option in the settings menu can be used to modify a wide range of settings, as listed below. You can return to the main settings list at any time using the Player 1 Start button. - Page 45 ● Press the Player 1 B Button to increase the number of lives (will reset to 0 beyond the maximum possible number) ● Press the Player 1 C Button to apply the current settings to all games in the games list. ●...
- Page 46 Force Timing All Games This option will force all games to operate on a timer, closing them once time is elapsed. For Free-Play purposes, ensure the “Closed” option is selected. Time Notification Strategy This option pertains to the Force Timing option above. Always ●...
- Page 47 Delete Games This option will control how the system deals with downloaded games once they are closed. Open ● ○ Games will be deleted immediately upon closing. Closed ● ○ Games will be saved indefinitely to the machine’s internal storage. You must accept the conditions of the popup before this feature can be enabled.
-
Page 48: Machine Specifications
Machine Specifications Intel Celeron N5095 4GB DDR4 Installed SD Card 240GB System Base Pandora Video HDMI (1280 x 720 - 720P) Connectivity ● Wireless Keyboard ● Spare USB for Dongle ● Wireless Internet ● Wired Ethernet Control Peripherals ● Player 1 Control Buttons (x9 (inc start button)) ●... - Page 49 ● Gameboy Advance ● Megadrive ● Final Burn Alpha ● PC Engine ● SEGA NAOMI ● Atomiswave ● SEGA Saturn ● Model 2 Game Category Search Parameters ● Fighting ● Shooting ● Puzzle ● Action ● Sport ● Racing ● 4 Player ●...
-
Page 50: Troubleshooting
Troubleshooting Issue Possible Cause/Solution No Sound Check the machine’s amplifier is turned on and is turned up. No Image Signal The cable connecting the main board to the monitor may have become disconnected or faulty. Verify the main board and the monitor are connected together and if so, replace the HDMI cable running from the main board to the... - Page 51 If you have any other issues, or any of the above does not solve your issue, contact us (Contact details on the back of this booklet)
Need help?
Do you have a question about the ARCADE MAX Challenger and is the answer not in the manual?
Questions and answers