Table of Contents
Advertisement
Quick Links
Advertisement
Table of Contents

Related Manuals for NEFF B3ACE4A 3B Series


Summary of Contents for NEFF B3ACE4A 3B Series
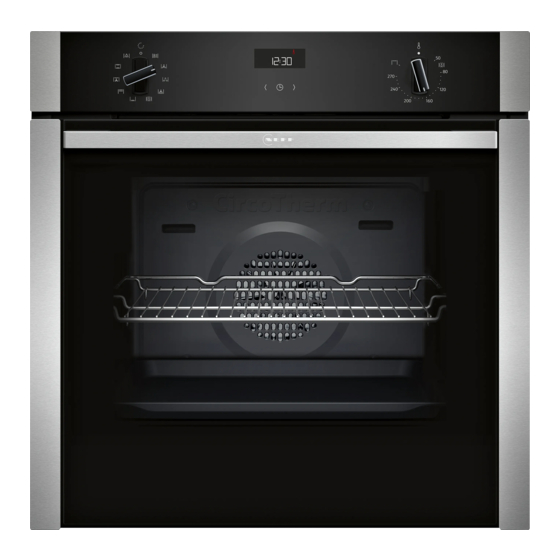
- Page 1 Oven User manual and installation instructions B3ACE4A.3B...
-
Page 2: Table Of Contents
en Safety Further information and explanations are available online: Table of contents ¡ Do not connect the appliance if it has been damaged in transit. INFORMATION FOR USE 1.2 Intended use Safety .............. 2 This appliance is designed only to be built into kitchen units. Read the special installation Preventing material damage ...... 4 instructions. -
Page 3: Safety
Safety en Hot steam may escape when you open the WARNING ‒ Risk of fire! appliance door. Steam may not be visible, de- Combustible objects that are left in the cook- pending on the temperature. ing compartment may catch fire. ▶ Open the appliance door carefully. ▶... - Page 4 en Preventing material damage If the insulation of the power cord is dam- WARNING ‒ Risk of suffocation! aged, this is dangerous. Children may put packaging material over ▶ Never let the power cord come into contact their heads or wrap themselves up in it and with hot appliance parts or heat sources.
-
Page 5: Environmental Protection And Saving En- Ergy
Environmental protection and saving energy en Fruit juice dripping from the baking tray leaves stains Sitting or placing objects on the appliance door may that cannot be removed. damage it. When baking very juicy fruit flans, do not pack too Do not place, hang or support objects on the appli- ▶... -
Page 6: Familiarising Yourself With Your Appliance
en Familiarising yourself with your appliance Familiarising yourself with your appliance 4 Familiarising yourself with your appliance 4.1 Controls Display → "Buttons and display", Page 6 You can use the control panel to configure all functions Temperature selector of your appliance and to obtain information about the Use the temperature selector to set the temper- operating status. -
Page 7: Cooking Compartment
Familiarising yourself with your appliance en Symbol Type of heating and What it's used for and how it works temperature range Circo-roasting Roast poultry, whole fish or larger pieces of meat. The grill element and the fan switch on and off alternately. The fan circulates the hot air around the food. -
Page 8: Locking Function
en Accessories When the appliance is in operation, the self-cleaning The cooling fan also runs in the oven light position. surfaces absorb splashes from roasting or grilling and Cooling fan break them down. The cooling fan switches on automatically during oper- If the self-cleaning surfaces no longer clean themselves ation. -
Page 9: Other Accessories
Push the accessory all the way in, making sure that your appliance in our brochures and online: it does not touch the appliance door. www.neff-home.com Accessories are appliance-specific. When purchasing Note: Take any accessories that you will not be using out of the cooking compartment while the appliance is accessories, always quote the exact product number (E in operation. -
Page 10: Basic Operation
en Basic operation Basic operation 7 Basic operation ¡ You can also set a cooking time and end time on 7.1 Switching on the appliance the appliance. Turn the function selector to any position other than ▶ → "Time-setting options", Page 10 the "Off" position . Changing the type of heating a The appliance is switched on. -
Page 11: Setting The Cooking Time
Time-setting options en 9.3 Setting the cooking time a Once the calculated start time is reached, the appli- ance starts heating up and the cooking time counts You can set the cooking time for operation of up to 23 down. hours 59 minutes. a When the cooking time has elapsed, a signal Requirement: The type of heating and a temperature sounds and the duration is at zero on the display. -
Page 12: Automatic Childproof Lock
en Childproof lock Cancelling the timer Use the button to reset the timer duration to zero. ▶ a After a few seconds, the appliance applies the You can cancel the timer duration at any time. change and goes out. Requirement: is highlighted on the display. Childproof lock 10 ... -
Page 13: Cleaning And Servicing
Cleaning and servicing en To save the changes, press and hold the button 11.2 Changing basic settings for approx. 4 seconds. Requirement: The appliance is switched off. Note: Following a power failure, the factory basic set- Press and hold the button for approximately tings are restored. -
Page 14: Shelf Supports
en Cleaning and servicing Area Suitable cleaning agents Hints Door handle ¡ Hot soapy waterHot To avoid permanent stains, remove descaling agents from the door soapy water handle immediately. Door seal ¡ Hot soapy water Do not remove or scrub. Cooking compartment Area Suitable cleaning agents Hints Enamel surfaces... -
Page 15: Appliance Door
Easy Clean cleaning aid en – From the inside of the appliance door Note: Marks may appear on the self-cleaning sur- – From the glass cover on the oven lamp faces. Residues of sugars and proteins in the food This prevents stains that cannot be removed. are not removed and stick to the surfaces. - Page 16 en Appliance door Open the appliance door approx. 45° wide. Note: Further information: 14.1 Detaching the appliance door Insert the coin in the gap in the lock and rotate as far as it will go . Requirements Turn the lock on the left-hand side in a clockwise ‒...
- Page 17 Appliance door en Set the appliance door down on a flat, soft, clean ATTENTION! Opening and closing the appliance door when it is surface. in the lock position damages the door hinges. Never force the appliance door open or closed. ▶ 14.2 Attaching the appliance door If the door hinge has been damaged, call the ▶...
- Page 18 en Appliance door Lift the intermediate pane from below and remove WARNING ‒ Risk of injury! it in the direction of the arrow . If the door locks are unsecured, the appliance door may become detached. After attaching the appliance door, close the left- ▶...
-
Page 19: Detaching The Shelf Supports
Shelf supports en Push down on the intermediate pane around Insert the inner pane into the door cover at an angle slide the retainer in at an angle and push down towards the back . until it clicks into place. Insert the retaining bracket for the inner pane into the opening... -
Page 20: Troubleshooting
en Troubleshooting Troubleshooting 16 Troubleshooting You can rectify minor faults on your appliance yourself. WARNING ‒ Risk of electric shock! Read the troubleshooting information before contacting Improper repairs are dangerous. after-sales service. This will avoid unnecessary costs. Repairs to the appliance should only be carried out ▶... -
Page 21: Customer Service
Disposal en Pull out the halogen bulb without turning it . Requirements ¡ The appliance is disconnected from the power sup- ply. ¡ The cooking compartment has cooled down. ¡ You must have a new halogen lamp to replace the old one. -
Page 22: How It Works
en How it works How it works 19 How it works Here, you can find the ideal settings for various types ¡ For best results, we recommend using dark-col- of food as well as the best accessories and cookware. oured metal baking tins. We have perfectly tailored these recommendations to your appliance. - Page 23 How it works en WARNING ‒ Risk of scalding! Very hot steam may escape when the lid is opened after cooking. Steam may not be visible, depending on the temperature. Lift the lid in such a way that the hot steam can es- ▶...
- Page 24 en How it works Food Accessory/cookware Height Type of Temperature in Cooking time in heating °C mins Bread, 1000 g (in a loaf tin or Universal pan 1. 210-220 1. 10-15 free-form) 2. 180-190 2. 40-50 Loaf tin Pizza, fresh, on a baking tray Universal pan 200-220 25-35...
- Page 25 How it works en Recommended settings for desserts Food Accessory/cookware Height Type of Temperature in Cooking time in heating °C mins Yoghurt Individual moulds Cooking 1.100 compart- 2.8-9 h ment floor Preheat the appliance for 15 minutes. Do not use the rapid heating function. Also follow the instructions in the individual sections.
- Page 26 en How it works Grilling Recommended settings for pork Food Accessory/cookware Height Type of Temperature in Cooking time in heating °C mins Bacon rashers Pan support 1. side 4-5 2. side 3-4 Sausages, thickness 2-4 cm Pan support 10-15 Gammon joint Uncovered cookware 2 170-180 25+20 Slide the universal pan underneath the wire rack.
-
Page 27: Test Dishes
How it works en Recommended settings for poultry Food Accessory/cookware Height Type of Temperature in Cooking time in heating °C mins Chicken, whole Pan support 170-180 25+15 Turkey, crown Pan support 140-150 20+25 Turkey, whole, 4-8 kg Pan support 150-160 12+12 Recommended settings for fish Food Accessory/cookware Height Type of... -
Page 28: Installation Instructions
en Installation instructions Food Accessory/cookware Height Type of Temperature in Cooking time in heating °C mins Hot water sponge cake Springform cake tin, 160-170 25-35 diameter 26 cm. Hot water sponge cake Springform cake tin, 25-45 diameter 26 cm. Hot water sponge cake, 2 levels Springform cake tin, 150-160 35-50... - Page 29 Installation instructions en 20.2 Appliance dimensions You will find the dimensions of the appliance here ¡ Wear protective gloves so that you do not cut yourself. Parts that are accessible dur- ing installation may have sharp edges. ¡ Dimensions of the figures in mm. 20.3 Installation below a worktop ¡...
-
Page 30: Installation In A Tall Unit
en Installation instructions 20.4 Installing below a hob If the appliance is installed below a hob, the following The minimum worktop thickness is based on the re- minimum dimensions must be adhered to (including quired minimum clearance . substructure, if applicable). Hob type a raised in mm a flush in mm... -
Page 31: Corner Installation
Installation instructions en ¡ Ensure that air exchange is guaranteed in accord- ¡ The power cable must be plugged in at the rear of ance with the diagram. the appliance until you hear a clicking sound. A 3 m power cable can be obtained from customer ser- vice. - Page 32 en Installation instructions If required, you can adjust the gap between the ap- If required, you can adjust the height of the appli- pliance door and the panels using the adjustment ance door using the adjustment screws on the left screws on the left and right. and right.
-
Page 33: Removing The Appliance
Installation instructions en 20.10 For handleless kitchens with vertical bar handle strips: Attach a suitable filling piece on both sides in order to cover any sharp edges and to guarantee safe in- stallation. Secure the filling piece to the unit. Pre-drill the filling piece and the unit to establish a screw connection. - Page 36 Valid within Great Britain: Imported to Great Britain by BSH Home Appliances Ltd. Grand Union House Old Wolverton Road Wolverton, Milton Keynes MK12 5PT United Kingdom *9001910078* BSH Hausgeräte GmbH 9001910078 Carl-Wery-Straße 34 041111 81739 München, GERMANY...
Need help?
Do you have a question about the B3ACE4A 3B Series and is the answer not in the manual?
Questions and answers