
Related Manuals for Euhomy HBZB-36F


Summary of Contents for Euhomy HBZB-36F
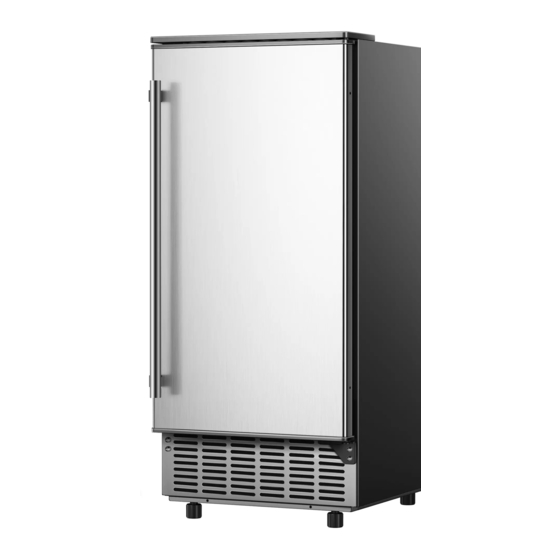
- Page 1 Under counter Ice Maker SKU: CIM010-80SI-USEH MODEL: HBZB-36F Email:support@euhomy.com Facebook:@Euhomy.Official...
- Page 2 Email: support@euhomy.com Facebook: @Euhomy.Official The Euhomy team is available 24/7 to address your questions, comments, and concerns. Your satisfaction is our ultimate goal. We want to make everything right so you'll share your positive experience with other shoppers on Amazon.
- Page 3 It may be that the PUA tube inside the machine fell off during transportation. You can remove the back cover of the machine and connect it by yourself. If you don't know how to operate, please contact the Euhomy team. We will give you a professional video to help you solve the problem.
-
Page 4: Table Of Contents
Contents Important Safety Information Specifications General Information Operation Procedures 9-16 Wiring Diagam 17-18 Cleaning And Maintenance 19-22 Troubleshooting Error Indicator Warranty... -
Page 5: Important Safety Information
Important Safety Information When using electrical appliances, basic safety precautions should be followed to reduce the risk of fire, electric shock, and injury to persons or property. Read all instructions before using any appliance. Use this appliance only for its intended purpose as described in this owner's manual. This ice maker must be properly installed in accordance with the installation instructions before it is used. - Page 6 Important Safety Information WARNING:Children should be supervised to ensure that they do not play with the appliance. WARNING: This appliance must be earthed and use the 110-120V/60Hz earthed power supply. WARNING: Do not store explosive substances such as aerosol cans with a flammable propellant in this appliance.
-
Page 7: Specifications
Specifications DIMENSIONS/ CONNECTIONS [20.3] [15.0] [16.8] [1.9] [2.1] Rating MODEL HBZB-36F POWER SUPPLY VOLTAGE 1Phase, 115V/60Hz CLIMATE CLASS 10–40 ELECTRICAL PROTECTION CLASS ICE MAKING RATING (Amps) 2.6Amp ICE HARVEST RATING (Amps) 3.0Amp ICE MAKING CAPACITY(KG/24H) 36kg/24Hour * REFRIGERANT CHARGE R290 2.65oz./75g NET WEIGHT(lbs.) -
Page 8: General Information
General Information 1.Main unit construction 1.Door 2.Ice-making & its water tank assembly: Including ice-making evaporator, water tank, water pump and some detecting parts 3.Handle 4.Ice tank 5.Operation panel 6.Air outlet: Must keep the air circulate smoothly, hot air will blow out when unit running. 7.Water draining port: Normal plugged with the cap. -
Page 9: Operation Panel
General Information A.Water dividing pipe: with nine little holes, water will flow out from these little holes. If no water flows out, can be disassembled and cleaned. B.Evaporator (ice-making module) C.Ice full detecting board: Use to detect the inner cabinet is full of ice or not, and to check the the ice-harvest process is over or not. - Page 10 General Information Part Name Specifications Door seal Door SUS & Foams Water tank side cover ABS White Float switch Electrical part DC5V Water tank cover ABS White Handle Pump Electrical part AC115V Water Tank ABS White Drain tube for water tank Silicone tube, FDA Water inlet solenoid Electrical part DC12V...
- Page 11 General Information Fan fix cover plate Zinc-Plate sheet =0.6 Plug + Power cord Electrical part AC115V Strain relief bushing PP black Electrical part DC12V 120mm Electrical part DC12V 90mm Air outlet panel SUS430 =0.8 Left bottom hinge SPCC =2.5mm Chrome Plated 1 (accessory) Right bottom hinge SPCC =2.5mm Chrome Plated...
-
Page 12: Operation Procedures
Operation Procedures UNPACKING YOUR ICE MAKER 1.Remove the exterior and interior packaging. Check if all the accessories are inside or not including the instruction manual, ice scoop, white water inlet pipe, the water draining pipe, the quick connector (connecting a 1/4-inch connector with a 1/2-inch one) etc. If any parts are missing, please contact our customer service. - Page 13 Operation Procedures 1. Ensure the unit is unplugged before starting door reversal. 2. Remove the 2 screw hole cover on the top cover, unscrew the two screws which is fixed to the top cover. 3. Remove the 2 screws from the top hinge, and 2 screws from the fix plate. 4.
-
Page 14: Installation Clearance
Operation Procedures a)This unit is not for outdoor use. Keep the proper room temperature and inlet water temperature according to above specification table. Otherwise it will affect the ice making performance. b)This unit should not be located near any heat source. c)The unit should be located on a firm &... - Page 15 Operation Procedures Drainage Pump Setting silicone drainage pipe drainage pump drainage outlet gray drainage pipe oor drain...
-
Page 16: Recommended Grounding Method
Operation Procedures WARNING: THIS UNIT MUST BE EARTHED. Electrical Shock Hazard Plug into a grounding wall outlet. Never remove the ground prong. Use separate power supply or receptacle. Never use an adapter. Never use an extension cord. Failure to follow these instructions can result in death, fire, or electrical shock. - Page 17 Operation Procedures WATER CONNECTION FOR YOUR ICE MAKER Important: Be sure to use the new hose-sets supplied with the appliance to connect to water mains and that old hose-sets should not be reused. I.Connect the water supplying hose to the unit Step 1: First remove the tape on the water inlet port for water supply (indicated in the following illustration “B”) located at the back unit, then use your other hand’s finger to press the out circle.
- Page 18 Operation Procedures Operation-button and display-area diagram OPERATION OF ICE MAKING PROCESS 1.Start up: Plug in the power plug, and the symbol will flash in the display window. Press the ON/OFF button on the control panel. The machine will start to make ice when the external pipe adds water to reach the standard level on the water tank through the electromagnetic water valve.
- Page 19 Operation Procedures 4.When the symbol lights up, the machine stops working, and it will work again after you take out the ice. 5.Shut down the unit: During the ice making process, press the “ON/OFF” button on the control panel to shut down the unit and the unit enters the standby mode. If you press "ON/OFF" longer than 5 seconds during ice making process, then the unit enters the deicing process directly.
-
Page 20: Wiring Diagam
Wiring Diagam Normal Sounds Your new ice maker may make sounds that are not familiar to you. Most of the new sounds are normal. Hard surfaces like the floor, walls and cabinets can make the sounds seem louder than they actually are. -
Page 21: Preparing The Icemaker For Long Storage
Wiring Diagam Preparing the Ice Maker for Long Storage If the ice maker will not be used for a long time, or is to be moved to another place, it will be necessary to drain out all of the water in the system. 1.Allow all of the ice cubes to be ejected from the evaporator of ice maker. -
Page 22: Cleaning And Maintenance
Cleaning And Maintenance WARNING: Before carrying out any cleaning or maintenance operations, unplug the ice maker from the main power supply. (EXCEPTION: Ice maker self-cleaning program). Do not use any alcohol or fume for cleaning/sanitization of the ice maker. It may cause cracks on the plastic parts. -
Page 23: Ice Making Parts Cleaning
Cleaning And Maintenance WARNING DO NOT use solvent cleaning agents or abrasives on the interior. These cleaners may transmit taste to the ice cubes, or damage or discolor the interior. Ice Making Parts Cleaning During the use of your unit, periodically clean the main system of your ice-maker. 1、Repeat above step to clean the water tank and other inner parts of the unit. - Page 24 Cleaning And Maintenance Ice Making Assembly System Cleaning by Using Nu-Calgon Nickel Safe Ice-machine Cleaner Minerals that are removed from water during the freezing cycle will eventually form a hard scaly deposit in the water system. Cleaning the system regularly helps remove the mineral scale buildup. How often you need to clean the system depends upon how hard your water is.
-
Page 25: Cleaning Suggestions
Cleaning And Maintenance WARNING The ice machine cleaner contains acids. DO NOT use or mix with any other solvent-based cleaner products. Use rubber gloves to protect hands. Carefully read the material safety instructions on the container of the ice machine cleaner. 8.Then open the water faucet of the main water supply, Let the water flow in the unit. -
Page 26: Troubleshooting
90 °F and change to the low Ice making cycle is normal, in water tank is too high. temperature water. but there is no ice cubes produced Refrigerant leakage. Please contact support@euhomy.com Cooling system tube is clogged. Please contact support@euhomy.com... -
Page 27: Error Indicator
Error Indicator a)Ambient temperature sensor breakdown Display E1 in digital window. b)The machine not make ice or the gas leak Display E2 in digital window c)Magnetic control switch cutoff---- “Full” light will be on when plugging on or just turning on the unit. -
Page 28: Warranty
Warranty Euhomy offers a limited 1-year warranty (“ warranty period" ) on all of our products purchased new and unused from Euhomy company, with an original proof of purchase and where a defect has arisen, wholly or substantially, as a result of faulty manufacture, parts or workmanship during the warranty pe9od. - Page 29 Email:support@euhomy.com Facebook:@Euhomy.Official...
Need help?
Do you have a question about the HBZB-36F and is the answer not in the manual?
Questions and answers