Advertisement
Quick Links
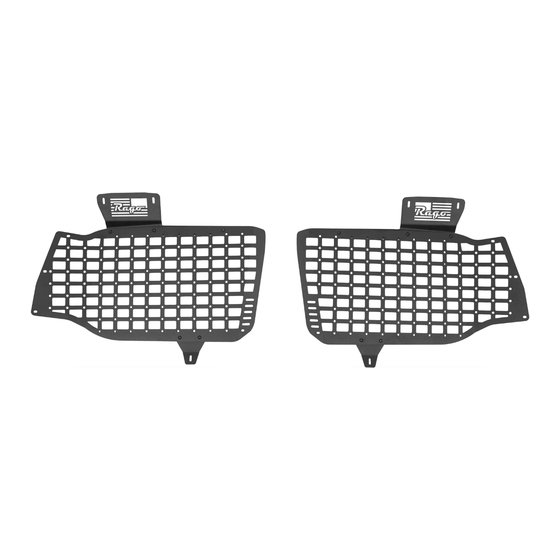
REAR WINDOW MSP
MODULAR STORAGE PANEL SYSTEM
2010-2022/TOYOTA 4RUNNER
2024/TOYOTA LAND CRUISER
R1017T4RUMSP-DM
AC7702801NA
WARNINGS/CAUTIONS BEFORE STARTING INSTALLATION
WARNINGS/CAUTIONS BEFORE STARTING INSTALLATION
-BEFORE YOU INSTALL THIS KIT-
-BEFORE YOU INSTALL THIS KIT-
Read and understand all instructions
Read and understand all instructions, warnings,
warnings, cautions, & notes contained in this
cautions, & notes contained in this installation
installation instruction guide. Consult your
instruction guide. Consult your vehicle owner's manual
for proper disconnection of electrical and lifting of
vehicle owner's manual for proper disconnection
vehicle if required for installation of this product.
of electrical and lifting of vehicle if required for
installation of this product.
This install may require some technical skills and
This install may require some technical skills and
knowledge of basic mechanical work. If you do not feel
knowledge of basic mechanical work. If you do not
that you are capable of performing this install please
feel that you are capable of performing this install
take this product to a trained professional.
please take this product to a trained professional.
After reading this guide please contact us with any
questions or concerns before installing product.
After reading this guide please contact us with any
questions or concerns before installing product.
Customer Service: 830-896-7571
INSTALLATION GUIDE
INSTALLATION GUIDE
Rago Fabrication is not responsible for any bodily
Customer Service: 830-896-7571
injury or harm to you or your vehicle as a result of an
Rago Fabrication is not responsible for any bodily
,
improper install.
injury or harm to you or your vehicle as a result of an
improper install.
Proper installation of this kit required knowledge of
the factory recommended procedures for removal and
Proper installation of this kit required knowledge of
installation of original equipment components.
the factory recommended procedures for removal
and installation of original equipment components.
We recommend that the factory shop manual and
any special tools needed to service your vehicle be
We recommend that the factory shop manual and
on hand during the installation. Installation of this kit
any special tools needed to service your vehicle
without proper knowledge of the factory recommended
be on hand during the installation. Installation
procedures may affect the performance of these
of this kit without proper knowledge of the
components and the safety of the vehicle.
factory recommended procedures may affect the
TOOLS
REQUIRED
- 13mm, 15mm, 18mm & 21mm sockets
- 10mm, 15mm, 18mm & 21 mm wrenches
- Pushpin Puller or Flathead Screwdriver
TOOLS
REQUIRED
- #4 Allen Head
- Snips/Scissors
- 10mm, 7/16 sockets
- 10mm, 7/16 wrenches
- Pushpin Puller or Flathead Screwdriver
SKILL
- 5/32, 5mm Hex
- Step Up Drill Bit
SKILL
TIME
REQUIRED
- Approximately 1 Hour
TIME
REQUIRED
- Approximately 1 Hour
Inspect all contents of this package to make sure
performance of these components and the safety of
product is not damaged and all installation hardware
the vehicle.
has been included. If parts are missing from kit, please
Inspect all contents of this package to make
sure product is not damaged and all installation
be prepared to provide the following information:
hardware has been included. If parts are missing
1. Name of purchase location
from kit, please be prepared to provide the following
information:
2. Bar Code on side of box
3. Date above bar code
1. Name of purchase location
4. Date inside box cover
2. Bar Code on side of box
3. Date above bar code
4. Date inside box cover
*ALWAYS WEAR EYE PROTECTION
WHEN OPERATING POWER TOOLS*
*ALWAYS WEAR EYE PROTECTION
WHEN OPERATING POWER TOOLS*
- T40 Torx Bit
- Zip Ties
- Marker
LEVEL
- Drill
- Easy
- 2 people
LEVEL
- Easy
Advertisement

Related Manuals for Rago FABRICATION AC7702801NA


Summary of Contents for Rago FABRICATION AC7702801NA
- Page 1 Inspect all contents of this package to make sure -BEFORE YOU INSTALL THIS KIT- -BEFORE YOU INSTALL THIS KIT- Rago Fabrication is not responsible for any bodily performance of these components and the safety of Customer Service: 830-896-7571 product is not damaged and all installation hardware...
- Page 2 1/4-20 X 3/4” BUTTON HEAD 1/4-20” NYLON LOCK NUT QTY: 10 QTY: 16 QTY: 10 1/4-20 Rivet Nut MPL0007 QTY: 6 QTY: 2 Reference this page throughout the install NEED HELP? (830) 896-7571 Page 2 | Rago Fabrication Page 2 | Rago Fabrication...
- Page 3 MODULAR STORAGE PANE L SYSTEM REAR WINDOW MSP INSTALLATION GUIDE INSTALLATION GUIDE STEP 1 Remove the grab handle and cover shown below using a (flathead screwdriver). NEED HELP? (830) 896-7571 Page 3 | Rago Fabrication Page 3 | Rago Fabrication...
- Page 4 MODULAR STORAGE PANE L SYSTEM REAR WINDOW MSP INSTALLATION GUIDE INSTALLATION GUIDE STEP 2 **KEEP HARDWARE** Using a (10mm socket), remove the OEM hardware shown below. NEED HELP? (830) 896-7571 Page 4 | Rago Fabrication Page 4 | Rago Fabrication...
- Page 5 MODULAR STORAGE PANE L SYSTEM REAR WINDOW MSP INSTALLATION GUIDE INSTALLATION GUIDE STEP 3 Install the provided spacer into the bottom mounting hole. NEED HELP? (830) 896-7571 Page 5 | Rago Fabrication Page 5 | Rago Fabrication...
- Page 6 INSTALLATION GUIDE INSTALLATION GUIDE STEP 4 (A, A1, A2) With the provided 1/4” hardware install the top mounting bracket using a (5/32 allen) and a (7/16 wrench). NEED HELP? (830) 896-7571 Page 6 | Rago Fabrication Page 6 | Rago Fabrication...
- Page 7 INSTALLATION GUIDE INSTALLATION GUIDE STEP 5 (A, A1, A2) With the provided 1/4” hardware, install the bottom mounting bracket using a (5/32 allen) and a (7/16 wrench). NEED HELP? (830) 896-7571 Page 7 | Rago Fabrication Page 7 | Rago Fabrication...
- Page 8 Install the molle panel with the hardware removed from step 2 for the top mount using a (10mm socket) and install the provided hardware that came with the spacer into the bottom mount using a (HW5 allen). NEED HELP? (830) 896-7571 Page 8 | Rago Fabrication Page 8 | Rago Fabrication...
- Page 9 MODULAR STORAGE PANE L SYSTEM REAR WINDOW MSP INSTALLATION GUIDE INSTALLATION GUIDE STEP 7 Using a marker, mark the holes highlighted below and remove the panel. NEED HELP? (830) 896-7571 Page 9 | Rago Fabrication Page 9 | Rago Fabrication...
- Page 10 INSTALLATION GUIDE INSTALLATION GUIDE STEP 8 bit), drill a hole no more than 7/16 on the marked holes from step 7. Using a (step up drill 7/16 NEED HELP? (830) 896-7571 Page 10 | Rago Fabrication Page 10 | Rago Fabrication...
- Page 11 REAR WINDOW MSP INSTALLATION GUIDE INSTALLATION GUIDE STEP 9 1/4” rivet nut into the holes drilled in step 8. Using a (rivet nut tool), install the provided NEED HELP? (830) 896-7571 Page 11 | Rago Fabrication Page 11 | Rago Fabrication...
- Page 12 INSTALLATION GUIDE STEP 10 If you have purchased a AC7703001NA- Rear Shelf, Refer to the install guide on the website before moving on to the next step. NEED HELP? (830) 896-7571 Page 12 | Rago Fabrication Page 12 | Rago Fabrication...
- Page 13 REAR WINDOW MSP INSTALLATION GUIDE INSTALLATION GUIDE STEP 11 Re-install the molle panel and install the provided 1/4” hardware into the rivet nut installed on step 9. NEED HELP? (830) 896-7571 Page 13 | Rago Fabrication Page 13 | Rago Fabrication...
- Page 14 MODULAR STORAGE PANE L SYSTEM REAR WINDOW MSP INSTALLATION GUIDE INSTALLATION GUIDE STEP 12 (OPTIONAL) Install the grab handle before fulling tightening all hardware. NEED HELP? (830) 896-7571 Page 14 | Rago Fabrication Page 14 | Rago Fabrication...
- Page 15 INSTALLATION GUIDE STEP 13 Stand back and enjoy your new RAGO Rear Window MSP. Check and re-tighten all mounting bolts after 100 miles and periodically thereafter. NEED HELP? (830) 896-7571 Page 15 | Rago Fabrication Page 15 | Rago Fabrication...
Need help?
Do you have a question about the AC7702801NA and is the answer not in the manual?
Questions and answers