Advertisement
About This Guide
This guide provides a brief introduction to the Tapo Smart Wi-Fi Light Bulb and the Tapo app, as well as regulatory information.
Features available in Tapo may vary by model and software version. Tapo availability may also vary by region. All images, steps, and descriptions in this guide are only examples and may not reflect your actual Tapo experience.
Conventions
In this guide, the following convention is used:
| Convention | Description |
| Blue | Key information appears in teal, including management page text such as menus, items, buttons and so on. |
| Underline | Hyperlinks are in teal and underlined. You can click to redirect to a website. |
 Note: Note: | Ignoring this type of note might result in a malfunction or damage to the device. |
More Info
- Specifications can be found on the product page at https://www.tapo.com.
- Our Technical Support and troubleshooting information can be found at https://www.tapo.com/support/.
- A Technical Community is provided for you to discuss our products at https://community.tp-link.com.
- Setup Video can be found at https://www.tp-link.com/support/setup-video/.
Introduction
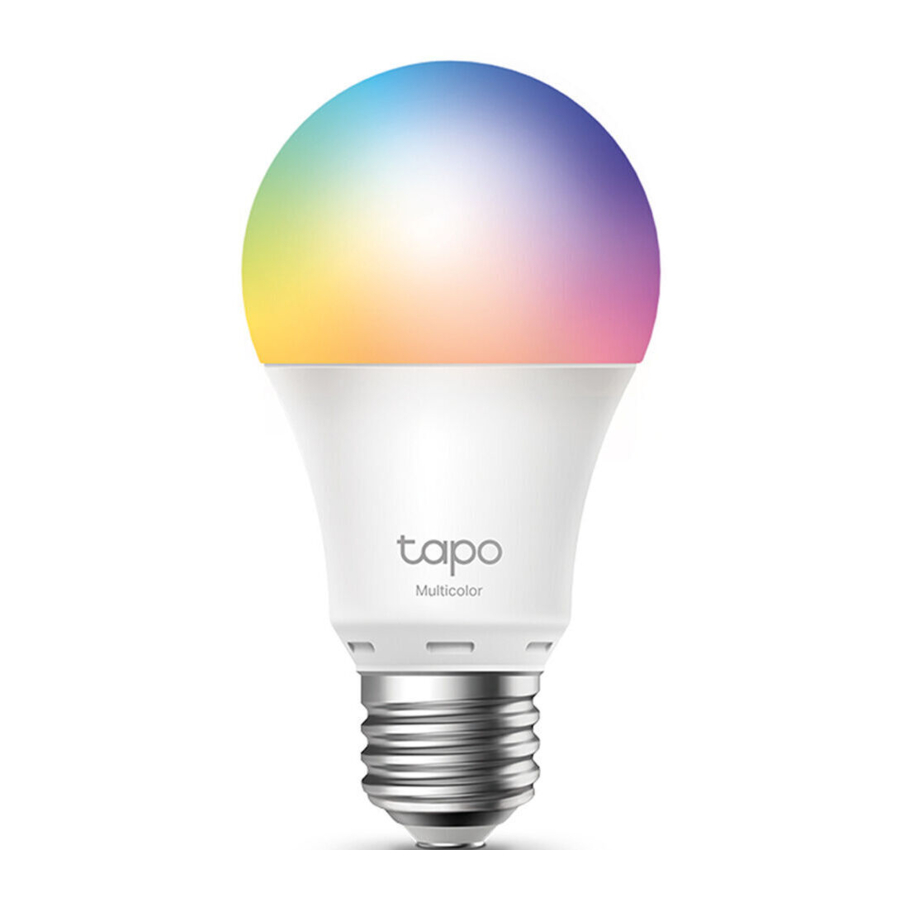
The Tapo smart Wi-Fi light bulb is part of the Tapo smart home family of products, including plugs, switches, cameras and more. Smart Bulb lets you easily control your lights via the Tapo app, no matter where you find yourself. You can adjust brightness, set schedules and timers, and set an alarm that wakes you naturally by simulating the sunrise. Group lights together to control your smart bulbs more easily.
Tapo L535 is Tapo's first Matter-compatible high-lumen multicolor smart bulb that seamlessly integrates with certified smart home platforms, including Apple Home, Amazon Alexa, Google Assistant, and Samsung SmartThings. No hub is required.
- Extra Bright Light - Brighten up your daily routine or activities with a 75W incandescent equivalent bulb.
- 16 Million Colors, Dimmable - With a wide range of colors and dimming capabilities, Tapo L535 offers endless lighting possibilities. Each color displays vibrantly thanks to a high CRI.
- Matter Certified - Integrate Matter-certified Tapo devices with other Matter end products into your preferred ecosystem.
- Remote Control - Instantly turn the light on/off wherever you are through the Tapo app.
- Timer - Set a countdown timer to automatically turn the light on or off after a certain amount of time.
- Schedule - Use Schedules to set your light to automatically turn on and off.
- Preset for Convenience - Save and preset your favorite lightings for multiple scenarios.
- Away Mode - Set a period of time during which the light will be randomly turned on and off to make it look like you're home.
- Sunrise and Sunset Mode - Automatically activate your bulb according to your time zone.
- Energy Saving - Reduces energy use by up to 87% without losing brightness compared to 75 W incandescent bulbs. Track real-time consumption via the Tapo app.
- Restore Last Light State - The bulb automatically returns to its previous power-off state.
- Device Sharing - Invite your family members to manage the bulb together.
- Voice Control - Use Amazon Alexa, Google Assistant, and SmartThings to control your bulb with voice commands.
- No Hub Required - Connect to your existing Wi-Fi router.
Set Up Your Smart Bulb
Follow the steps below to get started with your new smart bulb.
Step 1. Download Tapo App
Get the Tapo app from the App Store

or Google Play

or by scanning the QR code below.


Step 2. Log In
Open the app, and log in with your TP-Link ID. If you don't have an account, tap "Sign Up" to create one first.

Step 3. Add Your Smart Bulb
Tap the ![]() button in the app and select "Add Device". Select "Lights" and then your model. Follow app instructions to set up your smart bulb, and add it to your home network.
button in the app and select "Add Device". Select "Lights" and then your model. Follow app instructions to set up your smart bulb, and add it to your home network.

Set Up via Matter
This is a Matter-certified device. You can integrate it into any Matter ecosystem you prefer for easy control. As IoT manufacturers are working to optimize the user experience of Matter setup, the setup process and user experience should improve over time. Take Alexa, Google, and Apple ecosystems for example and the following shows you how to set up via Matter:
- Add to Alexa via Matter
- Add to Google via Matter
- Add to Apple via Matter
- Failed to Set Up via Matter?
Note:
- The Matter setup code can only be used to add the device to the first ecosystem. For the second commissioning, you will need to open the app of the first ecosystem to generate a new setup code. Please take a photo of the Matter setup code provided in the package as you will also need this code to set up if you do a factory reset.
- A Matter hub (i.e., controller) and smart home app of the same ecosystem are required.
More Information of Matter
- For matter setup guides for Alexa, Google and Apple, please refer to https://www.tp-link.com/support/faq/3564/
- For Matter setup troubleshooting, please refer to https://www.tp-link.com/support/faq/3574/
- For general questions and troubleshooting about Matter, please refer to https://www.tp-link.com/support/faq/3520/
- For the third-party setup video, please visit https://youtu.be/JS_7KmENSbo
- For Matter multi-admin setup and demo video, please visit https://youtu.be/C3t4kglK6tc
Before You Start
- Get a Matter Controller: This is needed to connect and manage Matter devices on your home network. For instance, Apple TV and HomePod are examples of Matter controllers. For details, please refer to the Part 3. General Questions for TP-Link Matter-enabled Devices at https://www.tp-link.com/support/faq/3520/
- Reset Your Device: It's important to start with a fresh device. Here's how:
- For most devices: Press and hold the 'Reset' button for 10 seconds.
- For smart bulbs: Turn the light switch off and on five times, with a 2-second pause between each action.
- Connect to Wi-Fi: Connect your phone to the same Wi-Fi network as your Matter controller. Choose the 2.4 GHz network if 2.4 GHz and 5 GHz networks are separate.
- Access Matter Setup Mode: This mode turns off 15 minutes after the device is powered up. To return to setup, simply turn your device off and then back on.
- Locate Matter Setup Code: Look for a QR code or a numeric code on your device or in its packaging. Snap a picture of it for future reference.
- Regarding the Matter Code: The original Matter code can only be used for setup in one app (you can reuse it after a device reset). If you wish to set it up in multiple apps, generate a new code using the first app for all subsequent ones.
Add to Alexa via Matter
Before you start:
The pairing mode of your Matter-certified device will automatically turn off in 15 minutes. You can turn the pairing mode back on by powering off your device, and then power it on.
Alexa will create the name according to the device type. Take L535E for example. The first L535E paired with Alexa will be automatically named "First Light."
- Check Compatibility (Click here for more information)
- Alexa app version: Update to the latest version
- Matter-supported Echo devices:
| Device | Version |
| Echo/Echo Dot | 5th Gen: Echo Dot, Echo Dot (Gen 5 with Clock) 4th Gen: Echo, Echo Dot, Echo Dot (Gen 4 with Clock) 3rd Gen: Echo, Echo Dot, Echo Dot (Gen 3 with Clock) |
| Echo Show | 3rd Gen: Echo Show 10, Echo Show 15 2nd Gen: Echo Show 8, Echo Show 5 1st Gen: Echo Show, Echo Show 8 |
Note: Please update the software of your Echo devices to a compatible version, such as v8289070468.
- How to Set Up Your Matter Device
- Launch the Alexa app and go to the Devices page.
![]()
- Tap + and then tap Add Device to add a new device.
![]()
- Choose Matter and then tap Next on the following pages.

- Tap Yes on the confirming page.
![]()
- Tap Scan QR Code and scan the QR Code.
Alternatively, you can tap Try Numeric Code Instead? to enter the numeric setup code that comes along with your device.

- Wait for your device to set up, then choose the Wi-Fi your device to connect to and enter the corresponding Wi-Fi password.

- Tap Done. Now you can find your device on the Device list and use your voice to control your device.
![]()
- Launch the Alexa app and go to the Devices page.
- How to Integrate Your Device into Another Ecosystem
As the setup code can only be used to add the device to the first ecosystem, for the second commissioning, you need to open the app of the first ecosystem to generate a new setup code.- Launch your Alexa and go to the device Settings page.
![]()
- Tap Other Assistants and Apps and then tap Add Another to create an 11-digit setup code.

- Copy the setup code.
![]()
- Launch the app of the second ecosystem. Follow the setup instruction to enter the setup code and follow the app instructions to complete the setup.
![]()
- Launch your Alexa and go to the device Settings page.


Add to Google via Matter
Before you start:
The pairing mode of your Matter-certified device will automatically turn off in 15 minutes. You can turn the pairing mode back on by powering off your device, and then power it on.
- Check Compatibility (Click here for more information)
- Google Home App: Update to the latest version
- Matter-supported Controller:
| Device | Version |
| Wi-Fi Routers | Nest Wi-Fi Pro (Wi-Fi 6E) |
| Speakers | Google Home, Google Home Mini, Nest Mini, Nest Audio |
| Displays | Nest Hub (1st gen), Nest Hub (2nd gen), Nest Hub Max |
Note: Please update the software/firmware of your controller devices to a compatible version, such as v1.56.324896 for Google Nest Hub (2nd gen).
- How to Set Up Your Matter Device
![warning]() Note: The pairing mode of your Matter-certified device will automatically turn off in 15 minutes. You can turn the pairing mode back on by restarting your device.
Note: The pairing mode of your Matter-certified device will automatically turn off in 15 minutes. You can turn the pairing mode back on by restarting your device. - Launch your Google Home App and tap +.

- Choose Set up device and tap New Device to add a new device.

- Choose Matter and tap Yes on the conforming page.

- Scan the setup QR code on your device. If your device comes without a QR code but a numeric code, you can tap Set up without QR code and enter the numeric code.
![]()
- Tap Done when the device is connected.
![]()
- Choose a location for your device and give it a name. Then you can find your device on the Device list and turn on/off your device on the Google Home app or with Google assistants.

- Launch your Google Home App and tap +.
- How to Integrate Your Device into Another Ecosystem
As the setup code can only be used to add the device to the first ecosystem, for the second commissioning, you need to go to the app of the first ecosystem to generate a new setup code.- Launch your Google Home app. Tap the gear button to go to the device settings page.
![]()
- Tap Linked Matter apps & services and then tap Link apps & services to create an 11-digit setup code.

- Tap Use pairing code.
If conditions permit, you can alternatively tap Share with QR code and you should use the other mobile device to scan the newly-created pairing QR code.
![]()
- Tap Copy pairing code to copy the new code.
![]()
Launch the app of the second ecosystem. Follow the setup instruction to enter the setup code and follow the app instructions to complete the setup.
![]()
- Launch your Google Home app. Tap the gear button to go to the device settings page.


Add to Apple via Matter
Before you start:
The pairing mode of your Matter-certified device will automatically turn off in 15 minutes. You can turn the pairing mode back on by powering off your device, and then power it on.
- Check Compatibility (Click here for more information)
- iOS system: Update to the latest version
- Matter-supported Controller: Home Pod, Home Pod mini, or Apple TV.
![warning]() Note: Please update your iOS devices to iOS 16.2 or a later version. It is recommended to update your iOS to the latest version for better experience.
Note: Please update your iOS devices to iOS 16.2 or a later version. It is recommended to update your iOS to the latest version for better experience.
- How to Set Up Your Matter Device
![warning]() Note: The pairing mode of your Matter-certified device will automatically turn off in 15 minutes. You can turn the pairing mode back on by restarting your device.
Note: The pairing mode of your Matter-certified device will automatically turn off in 15 minutes. You can turn the pairing mode back on by restarting your device. - Launch your Home App. Tap + and then tap Add or Scan Accessory to add a new device.
![]()
- Scan the setup QR code on your device.
![]()
- Choose a location for your device and give it a name.

- Choose how your device will appear. Now you can check your device on the Device list, turn on/off and dim your device on the Home app.
Here we use Tapo Plug as an example. The app page is subject to the actual display of Apple Home.
![]()
- Launch your Home App. Tap + and then tap Add or Scan Accessory to add a new device.
- How to Integrate Your Device into Another Ecosystem
As the setup code can only be used to add the device to the first ecosystem, for the second commissioning, you need to go to the app of the first ecosystem to generate a new setup code.- Launch your Home app and go to the Device Settings page.
![]()
- Scroll down, tap Turn On Pairing Mode and then Copy Code.

- Launch the app of the second ecosystem. Follow the setup instruction to enter the setup code and follow the app instructions to complete the setup.
![]()
- Launch your Home app and go to the Device Settings page.


Failed to Set Up via Matter?
Refer to the following and you can resolve most setup issues.
- Update Firmware: Make sure the firmware of your Matter hub and Smart Home app is updated to support Matter.
- Restart: Try turning off and then turning back on your device and the controller. Restart your smartphone and clear the cache of the smart home app.
- Check IPv6: Ensure that IPv6 is activated on your router.
Visit our FAQ for step-by-step guidance at https://www.tp-link.com/support/faq/1525/ - Enable Setup Mode: Restart your device to re-enter setup mode since Bluetooth should be turned off 15 minutes after the device is powered up.
- Regarding the Matter Code: The original Matter code can only be used for setup in one app (you can reuse it after a device reset). If you wish to set it up in multiple apps, generate a new code using the first app for all subsequent ones.
- Stay on the Code-Generating Page: Do not close the pairing code-generating page in the multi-admin setup. Otherwise, this may lead to exiting the setup mode. If you accidentally close the page after generating the pairing code before adding the device to another ecosystem, you can try to reopen it. If the reopening fails, it is recommended to restart the device and try to generate the pairing code again.
- Factory Reset Your Device: If the LED is blue but the setup failed, try to factory reset the device. For most devices: Press and hold the 'Reset' button for 10 seconds. For smart bulbs: Turn the light switch off and on five times, with a 1-second pause between each action.
- If the Matter-enabled device has already been added to another ecosystem, you will need to get a new setup code for pairing according to FAQ how to integrate your device into another ecosystem.
If the above steps did not help solve your problem, it's recommended that you try to factory reset the Matter-enabled device or use another smartphone to configure it. For more information, please refer to https://www.tp-link.com/support/faq/3574/
Set Up via Amazon Matter Simple Setup
What is Amazon Matter Simple Setup?
Amazon Matter Simple Setup can help connect and set up Tapo smart devices in fewer steps, without having to remember and re-enter your Wi-Fi password on each device.
To use this feature, confirm the following:
- The device is purchased from Amazon and tick "Link to your Alexa account and to Tapo to simplify setup" during purchase.
- The new Tapo device supports MSS (short for Matter Simple Setup).
- You have an MSS enabled Alexa device or router.
- You have saved your Wi-Fi information to Amazon by using Alexa echo.
- Your Tapo device and router are on the same network as your Alexa echo.
LED Indications during Matter Simple Setup
| LED | Status |
| Solid white | Ready for setup |
| Blinking white twice | MSS setup in progress |
| Blinking white three times | MSS setup failed and you can manually set up the bulb from the app manually |
How to add the Tapo device manually:
Open the Tapo app, tap the + button on the page, select your device model, and follow the app instructions to complete setup.
How to use Matter Simple Setup with Tapo devices
- Open the Amazon Alexa app. Then tap More and select Skills & Games.

- Enter Tapo in the search bar and choose Tapo.

- Tap the ENABLE TO USE button.
![]()
- Log in with your TP-Link ID that has bound to your Tapo device, and tap Authorize. After authorized successfully, the message Tapo has been successfully linked will come up.

- Power up your Tapo device and the setup will complete automatically in two minutes.


For setting up more Tapo devices, just power up and enjoy!
Done!
If this device displays on the Home page in the Tapo app, it indicates this device has been successfully associated with your Amazon account and joined your Wi-Fi network automatically.
If this device does not display on the Home page in the Tapo app, try setting it up manually. (Tap the + button on the page, select your device model, and then follow the app instructions to complete setup.)
Basic Device Control
Home Page
You can turn on or off the bulb any time anywhere and tap the bulb card to enter the status page.

Device Status Page
You can adjust colors and temperature, enjoy main features to control your device, and view its runtime & energy usage.

Device Settings Page
You can edit the basic information, set Last On State, enable gentle on/off, add a group, update firmware and more.
After successfully setting up your smart bulb, you will see the home page of the Tapo app. Here you can view the status of all devices that you've added and manage them. You can tap on the device to control and manage.
Configure Your Smart Bulb
You can configure your smart bulb by adjust lighting settings and setting Themes, Presets, Auto White, Schedule, Timer, Away Mode and more.
Turn On/Off
Tap the power button to turn the bulb on or off.

Set Presets
With Presets, you can quickly apply your favorite preset at one tap. To edit preset, just select one and tap edit.

Enable Auto White
Tap A under "My Presets" to select a lighting option (Auto Compensate or Auto Match) for your bulb. And the bulb will follow the color and brightness of the sun throughout the day.

Main Features
On the device status page, you can use the Theme, Schedule, Timer, and Away Mode features.

Set Theme
Tap Theme to apply theme to your bulb to fit your home atmosphere. You can custom shift style, speed, and color cycle yourself.

Set Schedule
Tap Schedule to add a schedule for your bulb to automatically turn on/off and adjust the lighting settings to simplify your daily routine.

Set Timer
Tap Timer to set the timer and lighting settings, then your bulb will automatically turn on with the specific settings after the timer ends.

Set Away Mode
Tap Away to preset the Away Mode, set the start and end time, then your bulb will be randomly turned on/off during this period.

Check Runtime & Energy Usage
Slide up to check your bulb's Runtime and Energy Usage today, past 7 days or past 30 days.

Smart Actions
Smart Actions automate repetitive tasks, allowing you to blaze through tedium with utmost ease. Set everything up once and never have to worry about it again. With Smart Actions, giving your home that level of intelligence is a snap. Shortcut lets you perform an action with a simple tap. Automation allows you to automate tasks to be performed at a set time. e.g. The light will light on at sunset.
Option 1: Edit based on the featured actions
- Go to the Smart Actions page and you will see the Featured Actions (Shortcut or Automation).
![]()
- Tap on a featured action. Tap EDIT to change the settings as needed and tap APPLY to save changes.


Option 2: Create your own smart actions
- Go to Smart page. Tap + on the top right to add a simple and smart action.
![]()
- For Shorcuts: Tap + to add action like turning on the smart bulb.
For Automation: Tap + to add triggers (When) like the trigger time, and tap + to add action (Then) like turning on the smart bulb.


Share Your Smart Bulb
You can invite your family members to manage your Tapo devices together by entering the TP-Link ID (email) you want to share the devices with.
Method 1
On the home page, long press the bulb card and tap Share.

Method 2
Go to Device Status page, slide up and tap Device Sharing.

Method 3
Go to Me page and tap Device Sharing to view your shared devices and devices shared from others.

Reset Your Smart Bulb
There are two types of reset available: a soft reset which resets the Wi-Fi settings only, and a factory reset that erases all of your custom settings and restore them to factory defaults.
Soft Reset (without losing the configuration settings except Wi-Fi)
- Turn the light switch controlling the smart bulb to the on position first.
- Switch it off and on 3 times, pausing for two seconds in between.
- Wait for about 4 seconds and the smart bulb should blink 3 times, which indicates a successful soft reset.
Factory Reset (back to factory default settings)
Method 1
- Turn the light switch controlling the smart bulb to the on position first.
- Switch it off and on 5 times, pausing for two seconds in between.
- Wait for about 4 seconds and the smart bulb should blink 3 times, which indicates a successful soft reset.
Method 2
On the home page in Tapo app, long press the card and tap Remove.


Go to bulb's Settings page and tap REMOVE at the bottom.

Safety Information
- Keep the device away from water, fire, humidity or hot environments.
- Do not attempt to disassemble, repair, or modify the device.
- Do not use the device where wireless devices are not allowed.
- Only use the control provided with or specified by these instructions to control this device.
- For lamps with a weight significantly higher than that of the lamps for which they are a replacement, attention should be drawn to the fact that the increased weight may reduce the mechanical stability of certain luminaires and lampholders and may impair contact making and lamp retention.

- RISK OF ELECTRIC SHOCK OR BURNS. Switch OFF the light switch controlling the bulb and WAIT for the bulb to cool down before attempting to change it.
- Do not install the Smart Bulb with wet hands or when standing on wet or damp surfaces.
- Compatible with regular light switches. Not suitable for use with standard in-wall dimmers. Not compatible with photosensors, motion sensors, or timers. Dimmable via the app only.
- NOT for use in totally enclosed or recessed luminaires. Suitable for damp locations.
- NOT FOR EMERGENCY LIGHTING.
- The increased weight may reduce the mechanical stability of certain luminaires and lampholders and may impair contact making and lamp retention.
- Please read and follow the above safety information when operating the device. We cannot guarantee that no accidents or damage will occur due to improper use of the device. Please use this product with care and operate at your own risk.
- Operating Temperature: 0℃~40℃(32℉~104℉)
- Storage Temperature: -20℃~70℃(-4℉-158℉)
- Operating Humidity: 10%~90%RH, Non-condensing
- Storage Humidity: 10%~90%RH, Non-condensing
Explanation of the symbols on the product label
Symbols may vary from products


Documents / Resources
References
Tapo | Smart Devices for Smart Living
Support | Tapo
https://community.tp-link.com
Support Videos | TP-Link
![www.apple.com]() App Store - Apple
App Store - Apple![play.google.com]() Google Play
Google PlayMatter Setup Guides for Alexa, Google and Apple | TP-Link
Why did the Matter set up of my Matter-certified device fail? | TP-Link
General Questions about Matter-Enabled Devices | TP-Link
![youtu.be]() How to Set Up a TP-Link Matter-Enabled Product on a 3rd Party Controller - YouTube
How to Set Up a TP-Link Matter-Enabled Product on a 3rd Party Controller - YouTube![youtu.be]() Matter Multi-Admin Setup and Demo - YouTube
Matter Multi-Admin Setup and Demo - YouTubehttps://www.amazon.com/b?ie=UTF8&node=37490568011
How to set up an IPv6 Internet connection on the TP-Link Wi-Fi Routers
How to set up Matter device with Alexa, Google, Apple or SmartThings | TP-Link Hong Kong
Download manual
Here you can download full pdf version of manual, it may contain additional safety instructions, warranty information, FCC rules, etc.
Advertisement


Need help?
Do you have a question about the Tapo L535E and is the answer not in the manual?
Questions and answers