Table of Contents
Advertisement
Quick Links
Advertisement
Table of Contents

Related Manuals for Creative NOMAD JUKEBOX 3


Summary of Contents for Creative NOMAD JUKEBOX 3
-
Page 2: How To Use This Manual
Information in this document is subject to change without notice and does not represent a commitment on the part of Creative Technology Ltd. No part of this manual may be reproduced or transmitted in any form or by any means, electronic or mechanical, including photocopying and recording, for any purpose without the written permission of Creative Technology Ltd. - Page 3 Contents...
-
Page 4: Table Of Contents
NOMAD Jukebox 3 Connectors ........ - Page 5 Resetting the player ..........2-7 Locking and unlocking your NOMAD Jukebox 3 ......2-8 To lock the player .
- Page 6 Managing Audio ..........3-4 Using the Music Library .
- Page 7 D Technical Specifications & Error Diagrams Technical Specifications for your NOMAD Jukebox 3 ....D-1 Understanding Error Diagrams ........D-3 E FAQs and Troubleshooting Frequently Asked Questions (FAQs) .
- Page 8 Introduction...
-
Page 9: Creative Nomad Jukebox 3
PC. Your player also comes equipped with an SB1394™ connector, so you can transfer audio tracks and data quickly and easily. It also has two Line Out connectors, which are ideal for connecting to external speakers, like a Creative Inspire™ 4.1 speaker system. - Page 10 Creative portable digital audio players and your PC. With AudioSync™, you can also synchronize music between your PC and NOMAD Jukebox 3. Creative File Manager is a data file manager for your player. With its intuitive Creative File interface, you can drag-and-drop data files between your computer and player.
-
Page 11: Interactive Tutorial
We have included a tutorial designed to guide you step by step around your new Interactive player. The tutorial is useful for both new and experienced owners. Tutorial If you are not familiar with technology or terms used in this document, you can Terminology refer to the "Glossary"... -
Page 12: Using This Document
• Sound Blaster Live!, Sound Blaster Audigy or Sound Blaster Extigy Additional • Depending on the audio stream you want to record, at least Real Player™ 7.0, requirements for RealOne™ or Windows Media Player 6.0 Audio Stream • Microsoft Internet Explorer 4.0 Recorder Capital letters are used to refer to buttons on the player or on an application, for Using this... -
Page 13: Handling The Player
Handling the While your player is quite robust, you should observe a few handling procedures to prolong its life. player ❍ Do not store or This section contains ❍ Do not subject to use in areas cautionary excessive force exceeding 45ºC information that you or impact. -
Page 14: Handling The Battery
Handling the When charging or handling your player’s battery, take note of these precautions: Battery ❍ Avoid contact ❍ Do not expose to with metal Never modify or heat or fire. objects like keys disassemble the or necklaces. battery. If there is leakage, stench, discoloration or deformation during... -
Page 15: Website Information
Visit www.NOMADworld.com regularly for updates and information on: Website • firmware updates Information • NOMAD accessories • tips and tricks • FAQs • troubleshooting • documentation updates • software updates or purchases Introduction vii... -
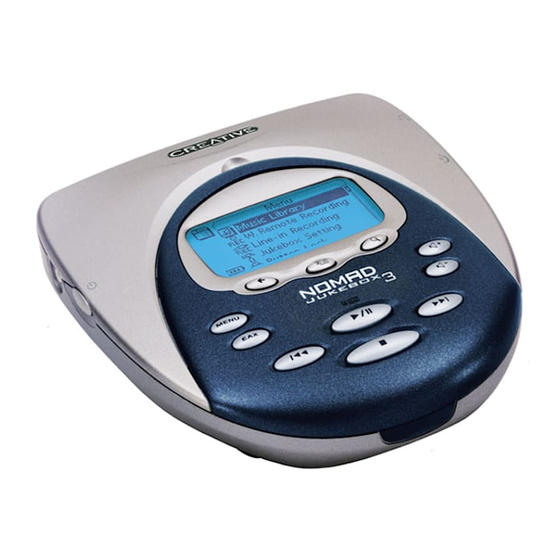
Page 16: About Nomad Jukebox 3
About NOMAD Jukebox 3... -
Page 17: External Views
Scroller Power On/Off button Find button Menu button Now Playing button button Volume Play/Pause/ Up/Down Record buttons button Reverse button Forward button Stop button Figure 1-1: Top view of your NOMAD Jukebox 3 About NOMAD Jukebox 3 1-1... -
Page 18: Side Views
Side views Scroller Headphones connector Optical/ Power On/Off Line In button connector Figure 1-2: Side views of your NOMAD Jukebox 3 Back view DC adapter connector Line Out Battery SB1394 connectors 1 compartment connector connector and 2 Figure 1-3: Back view of your NOMAD Jukebox 3... -
Page 19: Bottom View
Bottom view Battery compartment CreativeLink Reset hole Figure 1-4: Bottom view of your NOMAD Jukebox 3 About NOMAD Jukebox 3 1-3... -
Page 20: Player Buttons
Player Buttons The buttons on your NOMAD Jukebox 3 help you access many of your player’s features. The table below describes each button and its function. Button Function Notes OWER ❍ press and hold until player turns on ❍ turns the player on and off or off ❍... -
Page 21: Button Function
This action is also referred to as "Scroll Select". ❍ the Find operation starts after you ❍ finds albums, tracks, playlists and genres enter the first letter, for example “D” of “DJ playlist” About NOMAD Jukebox 3 1-5... - Page 22 ❍ the Playing List screen shows the contents of the Playing List. ❍ stops current operation and returns to the ❍ from the current screen, you can only previous screen go back up to 10 screens About NOMAD Jukebox 3 1-6...
-
Page 23: Nomad Jukebox 3 Connectors
NOMAD Your NOMAD Jukebox 3 has external connectors that can connect the player to other devices. The table below explains what those connectors are. Jukebox 3 Connectors Part Function Notes ❍ use another battery to extend the playback time ❍ holds the player’s battery ATTERY COMPARTMENT ❍... - Page 24 Connect it to the Sound Blaster Audigy audio upgrade your player’s firmware card’s SB1394 jack or an IEEE 1394 ❍ when your player is connected to connector, if you have one. your computer, use PlayCenter to control your player About NOMAD Jukebox 3 1-8...
-
Page 25: Using The Scroller
Using the The Scroller is one of the most important features of your NOMAD Jukebox 3. In this document, we will use a new term, “Scroll Select”, to indicate that you should Scroller use the Scroller to scroll through options and then select the option by pressing the Scroller. -
Page 26: Selecting List And Confirmation Box Options
Selecting list and confirmation box options Scroller options Figure 1-7: Unlocking the player Figure 1-6: Constructing a title from a list Move the Scroller to scroll through the options. Press the Scroller to select the option. About NOMAD Jukebox 3 1-10... -
Page 27: Player Accessories
Player You have many devices to use with your NOMAD Jukebox 3 to enhance your audio experience. These accessories are available separately, and can be purchased Accessories online from NOMADworld. Some of these accessories may not be available in all regions. - Page 28 FM Wired Remote ❍ Gives you the same functions as the Wired Remote, except that it also allows you to tune-in to local FM radio broadcasts. Visit www.NOMADworld.com to learn more about these accessories. About NOMAD Jukebox 3 1-12...
-
Page 29: Setting Up Your Player
Setting Up Your Player... -
Page 30: Inserting The Battery
Although your player comes with one battery, you can Figure 2-1: Inserting the battery in your NOMAD Jukebox 3 purchase a second battery to enjoy double the playing The diagram above shows you how to insert one battery. You can acquire an time. -
Page 31: Powering Your Player
Turn on the power from the power source. Remember to use only the accessories packaged for you. Substitute accessories may damage your player, or worse yet, hurt you. Figure 2-2: Powering your NOMAD Jukebox 3 Setting up your player 2-2... -
Page 32: Charging The Battery
Charging the The high performance lithium battery supplied with your player needs to be fully charged before you use it. Your player’s built-in battery charger should fully charge battery the battery in 4 hours to obtain the maximum playback time. If you are using two batteries, both batteries should be fully charged in 8 hours. - Page 33 Icon Power State Notes ❍ charge the battery fully before disconnecting the player from the DC power outlet ❍ your player is running from DC power and is ❍ while charging, the icon will alternate charging the battery between this icon and a battery state icon, showing the approximate level of charge ❍...
-
Page 34: Installing Software
Installing Your NOMAD Jukebox 3 comes with software that helps you create audio tracks, manage your music library and use your player. Software Make sure your player is not connected to your computer. Insert the Installation CD into your CD-ROM drive. -
Page 35: Connecting Your Player
Connecting Your NOMAD Jukebox 3 comes with an SB1394 cable for fast data transfers to and from your computer. Be sure that you have installed PlayCenter before connecting your player your player. You can also use a USB cable to connect your NOMAD Jukebox 3 to your computer. -
Page 36: Turning The Player On Or Off
Turning the Your player must be unlocked before you can turn it off. To unlock your player, see "Locking and unlocking your NOMAD Jukebox 3" on page 2-8. player on or off Press and hold down the POWER button. To turn your player Keep on holding the POWER button until the startup screen appears. -
Page 37: Locking And Unlocking Your Nomad Jukebox 3
Locking and Locking your NOMAD Jukebox 3 will disable all buttons on the player except for the Scroller. This feature is useful when you don’t want any buttons, like STOP, pressed unlocking your accidentally. NOMAD If you press a button while the player is locked, a popup window appears for you to Jukebox 3 unlock the player. -
Page 38: Changing The Faceplate
Changing the If you want to change the look of your player, you can purchase a set of differently colored faceplates. Avoid using sharp-tipped objects to detach the faceplate to faceplate prevent surface damage to your player. Go to www.NOMADworld.com to purchase more colored faceplates. Detach the faceplate as shown below. -
Page 39: Checking Jukebox Information
• specify power settings, see "Power Settings" on page 2-11. • set the default language, see "Language" on page 2-12. You can also change your startup screen. See Creative PlayCenter’s Online Help for information on how to change your startup screen. To configure your player: Press the MENU button. -
Page 40: Personalization
Scroll Select an option from the menu that appears: Go to the relevant section in the pages that follow. Personalization To construct a name, Scroll Select the letters and numbers to form the name. Each letter In this screen you can: and number selected is •... -
Page 41: Language
In this screen, you can: • adjust the screen backlight duration. A lower number setting conserves battery power for longer playback time. • set the contrast level for your player’s screen. The lower the number, the lower the contrast. • specify how long the player remains inactive before it automatically shuts down. -
Page 42: Testing Your Player
Testing your After setting up your NOMAD Jukebox 3, you can do a test run to make sure that it is in working order. player Make sure that your NOMAD Jukebox 3 is properly connected to the DC adapter and DC power outlet. -
Page 43: Using Your Player
Using Your Player... - Page 44 Using Your Player After setting up your player, you can use it to play, manage, enhance and record audio. Instructions on how to perform these functions are provided in the following When instructed to sections: Scroll Select, use the • "Playing Audio" on page 3-2 Scroller to scroll to the •...
-
Page 45: Playing Audio
Playing dedicated data file manager for your player. List icons. To play audio, you can either add audio selections from the NOMAD Jukebox 3's Basic audio Music Library to the player’s Playing List as described in "Adding audio selections to playback the Playing List"... - Page 46 Pressing the NOW PLAYING button again will display the Playing Track screen, which shows the track that is being played back or the track that has been selected. The upper-left corner of the screen will display the Playing Track icon. Playing Track Icon Track Title Album Title...
-
Page 47: Managing Audio
Scroll Select "Preview". The track is previewed once. Managing To effectively manage the audio in your player, you should be familiar with the Music Library, Playing List and Playlists. These will be described extensively in the Audio following sections: • "Using the Music Library" on page 3-4 •... - Page 48 • Delete tracks, playlists, albums, artists or genres in your player Note that modifying or renaming albums, artists or genres, including renaming, must be done in Creative PlayCenter. Playlists can also be renamed in the player, as described in "Using Playlists" on page 3-16.
- Page 49 Scroll Select “Open”. The tracks within the sub-category appear. Audio selections from the Music Library can either be added sequentially after Adding audio selections already in the Playing List ("Add to Play") or placed at the front of the selections to the Playing List for immediate playback ("Play Now").
- Page 50 Scroll Select “Add to Play” to add the audio selection to the back of the Playing List. Scroll Select "Play Now" or press the Play button to add the selection to the front of the Playing List and immediately play it back. Finding your favorite song or album in the Music Library has been made easy with Finding audio your player's "Find"...
- Page 51 Scroll Select the letters on the list to form the name of the track, playlist, album, artist or genre you want to find. The selected letters appear in the box at the bottom of the screen. Also, each time an entry is made into the box, the audio category you are in is searched, and the closest matching result is displayed.
- Page 52 To permanently delete tracks, albums, artists, genres or playlists, you must remove them from the Music Library in your NOMAD Jukebox 3. To delete a track Follow steps 1 through 5 in "To find a track in the Music Library" on page 3-5.
-
Page 53: Using The Playing List
Scroll Select the sub-category. For example, under Albums, Scroll Select the album you want to delete. A list appears. Depending on what you are deleting, Scroll Select “Delete Album”, "Delete Artist", "Delete Genre" or "Delete Playlist". A confirmation box appears, asking you if you want to delete the selected album, artist, genre or playlist. - Page 54 To expand an album, artist or genre Press the NOW PLAYING button until the Playing List screen appears. Scroll Select the album, artist or genre to expand. A list appears. Scroll Select “Expand”. The tracks in the selection appear beneath the album, artist or genre.
- Page 55 To view information about tracks in the Playing List Press the NOW PLAYING button . Track information can be viewed in either the Playing List or Playing Track screen. In the Playing List screen, Scroll Select the track that you want to view information about.
- Page 56 Scroll Select "Yes". The track, album, artist or genre is removed from the Playing List. To remove all audio from the Playing List Press the NOW PLAYING button until the Playing List screen appears. Scroll Select any track, album, artist or genre in the Playing List. A list appears.
- Page 57 To rearrange audio in the Playing List Press the NOW PLAYING button until the Playing List screen appears. Scroll Select the album, artist, genre or individual track to move. A list appears. Scroll Select “Change Order”. An icon appears next to the selected album, artist, genre or individual track.
- Page 58 To save a playlist Press the NOW PLAYING button until the Playing List screen appears. Scroll Select any item in the Playing List. A list appears. Scroll Select “Save as Playlist”. A list appears. Scroll Select the letters on the list to form a name for your playlist. This name appears in the box at the bottom of the screen.
-
Page 59: Using Playlists
As described earlier, a playlist is a Playing List which has been saved. Editing of Using playlists, such as rearranging content, should be done in Creative PlayCenter. Playlists However, you can rename playlists in your player. To rename a playlist Press the MENU button Scroll Select “Music Library”. -
Page 60: Enhancing Audio
Enhancing You can enhance your listening experience when playing the Playing List by applying Play Mode, EAX, or both at the same time. If you are previewing a track, Audio you will only be able to use EAX to enhance listening. Play Modes and EAX are described in the following sections: •... - Page 61 Scroll Select “Repeat Track”. The Repeat Track icon appears onscreen and the track is repeated continuously until you stop it. To repeat the whole Playing List Press the NOW PLAYING button until the Playing List screen appears. Note: If you are in the Playing Track screen, press the Scroller and skip to step If there is only one track in the Playing List when "Repeat All"...
- Page 62 Scroll Select "Play Mode...". A list appears. Scroll Select “Shuffle Repeat”. The Shuffle Repeat icon appears onscreen and tracks are selected at random and played back continuously until you stop playback. Bookmarking a track sets a playback point—you can jump to this point whenever Bookmarking a you play the bookmarked track.
- Page 63 To play the track from the bookmarked point Press the NOW PLAYING button until the Playing Track screen appears. Press the Scroller. A list appears. Scroll Select “Go to Bookmark”. The track plays from the bookmarked point. To remove a bookmark Press the NOW PLAYING button until the Playing Track screen appears.
- Page 64 To play a track once Press the NOW PLAYING button until the Playing Track screen appears. Press the Scroller. A list appears. Scroll Select “Track Once”. The Track Once icon appears onscreen. The Playing List stops playing back once the track ends. Once the "Normal"...
-
Page 65: Using Eax
Besides Play Modes, your player also allows you to enhance your listening Using EAX experience with EAX technologies formerly available only with Creative's Sound Blaster Live! and Audigy audio cards. EAX technologies (or "Settings") available in your player include: General information •... -
Page 66: Recording Audio
EAX by pressing the EAX button on the remote. Recording Another great NOMAD Jukebox 3 feature is its ability to record audio. Recorded audio is encoded directly into the file format (WAV or MP3) and bitrate (quality) of Audio your choice. -
Page 67: Wired Remote Microphone Recording
When recording, you will see a bar showing you the time available for recording. You will also see another bar showing you the elapsed recording time. Maximum Time Elapsed Recording Time Available For Recording See "About MP3" on page B-1 for more details on the appropriate file format and bitrate to use for your recordings. - Page 68 When you are ready to record, press and hold the RECORD button until the "Recording" message appears onscreen. Press the STOP button to end the recording. A name is automatically assigned to your recording and it is saved to the Recordings audio category in your Music Library.
-
Page 69: Analog Line-In Recording
To make an analog line-in recording Analog line-in Connect the analog line-in source to your player as described in the recording documentation accompanying the line-in device. Press the MENU button To pause or resume Scroll Select “Line-in Recording”. The Recording screen appears. recording, press the PAUSE button. - Page 70 When the analog line-in source is ready, press and hold the RECORD button until the "Recording" message appears onscreen. Press the STOP button to end the recording. A name is automatically assigned to your recording and it is saved to the Recordings audio category in your Music Library.
-
Page 71: Digital/Optical Line-In Recording
To make a digital/optical line-in recording Digital/optical line- Connect the digital/optical line-in source to your player as described in the in recording documentation accompanying the line-in device. Press the MENU button To pause or resume Scroll Select “Line-in Recording”. The Recording screen appears. recording, press the PAUSE button. - Page 72 When the digital/optical line-in source is ready, press and hold the RECORD button until the "Recording" message appears onscreen. Press the STOP button to end the recording. A name is automatically assigned to your recording and it is saved to the Recordings audio category in your Music Library.
-
Page 73: Using Applications
Using Applications... - Page 74 Creative PlayCenter, Creative File Manager, and other useful software, are included on your installation CD (see "Installing Software" on page 2-5). Creative PlayCenter is the best way to organize and transfer audio to and from your player. This chapter includes basic instructions on using PlayCenter to rip audio CDs, transfer tracks by manual selection or with AudioSync, edit track information as well as to create and edit playlists.
-
Page 75: Using Playcenter
Only basic instructions on how to use PlayCenter with your player are provided in Using this chapter—extensive instructions are found in the PlayCenter Help file. PlayCenter An overview of the PlayCenter interface is provided below: AudioSync After PlayCenter is Media Bar Button Transfer Window Main Window... -
Page 76: Ripping Tracks From An Audio Cd
Insert an audio CD into your CD-ROM drive. Ripping tracks If the CD starts playing, click the STOP button. You cannot rip tracks while the from an audio CD CD is playing. In PlayCenter’s Main window, click the AUDIO CD button. Click the boxes next to the tracks you want to rip. - Page 77 A dialog box appears, showing you the default transfer mode and track comparison information. The information in the dialog box may take a while to appear, depending on the number of tracks being analyzed. When the comparison is complete, a summary of tracks and playlists that can be transferred for both music libraries is shown.
-
Page 78: Editing Audio Track Information
Turn on your player. To transfer specific In the Transfer window, click the NOMAD JUKEBOX button. tracks from your PC In the Main window, click the PC MUSIC LIBRARY button. to your player Locate the folder where your tracks are stored. Select the tracks you want to transfer to your player. -
Page 79: Creating And Editing Playlists With Playcenter
Playlists can be created in your player, as described in "Saving the Playing List as a Creating and playlist" on page 3-14. They can also be created in PlayCenter. Extensive editing editing playlists options, such as adding or deleting tracks, are also available with PlayCenter. with PlayCenter In the Main window, click the NOMAD JUKEBOX button. -
Page 80: Viewing Non-English Track Information
Click the track and click the SHIFT-UP or SHIFT-DOWN icons on the Toolbar. In the Main window, click the NOMAD JUKEBOX button. To delete a playlist Click the MEDIA BAR, and select "Playlists". Click the playlist to delete. On the Toolbar, click "Delete". Track information for non-English audio tracks, such as Chinese, Japanese or Viewing Korean tracks, can be displayed in their native fonts when you are using... -
Page 81: Using File Manager
An overview of the File Manager Manager interface is provided below. Shortcut Left Pane Menus The Creative File Buttons Right Pane Manager application can be copied to a single floppy disk, allowing you to install the application onto another PC. -
Page 82: Transferring Data Files
Data files can be transferred to and from your player by either using the "copy- Transferring data and-paste" or "drag-and-drop" functions. Audio tracks in MP3, WAV or WMA file files formats will be stored as data files when they are transferred from your PC; they cannot be played by your player. - Page 83 Glossary...
-
Page 84: Useful Terms To Know
“hot swap” capability. This means that you do not have to turn off or restart your computer when attaching or detaching your 1394 device. You can connect up to 63 devices to a single port. Your player uses Creative’s SB1394 standard, which is compliant with IEEE 1394. See "SB1394". See "Equalization". - Page 85 Record audio from an analog source by using this connector. The connector Analog Line-In accepts both analog or optical line-in sources, automatically detecting whether the source is analog or optical. See "Optical Line-In" AudioSync can synchronize the music libraries in your player and PC. If either AudioSync library has insufficent space, you can selectively transfer tracks by artist, genre or playlist.
- Page 86 You can record on-demand, or schedule the recording. Creative File Manager is a data file manager for your player. With its intuitive Creative File interface, you can drag-and-drop data files between your computer and player.
- Page 87 Audigy’s SB1394 jack, without using a separate IEEE 1394 interface card. A unique type of interface for use with other Creative devices. CreativeLink When you convert sound waves into binary data (0s and 1s), you are creating Digital audio digital audio.
- Page 88 Certain EAX features provide advanced audio capabilities for music composition and sound design. To fully experience EAX, connect a Creative Inspire 4.1 speaker set to your player, and with EAX enabled, activate 4-channel surround sound in Jukebox Settings.
- Page 89 About a thousand million bytes. A 1 GB device can store 1000 MB worth of MP3 Gigabyte (GB) files. If your MP3 files are encoded at 128 kbps and each file is about 4 minutes long, a 10 GB device can store about 2500 MP3 files. See "CDDB".
- Page 90 From a list, you can select one of many options listed. For example, a list can List contain available EAX environments, or letters and numbers for you to construct a name for a recording. A battery composed of Lithium, a light metal with high electrochemical potential. Lithium-Ion battery Lithium batteries are light and store high amounts of electrical energy.
- Page 91 A pop-up window that appears to give you information, for example, "Bookmark Message box set at 00:04:23". A member of the MPEG compression family, MP3 is a commonly used compressed digital audio format. MP3 encoding transforms digital audio files (like WAV) to provide reasonable audio quality in relatively small file sizes.
- Page 92 Shows the track that is being played back or the track Playing Track screen that has been selected in the Playing List for playback. See "Playing List" and "Now Playing screens". The Playing List is like a long line of audio tracks, Playing List waiting for their turn to be played.
- Page 93 SB1394 is Creative's IEEE-1394 compatible standard for high speed (about SB1394 400Mbps at peak) digital audio transfer. Creative's SB1394 standard offers you maximum speed and compatibility with SB1394 peripherals and also provides you with a seamless user experience for transferring massive MP3 collections, DV editing, easy networking and more.
- Page 94 A Play Mode that plays tracks at random from the Playing List. It is almost like Shuffle waiting in line at a popular nightclub. Sometimes some tracks don’t get played at all. Just like Shuffle, except that your player continues to select tracks at random to Shuffle Repeat play.
- Page 95 An uncompressed digital audio format, WAV files are often used in systems WAV (wave) running Microsoft Windows. Recordings made with the Wired Remote or FM Wired Remote are in WAV or MP3 formats. An accessory for your player that you can use to access the player’s controls Wired Remote without dragging the player out from your bag or pocket.
-
Page 96: B Primers And Information
Primers and Information... -
Page 97: About Mp3
Primers and Information This chapter contains detailed information on key technologies used in the development of your NOMAD Jukebox 3 as well as details of Scroller operations and icons used in the player’s screens. MP3 is the acronym for Moving Picture Experts Group (MPEG) Audio Layer 3, a... -
Page 98: Where To Get Mp3 Files
EAX technologies are implemented across a range of audio hardware solutions, system software, application software, and application programming interfaces (APIs) from Creative. With EAX technology-enabled products, you can shape and customize your audio experience. Certain EAX features provide advanced audio capabilities for music composition and sound design. -
Page 99: About Usb
With these awesome EAX technologies, the NOMAD Jukebox delivers an unsurpassed listening experience. For more information, please visit EAX.creative.com. An older serial input/output technology than IEEE 1394, USB is commonly used for... -
Page 100: List Of Scroller Operations
List of Scroller Many operations are accessible from your player’s context-sensitive Scroller. Here is a summary of all operations or selections available: operations Scroller Description Notes operation ❍ the selection is played when its turn ❍ adds the selection to the Playing List DD TO comes ❍... - Page 101 Scroller Description Notes operation ❍ makes another recording using the same ❍ Scroll Select "New" after saving or settings as the previous recording discarding the previous recording ❍ press the PLAY button to play the ❍ disables Play Modes. ORMAL entire Playing List once, in sequence ❍...
- Page 102 Scroller Description Notes operation ❍ repeats playback of the current track only EPEAT RACK ❍ saves the contents and playback order of the AVE AS LAYLIST Playing List as a playlist ❍ sets a bookmark at this point in the track ❍...
-
Page 103: Information Diagram
Information Diagram Diagram Action / Meaning ❍ your PC is actively managing your player. To use your player, disconnect it from your PC. ❍ your PC is not actively managing your player. To use your player, disconnect it from your PC. ❍... -
Page 104: Playing List Icons
Icon Action / Meaning ❍ Pause ❍ Forward ❍ Reverse ❍ Skip forward ❍ Skip back The following icons are commonly found in the Playing List screen. Playing List Icons Icon Action / Meaning ❍ Album ❍ Artist ❍ Genre ❍... -
Page 105: Audio Enhancement Icons
Icon Action / Meaning ❍ Track within audio category ❍ Audio selected for playback or which is currently playing back The following icons appear onscreen when the respective audio enhancements are Audio active. Enhancement Icon Action / Meaning Icons ❍ Repeat Track ❍... -
Page 106: Navigational Icons
The following icons appear on-screen when you are in the associated firmware Navigational section. Icons Icon Action / Meaning ❍ Menu ❍ Playing List ❍ Playing Track ❍ Music Library ❍ Playlists category ❍ All Tracks category ❍ Albums category ❍... - Page 107 Icon Action / Meaning ❍ Genre category ❍ Recordings category ❍ EAX ❍ Find ❍ W.Remote Recording/ Line-In Recording ❍ Line-In Record/ Optical Record ❍ Voice Record ❍ Jukebox Setting Primers and Information B-11...
- Page 108 Icon Action / Meaning ❍ Jukebox Information ❍ Personalization Primers and Information B-12...
-
Page 109: C Handling Instructions
Handling Instructions... -
Page 110: Battery Handling
Handling Instructions To prolong the life of your player and its battery, you need to take some care in handling them. Improper handling can result in damage, excess heat buildup, smoke or fire. We have also included some precautionary information, to help you avoid hazardous situations. -
Page 111: Player Handling
Physical • Do not attempt to disassemble, solder or alter the batteries. • Do not remove the label. • If batteries are swallowed, seek medical attention immediately. • Do not pierce or crush the batteries, as it may cause the electrolyte to leak. Contact with the electrolyte is hazardous to your health. - Page 112 Physical • Do not attempt to disassemble or modify the player. • Do not subject your player to excessive force or impact. Severe impacts can seriously damage your player. Handling Instructions C-3...
-
Page 113: D Technical Specifications & Error Diagrams
Technical Specifications & Error Diagrams... -
Page 114: Technical Specifications For Your Nomad Jukebox 3
Technical Specifications & Error Diagrams Size (W x H x D) Technical ❑ 4.84" x 5.12" x 1.38" or 123 mm x 130 mm x 35 mm Specifications Weight for your ❑ 10.2 oz or 289 gms without batteries NOMAD Memory ❑... - Page 115 Signal to Noise Ratio ❑ Up to 98 dB (Line-Out) ❑ Up to 96 dB (Headphones) Channel Separation ❑ Up to 98 dB (Line-Out) ❑ Up to 75 dB (Headphones) ❑ <0.1% Frequency Response ❑ 20 Hz~20000 Hz Harmonic Distortion ❑...
-
Page 116: Understanding Error Diagrams
**** Audio Codec Support ❑ MPEG Audio Layer 3 (MP3), WAV, WMA (with DRM) and future formats If an error occurs, you may see any one of the following diagrams, indicating the Understanding general nature of the problem. Error Diagrams Diagram Likely Causes Suggested Action... - Page 117 Diagram Likely Causes Suggested Action ❍ see actions for firmware ❍ firmware corruption problems ❍ unexpected power loss ❍ allow firmware to complete during audio file the rebuilding of the library transfer Technical Specifications & Error Diagrams D-4...
-
Page 118: E Faqs And Troubleshooting
FAQs and Troubleshooting... -
Page 119: Frequently Asked Questions (Faqs
Why do I need two Line-out jacks? Features They are for front and rear speakers. For example, if you have a Creative Inspire 4.1 speaker system, you can connect the front speakers to Line-Out Jack 1, and the rear ones to Line-Out Jack 2. - Page 120 Where can I get official information on all Jukebox products? General Visit NOMADworld for updates and downloads relating to all Jukebox products, Creative’s MP3 players and accessories. Visit www.NOMADworld.com My player seems to have frozen. Is there anything I can do? You can reset your player.
- Page 121 You may see this message when installing this driver or update. If you do, you may choose to click the Continue Anyway button. Creative has tested this driver or update on Windows XP, and it does not impair or destabilize your computer.
- Page 122 Can I hear audio from my player without using headphones? Yes! Your player has 2 pairs of Line-Out connectors, to which you can connect normal stereo speakers, or such speakers as the Creative Inspire 4.1 speakers for immersive surround sound.
- Page 123 I have to recharge the battery quite often. Is there anything I can do to make it last longer? Generally, any operation requiring the player to access the hard disk uses battery power. Consequently, filling your player to capacity is not recommended. However, some operations consume more battery power: •...
- Page 124 If I damage or lose my DC adapter, can I buy a similar, off-the-shelf adapter? No. The adapter may not be compatible with your player, and may even damage it. You should get a replacement adapter from Creative at www.NOMADworld.com, or your local Creative office/distributor. Frequently Asked Questions (FAQs) and Troubleshooting E-6...
- Page 125 Index...
- Page 126 Index Numbers bitrate ..............bitstream ............. bookmark ............. 1394 ..............bookmarking audio 3-19 ..........about ............buttons FireWire ............back ..........................find ............... forward ............menu ............. about EAX ............now playing ........... about IEEE 1394 ..........pause ............about MP3 ............
- Page 127 ..........encoder ..............reset hole ............environment settings ..........SB1394 ............equalization ......................... error codes ............Creative Audio Stream Recorder ......expand/collapse/track details ........ Creative File Manager ......external views ............Creative PlayCenter 3 ......– CreativeLink ............FAQs ..............
- Page 128 glossary ............... go to bookmark ............ GraceNote ............Jukebox settings language 2-12 ............. personalization 2-11 ..........power settings 2-11 ..........handling batteries ..........handling instructions batteries ............battery disposal ..........kbps ..............electrolyte leakage ....................... player ............handling the battery .........
- Page 129 3-12 ..........nickel metal hydride (NiMh) ........rearranging tracks 3-13 ........nickel-cadmium (NiCad) ........saving as a playlist 3-14 ........NOMAD Jukebox 3 ............. playlist ..............normal ..............add tracks ............. Now Playing screens ..........change playback order ........Playing List ............
- Page 130 Scroller operations ..........add to play ............ cancel ............random audio playback 3-18 ........change order ..........rearranging tracks in the Playing List 3-13 ....clear bookmark ..........remove ..............delete from ........... remove all ............expand/collapse/track details ......rename ..............
- Page 131 software upgrades ..........Sound Blaster Audigy ........... supported playback formats ........unlocking the player ..........supported recording formats ......... upgrade player firmware ........switching off ............upgrading firmware ..........switching on ............A-11 ..............synchronizing music libraries ......... using a four speaker system .........
Need help?
Do you have a question about the NOMAD JUKEBOX 3 and is the answer not in the manual?
Questions and answers