Advertisement
Introduction
To ensure optimum performance and safety, read the following instructions before connecting, operating, or adjusting the product. Keep this manual for future reference.
Surge protection device recommended
This product contains sensitive electrical components that may have been damaged by electrical spikes, surges, electric shocks, lightning strikes, etc. The use of surge protection systems is highly recommended in order to protect and extend the life of your equipment.
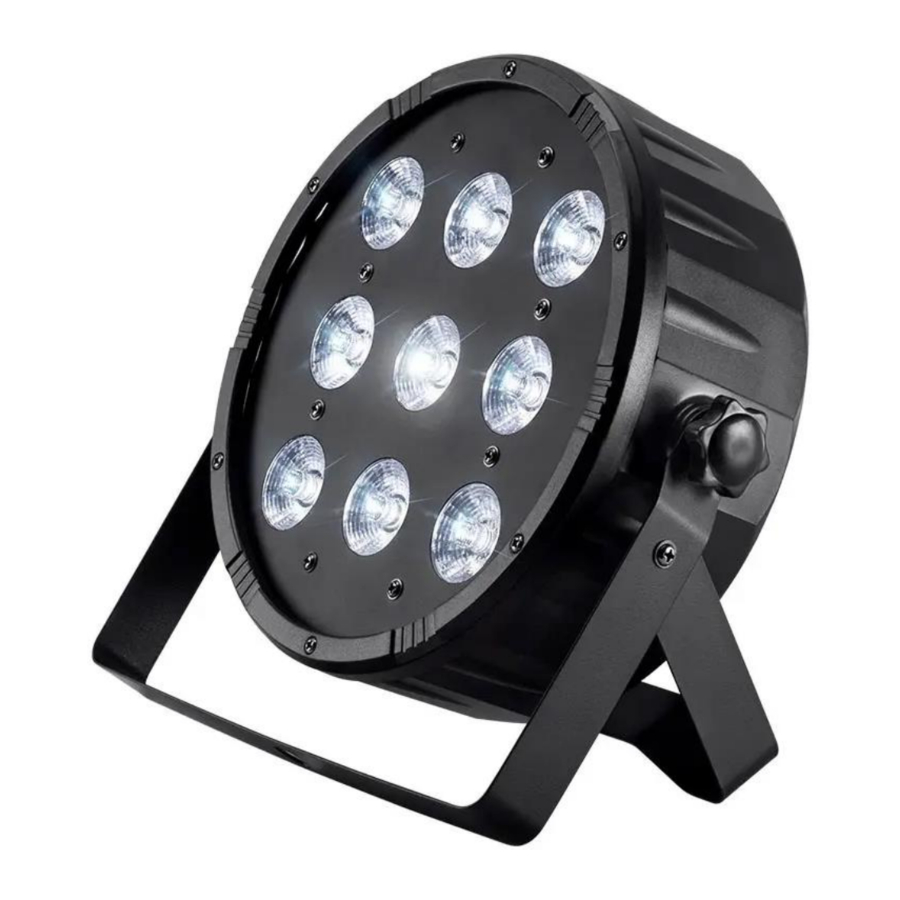
The light features nine 10-watt RGBW LEDs and several built-in programs for dimming and strobe effects, including a Strobe Follow mode, which allows multiple lights to strobe in sequence, rather than all at the same time. It also supports standard DMX-512 control signals for use as part of a larger light production.
Package Contents
- 1x Flat PAR stage light
- 1x AC power cord (NEMA 5-15P to IEC 60320 C13)
- 1x User's manual
Controls and Menu Display
The 4-digit LED display indicates the mode and the value for the selected function or mode.

- Press the MENU button to cycle through the various modes and functions.
- Press the UP button to increase the value of the selected function or mode. Press and hold the button to rapidly increase the displayed value. The list will cycle back to the beginning after the maximum value is reached.
- Press the DOWN button to decrease the value of the selected function or mode. Press and hold the button to rapidly decrease the displayed value. The list will cycle back to the end after the minimum value is reached.
- Once the desired value is displayed, press the ENTER button to set that value for the displayed function or mode and allow for the selection of another function or mode.
- If you want to discard any changes made to the value of the selected function or mode, simply press the MENU button to cycle to the next function or mode in the list.
Menu Modes
| Menu Display | Value Range | Function |
| A.001 | 001-512 | DMX512 channel selection |
| AdyE or AdnO | DMX512 priority | |
| AU01 | 01-08 | Color selection |
| FF00 | FF00-FF99 | Auto color change speed |
| EE00 | EE00-EE99 | Color gradual change, from slow to fast |
| CC00 | CC00-CC99 | Color pulse change, from slow to fast |
| F.000 | 000-255 | Strobe, from slow to fast |
| SoUd | Sound activated with strobe | |
| SUnd | Sound activated for color change | |
| r.000 | 000-255 | Red color, from dark to bright |
| G.000 | 000-255 | Green color, from dark to bright |
| b.000 | 000-255 | Blue color, from dark to bright |
| U.000 | 000-255 | White color, from dark to bright |
DMX Control
| Channel | DMX Values | Function |
| 1 | 000-255 | General dimmer |
| 2 | 000-255 | Red dimmer (0—100%) |
| 3 | 000-255 | Green dimmer (0—100%) |
| 4 | 000-255 | Blue dimmer |
| 5 | 000-255 | White dimmer (0—100%) |
| 6 | 000 | No strobe |
| 001-255 | Strobe, from slow to fast | |
| 7 | 000 | No macro function |
| 001-100 | Color on | |
| 101-150 | Color jump change | |
| 151-250 | Color gradient change | |
| 250-255 | Sound activated strobe mode sensitivity | |
| 8 | 000-255 | Macro function LED speed, from slow to fast |
Master/Slave Operation
Multiple fixtures can be daisy-chained together, using DMX cables (available separately) to connect the DMX OUT connector on one fixture to the DMX IN connector on the next in line.
The last light in the chain must have a DMX Terminator (P/N 601600, available separately) connected to the DMX OUT connector.
The first fixture in the chain is considered the Master and all the others are considered Slaves, that will perform the same actions as the Master. The Slaves must all be set to menu mode A.001.The Master can then be set to use any built-in program or to a DMX address for direct control using a DMX Controller (P/N 612120,available separately) to create the desired light effect.
Note: If the daisy chain is longer than 60 meters or if it contains 20 or more light fixtures, a DMX signal amplifier should be used to ensure that all devices get valid instruction signals.
3-PIN XLR to 5-PIN DMX Conversion
While most DMX-compatibIe equipment uses 3-pin XLR connectors, some devices use the official 5-pin DMX connector. To make a 3-pin to 5-pin converter simply make a cable with a 3 pin XLR connector on one end and a 5-pin DMX connector on the other. Connect the pins as follows:
| 3-pin XLR to 5-pin DMX Adapter | ||
| Signal | 3-pin XLR | 5-pin XLR |
| Ground/Shield | 1 | 1 |
| Data Complement (- signal) | 2 | 2 |
| Data True (+ signal) | 3 | 3 |
| Do Not Use | 4 | |
| Do Not Use | 5 | |
Troubleshooting
The following listed are common problems and solutions.
| PROBLEM | SOLUTIONS |
The light will not turn on | Check to ensure the power cord is connected to a power outlet. Check to ensure that the connected outlet has available power. |
The light will not execute DMX instructions | Check to ensure that the light is connected to the controller using a DMX cable. Check to ensure that the DMX chain is properly terminated. Check to ensure that the DMX cable is not faulty by swapping it out with a known good cable. Check to ensure the light is in DMX mode (001-512). Check to ensure the DMX controller is operating properly. |
Note: If you experience other problems with this light and cannot solve them on your own, please contact Monoprice Technical Support for assistance.
Specifications
| P/N | 612749 |
| Lamp Type | 9x10-watt RGBW 4-in-l LEDs |
| Control Modes | Stand-alone, sound-activated, DMX512 |
| DMX Channel | 8 |
| Input Voltage | 90-240 VAC, 50/60 Hz |
| Maximum Power Consumption | 90 watts |
| Dimensions | 9.8" x 3.9" x 9.8" (250 x 100 x 250 mm) |
| Weight | 2.6 lbs. (1.2 kg) |
CUSTOMER SERVICE
The Monoprice Customer Service department is dedicated to ensuring that your ordering, purchasing, and delivery experience is second to note. If you have any problems with your order, please give us an opportunity to make it right. You can contact a Monoprice Customer Service representative through the Live Chat link on our website www.monoprice.com or via email at support@monoprice.com. Check the website for support times and links.
TECHNICAL SUPPORT
MonopriceTM is pleased to provide free, live, online technical support to assist you with any questions you may have about installation, setup, troubleshooting, or product recommendations. If you ever need assistance with your new product, please come online to talk to one of our friendly and knowledgeable Tech Support Associates. Technical support is available through the online chat button on our website www.monoprice.com or through email by sending a message to tech@monoprice.com. Check the website for support times and links. To download the latest drivers, firmware, etc., go to www.monoprice.com and type the P/N into the search bar. If available, support files are linked at the bottom of the product page.
Safety Warnings and Guidelines
- Please read this entire manual before using this device. Pay extra attention to the following safety warnings and guidelines. Keep this manual in a safe place for future reference.
- This device is intended for indoor use only.
- Do not expose this device to water or moisture of any kind such as placing drinks or other containers with moisture on or near the device. If moisture does get in or on the device, immediately remove it from its power source and allow it to fully dry before reapplying power.
- Do not touch the device, the power cord, or any other connected cables with wet hands.
- Do not install the device on an unstable surface where it could fall and cause either personal injury or damage to the device and/or other equipment.
- When installing the device, ensure that the mount is sufficiently robust to support the weight of the unit and to prevent unwanted movement.
- Do not expose the device to excessive vibration or extreme force, shock, or fluctuations in temperature or humidity.
- Before the operation, check the unit and power cord for physical damage. Do not use it if physical damage has occurred.
- Before plugging the unit into a power outlet, ensure that the outlet provides the same type and level of power required by the device.
- This device uses a grounded power cord and requires a ground connection for safe operation. Ensure that the power source has a proper ground connection. Do not modify the plug or use a "cheater" plug to bypass the ground connection.
- This device has no user-serviceable parts. Do not attempt to open, service, or modify this device.
- Do not look directly into the light source.
- Do not expose this device to excessively high temperatures. Do not place it in, on, or near a heat source, such as a fireplace, stove, radiator, etc. Do not leave it in direct sunlight.
- Do not place or install this device in an area where it can be exposed to excessive amounts of dust, humidity, oil, smoke, or combustible vapors.
- Do not obstruct the fan or vent openings. Ensure that the unit is properly ventilated.
- If the device will not be used for any lengthy period, it should be unplugged from the wall.
- Take care to prevent damage to the power cord. Do not allow it to become crimped, pinched, walked on, or become tangled with other cords. Ensure that the power cord does not present a tripping hazard.
- Never unplug the unit by pulling on the power cord. Always grasp the connector head or adapter body.
- Clean using a soft, dry cloth only. Do not use chemical cleaners, solvents, or detergents.
- For stubborn deposits, moisten the cloth with warm water.
- This device has no user-serviceable parts. Do not attempt to open, service, or modify this device.
- When installing this device, ensure that there are no flammable or combustible materials within about 2 feet on all sides. Ensure that there is at least 2 feet of clearance between the unit and the surface or object(s) being illuminated.
- This device should only be operated by qualified adults.
- In the event of a serious operating problem, stop using the unit immediately.
- Keep away from corrosive materials.
www.monoprice.com
Need Help? We're here for you!
Contact us: www.monoprice.com/contactus
Documents / ResourcesDownload manual
Here you can download full pdf version of manual, it may contain additional safety instructions, warranty information, FCC rules, etc.
Advertisement

Need help?
Do you have a question about the Stage Right Series and is the answer not in the manual?
Questions and answers