
Related Manuals for Beko DRYPOINT RX 550


Summary of Contents for Beko DRYPOINT RX 550
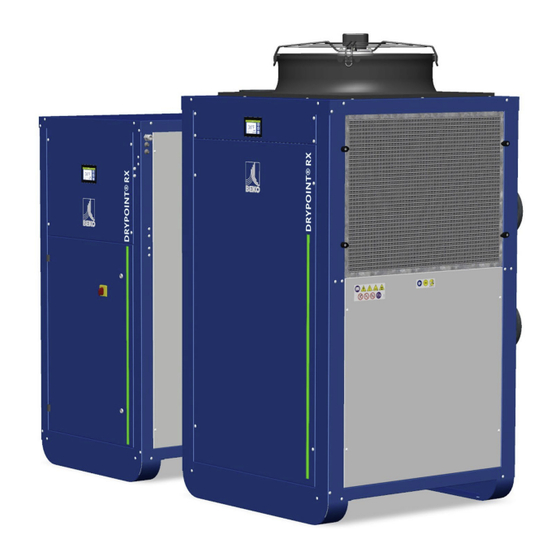
- Page 1 Installation and operating manual Compressed air refrigeration dryer DRYPOINT ® > 550 > 550 WC > 700 > 700 WC > 800 > 800 WC > 1000 > 1000 WC > 1300 > 1300 WC > 1500 > 1500 WC >...
-
Page 2: Table Of Contents
Installation and operating manual DRYPOINT ® Table of Contents Notes ............................6 Contact ..........................6 Information on the installation and operating manual ............7 Other applicable documents ....................7 Safety ............................8 Use ............................8 2.1.1 Intended use ..........................8 2.1.2 Reasonably foreseeable incorrect use .................. - Page 3 DRYPOINT ® Installation and operating manual Function description ......................29 3.2.1 Flow diagram, air-cooled models ................... 29 3.2.2 Flow diagram, water-cooled models ..................30 3.2.3 Compressed air flow ......................... 30 3.2.4 Refrigerating cycle ........................30 Type plate ...........................31 3.3.1 DRYPOINT RX type plate ....................... 31 ®...
- Page 4 Installation and operating manual DRYPOINT ® Electrical installation ......................55 Warning notices ......................... 55 Connections ........................57 7.2.1 External power supply....................... 58 7.2.2 WARNING / ALARM digital output ..................58 7.2.3 STANDBY – RUNNING digital output .................. 59 7.2.4 DEW POINT TEMPERATURE analogue output ..............60 7.2.5 Remote START-STOP digital input ..................
- Page 5 DRYPOINT ® Installation and operating manual Adjustments ..........................96 11.1 Warning notices ........................96 11.2 Adjustment ........................97 11.2.1 Adjustment of hot gas by-pass valve (models RX 550 … 1000) ........98 11.2.2 Adjustment of cooling water regulating valve, water-cooled models ......100 Spare parts .........................
-
Page 6: Notes
This documentation contains the necessary steps for using the product and accessories. Contact Manufacturer Customer service and tools BEKO TECHNOLOGIES CORP. BEKO TECHNOLOGIES CORP. 900 Great Southwest Pkwy SW | Atlanta, GA 30336 900 Great Southwest Pkwy SW | Atlanta, GA 30336 Tel. -
Page 7: Information On The Installation And Operating Manual
DRYPOINT ® Installation and operating manual Information on the installation and operating manual INFORMATION Copyright protection The contents of the installation and operating manual in the form of text, figures, illustrations, photographs, technical drawings, diagrams and other representations are protected by manufacturer copyright. The distribution and duplication of this document, exploitation and disclosure of its contents are prohibited unless expressly authorised. -
Page 8: Safety
• Combine the product and accessories with the products and components named and recommended by BEKO TECHNOLOGIES in the manual. • Comply with the prescribed maintenance schedules. Before using the product and accessories, the operating company must make sure that all conditions and prerequisites for intended use are met. -
Page 9: Reasonably Foreseeable Incorrect Use
DRYPOINT ® Installation and operating manual 2.1.2 Reasonably foreseeable incorrect use Reasonably foreseeable incorrect use is when the product or accessories are used in any other way than what described in section "2.1.1 Intended use" on page 8. Reasonably foreseeable incorrect use includes the use of the product or accessories in a manner unintended by the manufacturer or supplier but which may result from user behavior. -
Page 10: Target Group And Personnel
Installation and operating manual DRYPOINT ® Target group and personnel This manual addresses the personnel listed below who are involved with work on the product or accessories. INFORMATION Accessibility to the product This appliance is not intended for use by persons (including children) with reduced physical, sensory or mental capabilities, or lack of experience and knowledge, unless they have been given supervision or instruction concerning use of the appliance by a person responsible for their safety. - Page 11 DRYPOINT ® Installation and operating manual Skilled technical personnel - refrigeration engineering Skilled technical personnel specialising in refrigeration engineering have the training, professional experience, qualifications and the necessary skills to safely perform refrigerant fluid actions. They can instruct, detect possible dangerous situations independently and implement measures to avoid danger. Their skills include experience in handling refrigerant fluids, refrigerant circuits, measurement and control technology, and knowledge of local laws, standards and guidelines for refrigerant fluids technology.
-
Page 12: Explanation Of The Symbols
Installation and operating manual DRYPOINT ® Explanation of the symbols The symbols used below indicate safety-relevant and important information which must be followed when handling the product and ensure safe and optimum operation. Symbol Description / explanation General warning symbol (danger, warning, caution) Danger: pressurized system Danger: electric voltage Warning: hot surfaces... -
Page 13: Safety Instructions And Warning Notices
DRYPOINT ® Installation and operating manual Safety instructions and warning notices This section provides an overview of important safety aspects for personal protection, the safe and problem- free operation of the product and accessories. The following sections list the dangers posed by this product and accessories even if used correctly. To minimise the risk of personal injury and damage to property and avoid dangerous situations, follow the safety instructions and warning notices in the other sections of this manual. -
Page 14: Pressurized Systems
Installation and operating manual DRYPOINT ® 2.5.3 Pressurized systems The following may result in serious personal injury or death: • Contact with fast or suddenly escaping fluids. • Bursting system parts. • Whipping movements of pressurized hoses and pipes during separation. To safely handle pressurized systems, follow these instructions: •... -
Page 15: Transport And Storage
DRYPOINT ® Installation and operating manual 2.5.5 Transport and storage Incorrect transport or storage may result in personal injury or damage to property. For safe transport and storage of the product and accessories, follow these instructions: • Handle the packaging, product and accessories carefully. •... -
Page 16: Maintenance
Installation and operating manual DRYPOINT ® 2.5.7 Maintenance Improper performance of maintenance and repair work may result in serious personal injuries or death. For safe maintenance and repair, follow these instructions: • Before starting work, depressurise the product and accessories and secure them against unintentional pressurisation. -
Page 17: Handling Hazardous Substances
DRYPOINT ® Installation and operating manual 2.5.8 Handling hazardous substances Contact with condensate containing substances which endanger health and the environment can pose a health hazard, causing irritation or damage to the eyes, skin and mucous membranes. Polluted condensate must be prevented from entering the sewerage system, waters or the ground. To safely handle polluted condensate, follow these instructions: •... -
Page 18: Warning Notices
Installation and operating manual DRYPOINT ® Warning notices Warning notices warn against dangers when handling the product and accessories. To prevent accidents, personal injury and damage to property and impairments during operation, it is essential to comply with the warning notices. Structural set up: SIGNAL WORD Type and source of danger... -
Page 19: Product Information
DRYPOINT ® Installation and operating manual 3. Product information Product overview 3.1.1 DRYPOINT RX 550, 700 ® Pos. No. Description / explanation Pos. No. Description / explanation Heat exchanger [13] Condensate drain service valve High pressure switch HPS [17] User Interface Refrigerant compressor [21] Condensate drain... -
Page 20: Drypoint ® Rx 550, 700
Installation and operating manual DRYPOINT ® 3.1.2 DRYPOINT RX 550, 700 water-cooled ® Pos. No. Description / explanation Pos. No. Description / explanation Heat exchanger [18] Water condenser High pressure switch HPS [19] Water regulating valve Refrigerant compressor [21] Condensate drain Hot gas by-pass valve [22] ON-OFF switch... -
Page 21: Drypoint ® Rx 800
DRYPOINT ® Installation and operating manual 3.1.3 DRYPOINT RX 800 ® Pos. No. Description / explanation Pos. No. Description / explanation Heat exchanger [13] Condensate drain service valve High pressure switch HPS [17] User Interface Refrigerant compressor [21] Condensate drain Hot gas by-pass valve [22] ON-OFF switch... -
Page 22: Drypoint ® Rx 800
Installation and operating manual DRYPOINT ® 3.1.4 DRYPOINT RX 800 water-cooled ® Pos. No. Pos. No. Description / explanation Description / explanation Heat exchanger [18] Water condenser High pressure switch HPS [19] Water regulating valve Refrigerant compressor [21] Condensate drain Hot gas by-pass valve [22] ON-OFF switch... -
Page 23: Drypoint ® Rx 1000
DRYPOINT ® Installation and operating manual 3.1.5 DRYPOINT RX 1000 ® Pos. No. Description / explanation Pos. No. Description / explanation Heat exchanger [13] Condensate drain service valve High pressure switch HPS [17] User Interface Refrigerant compressor [21] Condensate drain Hot gas by-pass valve [22] ON-OFF switch... -
Page 24: Drypoint ® Rx 1000 Water-Cooled
Installation and operating manual DRYPOINT ® 3.1.6 DRYPOINT RX 1000 water-cooled ® Pos. No. Description / explanation Pos. No. Description / explanation Heat exchanger [18] Water condenser High pressure switch HPS [19] Water regulating valve Refrigerant compressor [21] Condensate drain Hot gas by-pass valve [22] ON-OFF switch... -
Page 25: Drypoint ® Rx 1300, 1500
DRYPOINT ® Installation and operating manual 3.1.7 DRYPOINT RX 1300, 1500 ® Pos. No. Pos. No. Description / explanation Description / explanation Heat exchanger [13] Condensate drain service valve High pressure switch HPS [17] User Interface Refrigerant compressor [21] Condensate drain Hot gas by-pass valve [22] ON-OFF switch... -
Page 26: Drypoint ® Rx 1300, 1500 Water-Cooled
Installation and operating manual DRYPOINT ® 3.1.8 DRYPOINT RX 1300, 1500 water-cooled ® Pos. No. Description / explanation Pos. No. Description / explanation Heat exchanger [18] Water condenser High pressure switch HPS [19] Water regulating valve Refrigerant compressor [21] Condensate drain Hot gas by-pass valve [22] ON-OFF switch... -
Page 27: Drypoint ® Rx 1700
DRYPOINT ® Installation and operating manual 3.1.9 DRYPOINT RX 1700 ® Pos. No. Pos. No. Description / explanation Description / explanation Heat exchanger [13] Condensate drain service valve High pressure switch HPS [17] User Interface Refrigerant compressor [21] Condensate drain Hot gas by-pass valve [22] ON-OFF switch... -
Page 28: Drypoint Rx 1700 Water-Cooled
Installation and operating manual DRYPOINT ® 3.1.10 DRYPOINT RX 1700 water-cooled ® Pos. No. Pos. No. Description / explanation Description / explanation Heat exchanger [18] Water condenser High pressure switch HPS [19] Water regulating valve Refrigerant compressor [21] Condensate drain Hot gas by-pass valve [22] ON-OFF switch... -
Page 29: Function Description
DRYPOINT ® Installation and operating manual Function description 3.2.1 Flow diagram, air-cooled models 29 | 128... -
Page 30: Flow Diagram, Water-Cooled Models
Installation and operating manual DRYPOINT ® 3.2.2 Flow diagram, water-cooled models 3.2.3 Compressed air flow The hot, humid air enters the heat exchanger [1], cools and reaches a temperature of approximately 36°F (2°C). At this temperature, the humidity present in the air changes to a liquid state, precipitates to the bottom of the exchanger [1] and is expelled through the automatic condensate drain [21]. -
Page 31: Type Plate
DRYPOINT ® Installation and operating manual Type plate 3.3.1 DRYPOINT RX type plate ® 31 | 128... -
Page 32: Scope Of Delivery
Installation and operating manual DRYPOINT ® Scope of delivery Illustration Description / explanation DRYPOINT ® Installation and operating manual 32 | 128... -
Page 33: Technical Data
DRYPOINT ® Installation and operating manual 4. Technical data Operating parameters INFORMATION Nominal conditions The nominal condition refers to an ambient temperature of 100°F (38°C) with inlet air at 100 psig (7 barg) and 100°F (38°C). INFORMATION Refrigerant quantity Refrigerant quantity stated below is the design value. The type plate records the quantity of refrigerant used in each device. - Page 34 Installation and operating manual DRYPOINT ® 4.1.1 DRYPOINT RX 550 … 700 ® DRYPOINT ® Parameter Unit scfm Air flow rate at nominal 1189 conditions 14716 19810 l/min 1.74 (0.12) 1.16 (0.08) Air pressure drop psi (bar) 2943 (5000) 2943 (5000) Cooling air fan flow cfm (m Cooling water flow...
-
Page 35: Drypoint ® Rx 800
DRYPOINT ® Installation and operating manual 4.1.2 DRYPOINT RX 800 … 1000 ® DRYPOINT ® Parameter Unit 1000 1000 scfm 1000 Air flow rate at nominal 1358 1698 conditions l/min 22640 28300 Air pressure drop psi (bar) 1.74 (0.12) 2.18 (0.15) Cooling air fan flow 5003 (8500) 5003 (8500) -
Page 36: Drypoint Rx 1300
Installation and operating manual DRYPOINT ® 4.1.3 DRYPOINT RX 1300 … 1500 ® DRYPOINT ® Unit Parameter 1300 1500 1300 1500 scfm 1300 1500 Air flow rate at nominal 2207 2547 conditions l/min 36790 42450 Air pressure drop psi (bar) 1.74 (0.12) 1.45 (0.10) Cooling air fan flow... -
Page 37: Drypoint Rx 1700
DRYPOINT ® Installation and operating manual 4.1.4 DRYPOINT RX 1700 ® DRYPOINT ® Unit Parameter 1700 1700 scfm 1700 Air flow rate at nominal 2887 conditions l/min 48110 Air pressure drop psi (bar) 1.74 (0.12) Cooling air fan flow 7652 (13000) cfm (m Cooling water flow 2.64 (4.48) -
Page 38: Correction Factors
Installation and operating manual DRYPOINT ® Correction factors Corrections factors (CF) Parameter Unit Value ≤ Ambient +89.6 +95.0 +100.4 +104.0 +109.4 +113.0 +122.0 °F +80.6 temperature (+32) (+35) (+38) (+40) (+43) (+45) (+50) (°C) (+27) 1.11 1.09 1.06 1.00 0.94 0.87 0.78 0.69... -
Page 39: Cooling Water Parameters, Water-Cooled Models
DRYPOINT ® Installation and operating manual Cooling water parameters, water-cooled models Parameter Unit Value Min. … max. water temperature °F +59.0 … +86.0 (°C) (+15 … +30) Min. … max. water pressure psi(g) 43.5 … 145.0 (bar(g)) (3 … 10) Required head pressure >... -
Page 40: Storage Parameters
Installation and operating manual DRYPOINT ® Storage parameters DRYPOINT ® Unit Parameter °F +33.8 … +122.0 Min. … max. temperature (°C) (+1 … +50) Relative humidity Max 80% without condensation Weight (kg) (188) (198) (206) (216) (223) (233) DRYPOINT ® Unit 1000 1300... -
Page 41: Materials
DRYPOINT ® Installation and operating manual Materials Component Material Housing and supports Structural steel, epoxy paint Refrigerant compressor Steel, copper, aluminium, oil Heat exchanger Aluminium Condenser Aluminium, copper, structural steel Pipes Copper Aluminium, copper, steel Valves Brass, steel BEKOMAT condensate drain Aluminium, plastic mix and electronics ®... -
Page 42: Dimensions
Installation and operating manual DRYPOINT ® Dimensions 4.6.1 DRYPOINT RX 550 … 1000 ® DRYPOINT ® Pos. No. Unit 1000 [X1] 30.51 (775) [X2] 5.43 (138) [X3] 7.83 (453) [Y1] 61.02 (1550) [Y2] 52.40 (1331) [Y3] 4.61 (117) in (mm) [Y4] 13.94 (354) [Y5]... -
Page 43: Drypoint Rx 1300
DRYPOINT ® Installation and operating manual 4.6.2 DRYPOINT RX 1300 … 1700 ® DRYPOINT ® Pos. No. Unit 1300 1500 1700 [X1] 37.68 (957) 6.69 (170) 8.07 (205) [X2] [X3] 24.80 (630) [Y1] 65.39 (1661) [Y2] 25.35 (644) 27.76 (705) in (mm) [Y3] 41.61 (1057) -
Page 44: Drypoint ® Rx 1300
Installation and operating manual DRYPOINT ® 4.6.3 DRYPOINT RX 1300 … 1700 water-cooled ® DRYPOINT ® Pos. No. Unit 1300 WC 1500 WC 1700 WC [X1] 37.68 (957) [X2] 6.69 (170) 8.07 (205) [X3] 24.80 (630) 65.39 (1661) [Y1] [Y2] 25.35 (644) 27.76 (705) [Y3]... -
Page 45: Connections
DRYPOINT ® Installation and operating manual Connections 4.7.1 DRYPOINT RX 550, 700 ® DRYPOINT ® Pos. Description / explanation Connection NPT 2” Sleeve connection, connection for compressed air inlet NPT 2” Sleeve connection, connection for compressed air outlet NPT 2 ½” Sleeve connection, connection for compressed air inlet NPT 2 ½”... -
Page 46: Drypoint Rx 800, 1000
Installation and operating manual DRYPOINT ® 4.7.2 DRYPOINT RX 800, 1000 ® DRYPOINT Pos. ® Connection Description / explanation ANSI 3” #150 Flanged connection, connection for compressed air inlet ANSI 3” #150 Flanged connection, connection for compressed air outlet 0.31 in Rubber hose, connection for condensate outlet (8 mm) M 20... -
Page 47: Drypoint ® Rx 1300
DRYPOINT ® Installation and operating manual 4.7.3 DRYPOINT RX 1300 … 1700 ® DRYPOINT Pos. ® Connection Description / explanation ANSI 3” #150 Flanged connection, connection for compressed air inlet 1300 ANSI 3” #150 Flanged connection, connection for compressed air outlet ANSI 4”... -
Page 48: Assembly Conditions
Installation and operating manual DRYPOINT ® Assembly conditions Observe the following conditions when setting up and selecting the installation location: • The location must be clean and dry, protected from direct sunlight, rain, frost, sources of heat and fire. Unlimited exchange of air and sufficient ventilation must be guaranteed, refer to section "4.8.1 Minimum distance from adjacent structure"... -
Page 49: Minimum Distance From Adjacent Structures
DRYPOINT ® Installation and operating manual 4.8.1 Minimum distance from adjacent structures CAUTION Cooling air re-circulation Re-circulation of cooling air may result in overheating and / or damage to the device . • Install an appropriate separating frame to separate the fresh air flow entering the condenser between the hot air flow exiting the dryer. -
Page 50: Transport And Storage
Installation and operating manual DRYPOINT ® 5. Transport and storage Warning notices WARNING Insufficient qualification If personnel carrying out work on the product and accessories are not properly qualified, this may result in accidents, personal injury and damage to property and impair operations. -
Page 51: Transport
DRYPOINT ® Installation and operating manual Transport NOTE Incorrect handling of the product Product damage might occur if it is not kept upright during transport. Heavy blows will cause irreparable damage. • Transport the product with care, in an upright position. Transporting Illustration Description / explanation... -
Page 52: Long Term Storage
Installation and operating manual DRYPOINT ® Storage NOTE Incorrect storage of the product Product damage might occur if it is not kept upright during transport. • Store the product in an upright position. NOTE Long term storage After a long storage period the device components and functioning must be checked by the manufacturer. -
Page 53: Assembly
DRYPOINT ® Installation and operating manual 6. Assembly Warning notices DANGER Incorrect spare parts, accessories or materials Using the incorrect spare parts, accessories or materials, and auxiliary and operating materials, may result in death or serious injury. Malfunctions, device failure and material damage can occur. •... -
Page 54: Assembly
Installation and operating manual DRYPOINT ® Assembly Assembly must be carried out while wearing the following protective equipment and after the preparatory tasks have been completed. Prerequisites Tools Material Protective equipment • • No tool necessary No material necessary Preparatory tasks Select and set up the place of installation under the specifications in section "4.8 Assembly conditions"... -
Page 55: Electrical Installation
DRYPOINT ® Installation and operating manual 7. Electrical installation Warning notices DANGER Incorrect spare parts, accessories or materials Using the incorrect spare parts, accessories or materials, and auxiliary and operating materials, may result in death or serious injury. Malfunctions, device failure and material damage can occur. - Page 56 Installation and operating manual DRYPOINT ® WARNING Insufficient qualification If personnel carrying out work on the product and accessories are not properly qualified, this may result in accidents, personal injury and damage to property and impair operations. • Work on the product and accessories must be carried out exclusively by skilled technical personnel specialising in electrical engineering.
-
Page 57: Connections
DRYPOINT ® Installation and operating manual Connections Electrical installation must be carried out while wearing protective equipment and after the preparatory tasks have been completed. Prerequisites Tools Material Protective equipment • • No tool necessary No material necessary Preparatory tasks A 3ph+E protective contact socket or a terminal box must be installed within reach of the installation location. -
Page 58: External Power Supply
Installation and operating manual DRYPOINT ® 7.2.1 External power supply NOTE Wrong phase sequence An incorrect phase sequence of L1, L2, L3 will prevent the product from starting. • Phases L1, L2, L3 must be connected to the device with correct phase sequence. -
Page 59: Standby - Running Digital Output
DRYPOINT ® Installation and operating manual 7.2.3 STANDBY – RUNNING digital output NOTE STANDBY – RUNNING digital output failure The STANDBY – RUNNING contact is a potential-free NO contact. Using the contact with unsuitable voltages and currents will cause its failure. •... -
Page 60: Dew Point Temperature Analogue Output
Installation and operating manual DRYPOINT ® 7.2.4 DEW POINT TEMPERATURE analogue output Connections Illustration Description / explanation 1. Guide a two-wires shielded signal cable through the arranged rubber grommet on the product. 2. Product side: connect the cable to the connector M9 [AO3] DEW POINT of the Electronic Control Unit. -
Page 61: Remote Reset Digital Input
DRYPOINT ® Installation and operating manual 7.2.6 Remote RESET digital input NOTE Remote electrical contact Using an unsuitable remote electrical contact may cause operating malfunctions. • Use a clean remote contact suitable for low voltage applications and free from any electrical potential. •... -
Page 62: Usb Memory Stick For Data Log Storage
Installation and operating manual DRYPOINT ® 7.2.7 USB memory stick for data log storage Connections Illustration Description / explanation 1. Insert a formatted USB memory stick into the USB slot located on the back side of the User Interface. 7.2.8 Remote management, Modbus RTU data signal INFORMATION Modbus RTU installation and configuration... -
Page 63: Commissioning
DRYPOINT ® Installation and operating manual 8. Commissioning Warning notices DANGER Operation outside the permissible limit Operation of the product or accessories outside the permissible limits and operating parameters, unauthorised work and modifications may result in death or serious injury. •... -
Page 64: Initial Commissioning
Installation and operating manual DRYPOINT ® Initial commissioning Initial commissioning must be carried out while wearing protective equipment and after the preparatory tasks have been completed. Prerequisites Tools Material Protective equipment • • No tool necessary No material necessary NOTE Refrigerant compressor failure Starting the product with the refrigeration compressor oil still cold can irreparably damage the refrigeration compressor. - Page 65 DRYPOINT ® Installation and operating manual Preparatory tasks Product assembly must be complete. Compressed air inlet/outlet valves must be closed. Electrical installation of the product must be complete. Section "3.1 Product overview" on page 19 must be read and applied. The condensate drain service valve must be open.
-
Page 66: Operation
Installation and operating manual DRYPOINT ® 9. Operation Warning notices DANGER Operation outside the permissible limit Operation of the product or accessories outside the permissible limits and operating parameters, unauthorised work and modifications may result in death or serious injury. •... -
Page 67: Overview Of User Interface After Power On
DRYPOINT ® Installation and operating manual Overview of User Interface after power ON Pos. No. Description / explanation Pos. No. Description / explanation Device status and notification area START-STOP button CONDENSATE DRAIN TEST Current date and time button Dew point temperature area FUNCTIONS MENU button Operate on the User Interface For product operation, preparatory tasks must have been completed. -
Page 68: Normal Running Status
Installation and operating manual DRYPOINT ® 9.4.1 Normal running status INFORMATION Dew point value A dew point between 32°F (0°C) and 50°F (10°C) displayed on the User Interface is considered to be correct under the possible operating conditions, e.g. flow rate, air inlet temperature, ambient temperature, etc. -
Page 69: Stopping And Starting
DRYPOINT ® Installation and operating manual 9.4.2 Stopping and starting INFORMATION Delayed starting function The device has a delayed start function to avoid frequent start/stop cycles which could damage the refrigerant compressor. The start delay occurs: • After the User Interface boots up following the device being switched on. •... -
Page 70: Condensate Drain Test
Installation and operating manual DRYPOINT ® 9.4.3 Condensate drain test INFORMATION Condensate drain test The condensate drain test can be performed at any time, regardless of the device status and any display indication. Illustration Description / explanation Condensate drain test 1. -
Page 71: Actual Process Values, Data Logger, Data Recording
DRYPOINT ® Installation and operating manual 9.4.4 Actual process values, data logger, data recording Illustration Description / explanation Actual process values 1. With the device in normal running status, press the FUNCTIONS MENU button [1] to access the functions menu screen. 2. - Page 72 Installation and operating manual DRYPOINT ® Illustration Pos. No. Pos. No. Description / explanation Description / explanation T1 – Dew point temperature. [10] HP – Pressure of refrigerant fluid at compressor discharge side. T2 – Air temperature at heat [11] Opening percentage of hot gas exchanger inlet side.
- Page 73 DRYPOINT ® Installation and operating manual Description / explanation Process values history screen Graphical and numerical representation of actual process values for the last 60 minutes of device operation. Stored values shifted out the last 60 minutes are lost. 1. Use buttons T1 [16], T2 [17], T3 [18], T4 [19], T5 [20], HP [21], LP [22], EHGBV [23], FAN [24] to show / hide the corresponding traces on the graph.
- Page 74 Installation and operating manual DRYPOINT ® Description / explanation 3. The User Interface shows the time remaining to the end of recording. 4. To manually stop the recording, press the STOP DATA RECORDING button [32]. 5. Stop the recording by pressing the CONFIRM button [31] or abort the command pressing EXIT [30].
-
Page 75: Warning Status
DRYPOINT ® Installation and operating manual 9.4.5 WARNING status A WARNING is an anomalous event related to a device malfunction. WARNINGS do not compromise device functioning or operator safety. NOTE WARNING status With the device in WARNING status the compressed air treatment may be incorrect. - Page 76 Installation and operating manual DRYPOINT ® WARNING Code Description / explanation Low Dew Point High Dew Point Probe Fault T2 Probe Fault T3 Drainer W5 Dn nn Drainer, specific faults Programmed Service High Discharge Temperature High Evaporating Pressure Low Condensing Pressure High Condensing Pressure Low Ambient Temperature High Ambient Temperature...
-
Page 77: Alarm Status
DRYPOINT ® Installation and operating manual 9.4.6 ALARM status An ALARM is an anomalous event related to a device malfunction or fault. An ALARM stops the device to ensure device and operator safety. NOTE ALARM status With the device in ALARM status the compressed air will not be treated. •... -
Page 78: Alarm Code
Installation and operating manual DRYPOINT ® ALARM Code Description / explanation High Pressure Switch Low Pressure Switch Low Evaporating Pressure High Discharge Temperature Compressor protection Probe Fault LP Probe Fault HP Probe Fault T1 Probe Fault T4 Low Differential Pressure High Evaporating Pressure Low condensing Pressure Reversed Phases... -
Page 79: Alarm History
DRYPOINT ® Installation and operating manual 9.4.7 ALARM history Illustration Description / explanation ALARM history 1. With the device stopped or in normal running status, press the FUNCTIONS MENU button [1] to access the functions menu screen. 2. Press the ALARM HISTORY button [2] to access the alarm history file screen. - Page 80 Installation and operating manual DRYPOINT ® Illustration Description / explanation 4. Use the CURSOR UP and CURSOR DOWN buttons [4, 5] to scroll the chronological list of ALARMS. ALARM history download To download the ALARM history, a USB memory stick must be installed by maintenance personnel.
-
Page 81: Remote Mode
DRYPOINT ® Installation and operating manual 9.4.8 Remote mode INFORMATION Device behavior in remote mode • The device starts and stops by a remote command without any preliminary signalling on the local User Interface. • Operations not permitted on the local User Interface: •... -
Page 82: Operating Hours And Maintenance Timer
Installation and operating manual DRYPOINT ® 9.4.9 Operating hours and maintenance timer Illustration Description / explanation Operating hours and maintenance timer 1. With the device stopped or in normal running status, press the FUNCTIONS MENU button [1] to access the functions menu screen. -
Page 83: System Settings And Automatic Start/Stop Weekly Timer
DRYPOINT ® Installation and operating manual 9.4.10 System settings and automatic start/stop weekly timer Illustration Description / explanation System settings and automatic start/stop weekly timer 1. With the device stopped or in normal running status, press the FUNCTIONS MENU button [1] to access the functions menu screen. - Page 84 Installation and operating manual DRYPOINT ® Illustration Description / explanation 7. Touch the screen to set the automatic start / stop time for the device. The set running time is highlighted by coloring the selected areas in green or blue. 8.
-
Page 85: Device Spare Parts List
DRYPOINT ® Installation and operating manual 9.4.11 Device spare parts list Illustration Description / explanation Device spare parts list 1. With the device stopped or in normal running status, press the FUNCTIONS MENU button [1] to access the functions menu screen. 2. -
Page 86: User Parameters
Installation and operating manual DRYPOINT ® Illustration Description / explanation 4. Use the CURSOR UP and CURSOR DOWN buttons [4, 5] to scroll the spare parts list. Spare parts list download To download the spare parts list, a USB memory stick must be already installed by maintenance personnel. - Page 87 DRYPOINT ® Installation and operating manual Value Default Code Accuracy Description / explanation range value Time drain ON Condensate drain, solenoid valve activation 0 … 20 time. seconds 0 = BEKOMAT drain installed ® Time drain OFF 0 … 20 Toff Condensate drain, solenoid valve pause minutes...
- Page 88 Installation and operating manual DRYPOINT ® Value Default Code Description / explanation Accuracy range value Auto Restart Automatic restart after a voltage drop NO = device must be intentionally NO, YES restarted YES = device restarts automatically, if it was running before voltage drop Auto Reset service drain Enables / disables the automatic clearing of W5 Warning...
- Page 89 DRYPOINT ® Installation and operating manual Advanced parameters, protected by security PIN Value Default Code Accuracy Description / explanation range value Reset by Password Clearing WARNINGS / ALARMS NO = clearing allowed locally (by User NO, YES (*2) Interface) and remotely YES = clearing allowed locally (by User Interface) Number of Alarms...
- Page 90 Installation and operating manual DRYPOINT ® Illustration Description / explanation Parameter modification 1. With the device stopped or in normal running status, press the FUNCTIONS MENU button [1] to access the functions menu screen. 2. Press the PROCESS PARAMETERS button [2] to access the user parameters screen.
-
Page 91: Modbus Function
DRYPOINT ® Installation and operating manual Illustration Description / explanation ADVANCED PROCESS PARAMETERS button 8. Press the ADVANCED PROCESS PARAMETERS button [9] to access the advanced parameters screen. To avoid incorrect operations, the access is protected by a security PIN. PROCESS VALUES HISTORY button 9. -
Page 92: Maintenance
Installation and operating manual DRYPOINT ® 10. Maintenance 10.1 Warning notices DANGER Pressurized system There is a danger of death or serious personal injury resulting from contact with fast or suddenly escaping fluids or bursting system parts. • Before starting work, depressurise the system and secure it against unintentional pressurisation. -
Page 93: Hot Surfaces
DRYPOINT ® Installation and operating manual WARNING Refrigerant fluid The incorrect handling of refrigerant fluid may result in serious injury. Malfunctions, device failure and environment damage can occur. Refer to the product type plate for the type and amount of refrigerant fluid in the product. •... -
Page 94: Maintenance
Installation and operating manual DRYPOINT ® 10.2 Maintenance Maintenance must be carried out while wearing the following protective equipment and after the preparatory tasks have been completed. Prerequisites Tools Material Protective equipment • • No tool necessary No material necessary Preparatory tasks The procedure on section "13 Decommissioning"... -
Page 95: Maintenance Timer Reset
DRYPOINT ® Installation and operating manual 10.2.1 Maintenance timer reset Illustration Description / explanation Maintenance timer reset 1. With the device stopped or in normal running status, press the FUNCTIONS MENU button [1] to access the functions menu screen. 2. Press the OPERATING HOURS button [2] to access the information screen. -
Page 96: Adjustments
Installation and operating manual DRYPOINT ® 11. Adjustments 11.1 Warning notices DANGER Pressurized system There is a danger of death or serious personal injury resulting from contact with fast or suddenly escaping fluids or bursting system parts. • Set up a safety area around the working area during assembly, installation, maintenance and repair work. -
Page 97: Adjustment
DRYPOINT ® Installation and operating manual WARNING Hot surfaces Contact with hot surfaces during work on the product and accessories can lead to burns, accidents and personal injury. • Pay attention to the hot surfaces during adjustment work. WARNING Insufficient qualification If personnel carrying out work on the product and accessories are not properly qualified, this may result in accidents, personal injury and damage to property and impair operations. -
Page 98: Adjustment Of Hot Gas By-Pass Valve (Models Rx 550
Installation and operating manual DRYPOINT ® 11.2.1 Adjustment of hot gas by-pass valve (models RX 550 … 1000) NOTE Schrader service valve Each time a pressure gauge is connected to the Schrader service valve, a part of refrigerant fluid is discharged in the environment. •... - Page 99 DRYPOINT ® Installation and operating manual Preparatory tasks The device is stopped. Inlet / outlet air valves must be closed. Compressed air must not flow into the heat exchanger. Remove service panels. A low pressure gauge must be connected to the Schrader service valve on the low pressure side of refrigerant circuit.
-
Page 100: Adjustment Of Cooling Water Regulating Valve, Water-Cooled Models
Installation and operating manual DRYPOINT ® 11.2.2 Adjustment of cooling water regulating valve, water-cooled models NOTE Schrader service valve Each time a pressure gauge is connected to the Schrader service valve, a part of refrigerant fluid is discharged in the environment. •... - Page 101 DRYPOINT ® Installation and operating manual Final tasks Disconnect the high pressure gauge from the refrigerant circuit. Reinstall the service panels. Slowly open the air inlet valve. Slowly open the air outlet valve. 101 | 128...
-
Page 102: Spare Parts
• Serial number (see type plate) • Material number and part designation • Required quantity of parts to be delivered The contact data for BEKO TECHNOLOGIES customer service are listed in section "1.1 Contact" on page 6. 102 | 128... -
Page 103: Spare Parts
DRYPOINT ® Installation and operating manual 12.2 Spare parts INFORMATION Callouts Callouts [#] mentioned below are included in section "3.1 Product overview" on page 19. Designation Heat exchanger High pressure switch HPS Refrigerant compressor Hot gas by-pass valve Condenser Cooling fan [10] Refrigerant fluid filter [12]... -
Page 104: Decommissioning
Installation and operating manual DRYPOINT ® 13. Decommissioning The product must be decommissioned during longer periods of standstill, for example: • Product or accessory maintenance. • Longer standstill of the system due to planned work (e.g. conversion work, major repairs, system decommissioning). -
Page 105: Decommissioning
DRYPOINT ® Installation and operating manual 13.2 Decommissioning Decommissioning must be carried out while wearing the following protective equipment. Prerequisites Tools Material Protective equipment • • No tool necessary No material necessary Decommissioning Slowly close the air inlet valve and secure it against unintentional opening. Slowly close the air outlet valve and secure it against unintentional opening. -
Page 106: Disassembly
Installation and operating manual DRYPOINT ® 14. Disassembly 14.1 Warning notices DANGER Pressurized system There is a danger of death or serious personal injury resulting from contact with fast or suddenly escaping fluids or bursting system parts. • Set up a safety area around the working area before starting work. •... - Page 107 DRYPOINT ® Installation and operating manual WARNING Insufficient qualification If personnel carrying out work on the product and accessories are not properly qualified, this may result in accidents, personal injury and damage to property. • Work on the product and accessories must be carried out exclusively by skilled technical personnel specialising in refrigeration engineering and customer service.
-
Page 108: Disassembly
Installation and operating manual DRYPOINT ® 14.2 Disassembly Disassembly must be carried out while wearing the following protective equipment and after the preparatory tasks have been completed. Prerequisites Tools Material Protective equipment • • No tool necessary No material necessary Preparatory tasks The procedure on section "13 Decommissioning"... -
Page 109: Disposal
DRYPOINT ® Installation and operating manual 15. Disposal 15.1 Warning notices NOTE Incorrect disposal Incorrect disposal of components, parts, operating and auxiliary materials, refrigerant fluid and cleaning media can cause environmental damage. • Dispose of components, parts, operating and auxiliary materials, refrigerant fluid and cleaning media properly and under national and local applicable regulations and standards. -
Page 110: Disposal Of Materials And Components
Installation and operating manual DRYPOINT ® 15.2 Disposal of materials and components Disposal must be carried out while wearing the following protective equipment and after the preparatory tasks have been completed. Prerequisites Tools Material Protective equipment • • No tool necessary No material necessary Preparatory tasks The procedure on section "14 Disassembly"... - Page 111 DRYPOINT ® Installation and operating manual Component Material Waste code Device (with or without refrigerant fluid) Refrigerant fluid Refrigerant compressor (sealed, with oil included) Refrigerant fluid filter (sealed) Refrigerant circuit tubes Copper Condenser (tubes) Condenser (frame) Fan grid Iron / carbon steel Hot gas by-pass valve Panels, mounting frame, supports, screws Heat exchanger...
-
Page 112: Troubleshooting
If there are any malfunctions / faults which are not described here, malfunctions which cannot be acknowledged / eliminated or other related questions, contact BEKO TECHNOLOGIES customer service. Refer to section "1.1 Contact" on page 6. 112 | 128... -
Page 113: Warnings And Alarms
DRYPOINT ® Installation and operating manual 16.1 Warnings and alarms 16.1.1 Clearing a WARNING Illustration Description / explanation 1. Refer to section "9.4.5 WARNING status" on page 75. 2. Fix the cause which has triggered the WARNING. 3. The User Interface notification area stops flashing and turns permanently orange. - Page 114 Delay: 20 minutes Compressed air line is Pressurise the compressed air depressurized. line. W5 Dn nn Condensate drain specific Consult BEKO TECHNOLOGIES malfunction. Drainer, specific faults W6 – Programmed Service Trigger: SrV value Refer to section "10.2 The maintenance time is expired.
- Page 115 DRYPOINT ® Installation and operating manual WARNING code – Text Cause Action Refer to section "16.2 Specific W9 – Low Condensing Pressure Transducer BHP, the condensing malfunctions" on page 121, Trigger: variable pressure of the refrigerant fluid is "Transducer BHP, condensing Reset: variable too low.
-
Page 116: Clearing An Alarm
Installation and operating manual DRYPOINT ® 16.1.2 Clearing an ALARM Illustration Description / explanation 1. Refer to section "9.4.6 ALARM status" on page 77. 2. Fix the cause which has triggered the ALARM. 3. The User Interface notification area stops flashing and turns permanently red. - Page 117 DRYPOINT ® Installation and operating manual Illustration Description / explanation ALARM history download To download the ALARM history, a USB memory stick must be installed by maintenance personnel. Refer to section "7.2.7 USB memory stick for data log storage" on page 62. 7.
- Page 118 Installation and operating manual DRYPOINT ® ALARM code - Text Cause Action A1 – High Pressure Switch High Pressure Safety Switch Refer to section "16.2 Specific Trigger: DI HPS open (HPS), the pressure of the malfunctions" on page 121, "High refrigerant fluid has reached the Pressure Safety Switch (HPS) has Reset: DI HPS closed...
- Page 119 DRYPOINT ® Installation and operating manual ALARM code - Text Cause Action Transducer BLP, defective or Replace the transducer. A7 – Probe Fault LP faulty. Trigger: BLP fault The electrical wiring between Reset: BLP reset transducer BLP and the Restore the electrical wiring. Electronic Control Unit is Delay: none interrupted.
- Page 120 Installation and operating manual DRYPOINT ® ALARM code – Text Cause Action A11 – Low Differential Pressure Refer to section "16.2 Specific Transducers BHP and BLP, low malfunctions" on page 121, Trigger: ∆p < 36.3 psi(g) (2.5 bar(g) differential pressure between HP "Transducers BHP and BLP, low Reset: ∆p ≥...
-
Page 121: Specific Malfunctions
DRYPOINT ® Installation and operating manual 16.2 Specific malfunctions Specific Cause Action malfunction Probe BT1 does not detect the Check / place the probe back in its temperature correctly. correct position. See "The refrigerant compressor The refrigerant compressor stopped. stopped" specific malfunction. The ambient temperature is too high or ventilation is insufficient. - Page 122 Installation and operating manual DRYPOINT ® Specific Cause Action malfunction Probe BT4 does not detect the Check / place the probe back in its temperature correctly. correct position. Excessive thermal load. The inlet compressed air temperature is too high. Restore the nominal operating The inlet compressed air flow rate is conditions.
- Page 123 DRYPOINT ® Installation and operating manual Specific Cause Action malfunction The ambient temperature is too low or the device is installed in a windy area. Restore the nominal operating conditions. The cooling water temperature is too low, water-cooled models. Refer to section "11.2.2 Transducer BHP, The cooling water regulating valve is out refrigerant fluid...
- Page 124 Installation and operating manual DRYPOINT ® Specific Cause Action malfunction The ambient temperature is too low or the device is installed in a windy area. Restore the nominal operating conditions. The cooling water temperature is too low, water-cooled models. Refer to section " Adjustment of cooling water regulating Transducers BHP The cooling water regulating valve is out...
- Page 125 DRYPOINT ® Installation and operating manual Specific Cause Action malfunction The cooling fan There is a refrigerant circuit leak. Repair the refrigerant circuit. stopped, without The electrical wiring is interrupted. Restore the electrical wiring. any warning / alarm Transducer BHP is defective. Replace the transducer.
-
Page 126: Notes
Installation and operating manual DRYPOINT ® 17. Notes 126 | 128... - Page 127 DRYPOINT ® Installation and operating manual 127 | 128...
- Page 128 Installation and operating manual DRYPOINT ® 128 | 128...
Need help?
Do you have a question about the DRYPOINT RX 550 and is the answer not in the manual?
Questions and answers