Advertisement
Overview
Batteries provide the overall power source for the complete vehicle, it's the heart of our electric vehicles.

Emergency Handling
- In the rare case of an emergency, leave the vehicle quickly and call for the appropriate help according to the situation.
- To ensure the safety of all passengers, carry out the following operations:
- If the battery wiring harness is on fire, use carbon dioxide or a dry powder fire extinguisher to extinguish the fire. For best results dousing a Lithium-LifePO4 fire, use a foam extinguisher, CO2, ABC dry chemical, powdered graphite, copper powder, or soda (sodium carbonate) as you would extinguish other combustible fires. Call your local fire department immediately.
- Call your local fire department immediately.
- If smoke is inhaled, get the affected person to a doctor as soon as possible.
- Notify your dealership of the incident or contact Venom EV.

- While working with a lithium-LifePO4 battery wear protective eyeglasses and clothing.
- Observe these instructions and keep them located near the battery for future use. Read, understand, and comply with all warnings and instructions.
- Batteries must not be mixed with domestic or industrial waste.
- Do not touch any electrical components without any insulation protection.
- Explosion and fire hazard. The terminals of a Lithium-LifePO4 battery are always alive, therefore do not place metallic items or tools on top of a Lithium-LifePO4 battery. Avoid short circuits.
- Do not open or dismantle the battery. Electrolyte is very corrosive. If the battery casing is damaged do not touch the exposed electrolyte or powder because it is corrosive.
- Batteries marked with the recycling symbol must be processed via a recognized recycling agency.

OPERATE THE VEHICLE ONLY FROM THE DRIVERS SEAT.
OPERATE THE VEHICLE ONLY IN SPECIFIED AREAS.
ONLY AN AUTHORIZED LICENSED DRIVER CAN OPERATE THE VEHICLE.
ONLY OPERATE THE VEHICLE IN COMPLIANCE WITH LOCAL AND STATE LAWS.
USE CAUTION WHEN OPERATING THE VEHICLE IN THE PRESENCE OF HIGHER-SPEED VEHICLES, IN CONGESTED AREAS, OR ON UNIMPROVED SURFACES.

OPERATING THE VEHICLE WHILE OCCUPANTS ARE NOT FULLY SEATED CAN CAUSE SERIOUS PERSONAL INJURY OR DEATH. START THE VEHICLE ONLY WHEN ALL OCCUPANTS ARE FULLY SEATED.
FALLING OBJECTS CAN CAUSE PROPERTY DAMAGE, SERIOUS PERSONAL INJURY, OR DEATH.
DO NOT OPERATE THE VEHICLE WHERE THERE IS A RISK OF FALLING OBJECTS.
DO NOT LET PASSENGERS RIDE IN THE VEHICLE OR TRAILER BEING TOWED.

KEEP AWAY FROM DROP-OFFS, STEEP SLOPES, AND UNSTABLE SURFACES.
SUDDEN STARTS, STOPS, AND TURNS CAN CAUSE PROPERTY DAMAGE AND SERIOUS PERSONAL INJURY.
FAILURE TO CORRECTLY MAINTAIN THE VEHICLE AND MAKE NECESSARY REPAIRS CAN DECREASE VEHICLE PERFORMANCE, CAUSE A FIRE, PROPERTY DAMAGE, SERIOUS PERSONAL INJURY, OR DEATH.
IF PROBLEMS ARE FOUND DURING SCHEDULED INSPECTION OR SERVICE, OPERATE THE VEHICLE ONLY WHEN REPAIRS ARE MADE.
MAKE SURE THAT ALL PASSENGERS CAN SECURE THEMSELVES IN THE VEHICLE BEFORE VEHICLE OPERATION.
TO PREVENT SERIOUS PERSONAL INJURY, KEEP ENTIRE BODY IN THE VEHICLE DURING OPERATION.
THE VEHICLE IS NOT SPECIALLY EQUIPPED FOR HANDICAPPED PERSONS.
BEFORE VEHICLE OPERATION, MAKE SURE THAT ALL PERSONS COMPLY WITH THE WARNINGS AND OPERATING INSTRUCTIONS.
INCORRECT OPERATION OF THE VEHICLE CAN CAUSE DECREASED VEHICLE PERFORMANCE, PROPERTY DAMAGE, SERIOUS PERSONAL INJURY, OR DEATH.
TO PREVENT FALLS FROM THE VEHICLE, PASSENGERS MUST STAY SEATED AND ALWAYS HOLD ON TO HAND HOLDS OR HANDRAILS AND WEAR SEAT BELTS WHEN THE VEHICLE IS IN OPERATION.
THE DRIVER MUST KEEP BOTH HANDS ON THE STEERING WHEEL WHEN THE VEHICLE IS IN OPERATION.
A SHARP TURN AT HIGH SPEEDS CAN CAUSE A ROLL-OVER, FALL, PROPERTY DAMAGE, AND SERIOUS PERSONAL INJURY. OPERATE THE VEHICLE SLOWLY IN TURNS.
UNINTENDED VEHICLE OPERATION CAN CAUSE SERIOUS PERSONAL INJURY OR DEATH.
BEFORE LEAVING THE VEHICLE OR DURING VEHICLE MAINTENANCE, DISABLE THE VEHICLE.
THE VEHICLE IS NOT DESIGNED TO MEET CHILD SAFETY SEAT COMPATIBILITY REQUIREMENTS. CHILDREN REQUIRING A CHILD SAFETY SEAT MUST NOT RIDE ON THE VEHICLE.
COMPLY WITH STATE AND LOCAL LAWS PERTAINING CHILD SAFETY.
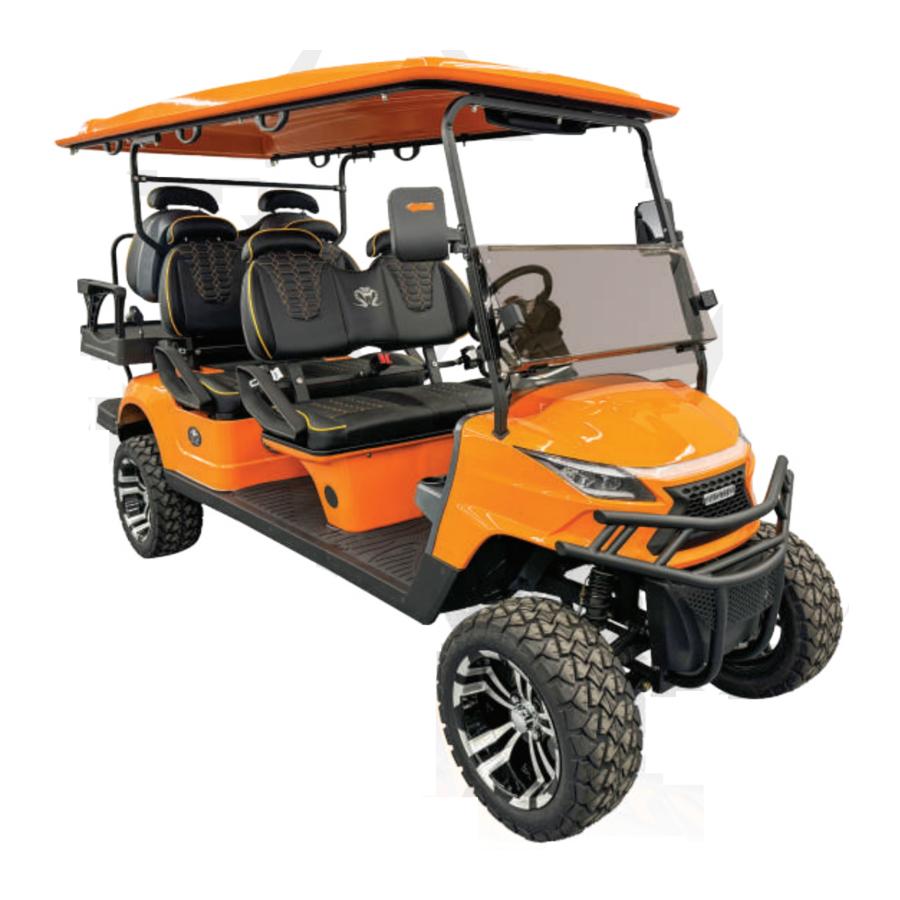
TECHNICAL PARAMETERS
THE HEART OF OUR CART:
52 V (FJ controller)
100 Ah Lithium Battery
KDS motor(5 kW)
Max Sale Speed: 25 Mph
Vehicle-Load Charger: 52 V
Dash includes phone charging port
| SIZE MATTERS | ||
| 2-Passenger | 4-Passenger | 6-Passenger |
| Length: 98" | Length: 119" | Length: 144" |
| Width Lifted: 51" Height Lifted: 81" Tire Size: 22x10-14 | Width Lifted: 51" Height Lifted: 81" Tire Size: 22x10-14 | Width Lifted: 51" Height Lifted: 81" Tire Size: 22x10-14 |
| Width Non-Lifted: 51" Height Non-Lifted: 76.5" Tire Size: 215/35-14 | Width Non-Lifted: 51" Height Non-Lifted: 76.5" Tire Size: 215/35-14 | Width Non-Lifted: 51" Height Non-Lifted: 76.5" Tire Size: 215/35-14 |
| Minimum Turning Radius: 139.79" Maximum Gradeability: 20% Minimum Ground Clearance: 6.25" | Minimum Turning Radius: 165.35" Maximum Gradeability: 15% Minimum Ground Clearance: 6.25" | Minimum Turning Radius: 204.72" Maximum Gradeability: 15% Minimum Ground Clearance: 6.25" |
CONTROL MECHANISM

OPERATING PROCEDURES
Pre-Operation Safety & Performance Inspection
Use the pre-operation checklist to inspect the operational conditions and performance of the vehicle. If bad operational conditions are found on a vehicle, stop operations. Removal from operation can prevent further damage to the vehicle or serious injuries. If the vehicle is not in an operateable condition, inquire your dealer for maintenance or repairs.
| RE-OPERATION CHECKLIST | |
| INSPECTION ITEMS | INSPECTION PROCEDURES |
| Battery | Before initially using vehicle, the batteries should be fully charged. |
| Brake | Check the brake pedal. When it is stepped on, it should be flexible and feel firm. It should return to its original position with flexibility when released. |
| Accelerator Pedal | Check the accelerator pedal. When it is stepped on and released, it should return to its original position with full flexibility |
| Tires | Check the tires' pressure. Pressure should be around 20 psi. Check the tires' surface, remove any embedded objects you can find. Be sure there are no cracks or other damage to the tires. Defective tires may cause an accident while driving. |
| Steering | Pull the steering wheel up and down, check the tightness of steering wheel. Rotate the steering wheel right and left. Be sure no excessive free play is felt or rattling heard. |
| Reverse Warning Beeper | Check the reverse beeper, when the direction selecting switch is toggled downward, the reverse gear is engaged, and a beep should be heard. |
| Lights | Check the signal lights, the brake lights, and turning lights should be in proper working condition. |
Always check your surroundings prior to starting your cart as well as before moving.
POWER-ON PROCEDURES
- Press the Vehicle Power Button
- Turn the key in the ignition switch away from the driver
- Check your surroundings and press the forward or reverse switch
- Release the parking brake by lightly pressing the accelerator pedal and slowly press the accelerator pedal and the vehicle will move
POWER-OFF PROCEDURES
- Turn the vehicle key into the off position
- You can eject t he power button, located on the dash of your cart. Turning the power button off will disconnect the relay switch, and your cart will not operate until the power button is inserted again.
The forward and backward switch must be in neutral position (not in forward or reverse), otherwise the vehicle will not be to move.
If you step on the accelerator pedal first and then engage the Ignition Switch, the vehicle will not move. You must release the brake pedal, and then step on the accelerator pedal again before the vehicle is able to move.
Failure to operate the vehicle as instructed can cause collision, loss of control or roll over, resulting in severe injury or death. Follow all safety warnings or labels in this owner manual. All operators must read, understand, and comply with these warnings and labels before operating the vehicles. Follow the safety information and operating procedures described.
LCD SCREEN FUNCTIONALITIES

Note: You can also control the volume but dragging your finger on the sound level bar, displayed on the top of the screen, after pressing the +/- icon.
 | IGNITION SWITCH
FORWARD & REVERSE SWITCH |
 | ACCELERATOR PEDAL BRAKE PEDAL |
 | STEERING WHEEL INSTRUMENT CLUSTER |
 | TURN SIGNAL SWITCH
|
Charger LED Display
| LED LIGHTS | INDICATION | |
 | Red LED Light Flashing | Charging |
 | Solid Green Light | Charge Completely |
 | Red & Green Light Flash in Order | Refer to the troubleshooting table |
How to Use Charger

TO DECREASE THE POSSIBILITY OF ELECTRICAL SHOCK OR ELECTROCUTION, MAKE SURE THE CHARGER PLUG IS NOT DAMAGED. THE POWER AC CORD HAS A PLUG WITH GROUND POST. DO NOT MOVE, CUT OR BEND THE GROUND POST.
- Inspect the charger cord to check if there is broken or damage to the power AC cord.
- Plug the AC charge handle into the vehicle receptacle completely.
- Plug the Power AC cord into the ground power completely.
- The charger will automatically start in several seconds after plugging in the AC power cord.
- The charger will automatically stop when the batteries are fully charged.
- Remove the AC charge cord before operating the vehicle.

- Ensure that your vehicle keys are in the off position, the cart will not charge if the key is in the "on position".
- Charge in a safe environment, such as avoiding extreme heat and water damage.
- Only use the charger that came at the time of purchase with your cart, that matches your model. Contact an authorized Venom dealer to obtain or replace parts.
- It is recommended to have an extinguishing device where you are storing or charging your cart, to safely respond to extreme circumstances. extinguishing devices around it so that emergency fire extinguishing treatment can be carried out in extreme circumstances.
System Power-On & Power-Off Procedures
Power-on procedure:
Press the vehicle power button located on the dash of your vehicle. After a brief pause, you may hear the "click" of the batteries waking up. Next, place the key into the ignition switch and turn the key forward (away from the driver). Your screen and cart should then power on and be ready to operate.
Power-off procedure:
Turn the vehicle key into the off position. You can eject the power button, located on the dash of your cart. Turning the power button off will disconnect the relay switch, and your cart will not operate until the power button is inserted again.
Charger Maintenance
IF THE PLUG PINS ARE BENT, SPEAK WITH YOUR LOCAL DEALER FOR REPLACING.
DO NOT TRY TO REPAIR THE AC CORD PLUG OR PINS.
Electrical Cords
Examine electrical cords for wear and damage before use. Immediately replace electrical cords for:
Cracks
Cuts
Frayed Wiring
Insulation Damage
Loose Connections
Splices
Electrical Plugs & Receptacles
ELECTRICAL PLUGS AND RECEPTACLES Examine electrical plugs for wear and damage before use. Immediately replace electrical plugs for:
Bent Pins
Corrosion
Cracks
Loose Connections
Missing Pins
Clean the Electrical Plugs & Receptacles
- Disconnect the AC cord from the power source.
- Disconnect the AC cord from the battery charger.
- Disconnect the DC cord from the vehicle charger receptacle.
- Apply electrical contact cleaner to the electrical plugs and receptacles. Refer to the manufacturer instructions.
- Clean the electrical plugs and receptacles.
- Lightly lubricate the electrical plugs and receptacles with WD-40®.
Tires & Wheels
DO NOT OVER INFLATE THE TIRES. EXCESS PRESSURE CAN CAUSE THE TIRE TO EXPLODE.
TO DECREASE THE RISK OF TIRE EXPLOSION, ADD SMALL AMOUNTS OF AIR TO THE TIRE AT INTERVALS TO SEAT THE TIRE BEADS.
OVER INFLATION OF SMALL TIRES CAN OCCURS IN A FEW SECONDS.
PROTECT FACE AND EYES WHEN REMOVING THE TIRE VALVE CORE.
USE ONLY SOCKETS MADE FOR IMPACT WRENCHES TO DECREASE THE RISK OF INJURY CAUSED BY A BROKEN SOCKET.
DO NOT USE TIRES THAT HAVE INFLATION PRESSURE LESS THAN THE TIRE PRESSURE RECOMMENDED.
ALWAYS FOLLOW THE CROSS-SEQUENCE PATTERN WHEN YOU INSTALL THE LUG NUTS TO MAKE SURE THE WHEEL IS EVENLY SEATED AGAINST THE HUB.

The general recommended tire inflation pressure is 20 psi, but the tire inflation pressure can be changed according to the specific terrain condition.
All four tires must have the same pressure for the best control qualities. Always put the valve stem cap back after checking or inflate the tires.
Use a tire plug to repair small holes in the thread part of the tires. For large holes or cuts, replace the whole tire.
- With the valve stem to the outside of wheel, install the wheel & tire on the hub with lug nuts.
- Tighten the lug nuts with your fingers in the cross sequence patten as shown.
- Tighten the lug nuts to 65 ft.lbs torque.
- Continue to follow the cross sequence pattern until the correct torque is reached.
Lift & Lower the Cart
LIFTING AND LOWER THE CART WITH CARGO CAN CAUSE PROPERTY DAMAGED, SERIOUS PERSONAL INJURY, OR DEATH. REMOVE ALL CARGO AND HAVE THE PERSON OUT FROM THE CART BEFORE THE CART IS LIFTED.
Steps For Lifting the Cart:
- Before the cart is lifted, turn the key off in the switch of the cart.
- Choose the jacks and jack stands rated for the cart.
- Engage the parking brake.
- Place the jack in the center of the lift point.
![]()
- Lift the front and rear of the cart.
- Put the jack stands under the frame rails.
- Power the cart onto the jack stands.

Steps For Lowering the Cart:
- Before the cart is lowered, turn offkey switch of the cart.
- Choose the jacks and jack stands rated for the cart.
- Place the jack in the center of the lift point.
- Lift the cart from the jack stands.
- Remove the jack stands under the frame rails.
- Power the cart on the ground.
- Remove the jacks.
VEHICLE MAINTENANCE
MOISTURE CAN CAUSE ELECTRICAL COMPONENT DAMAGE. DO NOT USE A PRESSURE WASHER OR STEAM CLEANER TO CLEAN THE VEHICLE ELECTRICAL SYSTEM. OTHERWISE, IT WILL CAUSE ELECTRICAL FAILURE PERMANENTLY.
Pre-Operation Before Cleaning the Vehicle:
- Move the vehicle on solid flat ground
- Apply the parking brake.
- Turn the key switch to OFF.
- Remove the key.
- Place the Forward & Reverse switch to Neutral.
- Use only commercially available automotive cleaners with a sponge or soft cloth for normal cleaning. A garden hose at normal residential water pressure is sufficient.
- Use a commercially available aluminum cleaner paste and fine grade steel wool to remove oxidation or discoloration from aluminum.
- Use non-abrasive wax products. Fertilizers, asphalt, creosote, paint, or chewing gum should be removed immediately to prevent possible stains.
- The seats of the vehicle will last longer with proper cleaning. Use a solution of 10% liquid soap and warm water applied with a soft cloth. Use a soft bristle brush to remove embedded dirt.
- Use mild soapy water and a micro-fiber cloth to clean the windshield to minimize the risk of scratching. Avoid using glass cleaners or paper towels as these increase the chances of scratching or scuffing the windshield.
UNINTENDED VEHICLE OPERATION CAN CAUSE SERIOUS PERSONAL INJURY OR DEATH. BEFORE LEAVING THE VEHICLE OR DURING VEHICLE MAINTENANCE, DISABLE THE VEHICLE.
ONLY TRAINED TECHNICIANS SHOULD SERVICE OR REPAIR THE VEHICLE TO PREVENT THE WARRANTY BEING VOID.
ANYONE DOING EVEN SIMPLE REPAIRS OR SERVICE SHOULD HAVE KNOWLEDGE AND EXPERIENCE IN ELECTRICAL AND MECHANICAL REPAIR.
THE APPROPRIATE INSTRUCTIONS MUST BE USED WHEN PERFORMING MAINTENANCE, SERVICE, OR ACCESSORY INSTALLATION. FAILURE TO CORRECTLY MAINTAIN THE VEHICLE AND MAKE NECESSARY REPAI R2S CAN DECREASE VEHICLE PERFORMANCE, CAUSE A FIRE, PROPERTY DAMAGE, SERIOUS PERSONAL INJURY, OR DEATH AND MAY LEAD TO WARRANTY BEING VOID.
IF PROBLEMS ARE FOUND DURING SCHEDULED INSPECTION OR SERVICE, OPERATE THE VEHICLE ONLY WHEN REPAIRS ARE MADE.DO NOT WEAR LOOSE CLOTHING OR JEWELRY SUCH AS RINGS, WATCHES, CHAINS, ETC., WHEN SERVICING THE VEHICLE OR BATTERY CHARGER. LIFT ONLY ONE END OF THE VEHICLE AT A TIME.
USE A SUITABLE LIFTING DEVICE WITH 1000 LB (454 KG) MINIMUM LIFTING CAPACITY. DO NOT USE THE LIFTING DEVICE TO HOLD THE VEHICLE IN THE LIFTED POSITION. USE APPROVED JACK STANDS OF PROPER WEIGHT CAPACITY TO SUPPORT THE VEHICLE AND CHOCK THE WHEELS THAT REMAIN ON THE FLOOR.
IF WIRES ARE REMOVED OR REPLACED, MAKE SURE THAT THE WIRING AND WIRE HARNESS ARE CORRECTLY ROUTED AND ATTACHED. FAILURE TO CORRECTLY ROUTE AND ATTACH THE WIRING COULD RESULT IN VEHICLE MALFUNCTION, PROPERTY DAMAGE, SERIOUS PERSONAL INJURY, OR DEATH AND MAY LEAD TO WARRANTY BEING VOID.
WEAR SAFETY GLASSES OR APPROVED EYE PROTECTION WHEN YOU DO THE SERVICING OF THE VEHICLE.
Storage Preparation
- Power down all accessories.
- Disconnect batteries per ensuring that the cables do not meet a terminal (Disconnect the main power outlet cables from battery pack, insulate the cable).
- Connect battery cables back to system, charge the battery to full state every 1-3 months to keep battery alive without damages caused by overdischarging.
- Perform all semi-annual lubrications.
- Thoroughly clean the front and rear body, seats, battery compartment and underside of the vehicle.
- Do not engage the park brakes but secure the golf cart from rolling. Check the wheels with wheel stoppers or something similar.
- Check tire pressure and inflate the tires to standard pressure level as values presented on tires.
Returning Cart to Service From Storage
- Fully charge the battery.
- Set the forward and reverse switch to neutral.
- Adjust the pressure in each tire to the recommended tire pressure.
- Have a trained technician lubricate the vehicle.
- Do a daily pre-operation safety checklist.
- Do a vehicle performance inspection.
Vehicle Transportation & Towing
DO NOT RIDE ON OR ALLOW OTHER PEOPLE ON A CART BEING TRANSPORTED ON A TRAILER OR BEING TOWEG WITH ANOTHER VEHICLE.
DO NOT CARRY PASSENGERS ON CART WHILE TOWING THE CERT.
SECURE THE SEATS/WINDSHIELD /OTHER LOOSE ITEMS BEFORE TOWING CART.
The following steps can help you to tow a Venom EV Strike cart safely without any damage.
- Turn off the switch.
- Keep the forward and reverse switch in a neutral position.
- If you need to tow the cart for a long distance, remove the battery connections from battery pack terminals.
- Move the cart at a slower speed (between 5-15 mph) or the same speed that you will generally move it if it has power. Exceeding the speed limit can over-spin the motor and ruin it.
- Pulling your cart faster than designed to go can over-spin the motor, potentially slinging the internal parts into pieces and ruining the motor.
- Unlock the electromagnetic brake on your cart motor, and make sure to unlock it mechanically before towing the golf cart.
ELECTROMAGNETIC PARKING BREAK
Located under the seat by the battery, simply move the toggle to EMB and the cart can be moved manually as the electromagnetic parking brake is now disengaged.
Move the toggle to RUN and the electromagnetic parking brake is once again, engaged.

Venom EV Strike Scheduled Maintenance Chart
| LOCATION | DESCRIPTION | DAILY | WEEKLY | MONTHLY | QUARTERLY | ANNUALLY |
| Battery | Check for any damages to the battery surface |  | ||||
| Charge the battery |  | |||||
| Fasten/tighten the nut on the battery cable |  | |||||
| Verify that battery is not over-charged |  | |||||
| Check the health of the battery |  | |||||
| Check whether the battery is fully charged |  | |||||
| Clean the surface of the battery |  | |||||
| Body & Chasis | Check the seat belt bolts and tighten if needed. | | ||||
| Verify brake fluid level in brake fluid resevoir |  | |||||
| Verify tire pressure and tire condition |  | |||||
| Verify no leaks are observed in shocks |  | |||||
| Fasten bolt to shaft |  | |||||
| Verify oil level in rear axle gear box |  | |||||
| Add grease to front hub and steering box |  | |||||
| Adjust the front and rear suspension |  | |||||
| Clean the body and seats |  | |||||
| Charger | Verify charging status and ensure charger is not hot |  | ||||
| Clean surface of charger. Do not allow water in |  | |||||
| Motor & Controller | Turn off power, and ensure terminals are tight |  | ||||
| Clean the surface of the controller |  | |||||
| Check the touching point to ensure solenoid is in order |  | |||||
| Verify no water has gotten into the motor |  | |||||
| Ensure connectors of motor and controller are tight |  | |||||
| Verify the accelerator pedal works well |  | |||||
| Ensure brake pedal is firm and can be released easily | | |||||
| Verify if brake pads need to be replaced |  |
CODE OF SAFETY PRACTICES
Important Safety Information
The driver must fully understand the technical performance, control mechanism and operating procedures of the vehicle, and abide by the following codes of safety practice:
Observe these NOTICES, CAUTIONS, WARNINGS, and DANGERS; to be aware that servicing a vehicle requires mechanical skill and a regard for conditions that could be hazardous. Improper service or repair may damage the vehicle or render it unsafe. This may also cause your warranty to be void.
Replace missing, damaged, or unreadable safety decals immediately to prevent possible property damage, personal injury, or death. Purchase replacement safety decals from your dealer.
Know and understand the laws and regulations for vehicle operations in your area. For any questions on material contained in this manual, contact an authorized representative for clarification.
- The driver must fully understand the technical performance, control mechanism, and operating procedures of the vehicle and abide by all codes of safety practices.
- Operate your vehicle responsibly and keep the vehicle in safe condition of operation.
- The driver must keep both hands on the steering wheel and both feet on the floor or pedals.
- Inspect the vehicle before each use to make sure it is in safe operating condition. Perform the daily inspection described in this manual.
- Always hae the vehicle checked by an authorized dealer if it is involved in an accident.
- Remove the key when the vehicle is not in use to prevent accidental starting or unauthorized use. vehicle.
- Drive the vehicle at appropriate speeds for the terrain and conditions. Be aware of environmental conditions that change the terrain and your ability to control the vehicle.
- Do not drive on excessively steep hills. Evaluate the terrain before descending a hill. Drive slowly and deliberately. Use the brake to limit speed and maintain control. Sudden braking or turning can cause loss of vehicle control. Drive straight up or down the hill; do not drive across the hill.
- Operate only in approved areas. Follow all applicable safety rules for the area.
Read all the safety statements carefully before attempting any procedures.

Failure to operate the vehicle as instructed can cause collision, loss of control or roll over, resulting in severe injury or death.
Follow all safety warnings or labels in this owner manual.
All operators must read, understand, and comply with these warnings and labels before operating the vehicles.
Follow the safety information and operating procedures described.
Please know where you are allowed to operate your cart.
Do not overload the cart while driving, so as to avoid potential safety hazards like reduced brake performance.
Unqualified personnel or under-aged drivers are not allowed to drive the vehicle.
Please drive within the suggested slope range.
Safety Instructions
 | Disassembly without training or authorization is not advised. Not only is it dangerous, but it could potentially void your warranty. |
 | Do not park or drive near any extreme heat source |
 | It is not advised to shortcircuit the positive and negative poles. |
 | Keep away from flammable and explosive objects |
 | Beware or high voltage electric shock |
 | Reach out to your authorized dealership for information about disposing of any parts on your cart. |
WWW.VENOM-EV.COM
833.VENOM.EV (836.6638)
sales@venom-ev.com
Documents / Resources
References
Download manual
Here you can download full pdf version of manual, it may contain additional safety instructions, warranty information, FCC rules, etc.
Advertisement


Need help?
Do you have a question about the STRIKE and is the answer not in the manual?
Questions and answers