Advertisement
Quick Links
Video Camera
Recorder
Operating Instructions
Before operating the unit, please read this manual thoroughly,
and retain it for future reference.
Owner's Record
The model and serial numbers are located on the bottom. Record the
serial number in the space provided below. Refer to these numbers
whenever you call upon your Sony dealer regarding this product.
Model No. CCD-TRV
Serial No.
CCD-TRV49/TRV58/TRV68/TRV78/
TRV88/TRV98
©2001 Sony Corporation
Model No. AC-L
Serial No.
CCD-TRV98
3-065-648-11 (3)
Advertisement

Related Manuals for Sony Hi8 CCD-TRV58


Summary of Contents for Sony Hi8 CCD-TRV58
- Page 1 Owner’s Record The model and serial numbers are located on the bottom. Record the serial number in the space provided below. Refer to these numbers whenever you call upon your Sony dealer regarding this product. Model No. CCD-TRV Model No. AC-L Serial No.
- Page 2 Welcome! Congratulations on your purchase of this Sony Handycam Vision camcorder. With your Handycam Vision, you can capture life’s precious moments with superior picture and sound quality. Your Handycam Vision is loaded with advanced features, but at the same time it is very easy to use.
- Page 3 Note: This equipment has been tested and found to comply with the limits for a Class B digital device, pursuant to Part 15 of the FCC Rules. These limits are designed to provide reasonable protection against harmful interference in a residential installation. This equipment generates, uses, and can radiate radio frequency energy and, if not installed and used in accordance with the instructions, may cause harmful...
- Page 4 Main Features Functions to adjust exposure (in the recording mode) •In a dark place NIGHTSHOT (p. 26) •In dark environments such as sunset, fireworks, Sunset & moon mode (p. 39) or general night views •Shooting backlit subjects BACK LIGHT (p. 25) •In spotlight, such as at the theater or a formal Spotlight mode (p.
- Page 5 Table of contents Main Features .......... 4 Editing Dubbing a tape ........50 Quick Start Guide ....... 6 Customizing Your Camcorder Getting started Changing the menu settings ....51 Using this manual ........8 Checking supplied accessories .... 10 Troubleshooting Step 1 Preparing the power supply ...
- Page 6 Quick Start Guide This chapter introduces you to the basic features of your camcorder. See the page in parentheses “( )” for more information. Connecting the power cord (p. 16) Use the battery pack when using your camcorder outdoors (p. 11). Open the DC IN jack cover.
- Page 7 Recording a picture (p. 20) Remove the lens cap. Set the POWER POWER switch to CAMERA while pressing the small green button. Press the red button. POWER Your camcorder starts recording. To stop recording, press the red button again. Open the LCD panel while pressing OPEN.
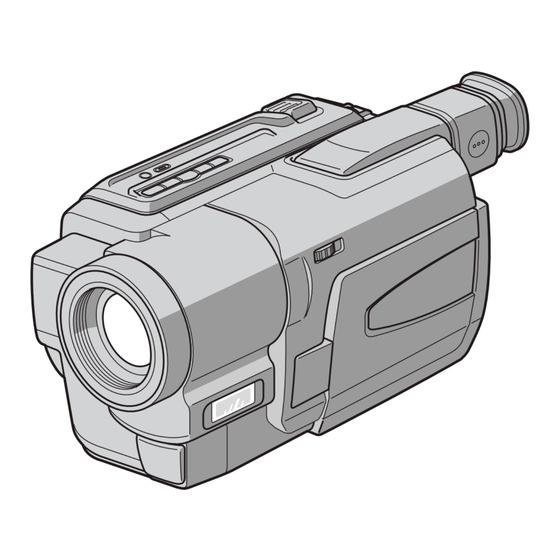
- Page 8 — Getting started — Using this manual The instructions in this manual are for the six models listed in the table below. Before you start reading this manual and operating your camcorder, check the model number by looking at the bottom of your camcorder. The CCD-TRV98 is the model used for illustration purposes.
- Page 9 Using this manual Precautions on camcorder care Lens and LCD screen / finder (on mounted models only) • The LCD screen and the finder are manufactured using extremely high-precision technology so over 99.99% of the pixels are operational for effective use. However, there may be some tiny black points and/or bright points (white, red, blue or green in color) that constantly appear on the LCD screen and the finder.
- Page 10 Checking supplied accessories Make sure that the following accessories are supplied with your camcorder. 1 Wireless Remote Commander (1) 4 Size AA (R6) battery for Remote (p. 78) Commander (2) (p. 78) CCD-TRV49/TRV78/TRV98 only CCD-TRV49/TRV78/TRV98 only 2 AC-L10A/L10B/L10C AC power adaptor 5 A/V connecting cable (1) (p.
- Page 11 Step 1 Preparing the power supply Installing the battery pack Install the battery pack to use your camcorder outdoors. Slide the battery pack down until it clicks. To remove the battery pack Slide the battery pack out in the direction of the arrow while pressing BATT RELEASE down.
- Page 12 Step 1 Preparing the power supply Charging the battery pack Use the battery pack after charging it for your camcorder. Your camcorder operates only with the “InfoLITHIUM” battery pack (L series). See page 65 for more information about “InfoLITHIUM” battery pack. (1) Open the DC IN jack cover and connect the AC power adaptor supplied with your camcorder to the DC IN jack with the plug’s v mark facing up.
- Page 13 Step 1 Preparing the power supply Notes •Prevent metallic objects from coming into contact with the metal parts of the DC plug of the AC power adaptor. This may cause a short-circuit, damaging the AC power adaptor. •Keep the battery pack dry. •When the battery pack is not to be used for a long time, charge the battery pack fully, and then use it until it fully discharges again.
- Page 14 Step 1 Preparing the power supply Recording time CCD-TRV49/TRV58/TRV68/TRV78 Recording with Recording with Battery pack the viewfinder the LCD screen Continuous* Typical** Continuous* Typical** NP-F330 (supplied) NP-F530 NP-F550 NP-F730 NP-F730H/F750 NP-F930 NP-F950 NP-F960 1035 CCD-TRV88 Recording with Recording with Battery pack the viewfinder the LCD screen Continuous*...
- Page 15 This unit is compatible with the “InfoLITHIUM” battery pack (L series). Your camcorder operates only with the “InfoLITHIUM” battery. “InfoLITHIUM” L series battery packs have the mark. “InfoLITHIUM” is a trademark of Sony Corporation.
- Page 16 •Place the AC power adaptor near a wall outlet. While using the AC power adaptor, if any trouble occurs with this unit, disconnect the plug from the wall outlet as soon as possible to cut off the power. Using a car battery Use Sony DC Adaptor/Charger (optional).
- Page 17 Step 2 Setting the date and time Set the date and time settings when you use your camcorder for the first time. If you do not use your camcorder for about 4 months, the date and time settings may be released (bars may appear) because the built-in rechargeable lithium cell in your camcorder will have been discharged.
- Page 18 Step 2 Setting the date and time To check the preset date and time Press DATE to display the date indicator. Press TIME to display the time indicator. Press DATE (or TIME) and then press TIME (or DATE) to simultaneously display the date and time indicator.
- Page 19 Step 3 Inserting a cassette When you want to record in the Hi8 system, use Hi8 video cassettes (1) Prepare the power supply (p. 11). (2) Open the lid of the cassette compartment, and press EJECT. The cassette compartment opens automatically. (3) Insert a cassette with its window facing out and the write-protect tab on the cassette up.
- Page 20 — Recording – Basics — Recording a picture Your camcorder automatically focuses for you. (1) Remove the lens cap by pressing both knobs on its sides and attach the lens cap to the grip strap. (2) Install the power source and insert a cassette. See “Step 1” to “Step 3” for more information (p.
- Page 21 Recording a picture Note Fasten the grip strap firmly. Do not touch the built-in microphone during recording. To enable smooth transition You can make the transition between the last scene you recorded and the next scene smooth as long as you do not eject the cassette even if you turn off your camcorder. When you change the battery pack, set the POWER switch to OFF (CHARGE).
- Page 22 Recording a picture Note When using the LCD screen except in the mirror mode, the viewfinder automatically turns off. When you use the LCD screen outdoors in direct sunlight The LCD screen may be difficult to see. If this happens, we recommend that you use the viewfinder.
- Page 23 Recording a picture Using the zoom feature Move the power zoom lever a little for a slower zoom. Move it further for a faster zoom. Using the zoom function sparingly results in better-looking recordings. “T” side: for telephoto (subject appears closer) “W”...
- Page 24 Recording a picture To record pictures with the viewfinder – adjusting the viewfinder If you record pictures with the LCD panel closed, check the picture with the viewfinder. Adjust the viewfinder lens to your eyesight so that the indicators in the viewfinder come into sharp focus.
- Page 25 Recording a picture Indicators displayed in the recording mode The indicators are not recorded on tape. Hi8 format indicator This appears while playing back or recording in Hi8 format. Recording mode indicator STBY/REC indicator Tape counter indicator 0:00:01 Remaining tape indicator This appears after you insert a cassette and record or play back for a while.
- Page 26 Recording a picture Shooting in the dark – NightShot The NightShot function enables you to shoot a subject in a dark place. For example, you can satisfactorily record the environment of nocturnal animals for observation when you use this function. While your camcorder is in CAMERA mode, slide NIGHTSHOT to ON.
- Page 27 Recording a picture Superimposing the date and time on pictures You can record the date and/or time displayed on the screen superimposed on the picture. Carry out the following operations in CAMERA mode. Press DATE to record the date. Press TIME to record the time. Press DATE (or TIME), then press TIME (or DATE) to record the date and time.
- Page 28 Checking the recording – END SEARCH You can use this button to record a picture from the last recorded scene successively. SEARCH You can go to the end of the recorded section after you record. Press END SEARCH in CAMERA mode. The last 5 seconds of the recorded section are played back and the playback stops.
- Page 29 — Playback – Basics — Playing back a tape You can monitor the playback picture on the screen. If you close the LCD panel, you can monitor the playback picture in the viewfinder. You can control playback using the Remote Commander supplied with your camcorder (CCD-TRV49/TRV78/TRV98 only).
- Page 30 Playing back a tape When monitoring on the LCD screen You can turn the LCD panel over and move it back to the camcorder body with the LCD screen facing out [a]. You can adjust the angle of the LCD panel by lifting the LCD panel up by 23 degrees [b].
- Page 31 Playing back a tape Various playback modes To operate video control buttons, set the POWER switch to PLAYER. To view a still picture (playback pause) Press X during playback. To resume playback, press X or N. To advance the tape Press M in the stop mode.
- Page 32 Viewing the recording on TV Connect your camcorder to your TV with the A/V connecting cable supplied with your camcorder to watch the playback picture on the TV screen. You can operate the playback control buttons in the same way as when you monitor playback pictures on the LCD screen.
- Page 33 When the super laser link function is activated (the SUPER LASER LINK button is lit), your camcorder consumes power. Press SUPER LASER LINK to turn off the super laser link function when it is not needed. is a trademark of Sony Corporation.
- Page 34 — Advanced Recording Operations — Using the wide mode You can record a cinema-like picture (CINEMA) or a 16:9 wide picture to watch on the 16:9 wide-screen TV (16:9FULL). Refer to the operating instructions of your TV. CINEMA Black bands appear on the screen during recording in the CINEMA mode [a], playing back on a normal TV [b] or a wide-screen TV [c].
- Page 35 Using the wide mode In CAMERA mode, set 16:9WIDE to CINEMA or 16:9FULL in in the menu settings (p. 52). MENU To cancel the wide mode Set 16:9WIDE to OFF in the menu settings. If the wide mode is set to 16:9FULL (CCD-TRV68/TRV78/TRV88/TRV98 only) The SteadyShot function does not work.
- Page 36 Using the fader function You can fade in or out to give your recording a professional appearance. STBY FADER M.FADER (mosaic) STRIPE BOUNCE (Fade in only) STBY MONOTONE When fading in, the picture gradually changes from black-and-white to color. When fading out, the picture gradually changes from color to black-and-white.
- Page 37 Using the fader function (1) When fading in [a] In the standby mode, press FADER until the desired fader indicator flashes. When fading out [b] In the recording mode, press FADER until the desired fader indicator flashes. The indicator changes as follows: FADER t M.FADER t STRIPE no indicator T MONOTONE T BOUNCE The last selected fader mode is indicated first of all.
- Page 38 Using special effects – Picture effect You can digitally process images to obtain special effects like those in films or on the PASTEL [a] : The contrast of the picture is emphasized, and the picture looks like an animated cartoon. NEG.
- Page 39 Using the PROGRAM AE function You can select PROGRAM AE (Auto Exposure) mode to suit your specific shooting requirements. Spotlight This mode prevents people’s faces, for example, from appearing excessively white when shooting subjects lit by strong light in the theater. Soft portrait This mode brings out the subject while creating a soft background for subjects such as people or flowers.
- Page 40 Using the PROGRAM AE function (1) In CAMERA mode, select PROGRAM AE in in the menu settings (p. 52). (2) Select the desired PROGRAM AE mode in the menu settings, then press the SEL/PUSH EXEC dial. MA N U A L S E T P ROGR AM A E A U T O P E F F E C T...
- Page 41 Adjusting the exposure manually You can manually adjust and set the exposure. Adjust the exposure manually in the following cases: • The subject is backlit • Bright subject and dark background • To record dark pictures (e.g. night scenes) faithfully (1) In CAMERA mode, press EXPOSURE.
- Page 42 Focusing manually You can gain better results by manually adjusting the focus in the following cases: •The autofocus mode is not effective when shooting – subjects through glass coated with water droplets – horizontal stripes – subjects with little contrast with backgrounds such as walls and sky •When you want to change the focus from a subject in the foreground to a subject in the background •Shooting a stationary subject when using a tripod...
- Page 43 Superimposing a title You can select one of eight preset titles and two custom titles (p. 45). You can also select the language, color, size and position of titles. VACATION (1) In CAMERA mode, press TITLE to display the title menu. (2) Turn the SEL/PUSH EXEC dial to select , then press the dial.
- Page 44 Superimposing a title To superimpose the title while you are recording Press TITLE while you are recording, and carry out steps 2 to 5. When you press the SEL/PUSH EXEC dial at step 5, the title is superimposed. To select the language of a preset title If you want to change the language, select before step 2.
- Page 45 Making your own titles You can make up to two titles and store them in your camcorder. Each title can have up to 20 characters. (1) In CAMERA or PLAYER mode, press TITLE. (2) Turn the SEL/PUSH EXEC dial to select , then press the dial.
- Page 46 Making your own titles To change a title you have stored In step 3, select CUSTOM1 SET or CUSTOM2 SET, depending on which title you want to change, then press the SEL/PUSH EXEC dial. Turn the SEL/PUSH EXEC dial to select [C], then press the dial to delete the title.
- Page 47 Using the built-in light You can use the built-in light to suit your shooting situation. The recommended distance between the subject and camcorder is about 1.5 m (5 feet). Press LIGHT until the indicator appears on the screen while your camcorder is in CAMERA mode.
- Page 48 Replacing the bulb Use the Sony XB-3D halogen lamp (optional). The supplied halogen lamp is not on the market. Purchase the Sony XB-3D halogen lamp. Remove the power source before replacing the bulb.
- Page 49 Using the built-in light CAUTION • When replacing the bulb, use only the Sony XB-3D halogen lamp (optional) to reduce the risk of fire. • To prevent possible burn hazard, disconnect the power source before replacing and do not touch the bulb until the bulb becomes cool enough to handle (for about 30 minutes or more).
- Page 50 — Editing — Dubbing a tape Using the A/V connecting cable Connect your camcorder to the VCR using the A/V connecting cable supplied with your camcorder. You can record and edit a picture with the connected VCR by using your camcorder as a player.
- Page 51 — Customizing Your Camcorder — Changing the menu settings To change the mode settings in the menu settings, select the menu items with the SEL/ PUSH EXEC dial. The default settings can be partially changed. First, select the icon, then the menu item and then the mode. (1) In CAMERA or PLAYER mode, press MENU.
- Page 52 Changing the menu settings Menu items are displayed as the following icons: MANUAL SET CAMERA SET PLAYER SET LCD SET TAPE SET SETUP MENU OTHERS Depending on your camcorder model The menu display may be different from that in this illustration. Selecting the mode setting of each item z is the default setting.
- Page 53 Changing the menu settings POWER Icon/item Mode Meaning switch EDIT z OFF — PLAYER To minimize picture deterioration when editing z ON To correct jitter PLAYER To not correct jitter. Set TBC to OFF when playing back a tape on which you have dubbed over and recorded the signal of a TV game or similar machine.
- Page 54 Changing the menu settings POWER Icon/item Mode Meaning switch REC MODE z SP To record in SP (Standard Play) mode CAMERA To increase the recording time to twice the SP mode ORC TO SET —— To automatically adjust the recording condition CAMERA to get the best possible recording.
- Page 55 Changing the menu settings POWER Icon/item Mode Meaning switch CLOCK SET —— To set the date or time (p. 17) CAMERA AUTO DATE z ON To record the date for 10 seconds after CAMERA recording has started To cancel the auto date function LTR SIZE z NORMAL To display selected menu items in normal size...
- Page 56 Changing the menu settings POWER Icon/item Mode Meaning switch WORLD TIME —— To set the clock to the local time. Turn the SEL/ CAMERA PUSH EXEC dial to set a time difference. The clock changes by the time difference you set here.
- Page 57 If you run into any problem using your camcorder, use the following table to troubleshoot the problem. If the problem persists, disconnect the power source and contact your Sony dealer or local authorized Sony service facility. If “C:ss:ss” appears on the screen, the self-diagnosis display function has worked. See page 61.
- Page 58 • EDIT is set to ON in the menu settings. c Set it to OFF. (p. 53) • The video head may be dirty. c Clean the heads using the Sony V8-25CLD cleaning cassette (optional). (p. 68) • The volume is turned to minimum.
- Page 59 Types of trouble and their solutions In the recording and playback modes Symptom Cause and/or Corrective Actions The power does not turn on. • The battery pack is not installed, or is dead or nearly dead. c Install a charged battery pack. (p. 11, 12) •...
- Page 60 CHG lamp does not light up. c Connect it firmly. (p. 12) • Something is wrong with the battery pack. c Contact your Sony dealer or local authorized Sony service facility. • The POWER switch is not set to OFF (CHARGE)
- Page 61 Contact your Sony dealer or local authorized Sony E:62:ss service facility and inform them of the 5-digit code. (example: E:61:10) If you are unable to rectify the problem even if you try corrective actions a few times, contact your Sony dealer or local authorized Sony service facility.
- Page 62 See the page in parentheses “( )” for more information. Warning indicators The video heads are dirty Slow flashing: •You need to clean the heads using the Sony V8-25CLD cleaning cassette (optional) (p. 68). The battery is dead or Self-diagnosis display (p. 61)
- Page 63 Warning indicators and messages Warning messages • CLOCK SET Set the date and time. (p. 17) • For “InfoLITHIUM” Use an “InfoLITHIUM” battery pack. (p. 65) BATTERY ONLY • CLEANING CASSETTE The video heads are dirty. (p. 68) • START/STOP KEY Press the START/STOP button to activate the ORC setting.
- Page 64 — Additional Information — Usable cassettes and playback modes Selecting the cassette type You can use both Hi8 and standard 8 mm video cassettes on your camcorder. When you use a Hi8 video cassette, recording and playback are carried out in the Hi8 system. When you use a standard 8 mm video cassette, recording and playback are carried out in the standard 8 mm system.
- Page 65 About “InfoLITHIUM” battery What is the “InfoLITHIUM” battery? The “InfoLITHIUM” battery is a lithium-ion battery that has functions for communicating information related to operating conditions between your camcorder and an AC power adaptor. The “InfoLITHIUM” battery calculates the power consumption according to the operating conditions of your camcorder, and displays the remaining battery time in minutes.
- Page 66 Using your camcorder abroad Using your camcorder abroad You can use your camcorder in any country or area with the AC power adaptor supplied with your camcorder within 100 V to 240 V AC, 50/60 Hz. When charging the battery pack, use a commercially available AC plug adaptor [a], if necessary, depending on the design of the wall outlet [b].
- Page 67 Maintenance information and precautions Moisture condensation If your camcorder is brought directly from a cold place to a warm place, moisture may condense inside your camcorder, on the surface of the tape, or on the lens. In this condition, the tape may stick to the head drum and be damaged or your camcorder may not operate correctly.
- Page 68 When the playback pictures still contain noise even if you have cleaned the video heads with a cleaning cassette, the video heads may have worn down due to long use. If this is the case, they must be replaced with new heads. Contact your Sony dealer or local authorized Sony service facility.
- Page 69 •If any solid object or liquid get inside the casing, unplug your camcorder and have it checked by a Sony dealer before operating it any further. •Avoid rough handling or mechanical shock. Be particularly careful of the lens. •Keep the POWER switch set to OFF (CHARGE) when you are not using your camcorder.
- Page 70 Maintenance information and precautions Built-in light •Do not knock or jolt the built-in light while it is turned on as it may damage the bulb or shorten the life of the bulb. •Do not leave the built-in light on while it is resting on or against something; it may cause a fire or damage the built-in light.
- Page 71 • If you touch the liquid, wash it off with water. • If the liquid get into your eyes, wash your eyes with a lot of water and then consult a doctor. If any problem occurs, unplug your camcorder and contact your nearest Sony dealer.
- Page 72 Specifications Storage temperature Output connectors Video camera –20 °C to +60 °C (–4 °F to +140 °F) recorder S video output Dimensions (approx.) 104 × 109 × 223 mm 4-pin mini DIN (4 1/8 × 4 3/8 × 9 1/8 in.) Luminance signal: 1 Vp-p, System 75 Ω...
- Page 73 Hooks for shoulder strap (p. 75) 5 OPEN button (p. 20) qs DC IN jack (p. 12, 16) This mark indicates that this product is a genuine accessory for Sony video products. When purchasing Sony video products, Sony recommends that you purchase accessories with this “GENUINE VIDEO ACCESSORIES”...
- Page 74 Identifying the parts and controls qd Video control buttons (p. 29, 31) qj Infrared rays emitter (p. 26, 33) x STOP (stop) qk NIGHTSHOT switch (p. 26) m REW (rewind) N PLAY (playback) ql Camera recording lamp (p. 20) M FF (fastforward) w;...
- Page 75 Identifying the parts and controls ws Speaker wh EXPOSURE button (p. 41) wd LCD screen (p. 21) wj FADER button (p. 37) wf MENU button (p. 51) wk BACK LIGHT button (p. 25) wg RESET button (p. 60) wl FOCUS button (p. 42) Attaching the shoulder strap Attach the shoulder strap supplied with your camcorder to the hooks for the shoulder strap.
- Page 76 Identifying the parts and controls e; DATE button (p. 27) eg TIME button (p. 27) ea DISPLAY button (p. 30) eh Viewfinder (p. 24) es TITLE button (p. 43) ej COUNTER RESET button (p. 21) ed VOLUME buttons (p. 29) ek CHG lamp (p.
- Page 77 Identifying the parts and controls r; EJECT button (p. 19) rf Built-in light (p. 47) ra Cassette compartment (p. 19) rg A/V OUT jack (p. 32) rs Grip strap rh RFU DC OUT (RFU adaptor DC output) jack (p. 32) rd S VIDEO OUT jack (p.
- Page 78 •Your camcorder works in the commander mode VTR 2. Commander modes 1, 2 and 3 are used to distinguish your camcorder from other Sony VCRs to avoid remote control misoperation. If you use another Sony VCR in the commander mode VTR 2, we recommend changing the commander mode or covering the sensor of the VCR with black paper.
- Page 79 Identifying the parts and controls Operation indicators LCD screen and Viewfinder Display window S T BY 0:00:00 M . F ADER C I NEMA SEARCH S E P I A JUL 4 2001 12:00:00 AM 1 Recording mode indicator (p. 54)/ qd Built-in light indicator (p.
- Page 80 Hi8 system ....... 64 I, J, K, L “InfoLITHIUM” battery ..65 Infrared rays emitter ..26, 33 LCD screen ......21 LP mode ........54 3 0 6 5 6 4 8 1 1 Sony Corporation Printed in Japan...
Need help?
Do you have a question about the Hi8 CCD-TRV58 and is the answer not in the manual?
Questions and answers