
Summary of Contents for Avalon E-Lite
- Page 1 Urban electric bike Please read this manual carefully before using the e-bike! USER MANUAL...
- Page 2 The bike is equipped with some of the most modern and technical innovations and meets the EN 15194 standard. Welcome to the exciting and revolutionary world of alternative transportation. Your Avalon bike offers new possibilities for eco-friendly transportation and leisure activities. You can be as active as you like or you can reach your goal in peace without being sweaty and out of breath.
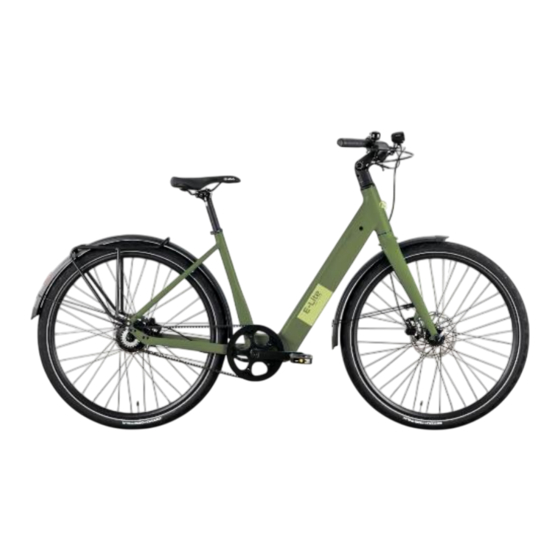
- Page 3 All colors...
-
Page 4: Table Of Contents
Table of contents 1.Security 1.1 Symbol 1.2 General safety instructions 1.3 Notes 2.Diagram with the specific components 3.Technical data 4.Installation instructions 4.1 Open the box 4.2 Installation of the stem 4.3 Assemble the front light 4.4 Assemble the front wheel 4.5 I ns t al l ati on of the pedal s 4.6 Assemble the saddle 4.6 Assembly instructions for the battery... -
Page 5: Security
Security 1.1 Symbols The information listed next to one of the following 1.2.2 Know your E-Bike symbols is important for your personal safety Your new electric bike has many features and Functions that have never been built into a bicycle before. -
Page 6: Notes
Security 1.2.5 Drive within your limits! 1.2.8 Keep your electric bike in a safe condition. Follow Take it slowly until you are familiar with the driving the inspection and maintenance guidelines. Check conditions you encounter. Be extra careful when wet, as important safety equipment before each trip. - Page 7 Securi ty * Regularly check the strength of the engine and rear fork the state of the circuit and lighting circuits; during use. If you notice any loose ends, you should Whether the front and rear brakes are functioning immediately follow them up. properly;...
- Page 8 Securi ty * Keep the tyre pressure in the correct range to avoid increased rolling resistance or deformation of tires and rims. * Maximum load: The maximum total weight of the bicycle is body weight than carrier weight and the vehicle's own weight and must not exceed 130 kg.
-
Page 9: Diagram With The Specific Components
Diagram with the specific components 1.Saddle 2.Seat post 3.Handlebar 4.Stem 5.Front light 6.Front fork 7.Front brakes 8.Mudguards 9.Frame 10. Pedals 11. Belt 12. Tires 13. Engine 14. Battery 15. Rear light 16. Brake lever left 1 7 . Grip left 18. -
Page 10: Technical Data
Technical data -Engine support up to 25km/h -Push aid up to 6km/h -Range with a charging cycle: 60-80km -recommended maximum load: 120 kg (driver and goods) -transported, driving noise: <55dB -Engine type: Brush-less rear wheel motor -Output power: 250W -Rated voltage: 36V -Engine weight approx: 2.3kg -Battery type: Lithium-ion battery 36V10Ah -Controller type: Bafang torque sensor... -
Page 11: Installation Instructions
Installation instructions 4.1 Open the box 4.2 Installation of the stem You will see a toolbox and a saddle, take your e -bike Use an Allen key to remove the four mounting out of the box. undo the cable ties. Detach the wheel screws from the handlebar. -
Page 12: Assemble The Front Light
Installation instructions 4.3 Assemble the front light turn the front light to an upwards position, hold down the front light and tighten the inner end of the screw. 4.5 Installation of the pedals Take the left pedal, If in doubt,look for the letter L on it. screw it counterclockwise onto the crank by hand. -
Page 13: Assemble The Saddle
Installation instructions 4.6 Assemble the saddle 4.7 Assembly instruction for the battery Unfold the saddle fastener and adjust the saddle to Insert the battery: Insert the battery along the rails. your comfortable riding height. Fold back in to When the battery has arrived at the end, turn the key to lock it. -
Page 14: Operational Instructions
Operational instruction 5 . 1 . 3 F u n c t i o n S u m m ary 5 . 1 Use of the Display CM 1 3 c a n p ro v i d e a l ot o f fu n c t i o n s t o f i t y o u r n ee d s . T h e i n d i c a t i n g c o n t e n t s a r e a s f o l l o ws : ●... - Page 15 Operational instruction ◆Power on/off (k i l o m e t e rs ), m a x i m u m s p e e d (k i l o m e t e rs / h o u r), a n d After long pressing the "ON/OFF"...
- Page 16 Operational instruction ◆Headlight ◆6km/h Push-assistance Press and hold the "UP" button for more than 2 seconds to turn on the headlights. After turning on the headlights, the backlight Hold the “DOWN” button will activate the push-assistance function, brightness decreases. Press and hold the "UP" button again for after 2s, the E- bike will travel at a uniform speed of 6 km/h while the more than 2 seconds to turn off the headlights and restore the backlight brightness.
- Page 17 Operational instruction M o t o r P o wer ◆ P AS l e v e l S h o rt p re ss t h e "i " b u t t o n t o dis p l a y t h e MO T O R S h o rt p re s s t h e "...
- Page 18 Operational instruction P a ra m e t e r s e tt i n g ◆ E rr o r c o d e W h e n t h e e l e c t ron i c c o n t ro l s y s t e m f ai ls , i t wi l l L o n g p re s s t h e "...
- Page 19 Operational instruction ◆ Un i t Di s p l a y s e t t i n g s : S h o rt p re s s " UP " o r " DO W N" t o s e l e ct " Un i t" , s h o rt ◆...
- Page 20 Operational instruction B a c kl i g h t b ri g ht n e ss ◆ S e t V o l t a g e " B ri g h t n e s s" i n d i c at e s t h e ba c k l i gh t b ri g h t n e s s "...
- Page 21 Operational instruction A u t o of f t i m e ◆ S o c v i e w “ A u t o o ff ” re p re s e n ts t h e a u t o m a t i c s h u t d o wn t im e "...
- Page 22 Operational instruction ◆ S p e e d l i m it s et t i n g A d v a n c e d s e t t i n g s " S p e e d Li m i t " re p re s e n t s t he s p e e d l i m it s e t t i n g. ◆...
- Page 23 Operational instruction ◆ S t a rt P a ss W o r d ◆ P a s s wo rd A f t er s e l e c ti n g " O N" i n t h e "S t a rt P a ss W o rd " S h o rt p r e s s t h e "...
- Page 24 Operational instruction ◆ Re s e t t o d e f a u l t s s et t i n g ◆ R e s e t P a s s wo r d S h o rt p re s s " UP " o r " DO W N" t o s e l e ct " Re s et t o A f t e r t u rn i n g o n t h e pas s w o rd, a "...
- Page 25 Operational instruction Q u a l i ty As s u r a n c e a n d W ar r a n ty S c o p e ◆ I n f o rm a t i o n ( S of t w ar e i nf orm a t i on ) Ⅰ...
- Page 26 Operational instruction ◆ Connection Layout Line sequence table Line Color Function Blue Black Green Yellow ■Some wire use the water-proof connector, users can not see the inside color.
- Page 27 Operational instruction Operation Cautions Be careful of safe use. Don’t attempt to release the connector when battery is on power. ●Try to avoid hitting. ●Do not modify system parameters to avoid parameters disorder. ●Make the display repaired when error code appears. This operating instruction is a general-purpose version.
- Page 28 Operational instruction...
- Page 29 5.2 Using the battery WARNING 5.2.1 Important safety information about the battery Keep the battery out of the reach of children. Before using the new e-bike, please read the following instructions for optimal use of the battery. Never try to open the battery. This is not only dangerous , but also leads to the exclusion of warranty.
- Page 30 Operational instruction 5.2.2 Discharge the battery side. All data are valid for a temperature of 25°C. In general, the battery charge level decreases by 1% with each ATTENTION temperature drop from 1°C. Always check that the battery is switched on before 5.2.4 More information and tours charging.
-
Page 31: Use Of The Charger
Operational instruction If a charger is used other than the one supplied with NOTE the bike, there is a risk of fire, electric shock and/or The battery discharges due to a chemical process serious injury. Please always make sure that the inside the battery cells. -
Page 32: Use Of The Motor
Operational instruction An extension cable can catch fire or lead to electric shock 5.4 Use of the Motor if it is not compatible to 100%. Do not use the bike in heavy rain or storm as this may be damaged. 5.3.2 Charger function This charger has been specially developed for charging Regularly check that the screws are tightened on... -
Page 33: Brake System
Operational instruction Therefore, one should be aware that the braking When electrical assistance is activated, starting with system is mainly used for speed control. The braking a bicycle is different from starting with ordinary bicycle system usually includes brake levers, disc brakes, and s. - Page 34 Operational instruction Use the wheel to check the distance. If the distance 5.6.2 Disc brake is too small, you can adjust the distance between the two brake pads with the screw No. 6. In case of friction, you should check the position of friction and fine-tune if necessary with screw No.
- Page 35 Operational instruction The number of gears available is the number of front For a mileage of 5000 km, it is recommended to re chain rings multiplied by the number of sprockets place the brake pads. If the brake pads are heavily on the rear wheel.
- Page 36 Operational instruction 5.7.2 Rear derailleur Setting : If the shifting process does not work correctly or the Place the chain on the smallest sprocket and adjust chain jumps off, this maybe due to a shifting cable that the H screw so that the smallest sprocket gear and is too loose or too strained.
- Page 37 Operational instruction 5.7.3 Chain 5.7.4 Instructions for use of the switching system: After a certain period of driving, the chain can show Avoid stepping backwards during shifting to prevent signs of wear such as elongation, which makes it damage or chain jumping off. longer.
-
Page 38: System Test Before Driving
System test before driving Always check the condition of the bike before each ride, Check whether the change between gears works in particular: smoothly and if necessary. adjust. Air pressure in the wheels, be sure to pay attention to Check cables. the air pressure in the wheels, be sure to pay Check that the bicycle lighting (front and rear) is attention to the area . - Page 39 Stand: January 2 0 2 5 . © Avalon Avalon Fietsen Cycletech Opaalstraat 6 1812 RH Alkmaar...
Need help?
Do you have a question about the E-Lite and is the answer not in the manual?
Questions and answers