Advertisement
Quick Links
Advertisement

Summary of Contents for Könner & Söhnen KS 22RLM
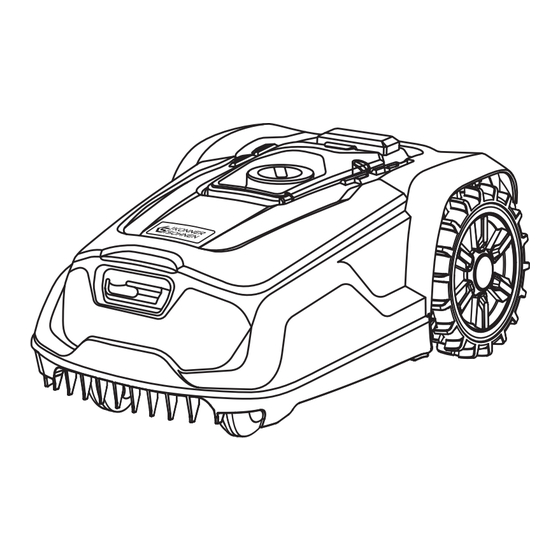
- Page 1 Owner’s Manual Please read this manual carefully before use! Robotic lawn mower KS 22RLM...
- Page 2 INTRODUCTION Thank you for opting for Könner & Söhnen products. This manual contains a brief description of safety, ® setup and use. More information can be found on the official importer’s website in the support section: konner-sohnen.com/manuals You can also go to the support section and download the manual by scanning the QR code or on thewebsite of the official importer of Könner &...
- Page 3 • Always perform a visual inspection of the device before using it. Do not use the device if its safety equip- ment, parts of the cutting unit or bolts are missing, worn or damaged. Damaged tools and bolts must only be replaced as a set to prevent imbalance.
- Page 4 • Do not try to repair the device by yourself unless you have professional training. All work not mentioned in these instructions may only be performed by authorised service representatives commissioned by us. • Only use accessories or attachments approved for this machine by or technically identical parts. Other- wise, there may be a risk of accidents resulting in personal injury or damage to the machine.
- Page 5 • Protect the battery from rain and moisture - do not immerse it in liquid. Do not expose the battery to microwaves or high pressure. • Battery may leak due to improper use - avoid contact! In case of accidental contact, flush the area with water.
- Page 6 Do not sit on the device. Do not use the device when it is raining, do not cut wet grass. Danger of electric shock! Caution! Risk of injury from moving blades. DANGER - rotating cutting blades. Keep nearby persons and children away from the lawn mower. Caution! The lawn mower blades will continue to move.
- Page 7 Device fuse. Short-circuit proof, closed safety transformer. Switched-mode power supply. Protection class ІІ. Electrical devices must not be disposed of with domestic waste. Producer. GRAPHICAL SYMBOLS ON THE CHARGING STATION GRAPHICAL SYMBOLS ON THE CHARGING STATION LED flashing green: LED flashing green: Boundary wire damaged or incorrectly connected.
- Page 8 The lawn mower can optionally be connected and controlled with Tuya Smart Арр. Please refer to the descriptions below for information on how the operating elements work. Android Android SPECIFICATIONS Robotic lawn mower KS 22RLM Motor voltage Drive speed 1,2 km/h No-load rotation speed 3100 rpm...
- Page 9 Power adapter Input voltage 230 V, 50 Hz; 1,5 A Output voltage 22 V; 2,5 A Protection class ІІ Protection type ІP65 Max. outdoor temperature 50 °C Charging station Input voltage 22 V, 2,5 A Output voltage 21 V, 2,4 A Protection class IPX4 Weight...
- Page 10 • Any parallel boundary wires (11) installed at a distance of at least 10 cm are identified as an obstacle by the lawn mower and are evaded (see figure 2). • Any parallel boundary wires (11) at a distance of 5 mm or less are not detected by the lawn mower and are passed over.
- Page 11 CONNECTING THE BOUNDARY WIRE TO THE CHARGING STATION CONNECTING THE BOUNDARY WIRE TO THE CHARGING STATION 1. Strip approx. 10-15 mm of both ends of the boundary wire (11) using cable strippers. 2. Fold the cover (23) upwards. 3. Connect the wire end of the boundary wire (11) that runs away from the front and surrounds the lawn to be mown to the contact socket (27) marked (-).
- Page 12 4. Enter the 4-digit PIN (factory setting “1111”). For information on which buttons translate into PIN entry and how, see chapter “Setting”. Change the factory-set password after initial commis- NOTE sioning, see chapter “Changing the PIN”. 5. Press the OK button (7) to enter the main menu. The lawn mower is now in standby mode.
- Page 13 • If the battery charge level is less than 70 %, the display shows “Low battery” after 2 seconds. The lawn mower charges until the battery charge level is 90 % and then starts mowing automatically. When the lawn mower is in standby mode: When the lawn mower is in standby mode: 3.
- Page 14 Main menu Menu level 2 Menu level 3 Error log Information Work log Setting Device information Factory set Version check Schedule Secondary areas EXPLANATION OF THE (STATUS) MESSAGES ON THE DISPLAY EXPLANATION OF THE (STATUS) MESSAGES ON THE DISPLAY Text in control panel Explanation Standby Lawn mower is in standby mode, there are no error messages...
- Page 15 Text in control panel Explanation Please reboot to start the firmware update Restart lawn mower Work interrupted, please retry Rain sensor activated Rain sensor is activated Mower in the station Mower in the station Mower is not in the station Mower is not in the station, If necessary, place the lawn mower in the station Press ,START’...
- Page 16 2. If necessary, open the cover (1). 3. Unlock the display (10) with the 4-digit PIN (factory setting “1111”). 4. Press the OK button (7) to enter the main menu. 5. Select “Spot mode” with the arrow buttons (6). The display shows “Close the cover to start”. 6.
- Page 17 We advise against having the lawn mower operate while NOTE it is raining. SETTING THE OPERATING TIMES SETTING THE OPERATING TIMES 1. If necessary, open the cover (1). 2. Unlock the display (10) with the 4-digit PIN (factory setting “1111”). 3.
- Page 18 5. Select the day you want to set (Mon, Tue, Wed, Thu, Fri, Sat, Sun) with the arrow buttons (6). 6. Press the OK button to enter the day setting. 7. Select the start and end time with the arrow buttons (6). Two mowing periods can be set per day. 8.
- Page 19 2. Unlock the display (10) with the 4-digit PIN (factory setting “1111 “). 3. Press the OK button (7) to enter the main menu. 4. Use the arrow buttons (6) to select “Setting”. 5. Use the arrow buttons (6) to select “Version check”. A check is made to see if a more recent firmware is available.
- Page 20 It is also possible to read the charge level without unlocking the display, but it is easier when the display is unlocked. WORKING INSTRUCTIONS Regular mowing stimulates the grass to an increased leaf formation, while at the same time killing weeds. As a result, the lawn becomes denser after each mowing and an evenly resilient lawn is created.
- Page 21 12. Now press the , that has the same colour as the set check mark. 13. Select your WLAN and enter the corresponding password. 14. Confirm the successful connection with “Finish”. The device is now listed in the tab and can be selected. If you have already connected other devices to the app: If you have already connected other devices to the app: 9.
- Page 22 Secondary areas Secondary areas Here you can set up to 5 secondary areas. The lawn mower must be in standby mode so that you can make settings here. 1. Select a secondary area. 2. Set the distance to the entry point. The lawn mower travels along the boundary wire for the distance you have specified and then starts mowing.
- Page 23 “ “ Check for firmware upgrade Check for firmware upgrade” ” checks if the firmware is up to date and enables an upgrade if a newer version is available. “ “ Remove device Remove device” ” deletes the lawn mower from your device list in the opp. Also read “Disconnecting the device and deleting data from the app”.
- Page 24 REMOVING BLOCKAGES REMOVING BLOCKAGES Wear safety gloves. There is a risk of injury. 1. Turn the lawn mower over. 2. Open the battery compartment (32) by removing the 4 screws on the underside of the device. 3. Remove the battery (33). 4.
- Page 25 TROUBLESHOOTING Problem Possible сause Remedy Insert rechargeable battery Rechargeable battery not inserted (see “Replacing the rechargeable battery”) Cover (1) is open Close cover (1) Machine does not start Defective motor Send the device in to the Service Centre for repair Pre-mow the lawn area if necessary.
- Page 26 ANNEX | 25 konner-soehnen.com...
- Page 27 ANNEX 100 cm 120 cm | 26 konner-soehnen.com...
- Page 28 ANNEX | 27 konner-soehnen.com...
- Page 29 ANNEX | 28 konner-soehnen.com...
- Page 31 CONTACTS Deutschland: Deutschland: DIMAX International GmbH Flinger Broich 203 -FortunaPark- 40235 Düsseldorf, Deutschland www.koenner-soehnen.com Ihre Bestellungen Ihre Bestellungen orders@dimaxgroup.de Kundendienst, technische Fragen Kundendienst, technische Fragen und Unterstützung und Unterstützung support@dimaxgroup.de Garantie, Reparatur und Service Garantie, Reparatur und Service service@dimaxgroup.de Sonstiges Sonstiges info@dimaxgroup.de Polska:...
Need help?
Do you have a question about the KS 22RLM and is the answer not in the manual?
Questions and answers