Advertisement
Quick Links
Advertisement

Subscribe to Our Youtube Channel
Summary of Contents for Ezviz RM600
- Page 1 ROBOTIC LAWN MOWER User Manual Scan the QR code for operation video and user manual www.ezviz.com...
- Page 2 Original instructions PRODUCT SAFETY PRECAUTIONS Read all safety instructions carefully before assembling and operating this machine. Ensure the machine has been assembled correctly and safely. Keep the instructions safe and pass them on to any subsequent user so that the information is always available.
- Page 3 mower! Keep away from the machine! Supervise children! · DO NOT modify the mower by yourself. Modifications could interfere with mower operations, result in serious injury and/or damage, or void the Limited Warranty. · Before working on the mower itself(e.g.maintenance, tool change, etc.) as well as during transport and storage, power off the mower by pressing and holding the on/off button 15s.
- Page 4 - before clearing a blockage. - before checking, cleaning. - before storage. - if the machine vibrates abnormally(stop and check immediately). - after impact with other objects, check the machine for damage and obtain necessary repair advice from after-sales service. Maintenance ·...
- Page 5 DECLARATION OF CONFORMITY Hereby, Hangzhou Ezviz Software Co., Ltd declares that the radio equipment type [ CS-R64-A11, CS-R64-A21 ] is in compliance with Directive 2014/53/EU. Hereby, Hangzhou Ezviz Software Co., Ltd declares that the Machinery equipment type [ CS-R64-A11, CS- R64-A21 ] is in compliance with Directive 2006/42/EC.
- Page 6 ) in conformity with EC directive 2000/14/ EC. The guaranteed sound power level includes variation in production as well as variation from the test code with 1-3 dB(A). Europe Authorised Representative EZVIZ Europe B.V. Dirk Storklaan 3,2132PX Hoofddorp, The Netherlands.
- Page 7 OR INDIRECT DAMAGES, INCLUDING, AMONG OTHERS, DAMAGES FOR LOSS OF BUSINESS PROFITS, BUSINESS INTERRUPTION, OR LOSS OF DATA OR DOCUMENTATION, IN CONNECTION WITH THE USE OF THIS PRODUCT, EVEN IF EZVIZ HAS BEEN ADVISED OF THE POSSIBILITY OF SUCH DAMAGES.
- Page 8 Please note the following situations: ��������������������������������������������������������������������������������������������������������������� 10 Fix the Base Station ��������������������������������������������������������������������������������13 Joining Up the Boundary Wire �����������������������������������������������������������������14 Get the EZVIZ App �����������������������������������������������������������������������������������14 Operations on the EZVIZ App ������������������������������������������������������������������17 1� Homepage �������������������������������������������������������������������������������������������������������������������������������������������������� 17 2� Setting ������������������������������������������������������������������������������������������������������������������������������������������������������� 18 Routine Maintenance �����������������������������������������������������������������������������19 1�...
- Page 9 1� Environmental Precautions ����������������������������������������������������������������������������������������������������������������������� 26 2� Rechargeable Lithium ion Battery ������������������������������������������������������������������������������������������������������������� 26 INFORMATION FOR PRIVATE HOUSEHOLDS ����������������������������������������� 27 LIMITED WARRANTY ���������������������������������������������������������������������������� 28...
- Page 10 The mower is positioned at the centre of the intended area to mow, once pressing the “Spot Mow” button on the EZVIZ App, it will leave a circle with a radius of 1.5m by spiral mowing path. After completion of “Spot Mow”, the mower will stop and need to be moved back to the base station manually.
- Page 11 Overview 1� Package Contents Mower ×1 Base Station ×1 Boundary Wire ×1 * Power Supply Unit ×1 Low-voltage Cable ×1 Extra Blades ×3 Screws ×4 Nails ×2 Pegs ×160 * Wire Connector ×2 Regulatory Information ×1 Hex Key ×1 Ruler ×1 Blade Screws ×3 Quick Start Guide ×1 •...
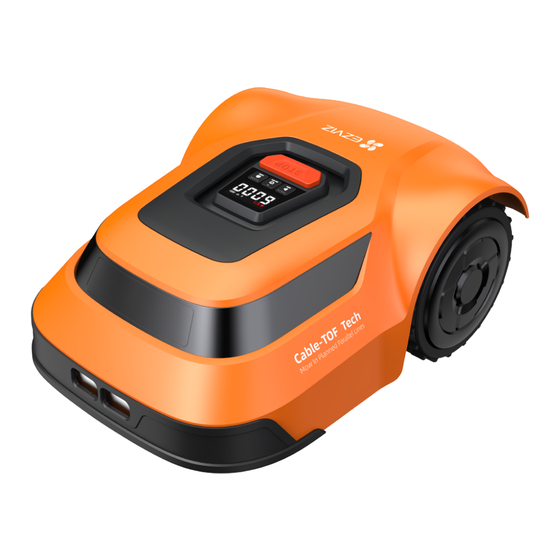
- Page 12 2� Basics Mower(Top View) STOP Button * * Control Panel * Cover Driven Wheel×2 Charging Contacts Universal Wheel×2 The collision sensor is located under the cover. Control Panel Mower locked. Enter the PIN code to unlock the mower. After restarting the mower, you need to re-enter the PIN code to unlock it. When battery level is below 15%, this sign lights up and the mower will return to the base station.
- Page 13 STOP Button Press once to stop the mower immediately once accidents happen. Mower(Bottom View) Blades×3 Blade Disc Battery Cover The blades are set to be a loose state for a better working performance, do not need to tighten it.
- Page 14 Base Station LED Indicator * Charging Port Baseplate * Wire Groove Location Remark LED Indicator Solid white/blue: Mower leaves the base station. Solid red: In charging You can view the charging status on the mower’s control panel. Solid green: Charge finished Alternating flashing red and white: The boundary wire is broken.
- Page 15 Preparation 1� Tool Preparation Ensure you have all the accessories and tool(s) needed for assembly and operation. This also includes suitable personal protective equipment, rubber mallet and pliers (purchase separately). 2� Check Your Lawn To reduce unnecessary mistakes and make the whole installation process easier and smoother, please check: 1.
- Page 16 Place the Base Station • The base station must be placed on the lawn, ensuring that the bottom is flat and soft soil. • The baseplate of the base station must not be bent. • If the working area has two parts separated with a steep slop, it is recommended to put the base station in the lower section.
- Page 17 Connect the Boundary Wire to the Base Station 1� Insert One End of the Boundary Wire • Before connecting the boundary wire to the Base Station, ensure the Base Station power supply is disconnected from the power outlet. • For better illustrate the connection of boundary wire, the boundary wire is in red in the following figures. The actual boundary wire is in black.
- Page 18 2� Lay the Boundary Wire Lay the boundary wire anti-clockwise around the lawn according to the shape of your lawn. • Boundary wires cannot be laid cross over. • Please use the original boundary wire which is specially designed to be moisture-proof. •...
- Page 19 Please note the following situations: For obstacle area For large obstacles ≥130cm from the edge of the lawn, lay the boundary wire around the area at a distance of 35cm, and then return vertically to the edge of the lawn. The distance between the two parallel wires should be ≥20cm.
- Page 20 For large obstacles <130cm from the edge of the lawn, keep a 35cm spacing around the obstacles. ≥35cm ≥35cm ≥35cm <130cm For passage A passage is a section that has boundary wire on each side and that connects 2 parts of the working area. Please keep a passing distance of more than 60cm to ensure that the mower can pass through the narrow passage normally.
- Page 21 For slopes The mower has the ability to safely climb slopes of 45%, and areas that are steeper than this should be isolated with the boundary wire. To calculate the slope of your lawn, you can refer to the following figures and method: 36cm(Elevation) =45%(slope) 100cm(Length)
- Page 22 Fix the Base Station 1. Insert two metal nails into the holes located at the head of the base station and hammer them into the lawn with the claw hammer. Please make sure that the two metal nails are completely nailed into the lawn, which determines the positioning accurately of the mower.
- Page 23 EZVIZ App 1. Connect your mobile phone to Wi-Fi. 2. Download and install the EZVIZ App by searching for “EZVIZ” in the App Store or Google Play 3. Launch the App and register an EZVIZ user account. • If you have already used the App, please make sure that it is the latest version. To find out if an update is available, go to the App store or Google Play and search for “EZVIZ".
- Page 24 Add the Mower to EZVIZ App 1. Log in to your EZVIZ app account. 2. On the Home screen, tap “+” on the upper-right corner to go to the Scan QR Code interface. 3. Scan the QR code on the rear part or the bottom of the mower.
- Page 25 • For Android system: 1. Click "Next" and once the progress reaches 100%, the mower has been successfully added. 2. Go back to the homepage, click the mower in the device list. 3. Click "Connect device", the interface will display the name of the Wi-Fi name and password of the mower. 4.
- Page 26 Operations on the EZVIZ App The App interface may be different due to version update, and the interface of the App you installed on your phone shall prevail. 1� Homepage Icon Description More function View working information Set mowing direction Spot mow.
- Page 27 2� Setting In the “More” page, you can set parameters of the mower. Name Description Work Configuration Schedule, Cutting Height, Mowing Record. Functional Configuration Rain and Snow Perception *, PIN-Code Reset. Firmware Version, Device Information(Model, Serial Number, Cutting Area, Unit, Device Information Instruction.
- Page 28 Routine Maintenance • Shutting down the mower and powering off the base station before all maintenance operations. • Always wear safety goggles or glasses with side shields during operation. If operation is dusty, it is advised to also wear a dust mask. •...
- Page 29 • Make certain ALL 3 blades and screws are replaced at the same time to keep a balanced cutting system. • Please visit www.ezviz.com for more information on additional blades. It is recommended to check the blades regularly. If the blades are blunt, damaged or showing signs of imbalance, they must be replaced.
- Page 30 Lift the mower with two hands with the blades facing outwards. 7� OTA 1. When the firmware version is updated, the EZVIZ App will push the firmware upgrade pop-up window when connected to the network. 2. Please keep the current state of the mower to meet the upgrade conditions: •...
- Page 31 Troubleshooting • Only perform the steps described within these instructions! All further inspection, maintenance and repair work must be performed by a qualified specialist. • Gloves and appropriate protective clothing must be worn when performing these instructions. Always turn off the mower before making any adjustment.
- Page 32 E451 Error: Right wheel Please check if the right wheel is stuck. Remove the unusual object, then motor blockage press the STOP button on the mower and press MOW + ON/OFF to resume protection mowing. If the error persists, contact after-sales service. E501 Error: Battery error Please restart the mower and then put it in the base station.
- Page 33 Failed to change the mowing direction? A: The mower cannot change direction during mowing. Please change direction on the App after the mower completes the task. After using for a period of time, the working time of the mower becomes shorter� Please charge the mower refer to the instructions in the user manual.
- Page 34 - If the lift sensor or collision sensor is stuck or being triggered continuously, gently shake the upper shell of the mower to check if there is debris or other objects blocking it from the mower. - After troubleshooting and cleaning, restart the mower. If it still does not work properly, please contact the customer service of the purchasing channel for after-sales processing.
- Page 35 Appendix 1� Environmental Precautions The chemical substances contained in the built-in lithium-ion battery of this product may cause environmental pollution. Please remove it before scrapping and send it to a professional battery recycling station for centralized disposal. Steps for removing the battery (the following information is only applicable when discarding the device, not the daily operation instructions): 1.
- Page 36 INFORMATION FOR PRIVATE HOUSEHOLDS 1. Separate collection of waste equipment: Electrical and electronic equipment that has become waste is referred to as waste equipment. Owners of waste equipment must dispose of it separately from unsorted municipal waste. In particular, waste equipment does not belong in household waste, but in special collection and return systems.
- Page 37 Your EZVIZ product is warranted for a period of two (2) or three (3) years from the date of purchase against defects in materials and workmanship, or such longer period as may be required by law in the country or state where this product is sold.
Need help?
Do you have a question about the RM600 and is the answer not in the manual?
Questions and answers