Advertisement
Quick Links
Catalog
Introduction....................................................................................................................................... 3
Product Brief ....................................................................................................................................3
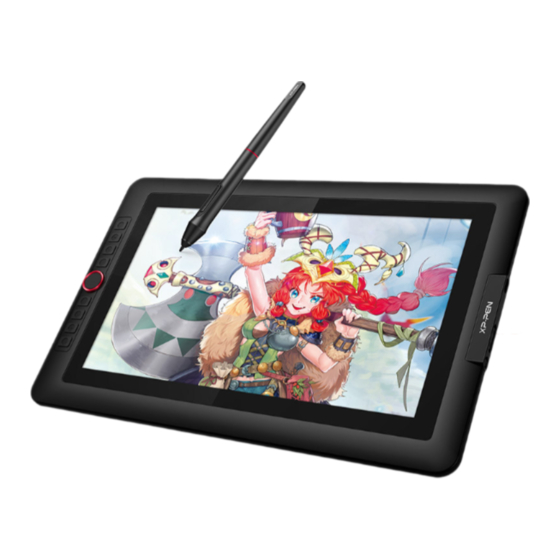
1、 Product Overview .............................................................................................................. 3
2、 Accessories .......................................................................................................................... 4
3、 Computer USB-C Connection ........................................................................................4
4、 Android Phone and Tablet Connection ...................................................................... 5
5、 Compatibility ...................................................................................................................... 6
Product Settings .............................................................................................................................6
6、 Driver Download ................................................................................................................6
7、 Driver Installation .............................................................................................................. 7
a) Windows .............................................................................................................................. 7
b) Mac ....................................................................................................................................... 7
c) Linux ......................................................................................................................................8
8、 Driver Function Settings ..................................................................................................9
Device Setting .......................................................................................................................10
Pen Settings ...........................................................................................................................21
Driver settings .......................................................................................................................24
9、 Driver Uninstallation .......................................................................................................25
1
Advertisement

Related Manuals for XP-PEN Artist 15.6 Pro V2


Summary of Contents for XP-PEN Artist 15.6 Pro V2
- Page 1 Catalog Introduction............................3 Product Brief ............................3 1、 Product Overview ......................3 2、 Accessories .......................... 4 3、 Computer USB-C Connection ..................4 4、 Android Phone and Tablet Connection ..............5 5、 Compatibility ........................6 Product Settings ..........................6 6、 Driver Download ........................6 7、 Driver Installation ......................7 a) Windows ..........................
- Page 2 a) Windows ..........................25 b) Mac ............................. 25 c) Linux ............................25 FAQ ..............................25...
- Page 3 Introduction Product Brief 1、 Product Overview 1. Shortcut Key 2. Roller 3. Display/Work area 4. USB-C to USB-A port 5. Full-featured USB-C port 6. Brightness up / down 7. Power Key/ Indicator Light Click the power button to turn it on, and the blue light is steady on...
- Page 4 2、 Accessories X3 Pro Smart Chip Stylus*1 Pen Holder*1 Pen Nibs*8 S01 foldable stand*1 USB-C to USB-C Cable*1 USB-C to USB-A Cable*1 USB-A Extension Cord*1 Glove*1 Cleaning Cloth*1 Power Adapter*1 *lmage is for illustration only.
- Page 5 2) lf the drawing display does not light up, please connect the drawing display via the USB-A to USB-C cable to the power adapter for power supply. *Due to different product specifications, the power adapter may not be standard. Please refer to the actual product received.
- Page 6 1、 Driver Download 1、Make sure your computer and device are connected 2、Log in to the XPPen official website (www.xp-pen.com.cn), click on the "Support" page and then download. Choose a product model and download the latest driver according to your computer system.
- Page 7 2、 Driver Installation Notes: Before installation, please turn off all anti-virus software and graphics software. Uninstall drivers (if any) for other drawing displays before the installation. Restart your computer after the installation is completed. For the best performance for your device, we recommend you to install the latest driver. ...
- Page 8 If there is no PenTablet_Driver on the list, go to resource Library -> Application Support -> PenDriver to add the driver manually. c) Linux DEB: Enter command “sudo dpkg -i”. Drag the installation file to the window and execute the command; RPM: Enter command “sudo rpm -i”.
- Page 9 execute the command; Tag.gz: Unzip file. Enter command “sudo”. Drag “install.sh” to the window and execute command. 3、 Driver Function Settings Before using, ensure that your device is successfully connected to your computer; If the device is connected to your computer successfully, the device name will be displayed in the upper left corner of the driver.
- Page 10 Device Setting Click the icons on the left menu bar to switch drive functions, from top to bottom they are Device Settings, Pen Settings, and Drive Settings. Click the Hide/Show button in the upper right corner to turn on/off the ...
- Page 11 1. Calibration Due to individual differences in stylus-holding habits and the angle at which the stylus is held, please use the stylus in your usual manner. To ensure that the product better fits your personal usage habits, click the center of the Red Cross on the device screen with the stylus to calibrate the offset between the stylus and the cursor.
- Page 12 b) Customize screen area: Drag to select an area: Drag the cursor from one point to another on the screen. Coordinates: Manually enter coordinates in the corresponding input boxes for X, Y, W and H. Click to set screen area: Click the upper left corner position and lower ...
- Page 13 Set the device working area: Full area: The whole work area of the device is available. b) Customize active area: Drag to select an area: Drag the cursor from one point to another on the device. Coordinates: Manually enter coordinates in the corresponding input ...
- Page 14 and lower right corner position on your device. Proportion: Scale your device's work area and selected display area proportionately. If you draw a circle on the device after selecting proportions, a circle will appear on the screen. However, part of the work area may not be used. But if you don’t choose the proportion and draw a circle, the circle may change into an ellipse on the screen.
- Page 15 4. Application You can add up to 7 applications from the application list above as needed. The specific steps for adding are as follows: . Click the + icon on the top right of the application bar to open the application list;...
- Page 16 If you select all other applications, it will apply to other uncustomized applications. 5. Shortcut Keys Click the corresponding shortcut key on the device diagram to open the hotkey setting interface and customize the function Settings.
- Page 17 Shortcut Keys You can set the current key to the common keyboard shortcut under the application of your choice: For example, set it as Alt+A in 3D MAX, so the alignment tool can be used. Multiple shortcuts can be set with the same key: For example, type Ctrl+C/ Ctrl+V, and when you press the key, the shortcut key functions set will all run at once.
- Page 18 Set the key combination of mouse and keyboard. With the "Shift" and "Left Click" selected, the shortcut actions can be enabled in application that supports such key combinations. Other The current key can be set to other shortcut functions besides keyboard shortcuts and mouse:...
- Page 19 Show Driver Panel: Displays the driver Settings panel quickly. Switch Monitor:When there are multiple display devices, you can make the cursor map to other display devices. Precision Mode:Limit the device’s work area to a certain area. This function may allow you to create more detailed drawings. [B]/[E]:Function switching between pen and eraser for very few applications.
- Page 20 6. Scroll Wheel Click on the corresponding button position on the device image to customize its function. The driver enables zoom (default), brush, scroll and rotate functions.
- Page 21 Click Customize from the drop-down menu of each group of wheel functions, then you can type the key or key combination to be set by the keyboard to customize the wheel clockwise and anticlockwise function. Pen Settings When the stylus is within the work area, the device will recognize the stylus and ...
- Page 22 corresponding stylus to set the Settings. When you use the stylus, the driver will automatically switch to the stylus's custom Settings. 1. Pen Keys Click on the pen keys position on the image and open the hotkey setting interface, then you can customize the function Settings. The specific operation mode of the custom function setting is the same as the operation mode of Product Settings ->...
- Page 23 2. Pressure Pressure Curve You can adjust the pressure by manually adjusting the Pressure Curve or by clicking on Pressure Preset Options in the right column. You can use the stylus to draw freely on the drawing board at the bottom left, helping you more intuitively feel the brush effect of the preset pressure.
- Page 24 3. Other Windows Ink(for Windows only) If your main use of the device is painting, please do not turn it off. If you need to use this function in Microsoft Office/Whiteboard or other software, please do not turn it off. Mouse Mode ...
- Page 25 2. Current device Diagnostic tool You can use the diagnostic tool in case of any problems while using the driver. Feedback If you have any questions or suggestions during the use of the driver, you can give us feedback through this page. Prompt ...
- Page 26 2) Check if the cable is connected properly. 3) Check if the power indicator is blue. If not, check the cable and restart the device. 4) If the signal is unstable, check if the cable port is stable. Computer fails to recognize the device. 1) Check if your computer's USB port used works normally.
- Page 27 Cursor offsets. 1) Confirm the mapping of the driver. 2) Calibrate the pen with the driver. Line latency during drawing with the software. 1 ) Check if the computer configuration (CPU&GPU) meets the recommended configuration requirements for the drawing software installed, and optimize related functions via settings according to the FAQs posted on the official website of the drawing software.
Need help?
Do you have a question about the Artist 15.6 Pro V2 and is the answer not in the manual?
Questions and answers
no matter which version i download or what i do, it wont allow me to recalibrate my pen. i have tried literally everything i could find and still came up empty handed. i dont even see a calibration BUTTON.