Table of Contents
Advertisement
Quick Links
SERVICE
CLOTHES DRYER
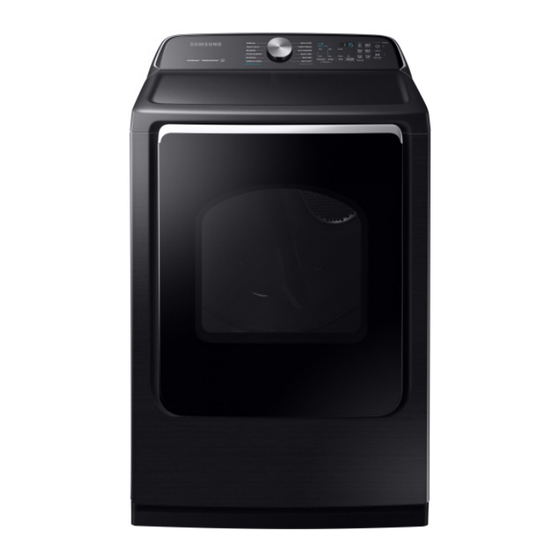
DVE54R7600V/A3
CLOTHES DRYER
Basic Model : DVE(G)50R5400*
Project Name : DV7000R
Model Code : DVE54R7600V/A3
DVE54R7600W/A3
DVE54R7600C/A3
DVG54R7600V/A3
DVG54R7600W/A3
DVG54R7600C/A3
DVE54R7200V/A3
DVE54R7200W/A3
DVG54R7200V/A3
DVG54R7200W/A3
Manual
1. Safety Instructions
2. Features and Speci ications
3. Disassembly and Reassembly
4. Troubleshooting
CONTENTS
Advertisement
Table of Contents
Troubleshooting

Related Manuals for Samsung DVE54R7600V/A3


Summary of Contents for Samsung DVE54R7600V/A3
- Page 1 CLOTHES DRYER Basic Model : DVE(G)50R5400* Project Name : DV7000R Model Code : DVE54R7600V/A3 DVE54R7600W/A3 DVE54R7600C/A3 DVG54R7600V/A3 DVG54R7600W/A3 DVG54R7600C/A3 DVE54R7200V/A3 DVE54R7200W/A3 DVG54R7200V/A3 DVG54R7200W/A3 SERVICE Manual CLOTHES DRYER CONTENTS 1. Safety Instructions 2. Features and Speci ications 3. Disassembly and Reassembly 4. Troubleshooting...
-
Page 2: Table Of Contents
This document can not be used without Samsung's authorization. CONTENTS 1. Safety Instructions ..............3 1-1. -
Page 3: Safety Instructions
This document can not be used without Samsung's authorization. 1. SAFETY INSTRUCTIONS 1-1. CAUTION FOR SAFETY DURING SERVICING 1. Do not allow the customer to repair the product. 4 The person may be injured or the product life may be shortened. -
Page 4: Important Safety Information
This document can not be used without Samsung's authorization. 1-2. IMPORTANT SAFETY INFORMATION To avoid risk of fire, electric shock, serious injury, when using your dryer, follow these basic precautions: 1. Read all instructions before using the dryer. 2. Install dryer according to Installation Instructions. Refer to the Grounding Instructions in the Installation Instructions for proper grounding of the dryer. -
Page 5: Electrical Service Information
This document can not be used without Samsung's authorization. 22. Never operate the dryer with the guards and/or the panels removed. 23. Do not operate the dryer with missing or broken parts. 24. Do not bypass safety devices. 25. Keep area around the exhaust opening and adjacent surrounding areas free from accumulation of lint, dust, and dirt. -
Page 6: Features And Specifications
This document can not be used without Samsung's authorization. 2. FEATURES AND SPECIFICATIONS 2-1. FEATURES Cycle Description For most fabrics including cottons and linens. NORMAL If Normal is selected, the Eco Dry function is enabled by default. For more information, see Eco Dry in the “Control panel” section. -
Page 7: Product Dimension
This document can not be used without Samsung's authorization. 2-2. PRODUCT DIMENSION Type Front Loading Dryer A. Height Product-inches(mm) 44.4(1127) B. Width Product-inches(mm) 27.0 (686) Dimentions C. Depth with door open 90° Product-inches(mm) 50.1(1273) D. Depth Product-inches(mm) 30.3(768) Water pressure-psl (kPa) -
Page 8: Comparing Specifications With Existing Models
This document can not be used without Samsung's authorization. 2-3. COMPARING SPECIFICATIONS WITH EXISTING MODELS Project DV7000R(Basic) DV7000R(New) Model DVE(G)50R5400* DVE(G)50R5200* DVE(G)54R7600* DVE(G)54R7200* Capacity (cu.ft / DOE) Power Resource Electric / Gas Electric / Gas Electric / Gas Electric / Gas... -
Page 9: Options Specifications
This document can not be used without Samsung's authorization. 2-4. OPTIONS SPECIFICATIONS Item Code Remarks MANUAL-BOOK DC68-03784D Y connector DC67-00324A Default Short Water Hose DC97-15249A DVE(G)54R7600* DIE RACK DRY DC61-03052B only 10 _ Features and Specifications... -
Page 10: Disassembly And Reassembly
This document can not be used without Samsung's authorization. 3. DISASSEMBLY AND REASSEMBLY 3-1. TOOLS FOR DISASSEMBLY AND REASSEMBLY Tool Type Remarks Socket set with 14 mm Fan (2) 6” extention Tool to protect the idle and abrasion of the bolt Vice pliers for the box driver. -
Page 11: Standard Disassembly Drawings
This document can not be used without Samsung's authorization. 3-2. STANDARD DISASSEMBLY DRAWINGS To avoid risk of electrical shock, personal injury or death, disconnect the power to the Clothes Dryer. ► This is a standard disassembly diagram and may differ from the actual product. Use this material as a reference when disassembling and reassembling the product. - Page 12 This document can not be used without Samsung's authorization. Part Name Figure Description 1. Unplug the power cord of the dryer. 2. Remove the four hinge screws from the door, and then remove the door by lifting it up slightly. 3. Remove the two screws from the lever holder, and then remove the holder cover.
- Page 13 This document can not be used without Samsung's authorization. Part Name Figure Description 7. Remove the glass holder, and switch the positions of : a. the hinge cover and the door handle. b. the hinge holder and the glass-guide holder.
- Page 14 This document can not be used without Samsung's authorization. Part Name Figure Description 1. Unplug the unit. 2. Remove Top Cover. 3. Remove Control Panel. 4. Remove Frame Front. Drum Front 5. Remove Plate(U) 6. Remove Drum Front retaining 5 screws.
- Page 15 This document can not be used without Samsung's authorization. Part Name Figure Description 1. Disconnect Power Supply to Unit. 2. Remove Top Cover, Console, Front Panel, Plate(u), Drum Front. 3. Remove Belt. Drum 4. Lift Drum and Pull out. Carefully spread the cabinet as needed to get extra clearance. But, take care not to deform the cabinet.
- Page 16 This document can not be used without Samsung's authorization. Part Name Figure Description 1. After remove Drum, do the following. 2. Remove the 2 screws from Duct Connector. 3. Separate Duct Connector. 4. Remove 1 Housing Motor. 5. Remove 2 Housing Belt Cut. Off Switch.
- Page 17 This document can not be used without Samsung's authorization. Part Name Figure Description 1. After the knock-down to Motor/Assy-Motor, do the following. 2. Shut off gas supply. 3. Disconnect gas pipe. 4. Remove all the connectors. Burner 5. Remove two screws (one at the front and the other one at the back) securing Burner to Frame.
- Page 18 This document can not be used without Samsung's authorization. Part Name Figure Description 1. Unplug the unit. 2. Remove Top Cover. Thermistor 3. Remove 1 screw from the Assy Drum Back. To remove the screw, use long tools. Sensors 1. Remove each securing screws to remove each of (Thermostat, the sensors.
-
Page 19: Troubleshooting
This document can not be used without Samsung's authorization. 4. TROUBLESHOOTING 4-1. INFORMATION ITEMS AND DIAGNOSTIC CODES An occurrence of an Error will make a sound of error melody for 5sec and continuously show one of the Error Displays. Information... -
Page 20: Special Features
This document can not be used without Samsung's authorization. 4-2. SPECIAL FEATURES 4-2-1. Child Lock • Child Lock prevents children from playing with the dryer. When Child Lock is activated, all buttons except for the Power button are disabled. •... -
Page 21: 22 _ Troubleshooting
This document can not be used without Samsung's authorization. 4-2-5. CLEANING ■ Feature Panel • Clean with a soft, damp cloth. Do not use abrasive substances. • Do not spray liquid cleaning agents directly on the display of the dryer. - Page 22 This document can not be used without Samsung's authorization. 4-2-7. Smart Install • Smart Install allows service personnel to check if the dryer is installed properly. ■ To enter Smart Install Turn on the dryer, and press and hold the Adjust Time Up + Temp.
-
Page 23: Trouble Diagnosis
This document can not be used without Samsung's authorization. 4-3. TROUBLE DIAGNOSIS As the micom dry machine is configured for the complicate structure, there might be a service call. The below information is prepared for exact trouble diagnosis and suitable repair guide. - Page 24 This document can not be used without Samsung's authorization. Problem What to do • Seams, pockets, and other similarly heavy areas may not be completely dry when the rest of the load has reached the selected dryness level. This is normal. You can choose a higher dryness level or a cycle that involves a higher dryness level.
-
Page 25: Component Testing Procedures
This document can not be used without Samsung's authorization. 4-4. COMPONENT TESTING PROCEDURES Part Name Image Description Electric THERMISTOR THERMOSTAT1 • Thermistor resistance 10K Ω @ 25°C (77°F) Thermistor Thermostat • Thermostat 1 resistance < 1Ω 85˚C, 25A Thermal cut-Off •... - Page 26 This document can not be used without Samsung's authorization. Part Name Image Description • Belt Cut-off S/W Belt Cut-off S/W - Lever open: Resistance value < 1Ω - Lever push: Resistance value: ∞ Ω Belt Cut-Off Switch 125V, 16A •...
-
Page 27: 28 _ Troubleshooting
This document can not be used without Samsung's authorization. Part Name Image Description • Valve 1-2: Resistance value approx. 1365Ω • Valve 1-3: Resistance value approx. 560Ω Gas Valve • Valve 4-5: Resistance value approx. 1325Ω (25M01A) • Valve 6-7: Resistance value approx. 1000Ω... - Page 28 North & Latin America gspn3.samsungcsportal.com China china.samsungportal.com This Service Manual is a property of Samsung Electronics Co.,Ltd. © 2023 Samsung Electronics Co.,Ltd. All Any unauthorized use of Manual can be punished under applicable rights reserved. International and/or domestic law.
Need help?
Do you have a question about the DVE54R7600V/A3 and is the answer not in the manual?
Questions and answers