Advertisement
General Information
Unpacking and Inventory
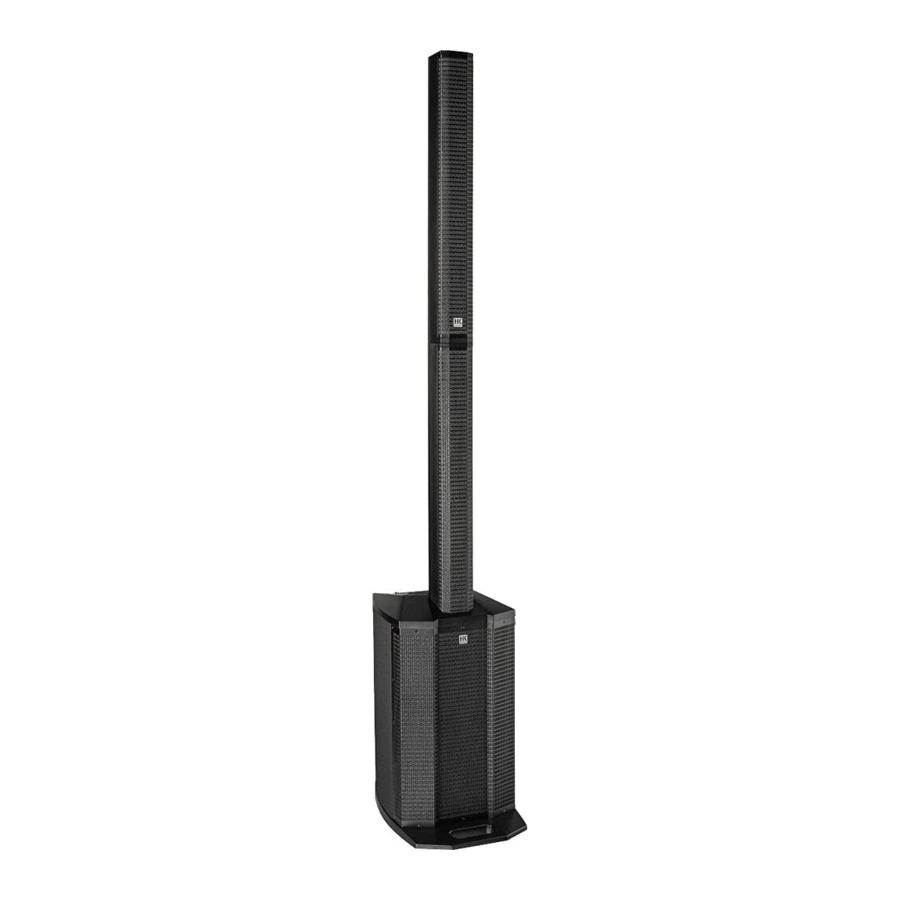
Please remove the entire system from the cartons and make sure you have received all its component parts. POLAR comes in two cartons and consists of a subwoofer, a columnar mid/high unit and a spacer. The shipping box for the subwoofer also contains a padded protective cover for the bass bin, a gig bag for the two columnar elements, and the mains power cord.
The Components

The Subwoofer
The powered subwoofer houses the bass woofer, the system's electronic components and the power amplifiers. On the top panel is a signal-carrying, plug-in port serving to connect the column's elements and a carrying handle. Another handy grip routed into the front of the bottom panel lets you comfortably carry the subwoofer with one or two hands. The integrated control panel with the display, control features and connectors slopes slightly toward the rear to protect the controls against damage. The bass reflex ports are located at the bottom of the front panel. The power off /on switch and mains socket are on the rear panel.
The Column
- The column consists of a mid/high unit and a spacer.
- The spacer plugs into a signal-carrying socket/coupler on the subwoofer. The mid/ high unit plugs into the spacer using the same type of connector.
- This coupler provides a mechanical and electrical connection between the mid/high unit and spacer, so you do not need speaker cables to connect the two.
Setting up the System
Connecting Components
- Place the subwoofer on a level, stable surface.
- Connect the spacer and the mid/high unit to the subwoofer as described in section above.
- Make sure the components are firmly seated and connected to one another.
- Plug the power cord into the rear mains power socket.

Heads up: Feel free to set the system up without a spacer if you wish to place it on a high stage, table or the like.

Do not transport or otherwise move an assembled POLAR system. This could damage it, or if it tips, injure people or destroy property.
Stereo Setup

If you wish to run two POLAR 12s in stereo, route the mixing console's left channel to the system on the left and its right channel to the system on the right. Make sure the DSP settings for Mode, EQ, Delay, and so on are identical for both systems. See section "DSP Menu" for more on this.
Info: You can also operate a POLAR 10 and a POLAR 12 in stereo. Use the two Sub  knobs and the respective DSP settings (system EQs; see section "Settings" for more on this) to compensate for the differences in the two systems' bass response.
Delay Line for Distributed Systems

POLAR's Delay function lets you use it for a delay line. See section "Settings", Delay, to learn more about this. All you have to do is measure the distance between the main speaker and POLAR in meters, and enter that number to "Delay" in the DSP menu. POLAR factors the main speaker's delay into the equation, automatically calculates the delay time, and renders the signal with the proper delay.
Connectors and Control Features

Rear Panel
- Mains
Please use the factory-included power cable to connect this IEC mains socket to a wall outlet.
Heads up: The built-in switching power unit features a wide-range input that automatically adapts to AC voltages ranging from 100 V to 240 V at 50 or 60 Hz. - Power
This on/off button powers the system up and down. When you switch POLAR on, it loads the most recently used DSP settings and will be ready to operate within seconds when the four channels' level indicators and the Master volume setting appear in the display.

Channel 1 and Channel 2 (Line/Mic)
Channel 1 and 2's feature sets are identical. These channels accept microphones and line-level instruments such as keyboards.
- Input
This balanced XLR / 1/4" (6.35 mm) combo jack accepts an XLR connector or a balanced or unbalanced 1/4" (6.35 mm) jack plug.
Heads up: A balanced signal is always preferable because it is less susceptible to HF and other interference. - Line/Mic
Adjust the preamplifiers' gain and impedance with this selector. Set it to Line to connect a line-level device such as a mixing console, keyboard or the like. Set it to Mic to connect a dynamic microphone. - Volume
Turn this knob to adjust the signal level. Twist it counterclockwise to the far left to turn the volume all the way down and clockwise to the far right to turn it all the way up.
Channel 3 (Instrument)
Use this input to connect an instrument with high-impedance (Hi-Z) output signals such as an electric or acoustic guitar or bass or an electric piano. The high-impedance input stage renders the instrument's full tonal and dynamic range.
- Input
Connect instruments to this unbalanced 1/4" (6.35 mm) jack. - Volume
Turn this knob to adjust the signal level. Twist it counterclockwise to the far left to turn the volume all the way down and clockwise to the far right to turn it all the way up.
Channel 4 (Aux + Bluetooth)
Connect stereo sources such as DJ consoles, CD/MP3 players or mixing consoles to Channel 4 and use it to stream audio via Bluetooth. Channel 4 accepts and renders Aux and Bluetooth signals at the same time.
- Input
Connect audio sources with high output levels such as a CD/MP3 player, smartphone, DJ mixer or a computer to this unbalanced input consisting of two RCA/cinch connectors. - Volume
Turn this knob to adjust the signal level for both the Aux and Bluetooth inputs. Twist it counterclockwise to the far left to turn the volume all the way down and clockwise to the far right to turn it all the way up.
Heads up: When using the Aux input while streaming audio via Bluetooth, balance the two signal levels by adjusting the Bluetooth player's volume to match that of the incoming Aux signal. - Sub
Turn this knob to adjust the amount of bass. Twist it counterclockwise to the far left to turn the bass all the way down and clockwise to the far right to turn it all the way up. Turn the Sub knob to 0 dB to achieve a relatively balanced volume between the column and the subwoofer.
Good to know: It is often a good idea to back off the bass slightly when placing the subwoofer in a corner or in very small rooms. Reducing the amount of bass also increases the system's peak volume without triggering its limiter circuits. - Mix Out
This balanced XLR output provides a summed signal – that is, a mix of all input channels' signals.
Heads up: Mix Out serves to forward the summed signal to an FOH mixer, other speakers, monitors or recording device. You can also send it another powered subwoofer if the unit has a high-cut or low-pass filter to suppress high frequencies. - LCD Display
In normal operating mode, this display indicates the input channels' levels and the master volume.
In DSP mode, it shows the parameters of the currently selected DSP menu. See section "Settings", DSP Settings, for more on this.
![]()

Level Indicators
The four level indicators show the input channels' levels. The Overload section tells you the incoming signal is saturating the input because its level is too high. If Overload lights up, turn down the channel's input gain and/or the connected device's output level.
Heads up: POLAR has enough dynamic range to handle occasional spikes where the signal peaks out. However, if an Overload indicator lights up continuously or it sounds like the signal is clipping, turn the given channel's volume down to prevent the distortion produced by an overloaded system.
Good to know: It is important to dial in the proper signal levels to minimize noise. The best way to do this is by maxing out the channel levels: turn up the input channels' volume until the Overload indicator lights up at the loudest signal peak, and then back it off just enough so the Overload indicator no longer lights up. Then turn the Master knob up only as far as you need it to go.
- Master (push to edit)
The Master knob on the right of the display serves primarily to adjust the system's overall volume. The display indicates the current value; the control range sweeps from -60 to +10 dB in 1 dB increments.
DSP Menu
Press the Master knob (push to edit) to access and edit various DSP parameters listed in a menu. The display shows the currently selected parameter.
- Turn the Master knob to navigate the menu. Press it to select the current menu option or confirm your entry.
 Note: POLAR will exit the selected menu option and automatically return to the main Master Volume window if you do not make or confirm an entry within eight seconds. It does this to prevent inadvertent operating errors.
Heads up: The system's memory stores all current DSP settings when you power it down and reloads those settings when you power the system back up again.
The following functions are available:
Bluetooth
| Bluetooth | Pairing: activate Bluetooth connection (push again to activate pairing process) |
POLAR can stream audio via Bluetooth, which is a wireless way of rendering music on mobile Bluetooth-enabled players such as smartphones and tablet PCs.
Connecting to a Bluetooth device
- Press the master knob once. The display will show the menu option "Bluetooth".
- Press the Master knob again ("Pairing") to start the Bluetooth connection process known as pairing. Bluetooth-enabled devices should now be able to discover POLAR. The Bluetooth icon in the display flashes slowly for 120 seconds, indicating that you can pair the system with a Bluetooth-enabled device during this two-minute window.
- Go to the Bluetooth menu of your player and select "HK Audio POLAR" to pair the two devices.
- The Bluetooth symbol lights up continuously in the POLAR display as soon as the two are properly paired.
The display indicates the Bluetooth status:
- Display shows the number 4 rather than a Bluetooth icon
Bluetooth is off
![]()
- Icon flashes slowly
You have 120 seconds to pair devices - Bluetooth icon lights up continuously
Devices are connected
![]()
- Icon flashes quickly
Bluetooth pairing failed or the connection dropped out (e.g. out of Bluetooth range)


Heads up: If the Bluetooth icon flashes quickly, check if your Bluetooth device is within range, Bluetooth is enabled, and POLAR is selected in the list of Bluetooth devices. If POLAR does not appear in the list of Bluetooth devices, try Bluetooth Pairing again to reconnect.
Channel 4 renders audio signals sent from the Bluetooth device. Adjust the level with channel 4's Volume knob or with the control on the Bluetooth device. We strongly recommend turning channel 4's volume down before you hit the play button on your Bluetooth device.
Read chapter "Bluetooth" to learn more about Bluetooth.
Settings
System EQ
| Hi EQ | Adjust high frequency: +/- 12 dB (default: 0 dB) |
| Mid EQ | Adjust mid frequency: +/- 12 dB (default: 0 dB) |
| Mid Freq | Set mid frequency: 70 Hz – 12 kHz (default: 1 kHz) |
| Low EQ | Adjust low frequency: +/- 12 dB (default: 0 dB) |
POLAR's three-band EQ serves to tune the system's overall sound. Hi EQ and Lo EQ are shelving filters; Mid EQ is semi-parametric.
Good to know: Use these tone controls to tweak the overall sound to suit the application and your taste. It is often a good idea to dial down the bass a bit in small rooms with short distances between the system and walls and audiences. The same goes for high frequencies when a sensitive microphone or highly reflective surfaces such as glass walls or windows increase the likelihood of feedback. Use the semi-parametric midrange band to cut a specific frequency that is interfering with your sound or boost a frequency range that sounds a little thin.
Hi EQ: Use this parameter to boost or cut high frequencies. Control range: +/-12 dB • Frequency: 12 kHz
Mid EQ: Use this parameter to boost or cut midrange frequencies. Control range +/-12 dB
Mid Freq: Use this parameter to select and adjust the midrange center frequency. Frequency range: 70 Hz - 12 kHz
Low EQ: Use this parameter to boost or cut low frequencies. Control range: +/-12 dB • Frequency: 70 Hz
Heads up: the EQ only applies to the speakers, it has no effect on the Mix Out.
Mode
| Mode | Music (default) |
| Voice | |
| DJ |
Three preprogrammed modes let you tune the system's sound to suit the application.
Music: This mode is your go-to choice for live applications and playing all kinds of music, apart from electronic music.
Voice: Optimized for the human voice, this mode is good for speaking engagements and for other speech applications.
DJ: This mode is the best choice for playing electronic music.
Heads up: Changing the Music/Voice/DJ mode does not overwrite the three-band EQ's settings. The three-band EQ is an independent, additional sound-shaping tool.
Delay
| Delay | Off: turns off delay function (default) |
| 0–100 m: choose delay distance |
Use the "Delay" menu option if you need to delay the audio signal rendered by the POLAR speakers. The system makes it easy to do this: simply set the delay from 0 (off ) to 100 meters in 0.25-meter increments.
Heads up: The delay function comes very handy if you want to use POLAR as a delay line for larger events. In acoustically challenging venues, it can help you distribute sound more uniformly, improve speech intelligibility all the way to the back rows, achieve high-quality audio, and reduce the volume of the main PA up front by the stage. All you need to do to sync POLAR up with the main PA is enter the distance between POLAR and the stage in meters.
Managing Presets
| Load Preset | Load customized settings |
| Store Preset | Store customized settings |
| Erase Preset | Erase selected preset |
Load Preset
Five memory slots (U1 to U5) are available for storing your personal DSP settings. "U" stands for user preset. A user preset contains the settings for all parameters in the DSP menu (mode, three-band EQ, delay, display brightness, etc.).
Turn the Master knob to select the preset you wish to load from U1 through U5, and then press the knob to load the selected preset. "Exit" quits the menu without loading a preset.
Store Preset
This option stores the current DSP menu settings. Turn the Master knob to select the desired memory slot from U1 through U5. Confirm your selection by pressing the Master knob. A box serving to name this preset appears in the display. "Exit" quits the menu without saving a preset.
Text Editor: Turn the Master knob to access the text box and navigate the menu to the Save, Clear and Cancel options. Once you have dialed up the text box, press the knob to select the first of the twelve character spaces, and then turn it to select a letter or character. Press the knob again to move to the next character space, and then turn it to select the next letter or character. Press the Master knob twice – without turning it – to exit the text box. The enter symbol, an arrow, will appear in the display. Now you can turn the knob to navigate from the text box to the Save, Clear and Cancel options.
Save: Selecting Save lets you store the preset by pressing the Master knob. This takes you back to the U1 to U5 selection menu, where you can copy the preset to another memory slot or quit the menu via Exit.
Clear: Selecting Clear lets you wipe the Text box clean by pressing the Master knob so you can enter a new name.
Cancel: Selecting Cancel lets you stop the naming process by pressing the Master knob. This takes you back to the U1 to U5 selection menu, where you can select a different memory slot or cancel the entire saving process via "Exit".
Erase Preset
This option serves to delete the selected preset. Pressing the Master knob does not yet erase the preset. A confirmation prompt appears first:
Confirm Erase: Yes/No
Turn the knob to select Yes or No, and then press the Master knob to confirm your selection. Yes irrevocably deletes the preset; No takes you back to the DSP menu.
Display
| LCD Dim | Off: display is constantly on (default) |
| On: after 8 sec. of no operation, display turns dark | |
| Brightness | Display brightness 0 – 10 (default: 5) |
| Contrast | Display contrast 0 – 10 (default: 5) |
LCD Dim: Deactivate (Off) this function if you want the display to remain bright. Activate it (On), and the display will dim eight seconds after you last used the Master knob. The readout darkens, but it will remain clearly legible. As soon as you use the Master knob, the display will brighten to the set level.
Bright: Adjusts the display's brightness from 0 to 10.
Contrast: Adjusts the display's contrast from 0 to 10.
Factory Reset
| Factory Reset | Reset all settings to default |
Reset
- "Reset" lets you restore POLAR's factory DSP settings.
- Pressing the Master knob does not yet trigger a reset. A security prompt appears first:
Confirm Reset: Yes/No
Turn the knob to select Yes or No, and then press the Master knob to confirm your selection. Yes irrevocably resets all DSP functions to the factory defaults, with Music mode activated, the Bluetooth connection severed, and all five user presets erased.
Good to know: This function comes in handy if you frequently rent the system out. It lets you quickly restore the factory settings before handing the system over to the next customer.
Exit DSP Menu
| Exit | Exit DSP menu |
This menu option lets you quit the DSP menu and restore the Master knob to its function as a volume control. This also happens automatically if you leave the Master knob to idle for eight seconds.
Bluetooth
Pairing a Bluetooth device
- Press the Master knob once to access the "Bluetooth" menu.
- Press it again to start the pairing process.
- The Bluetooth icon in the display flashes slowly and "POLAR" can be found in the Bluetooth list of the Bluetooth-enabled device for 120 seconds.
- Select "HK Audio POLAR" on the Bluetooth-enabled device to pair it with POLAR.
The Bluetooth symbol lights up continuously in the POLAR display as soon as the two are properly connected. Read section "DSP Menu" to learn more about the Bluetooth status indicator in the display.
Automatic Pairing
When you switch POLAR back on again, it automatically searches for the most recently connected device for 120 seconds. Once it finds that device, POLAR connects to it so you do not have to dial up and launch Bluetooth Pairing manually. If the device fails to connect after 120 seconds, you can either trigger an automatic search again by switching POLAR off and back on again, or launch the search manually by activating Bluetooth Pairing.
Switching Bluetooth Devices
You cannot switch to another device while a Bluetooth device is paired or POLAR is searching for the most recently connected device. You will have to dial up and launch Bluetooth Pairing manually to disconnect the currently paired device and connect another Bluetooth device.
Heads up: Bluetooth Pairing always triggers a new attempt to pair a Bluetooth-enabled device and disconnects the current Bluetooth connection.
Range
POLAR supports Bluetooth 5. Bluetooth 5-enabled devices' range can extend up to 40 meters. Devices that do not support Bluetooth 5 typically run up to 10 meters, but that depends on factors such as the given device's quality, transmission power and current environment. For example, walls obstructing the transmission path or a protective cover on the Bluetooth device impede radio communication. The sound drops out if the device moves out of range or behind walls that interfere with the signal. In this case, the Bluetooth icon in the POLAR display will flash quickly.
The connection re-establishes automatically if you bring the Bluetooth device back in range within 120 seconds, and the Bluetooth icon in the POLAR display will light up continuously.
Bluetooth Audio Stream Stutters or Drops Out
A cable is less susceptible to interference than Bluetooth, which has to send a constant stream of audio data via a radio frequency.
To get a clear signal without dropouts, it is best to align POLAR and the source device in line of sight of one another.
Good to know: Your source device may be set up to issue ringtones, notifications and system sounds. The speakers will render these sounds along with the audio stream if they arrive via Bluetooth, so be sure to disable these functions on your Bluetooth device.
Visit www.bluetooth.org to learn more.
Technical Specifications
| POLAR 12 System | |
| Max. SPL peak | 127 dB half space |
| Frequency response +/- 10 dB | 38 Hz – 20 kHz |
| Power amp output | 2000 W |
| Amp type | Class D – biamped |
| Crossover frequency | 180 Hz, 24 dB/oct. |
| Active protective circuits | Under-voltage, Thermal, Short Circuit, Overcurrent Protection; Peak, RMS Limiter |
| Inputs | 2x Balanced XLR/ 1/4" (6.3 mm) combo jack, 1x Hi-Z instrument jack, 2x RCA/Cinch, Bluetooth audio stream |
| Outputs | Mix Out |
| Max. input level | +4 dBu |
| Modes (Filter presets) | Music, Voice, DJ |
| User presets | 5 |
| EQ | 3-band, semi-parametric mid EQ |
| System delay | up to 291 ms (100 m) |
| Bluetooth | 5.0 |
| Housing | Birch multiplex / ABS |
| Finish | Black 2-component lacquer |
| Overall system height | 218 cm |
| Weight | 28 kg / 61.7 lbs |
| POLAR 12 Subwoofer | |
| Bass woofer | 1x 12", 2.5" voice coil |
| Front grille | 1.5 mm metal grille backed with black acoustic foam |
| Dimensions (WxHxD) | 36.6 x 67.5 x 54.1 cm |
| Weight | 22.1 kg / 48.7 lbs |
| POLAR Mid/High Unit | |
| Mid speaker | 6x 3", 3/4" voice coil, neodymium |
| HF driver | 1x 1", 1" voice coil |
| Horn directivity | 120° x 30° |
| Front grille | 1 mm metal grille backed with black acoustic foam |
| Dimensions (WxHxD) | 10.8 x 82.5 x 9.8 cm |
| Weight | 3.9 kg / 8.6 lbs |
| POLAR Spacer | |
| Front grille | 1 mm metal grille backed with black acoustic foam |
| Dimensions (WxHxD) | 10.8 x 82.5 x 9.8 cm |
| Weight | 2 kg / 4.4 lbs |
| General Technical Specifications | |
| Current consumption pursuant to EN 62368-1 | 0.6 A / 220-240 V AC 0.8 A / 100-120V AC |
Important Safety Instructions
Read before connecting!
This product has been built by the manufacturer in accordance with IEC 62368-1 and left the factory in safe working order. To maintain this condition and ensure non-risk operation, the user must follow the advice and warning comments found in the operating instructions. If this product shall be used in vehicles, ships or aircraft or at altitudes exceeding 2000 m above sea level, take care of the relevant safety regulations which may exceed the IEC 62368-1 requirements.


To prevent the risk of fire and shock hazard, do not expose this appliance to moisture or rain. Do not open case – no user serviceable parts inside. Refer service to qualified service personnel.
 This symbol, wherever it appears, alerts you to the presence of uninsulated dangerous voltage inside the enclosure – voltage that may be sufficient to constitute a risk of shock.
![]() This symbol, wherever it appears, alerts you to the presence of externally accessible hazardous voltage. External wiring connected to any terminal marked with this symbol must be a "ready made cable" complying with the manufacturers recommendations, or must be a wiring installed by instructed persons only.
This symbol, wherever it appears, alerts you to the presence of externally accessible hazardous voltage. External wiring connected to any terminal marked with this symbol must be a "ready made cable" complying with the manufacturers recommendations, or must be a wiring installed by instructed persons only.
 This symbol, wherever it appears, alerts you to important operating and maintenance instructions in the accompanying literature. Read the manual.
This symbol, wherever it appears, tells you: Take care! Hot surface! To prevent burns you must not touch.
- Do not use this product near water. Do not place the product near water, baths, wash basins, kitchen sinks, wet areas, swimming pools or damp rooms.
- Do not place objects containing liquid on the product – vases, glasses, bottles etc.
- Clean only with dry cloth.
- Do not remove any covers or sections of the housing.
- The set operating voltage of the product must match the local mains supply voltage. If you are not sure of the type of power available consult your dealer or local power company.
- Before connecting the device, please ensure that the mains supply you are using is equipped with adequate protection against short circuiting and grounding faults when the device is plugged in.
![shock hazard]() To reduce the risk of electrical shock, the grounding of this product must be maintained. Use only the power supply cord provided with this product, and maintain the function of the center (grounding) pin of the mains connection at any time. Make sure the mains outlet used provides a proper protective ground connection.
To reduce the risk of electrical shock, the grounding of this product must be maintained. Use only the power supply cord provided with this product, and maintain the function of the center (grounding) pin of the mains connection at any time. Make sure the mains outlet used provides a proper protective ground connection.- Do not defeat the safety purpose of the polarized or grounding-type plug. A polarized plug has two blades with one wider than the other. A grounding type plug has two blades and a third grounding prong. The wide blade or the third prong are provided for your safety. If the provided plug does not fit into your outlet, consult an electrician for replacement of the obsolete outlet.
- Protect the power cord from being walked on or pinched particularly at plugs, convenience receptacles, and the point where they exit from the device! Power supply cords should always be handled carefully. Periodically check cords for cuts or sign of stress, especially at the plug and the point where the cord exits the device.
- Never use a damaged power cord.
- Unplug this product during lightning storms or when unused for long periods of time.
- This product can be fully disconnected from mains only by pulling the mains plug at the unit or the wall socket. The product must be placed in such a way at any time, that disconnecting from mains is easily possible.
- Fuses are to be replaced exclusively by qualified personnel, and then only with fuses of the proper type and rating.
- Refer all servicing to qualified service personnel. Servicing is required when the unit has been damaged in any way, such as:
- When the power cord or plug is damaged or frayed.
- If liquid has been spilled or objects have fallen into the product.
- If the product has been exposed to rain or moisture.
- If the product does not operate normally when the operating instructions are followed.
- If the product has been dropped or the cabinet has been damaged.
- Do not connect external speakers to this product with an impedance lower than the rated impedance given on the product or in this manual. Use only cables with sufficient cross section according to the local safety regulations.
- Keep away from direct sunlight.
- Do not install near heat sources such as radiators, heat registers, stoves or other devices that produce heat.
- This apparatus is for moderate climates areas use, not suitable for use in tropical climates countries.
- Do not block any ventilation openings. Install in accordance with manufacturer's instructions. This product must not be placed in a built-in installation such as a rack unless proper ventilation is provided.
- Always allow a cold device to warm up to ambient temperature, when being moved into a room. Condensation can form inside it and damage the product, when being used without warming up.
- Do not place naked flame sources, such as lighted candles on the product.
- The device must be positioned at least 20 cm/8" away from walls.
- Use only with the cart, stand, tripod, bracket or table specified by the manufacturer or sold with the product. When a cart is used, use caution when moving the cart/product combination to avoid injury from tip-over.
- Use only accessories recommended by the manufacturer, this applies for all kind of accessories, for example protective covers, transport bags, stands, wall or ceiling mounting equipment. In case of attaching any kind of accessories to the product, always follow the instructions for use, provided by the manufacturer. Never use fixing points on the product other than specified by the manufacturer.
- This appliance is NOT suitable to be used by any person or persons (including children) with limited physical, sensorical or mental ability, or by persons with insufficient experience and/or knowledge to operate such an appliance. Children under 4 years of age must be kept away from this appliance at all times.
![burn hazard]()
![shock hazard]()
Never push objects of any kind into this product through cabinet slots as they may touch dangerous voltage points or short out parts that could result in risk of fire or electric shock.- This product is capable of delivering sound pressure levels in excess of 90 dB, which may cause permanent hearing damage! Exposure to extremely high noise levels may cause a permanent hearing loss. Wear hearing protection if continously exposed to such high levels.
- The manufacturer only guarantees the safety, reliability and efficiency of this product if:
- Assembly, extension, re-adjustment, modifications or repairs are carried out by the manufacturer or by persons authorized to do so.
- The electrical installation of the relevant area complies with the requirements of IEC (ANSI) specifications.
- The unit is used in accordance with the operating instructions.
- This product is optimized for use with music and speech signals. Using this product with sine wave, square wave or other kind of measuring signals at higher level may lead to severe damage of the product.
General Notes on Safety for the Product
Mounting systems may only be used for those loudspeaker systems authorized by the manufacturer and only with the mounting accessories specified by the manufacturer in the installation instructions. Read and heed the manufacturer's installation instructions. The indicated load-bearing capacity cannot be guaranteed and the manufacturer will not be liable for damages in the event of improper installation or the use of unauthorized mounting accessories. The system's load-bearing capacity cannot be guaranteed and the manufacturer will not be liable for damages in the event that loudspeakers, mounting accessories, and connecting and attaching components are modified in any way.
Components affecting safety may only be repaired by the manufacturer or authorized agents, otherwise the operating permit will be voided.
Installation may be performed qualified personnel only, and then only at pick-points with sufficient load-carrying capacity and in compliance with local building regulations. Use only the mounting hardware specified by the manufacturer in the installation instructions (screws, anchors, etc.). Take all the precautions necessary to ensure bolted connections and other threaded locking devices will not loosen.
Fixed and portable installations (in this case, speakers and mounting accessories) must be secured by two independent safeties to prevent them from falling. Safeties must be able to catch accessories or parts that are loose or may become loose. Ensure compliance with the given national regulations when using connecting, attaching, and rigging devices. Factor potential dynamic forces (jerk) into the equation when determining the proper size and load-bearing capacity of safeties.
Be sure to observe speaker stands' maximum load-bearing capacity. Note that for reasons of design and construction, most speaker stands are approved to bear centric loads only; that is, the speakers' mass has to be precisely centered and balanced. Ensure speaker stands are set up stably and securely. Take appropriate added measures to secure speaker stands, for example when:
- the floor or ground surface does not provide a stable, secure base.
- they are extended to heights that impede stability.
- high wind pressure may be expected.
- there is the risk that they may be knocked over by people.
Special measures may become necessary as precautions against unsafe audience behavior. Do not set up speaker stands in evacuation routes and emergency exits. Ensure corridors are wide enough and put proper barriers and markings in place when setting speaker stands up in passageways. Mounting and dismounting are especially hazardous tasks. Use aids suitable for this purpose. Observe the given national regulations when doing so.

Wear proper protection (in particular, a helmet, gloves, and safety shoes) and use only suitable means of ascent (ladders, scaffolds, etc.) during installation. Compliance with this requirement is the sole responsibility of the company performing the installation.

After installation, inspect the system comprised of the mounting fixtures and loudspeakers to ensure it is properly secured.
The operator of loudspeaker systems (fixed or portable) must regularly inspect or task a third party to regularly inspect all system components in accordance with the given country's regulations and have possible defects repaired immediately. We also strongly recommend maintaining a logbook or the like to document all inspections.
Also be sure to provide sufficient safety margins for the rigging points used for flown systems. Observe the given national regulations when doing so.
![]() Professional loudspeaker systems can produce harmful volume levels. Even prolonged exposure to seemingly harmless levels (starting at about 95 dBA SPL) can cause permanent hearing damage! Therefore we recommend that everyone who is exposed to high volume levels produced by loudspeaker systems wears professional hearing protection (earplugs or earmuffs).
Professional loudspeaker systems can produce harmful volume levels. Even prolonged exposure to seemingly harmless levels (starting at about 95 dBA SPL) can cause permanent hearing damage! Therefore we recommend that everyone who is exposed to high volume levels produced by loudspeaker systems wears professional hearing protection (earplugs or earmuffs).
Warranty
Use the convenient online registration option at www.hkaudio.com.
HK Audio
Technischer Service
Postfach 1509
66595 St. Wendel, Germany
Fax: +49 6851 905 100
HK Audio • Postfach 1509 • 66595 St. Wendel • Germany • info@hkaudio.com • www.hkaudio.com
International Inquiries: fax +49-68 51-905 215 • international@hkaudio.com
Manufacturer: Stamer Musikanlagen GmbH, Magdeburger Str. 8, 66606
St. Wendel, Germany
Documents / Resources
References
Download manual
Here you can download full pdf version of manual, it may contain additional safety instructions, warranty information, FCC rules, etc.
Advertisement


Need help?
Do you have a question about the POLAR 12 and is the answer not in the manual?
Questions and answers