Advertisement
Available languages
Available languages
Quick Links
Advertisement

Subscribe to Our Youtube Channel
Related Manuals for Signature Design by Ashley W10002


Summary of Contents for Signature Design by Ashley W10002
- Page 3 Fireplace User Guide MODEL#: EF16-23 SAVE THESE INSTRUCTION THIS PRODUCT WAS MANUFACTURED BY PAITE FOR ASHLEY FURNITURE INDUSTRIES, INC. All Rights Reserved. Page 1 of 16...
- Page 4 Table Of Contents ................2 Table of Contents ..........3-4 IMPORTANT SAFETY INFORMATION ..........5 PARTS AND ASSEMBLY.....................8 PREPARATION ............8 GROUNDING INSTRUCTIONS ............9 SITE PREPARATION ................9 Locating Your fireplace ................9 Specifications ................10 FCC STATEMENT ............11 OPERATIONS AND FEATURES ............11 Using the Remote Control ..............12 Using the Control Panel ................13...
- Page 5 IMPORTANT SAFETY INFORMATION PLEASE READ AND CAREFULLY FOLLOW ALL OF THE INFORMATION AND INSTRUCTIONS IN THIS USER GUIDE, INCLUDING ALL SAFETY, OPERATING, AND MAINTENANCE INFORMATION. IF THE INFORMATION IN THIS USER GUIDE IS NOT FOLLOWED EXACTLY, FIRE, ELECTRIC SHOCK, BURN, DEATH OR OTHER SERIOUS INJURY AND/OR PROPERTY DAMAGE MAY RESULT.
- Page 6 IMPORTANT SAFETY INSTRUCTIONS CAUTION Read and follow all instructions before using this fireplace. Failure to follow all safety instructions could result in serious bodily injury, death or property damage. When using electrical appliances, basic precautions should always be followed to reduce the risk of fire, electrical shock, injury or death and property damage.
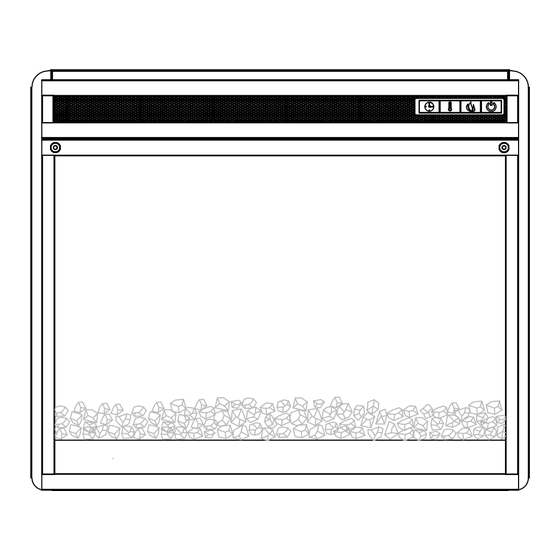
- Page 7 PARTS AND ASSEMBLY Unplug the fireplace before assembling or disassembling. Failure to do WARNING so could result in serious bodily injury or death. The unit may remain hot for several minutes after being turned off and unplugged. Thumbscrew Glass Stone Front Frame Thumbscrews are attached on front frame and are meant to be permanent and should not be removed.
- Page 8 PARTS AND ASSEMBLY Step 2: The front frame can be taken off when thumbscrews are completely loosened. Step 3: Glasses and Stones are options to put into bottom of fireplace unit. Optional stone pieces Optional glass pieces EF16-23 MODEL#: Page 6 of 16...
- Page 9 PARTS AND ASSEMBLY Step 4: Turn clockwise for both left and right thumbscrews until tight to close front frame. Below picture show 2 options finished figure. To prevent the frame from falling forward, ensure that the thumbs WARNING screws are attached properly and fully tightened. EF16-23 MODEL#: Page 7 of 16...
- Page 10 PREPARATION GROUNDING INSTRUCTIONS This product must be grounded. This product is equipped with a cord having an equipment-grounding conductor and a grounding plug. The plug must be plugged into an appropriate outlet that is properly installed and grounded in accordance with all local codes and ordinances. This fireplace is for use on 120 volts circuit and has a grounded plug that looks like the one illustrated on Figure 1.
- Page 11 SITE PREPARATION Ensure the power cord is not installed so that it is pinched or against a sharp edge and ensure that the power cord is stored and secured to avoid tripping or snagging to reduce the risk of fire, electric shock, property damage, serious injury or death. Locating Your Fireplace Read and follow the important safety instruction in this user guide.
- Page 12 FCC STATEMENT NOTE: This equipment has been tested and found to comply with the limits for a Class B digital device, pursuant to Part 15 of the FCC Rules. These limits are designed to provide reasonable protection against harmful interference in a residential installation. This equipment generates, uses, and can radiate radio frequency energy and, if not installed and used in accordance with the instructions, may cause harmful interference to radio communications.
- Page 13 OPERATIONS AND FEATURES Using the Remote Control Power This will turn the unit ON and OFF. When the unit is turned back ON, the system Adjust Temperature will recall the last heat This allows programming of the setting used. Store flame thermostat.
- Page 14 The Fireplace Remote Control The remote combines all the functions of the front panel controls for flexibility and convenience when changing desired settings. The first thing to do with the remote control is to remove the plastic sheet insulated the battery. The battery is supplied with the remote control.
- Page 15 Digital Display Timer Function This icon will light up with a blue light when Thermostat using the Timed will be Shut-OFF function. A ℉ ℃ displayed along with the time will be displayed temperature on the main on the main display display .
- Page 16 CARE AND MAINTENANCE Light Emitting Diode This fireplace is fitted with LED (Light Emitting Diode) bulbs in place of conventional bulbs. These generate the same light levels as convention bulbs, but use a fraction of the energy. These LED bulbs are maintenance free and should not require replacing during the life of the product.
- Page 17 TROUBLE SHOOTING GUIDE There are no user serviceable parts inside the fireplace. If the unit appears to malfunction, turn the unit off and unplug the unit from the wall immediately. Please contact the store that this was purchase from with the original purchase receipt or call 1 (800) 477-2222 for service related questions or concerns.
- Page 18 EF16-23 MODEL#: Page 16 of 1...
- Page 19 Manuel de l'utilisateur du foyer NUM RO DE MOD"LE : EF16-23 CONSERVEZ CES INSTRUCTIONS CE PRODUIT A T FABRIQU PAR PAITE POUR ASHLEY FURNITURE INDUSTRIES, INC. Tous droits r#serv#s. Page 1 de 16...
- Page 20 Table Des Matières ..............2 Table des matières ...3-4 RENSEIGNEMENTS IMPORTANTS EN MATIÈRE DE SÉCURITÉ PIÈCES ET ASSEMBLAGE..............................8 PRÉPARATION ........8 INSTRUCTIONS POUR LA MISE À LA TERRE ..........9 PRÉPARATION DE L'EMPLACEMENT ..........9 Choisir l'emplacement de votre foyer .................9 Caractéristiques DÉCLARATION DE LA COMMISSION FÉDÉRALE DES ..............10 COMMUNICATIONS ..........11...
- Page 21 RENSEIGNEMENTS IMPORTANTS EN MATIÈRE DE SÉCURITÉ VEUILLEZ LIRE ET SUIVRE ATTENTIVEMENT TOUTES LES INFORMATIONS ET INSTRUCTIONS CONTENUES DANS CE GUIDE DE L'UTILISATEUR, Y COMPRIS L'INFORMATION EN MATIÈRE DE SÉCURITÉ, DE FONCTIONNEMENT ET D'ENTRETIEN. NE PAS SUIVRE DE FAÇON PRÉCISE L'INFORMATION CONTENUE DANS CE MANUEL DE L'UTILISATEUR POURRAIT ENTRAÎNER UN FEU, UNE DÉCHARGE ÉLECTRIQUE, UNE BRÛLURE, LA MORT, D'AUTRES IMPORTANTES BLESSURES OU DES DOMMAGES MATÉRIELS.
- Page 22 INSTRUCTIONS IMPORTANTES EN MATIÈRE DE SÉCURITÉ ATTENTION Veuillez lire et suivre toutes les instructions avant d'utiliser ce foyer. Le fait de ne pas suivre toutes les instructions CHAUD en matière de sécurité pourrait entraîner d'importantes blessures, la mort ou des dommages matériels. Dans le but de réduire le risque de feu, de décharge électrique, de blessures, de mort et de dommages matériels, des précautions de base devraient toujours être prises lors de l'utilisation d'appareils électriques.
- Page 23 PIÈCES ET ASSEMBLAGE Débranchez le foyer avant de l'assembler ou de le démonter. Le AVERTISSEMENT fait de ne pas suivre cette instruction pourrait entraîner d'importantes blessures ou la mort. L'article peut rester chaud plusieurs minutes après avoir été éteint et débranché. Vis De Serrage Verre Pierre...
- Page 24 PIÈCES ET ASSEMBLAGE Étape 2 : Une fois que les vis de serrage sont entièrement desserrées, le cadre avant peut être retiré. Étape 3 : Les pièces de verre et les pierres sont facultatives; elles peuvent être placées au fond du foyer.
- Page 25 PIÈCES ET ASSEMBLAGE Étape 4 : Tournez les vis de serrage droite et gauche jusqu'à ce qu'elles soient bien serrées afin de fermer le cadre avant. L'illustration ci-dessous montre l'étape 2. Afin d'éviter que le cadre tombe vers l'avant, assurez-vous que AVERTISSEMENT les vis de serrage sont fixées correctement.
- Page 26 PRÉPARATION INSTRUCTIONS POUR LA MISE À LA TERRE Ce produit doit être mis à la terre. Ce produit est fourni avec un cordon électrique composé d'un conducteur de mise à la terre d'équipement et d'une fiche de mise à la terre. La fiche électrique doit être branchée sur une prise de courant appropriée qui est correctement installée et mise à...
- Page 27 PRÉPARATION DE L'EMPLACEMENT Pour réduire le risque de feu, de décharge électrique, de dommages matériels, d'importantes blessures ou de mort, assurez-vous que le cordon d'alimentation n'est pas comprimé ou placé contre un objet pointu et qu'il est rangé et attaché pour éviter que les gens y trébuchent.
- Page 28 DÉCLARATION DE LA COMMISSION FÉDÉRALE DES COMMUNICATIONS REMARQUE : Après avoir subi des tests, cet équipement a été classé dans les limites de la catégorie d'un appareil numérique de classe B en accord avec la partie 15 des directives de la Commission fédérale des communications.
- Page 29 OPÉRATIONS ET FONCTIONNALITÉS Utiliser la télécommande Alimentation Ce bouton sert à mettre l'article sous tension et hors tension. Lorsque l'article Réglage de la température est remis sous tension, le système garde Cette commande vous permet de en mémoire le dernier réglage de programmer le thermostat.
- Page 30 La télécommande du foyer La télécommande permet d'utiliser toutes les fonctions du panneau de commande avant pour une flexibilité et une commodité accrues lors de la modification des réglages. Avant tout, retirez la pellicule de plastique recouvrant la pile de la télécommande (la pile est comprise avec la télécommande).
- Page 31 Affichage numérique Fonction de minuterie Cette icône s'allume en bleu lorsque la fonction de Thermostat mise hors tension minutée est activée. Une durée La température entre 10 minutes et s'affichera sur l'écran 9 heures s'affichera sur principal, suivie de ℉ l'écran principal.
- Page 32 ENTRETIEN Diode électroluminescente Ce foyer est doté de DEL (diodes électroluminescentes) au lieu d'ampoules ordinaires. Elles permettent d'obtenir le même niveau de luminosité que des ampoules traditionnelles tout en consommant beaucoup moins d'énergie. Ces DEL ne nécessitent aucun entretien et ne devraient pas avoir à être remplacées pendant la durée de vie du produit.
- Page 33 DIRECTIVES EN CAS DE DÉFAILLANCE Le foyer ne contient aucune pièce interne réparable par l'utilisateur. Si l'article semble être défectueux, mettez-le hors tension et débranchez-le immédiatement du mur. Veuillez communiquer avec le magasin où l'achat a été effectué et présentez le reçu d'achat original ou composez le 1 800 477-2222 si vous avez des questions ou des préoccupations concernant la réparation.
- Page 34 é Page 16 of 1 EF16-23 MODEL#:...
- Page 35 Manual de usuario de la unidad de inserto de chimenea el) ctrica N.$DE MODELO: EF16-23 GUARDE ESTAS INSTRUCCIONE ESTE PRODUCTO FUE FABRICADO POR PAITE PARA ASHLEY FURNITURE INDUSTRIES, INC. Reservados todos los derechos. Página 1 de 16...
- Page 36 Índice ..............2 Índice............3-4 INFORMACIÓN IMPORTANTE DE SEGURIDAD ...............5 PIEZAS Y ARMADO ................8 PREPARACIÓN ........8 INSTRUCCIONES DE CONEXIÓN A TIERRA ....9 PREPARACIÓN DEL LUGAR DE INSTALACIÓN ......9 Colocación de la unidad de inserto de chimenea eléctrica Especificaciones................9 .......10 DECLARACIÓN DE LA FCC ESTADOUNIDENSE .........11 OPERACIÓN, CARACTERÍSTICAS Y FUNCIONES ..............11...
- Page 37 INFORMACIÓN IMPORTANTE DE SEGURIDAD LEA CUIDADOSAMENTE TODA LA INFORMACIÓN Y CUMPLA TODAS LAS INSTRUCCIONES PROVISTAS EN ESTA GUÍA DE USUARIO, INCLUYENDO TODA INFORMACIÓN DE SEGURIDAD, OPERACIÓN Y MANTENIMIENTO. SI NO SE ATIENDE CUIDADOSAMENTE LA INFORMACIÓN PROVISTA EN ESTA GUÍA DE USUARIO PODRÍAN PRODUCIRSE INCENDIOS, DESCARGAS ELÉCTRICAS, QUEMADURAS, LESIONES QUE PUDIERAN SER GRAVES Y HASTA MORTALES Y DAÑOS A BIENES E INSTALACIONES.
- Page 38 INFORMACIÓN IMPORTANTE DE SEGURIDAD PRECAUCIÓN Lea y cumpla todas las instrucciones antes de poner en operación esta unidad. EL INCUMPLIMIENTO DE ALGUNA DE LAS CALIENTE INSTRUCCIONES DE SEGURIDAD PODRÍA CAUSAR LESIONES PERSONALES GRAVES QUE PUDIERAN SER MORTALES Y DAÑOS A BIENES E INSTALACIONES.
- Page 39 PIEZAS Y ARMADO desenchufe la unidad de inserto de chimenea eléctrica antes de armarla ADVERTENCIA o de desarmarla. El incumplimiento de lo anterior podría causar lesiones personales que pudieran ser graves y hasta mortales. Esta unidad podría permanecer caliente durante varios minutos después de haberla apagado y desenchufado.
- Page 40 PIEZAS Y ARMADO Paso 2: Una vez que haya aflojado completamente los tornillos se puede desmontar el marco exterior. Paso 3: En la parte inferior de la unidad de chimenea eléctrica se pueden colocar piezas de vidrio y/o de piedra. Piezas opcionales de piedra Piezas opcionales de vidrio EF16-23...
- Page 41 PIEZAS Y ARMADO Paso 4: Para volver a fijar el marco exterior, haga girar los tornillos izquierdo y derecho en sentido horario hasta apretarlos completamente. La ilustración a continuación muestra el paso 2 2 options finished figure. A fin de evitar que el marco exterior se desplome hacia delante, ADVERTENCIA compruebe que los tornillos estén correctamente sujetos y completamente apretados.
- Page 42 PREPARACIÓN INSTRUCCIONES DE CONEXIÓN A TIERRA La unidad de inserto de chimenea eléctrica debe estar conectada a tierra. El cable de alimentación de electricidad de la unidad incluye un conductor de conexión a tierra y un enchufe con pata de conexión a tierra. El enchufe se debe conectar a un tomacorriente adecuado, correctamente instalado y conectado a tierra en conformidad con todas las normas y ordenanzas locales.
- Page 43 PREPARACIÓN DEL LUGAR DE INSTALACIÓN Compruebe que al tender el cable de alimentación de electricidad se evite que esté sometido a aplastamientos y al contacto con bordes afilados. Asegúrese de que el cable esté sujeto firmemente a fin de evitar tropiezos y de reducir el riesgo de incendios, de descargas eléctricas, de daños a bienes e instalaciones y de lesiones que pudieran ser graves y hasta mortales.
- Page 44 DECLARACIÓN DE LA FCC ESTADOUNIDENSE NOTA: este producto fue probado y quedó demostrado que cumple con los límites para dispositivos digitales de la Clase B, conforme al Apartado 15 de la normativa de la Agencia Federal de Comunicaciones (FCC) estadounidense. Dichos límites están diseñados a fin de suministra una protección razonable contra interferencias dañinas en instalaciones residenciales.
- Page 45 OPERACIÓN, CARACTERÍSTICAS Y FUNCIONES Uso del control remoto Botón De Encendido Y Apagado Permite encender y apagar la Botones De Ajuste De La unidad. Cuando se vuelve a Temperatura encender la unidad se recuperarán los ajustes Estos botones permiten la programación del anteriormente utilizados.
- Page 46 Control remoto de la unidad de inserto de chimenea eléctrica El control remoto incluye todas las funciones de los controles del panel delantero, para mayor flexibilidad y practicidad al hacer cambios en los ajustes. Para utilizar el control remoto primero se debe retirar la lámina plástica de aislamiento de la batería. El control remoto se suministra con una batería.
- Page 47 Pantalla digital Función De Temporizador Este icono se enciende de color azul cuando está Termostato activada la función del temporizador del apagado Las leyendas " " y " " se ℉ ℃ automático. En la pantalla muestran en la pantalla digital se muestra un valor digital, junto con el valor entre 10 minutos y 9 horas...
- Page 48 CUIDADO Y MANTENIMIENTO Diodo Emisor De Luz Esta unidad de chimenea eléctrica incorpora diodos LED emisores de luz en vez de bombillas convencionales. Dichos diodos generan el mismo nivel de luz que las bombillas convencionales, pero consumen una fracción de la electricidad. Los diodos LED no requieren de mantenimiento y no se prevé...
- Page 49 GUÍA DE SOLUCIÓN DE PROBLEMAS Esta unidad de inserto de chimenea eléctrica no incluye piezas que se puedan reparar o recibir mantenimiento por parte de los usuarios. Si la unidad pareciera presentar un mal funcionamiento, apáguela y desenchúfela de inmediato del tomacorriente. En el caso de preguntas o inquietudes respecto al servicio de la unidad, comuníquese con la tienda en la que adquirió...
- Page 50 EF16-23 Página 15 de 1 N.° DE MODELO:...
Need help?
Do you have a question about the W10002 and is the answer not in the manual?
Questions and answers