Advertisement
Available languages
Available languages
Quick Links
USE AND CARE GUIDE
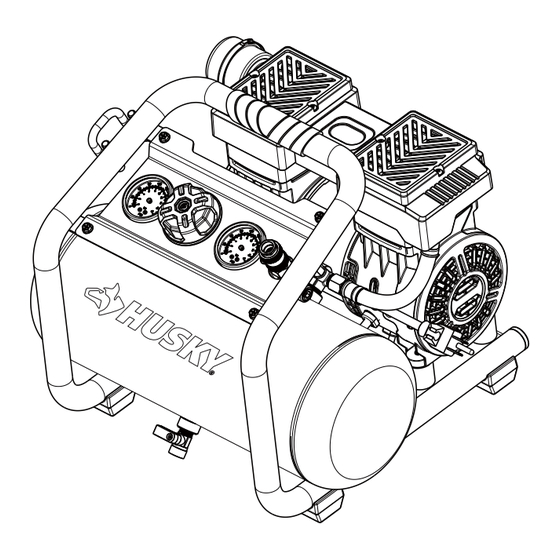
2 GAL. SILENT AIR COMPRESSOR
Questions, problems, missing parts?
Before returning to the store, call
Husky Customer Service
8 a.m. - 7 p.m., EST, Monday-Friday,
9 a.m. - 6 p.m., EST, Saturday
1-888-HD-HUSKY
HUSKYTOOLS.COM
We appreciate the trust and confidence you have placed in Husky through the purchase of this air compressor. We strive to continually
create quality products designed to enhance your home. Visit us online to see our full line of products available for your home improvement needs.
THANK YOU
Thank you for choosing Husky!
Item #1011131432
Model # 3300241A
Advertisement

Related Manuals for Husky 3300241A


Summary of Contents for Husky 3300241A
- Page 1 THANK YOU We appreciate the trust and confidence you have placed in Husky through the purchase of this air compressor. We strive to continually create quality products designed to enhance your home. Visit us online to see our full line of products available for your home improvement needs.
- Page 2 Electrical Safety (Electrical Connection) ........4 Parts List ................11 Electrical Safety (Speed And Wiring) ........4 Electrical Safety (Grounding Instructions) ........4 Warranty ................. 5 Husky Air Compressor Limited Three-Year Warranty ....5 Additional Limitations ..............5 Specifications ..............5 Air Compressor ................5 Pre-Assembly ..............6 Packing List ................6...
- Page 3 Safety Information (continued) AIR COMPRESSOR AND PNEUMATIC TOOL ELECTRICAL SAFETY SAFETY Avoid body contact with grounded surfaces such as pipes, radiators, ranges, and refrigerators. There is an increased WARNING: Do not attempt to modify this tool or create risk of electric shock if your body is grounded. accessories not recommended for use with this tool.
- Page 4 Safety Information (continued) ELECTRICAL SAFETY (EXTENSION CORDS) ELECTRICAL SAFETY (GROUNDING (CONTINUED) INSTRUCTIONS) This product must be grounded. In the event of an electrical Ampere rating (on air compressor data plate) short circuit, grounding reduces the risk of electric shock by 0–...
- Page 5 HUSKY AIR COMPRESSOR LIMITED THREE-YEAR WARRANTY This warranty covers defects in workmanship or materials in this Husky air compressor for the three-year period from the date of purchase. This warranty is specific to this air compressor model. Warranties for other Husky products may vary. This warranty applies only to the original retail purchaser and may not be transferred.
- Page 6 Pre-Assembly PACKING LIST Before assembling and operating this air compressor, ensure the following items are identified in the packaging: - Air c ompressor - Air lter - Instruction manual TOOLS REQUIRED Safety goggles (ANSI Z87.1 CERTIFIED) PACKAGE CONTENTS Part Description Quantity Motor/Pump assembly Drain valve...
- Page 7 Assembly ASSEMBLING THE AIR FILTER - Align the air lter (D) with the hole on the pump and tighten it by turning it clockwise.
- Page 8 Operation Instructions air pressure regulator drain valve drain valve Starting up Close the air tank drain valve (B) by turning clockwise. Plug in the power cord (C). Set the ON/OFF switch (L) to the ON position and allow tank pressure to build. The motor will stop when tank pressure reaches “cut-out”...
- Page 9 Maintenance drain valve drain valve CLOSE OPEN...
- Page 10 Troubleshooting Problem There is low pressure, not The tank drain valve is open. Close the drain valve. Check fittings with soapy water. Tighten or reseal leaking enough air, or the There is a leak in the fittings. compressor does not stop. fittings.
- Page 11 Service Parts EXPLODED VIEW PARTS LIST Part Description Part Description Elbow Fitting Pressure Plate End Cap Safety Valve Rubber Hose Capacitor Fixing Ring Capacitor Pressure Regulator Capacitor Shroud Pressure Gauge Panel Crimping Cap Cushion Pad Quick Coupler Regulator Knob Motor Power Cord Air Filter Pump Cover...
- Page 12 Questions, problems, missing parts? Before returning to the store, call Husky Customer Service 8 a.m. - 7 p.m., EST, Monday-Friday, 9 a.m. - 6 p.m., EST, Saturday 1-888-HD-HUSKY HUSKYTOOLS.COM Retain this manual for future use.
- Page 13 GRACIAS Apreciamos la con anza que ha depositado en Husky por la compra de este compresor de aire. Nos esforzamos por crear continuamente productos de calidad diseñados para mejorar su hogar. Visítenos en Internet para ver nuestra línea completa de productos disponibles para sus necesidades de mejorar su hogar.
- Page 14 Seguridad eléctrica (velocidad y cableado) ........4 Seguridad eléctrica (instrucciones de conexión a tierra) ....4 Garantía ................... 5 Garantía limitada de Tres años del compresor de aire husky..... 5 Limitaciones adicionales ..............5 Especificaciones ..............5 Compresor de aire ................5 Pre-ensamblaje ..............
- Page 15 Información de seguridad (continuación) COMPRESOR DE AIRE Y SEGURIDAD DE LA SEGURIDAD ELÉCTRICA HERRAMIENTA NEUMÁTICA Evite el contacto del cuerpo con superficies con conexión a tierra como tuberías, radiadores, estufas y refrigeradores. Hay un riesgo ADVERTENCIA: No intente modificar esta herramienta mayor de choque eléctrico si su cuerpo es aterrizado.
- Page 16 Información de seguridad (continuación) SEGURIDAD ELÉCTRICA (CABLES DE SEGURIDAD ELÉCTRICA EXTENSIÓN) (CONTINUACIÓN) (INSTRUCCIONES DE CONEXIÓN A TIERRA) Este producto debe estar aterrizado. En el caso de un corto Capacidad en amperios (en la placa de características del circuito, la conexión a tierra reduce el riesgo de choque eléctrico compresor de aire) proporcionando un cable de escape para la corriente eléctrica.
- Page 17 GARANTÍA LIMITADA DE TRES AÑOS DEL COMPRESOR DE AIRE HUSKY Esta garantía cubre defectos en mano de obra y materiales en este compresor de aire Husky por el periodo de tres años a partir de la fecha de compra. Esta garantía es específica a este modelo de compresor de aire.
- Page 18 Pre-ensamblaje LISTA DEL EMPAQUE Antes de ensamblar y operar este compresor de aire, asegúrese de que los siguientes artículos estén identi cados en el empaque: - Compresor de aire - Filtro de aire - Manual de instrucciones HERRAMIENTAS REQUERIDAS Gafas de seguridad(ANSI Z87.1 CERTIFIED) CONTENIDO DEL PAQUETE Pieza Descripción...
- Page 19 Ensamblaje MONTAJE DEL FILTRO DE AIRE - Alinee el ltro de aire (D) con el ori cio de la bomba y apriételo girándolo en el sentido de las agujas del reloj. n ó i c i . l a...
- Page 20 Instrucción de operación Coloque el interruptor ENCENDIDO/APAGADO (L) en la posición APAGADO y enchufe el cable eléctrico. Coloque el interruptor ENCENDIDO/APAGADO (L) en la posición ENCENDIDO y haga funcionar el compresor de aire durante 10 minutos. Coloque el interruptor ENCENDIDO/APAGADO (L) en la posición APAGADO. Empezando Cierre la válvula de drenaje del tanque de aire (B) girándola en dirección de las manecillas del reloj.
- Page 21 Mantenimiento CERARR ENCENDIDO APAGADO ABRIR n ó i c i . l a...
- Page 22 SOLUCIÓN DE PROBLEMAS Problem Hay poca presión, aire La válvula de drenaje del tanque Cierre el tanque y drene la válvula. insuficiente o el compresor está abierta. Revise los conectores con agua jabonosa. Apriete o vuelva a Hay una fuga en los conectores. sellar los conectores con fugas.
- Page 23 Piezas de servicio VISTA ESQUEMÁTICA PARTS LIST Pieza Descripción Cantidad Pieza Descripción Cantidad Codo en ángulo recto Placa de presión Válvula de seguridad Tapa nal Manguera de goma Anillo de jación del condensador Condensador Regulador de presión Manómetro Cubierta del condensador Panel Tapa de prensado Almohadilla...
- Page 24 Questions, problèmes, pièces manquantes? Avant de retourner au magasin, appelez le service à la clientèle Husky 8h - 19h, heures normales de l'Est, du lundi au vendredi, 9h - 18h, heures normales de l’Est, le samedi. 1-888-HD-HUSKY HUSKYTOOLS.COM Conservez ce manuel pour référence future.
Need help?
Do you have a question about the 3300241A and is the answer not in the manual?
Questions and answers