
Related Manuals for ZyXEL Communications N220 - V1.0


Summary of Contents for ZyXEL Communications N220 - V1.0
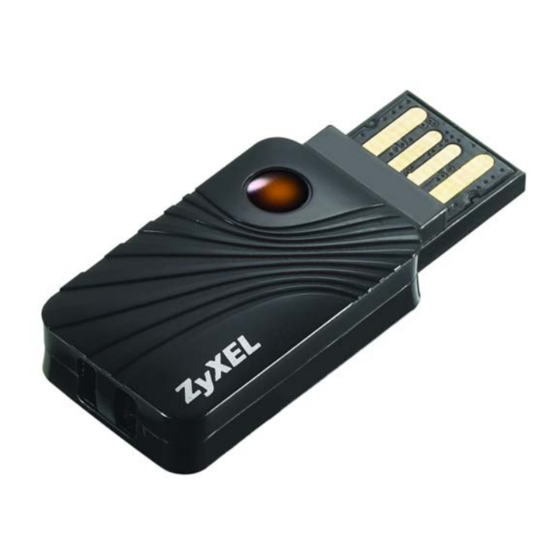
- Page 1 N220 Wireless N-lite USB Adapter Version 1.0 Edition 1, 07/2010 www.zyxel.com www.zyxel.com Copyright © 2010 ZyXEL Communications Corporation...
-
Page 3: About This User's Guide
This manual is intended for people who want to configure the N220 using the ZyXEL utility. Tips for Reading User’s Guides On-Screen When reading a ZyXEL User’s Guide On-Screen, keep the following in mind: • If you don’t already have the latest version of Adobe Reader, you can download it from http://www.adobe.com. - Page 4 About This User's Guide Customer Support Should problems arise that cannot be solved by using this manual, please contact your vendor for customer service. Please have the following information ready when you contact the vendor. • Product model and serial number. •...
-
Page 5: Document Conventions
Document Conventions Document Conventions Warnings and Notes These are how warnings and notes are shown in this User’s Guide. Warnings tell you about things that could harm you or your N220. Note: Notes tell you other important information (for example, other things you may need to configure or helpful tips) or recommendations. - Page 6 Document Conventions Icons Used in Figures Figures in this User’s Guide may use the following generic icons. Wireless Access Point Computer Notebook computer Server Modem Telephone Internet Wireless Signal N220 User’s Guide...
-
Page 7: Safety Warnings
Safety Warnings Safety Warnings • Do NOT use this product near water, for example, in a wet basement or near a swimming pool. • Do NOT expose your device to dampness, dust or corrosive liquids. • Do NOT store things on the device. •... - Page 8 Safety Warnings N220 User’s Guide...
-
Page 9: Table Of Contents
Contents Overview Contents Overview Introduction and Configuration .................... 15 Getting Started ........................... 17 Tutorial ............................23 Wireless LANs ........................... 37 Station Mode ..........................49 AP Mode ............................ 75 Maintenance ..........................85 Troubleshooting and Specifications ..................89 Troubleshooting ......................... 91 Product Specifications ....................... 95 Appendices and Index ...................... - Page 10 Contents Overview N220 User’s Guide...
-
Page 11: Table Of Contents
1.4 Hardware and Utility Installation ..................20 1.4.1 ZyXEL Utility Icon ....................... 20 1.5 Configuration Methods ....................... 21 1.5.1 Enabling Windows Wireless Configuration ..............21 1.5.2 Accessing the ZyXEL Utility ..................21 Chapter 2 Tutorial ............................. 23 2.1 Overview ..........................23 2.1.1 What You Can Do in This Tutorial ................ - Page 12 4.1.1 What You Can Do in This Section ................49 4.1.2 What You Need to Know .................... 49 4.1.3 Before You Begin ....................... 50 4.2 ZyXEL Utility Screen Summary ................... 50 4.3 The Link Info Screen ......................51 4.3.1 Trend Chart ........................ 53 4.4 The Site Survey Screen .....................
- Page 13 6.1.2 What You Need to Know .................... 85 6.1.3 Before You Begin ....................... 85 6.2 The About Screen ....................... 86 6.3 Uninstalling the ZyXEL Utility ....................86 6.4 Upgrading the ZyXEL Utility ....................87 Part II: Troubleshooting and Specifications ........89 Chapter 7 Troubleshooting........................
- Page 14 Table of Contents Appendix E Legal Information ....................179 Index............................183 N220 User’s Guide...
-
Page 15: Introduction And Configuration
Introduction and Configuration Getting Started (17) Tutorial (23) Wireless LANs (37) Station Mode (49) AP Mode (75) Maintenance (85) -
Page 17: Getting Started
Getting Started 1.1 Overview The ZyXEL N220 wireless N-lite USB adapter brings you a better Internet experience over existing 802.11 networks. With data rates of up to 150 Mbps, you can enjoy a breathtaking high-speed connection at home or in the office. It is an excellent solution for daily activities such as file transfers, music downloading, video streaming and online gaming. -
Page 18: Before You Begin
1.1.2 Before You Begin • Read the Quick Start Guide for information on making hardware connections and using the ZyXEL utility to connect your N220 to a network. 1.2 About Your N220 Your N220 is an IEEE 802.11n compliant wireless LAN adapter. It can also connect to IEEE 802.11b/g wireless networks. -
Page 19: Application Overview
Chapter 1 Getting Started The following table describes the operation of the N220’s LEDs. Table 2 N220 LEDs COLOR STATUS DESCRIPTION Orange Slow The N220 is turned on, connected to an AP, and is not Blinking transmitting or receiving data. Rapid The N220 is turned on, connected to an AP, and is Blinking... -
Page 20: Ad-Hoc
1.4.1 ZyXEL Utility Icon After you install and start the ZyXEL utility, an icon for the ZyXEL utility appears in the system tray. Note: The ZyXEL utility system tray icon displays only when the N220 is installed properly. -
Page 21: Configuration Methods
Chapter 1 Getting Started The color of the ZyXEL utility system tray icon indicates the status of the N220. Refer to the following table for details. Table 3 ZyXEL Utility: System Tray Icon COLOR DESCRIPTION The N220 is not connected to a wireless network. - Page 22 Chapter 1 Getting Started The ZyXEL utility screens are similar in all Microsoft Windows versions. Screens for Windows XP are shown in this User’s Guide. Note: Click the icon (located in the top right corner) to display the online help window.
-
Page 23: Tutorial
2.1 Overview This tutorial shows you how to join a wireless infrastructure network using the ZyXEL utility. The wireless client is labeled C and the Access Point is labeled AP. Figure 6 Infrastructure Network 2.1.1 What You Can Do in This Tutorial •... -
Page 24: Before You Begin
Setup (WPS) This section gives you an example of how to set up your wireless network using WPS. This example uses the N220 as the wireless client, and ZyXEL’s NBG334W as the Access Point (AP). Note: The Access Point must be a WPS-aware device. -
Page 25: Pin Configuration
Chapter 2 Tutorial The AP sends the proper configuration settings to the N220. This may take up to two minutes. Then the N220 is able to communicate with the AP securely. The following figure shows you an example to set up wireless network and security by pressing a button on both the AP (the NBG334W in this example) and the N220. - Page 26 Chapter 2 Tutorial Click the Start buttons on both the N220 utility screen and the AP’s configuration utility (the WPS Station screen on the NBG334W) within two minutes. The NBG334W authenticates the wireless client and sends the proper configuration settings to the wireless client. This may take up to two minutes. Then the wireless client is able to communicate with the NBG334W securely.
- Page 27 Chapter 2 Tutorial The following figure shows you the example of configuring the wireless network and security on the N220 and the AP (ZyXEL’s NBG334W in this example) by using the PIN method. N220 User’s Guide...
- Page 28 Chapter 2 Tutorial Figure 8 Example WPS Process: PIN Method WITHIN 2 MINUTES Authentication by PIN SECURITY INFO COMMUNICATION N220 User’s Guide...
-
Page 29: Connecting To An Ap Without Using Wps
After you install the ZyXEL utility and then insert the wireless client, follow the steps below to connect to a network using the Site Survey screen. Open the ZyXEL utility and click the Site Survey tab to open the screen shown next. - Page 30 Exit button to return to the Site Survey screen. Figure 10 ZyXEL Utility: Security Settings The Summary window appears. Check your settings and click Save to continue. Figure 11 ZyXEL Utility: Summary...
-
Page 31: Creating And Using A Profile
Chapter 2 Tutorial The ZyXEL utility returns to the Link Info screen while it connects to the wireless network using your settings. When the wireless link is established, the ZyXEL utility icon in the system tray turns green and the Link Info screen displays details of the active connection. - Page 32 Chapter 2 Tutorial Open the ZyXEL utility and click the Profile tab to open the screen as shown. Click Add to configure a new profile. Figure 13 ZyXEL Utility: Profile The Add New Profile screen appears. The wireless client automatically searches for available wireless networks, which are displayed in the Scan Info box.
- Page 33 Choose the same encryption method as the AP to which you want to connect (In this example, WPA-PSK). Figure 15 ZyXEL Utility: Profile Security This screen varies depending on the encryption method you selected in the previous screen. In this example, enter the pre-shared key and leave the encryption type at the default setting.
-
Page 34: Configuring The N220 As An Ap
Note: Only one profile can be activated and used at any given time. Figure 18 ZyXEL Utility: Profile Activate When you activate the new profile, the ZyXEL utility goes to the Link Info screen while it connects to the AP using your settings. When the wireless link is established, the ZyXEL utility icon in the system tray turns green and the Link Info screen displays details of the active connection. - Page 35 Chapter 2 Tutorial Select AP Mode in the main ZyXEL Utility screen. The AP Mode version of the default Link Info screen displays. Figure 19 ZyXEL Utility - AP Mode Under Status, you can view the current settings on the N220. In the Association List, you can see if any wireless clients have connected to your N220.
- Page 36 Chapter 2 Tutorial N220 User’s Guide...
-
Page 37: Wireless Lans
H A P T E R Wireless LANs 3.1 Overview This section provides background information on wireless Local Area Networks. 3.1.1 What You Can Do in This Section • Connect securely to an AP using many of the strongest and most common encryption protocols. -
Page 38: Before You Begin
Chapter 3 Wireless LANs Encryption The process of taking data and encoding it, usually using a mathematical formula, so that it becomes unreadable unless decrypted with the proper code or pass phrase. 3.1.3 Before You Begin • You should have valid login information for an existing network Access Point, otherwise you may not be able to make a network connection right away. -
Page 39: Wireless Lan Security
Chapter 3 Wireless LANs • If two wireless networks overlap, they should use a different channel. Like radio stations or television channels, each wireless network uses a specific channel, or frequency, to send and receive information. • Every device in the same wireless network must use security compatible with the AP or peer computer. - Page 40 For WLAN adapters without the passphrase feature, you can still take advantage of this feature by writing down the four automatically generated WEP keys from the Security Settings screen of the ZyXEL utility and entering them manually as the WEP keys in the other WLAN adapter(s).
-
Page 41: Wifi Protected Setup
Chapter 3 Wireless LANs For EAP-TLS authentication type, you must first have a wired connection to the network and obtain the certificate(s) from a certificate authority (CA). Certificates (also called digital IDs) can be used to authenticate users and a CA issues certificates and guarantees the identity of each certificate owner. -
Page 42: Push Button Configuration
Chapter 3 Wireless LANs Depending on the devices you have, you can either press a button (on the device itself, or in its configuration utility) or enter a PIN (a unique Personal Identification Number that allows one device to authenticate the other) in each of the two devices. - Page 43 Chapter 3 Wireless LANs need to log into the configuration interfaces of both devices to use the PIN method. When you use the PIN method, you must enter the PIN from one device (usually the wireless client) into the second device (usually the Access Point or wireless router).
-
Page 44: How Wps Works
Chapter 3 Wireless LANs The following figure shows a WPS-enabled wireless client (installed in a notebook computer) connecting to the WPS-enabled AP via the PIN method. Figure 23 Example WPS Process: PIN Method ENROLLEE REGISTRAR This device’s WPS PIN: 123456 Enter WPS PIN from other device: START... - Page 45 Chapter 3 Wireless LANs already part of a network, it sends the existing information. If not, it generates the SSID and WPA(2)-PSK randomly. The following figure shows a WPS-enabled client (installed in a notebook computer) connecting to a WPS-enabled access point. Figure 24 How WPS works ACTIVATE ACTIVATE...
-
Page 46: Example Wps Network Setup
Chapter 3 Wireless LANs subsequent WPS connections in which it is involved. If you want a configured AP to act as an enrollee, you must reset it to its factory defaults. 3.4.3.1 Example WPS Network Setup This section shows how security settings are distributed in an example WPS setup. The following figure shows an example network. -
Page 47: Limitations Of Wps
Chapter 3 Wireless LANs In step 3, you add another access point (AP2) to your network. AP2 is out of range of AP1, so you cannot use AP1 for the WPS handshake with the new access point. However, you know that Client 2 supports the registrar function, so you use it to perform the WPS handshake instead. - Page 48 Chapter 3 Wireless LANs configuration interface of the registrar device to discover the key the network is using (if the device supports this feature). Then, you can enter the key into the non-WPS device and join the network as normal (the non-WPS device must also support WPA-PSK or WPA2-PSK).
-
Page 49: Station Mode
H A P T E R Station Mode 4.1 Overview This section shows you how to configure your N220 using the ZyXEL utility in Windows. Note: Some features available in Windows XP or Windows 2000 are not available in Windows Vista. -
Page 50: Before You Begin
An enhanced security framework designed to improve an existing security protocol, such as WPA-PSK or WPA2-PSK. 4.1.3 Before You Begin • Make sure the ZyXEL utility is already installed. See the Quick Start Guide for more. 4.2 ZyXEL Utility Screen Summary This section describes the ZyXEL utility screens. -
Page 51: The Link Info Screen
Use this screen to configure preamble type, enable power saving and use WiFi Protected Setup (WPS). 4.3 The Link Info Screen When the ZyXEL utility starts, the Link Info screen displays, showing the current configuration and connection status of your N220. Figure 29 Link Info The following table describes the labels in this screen. - Page 52 Chapter 4 Station Mode Table 5 Link Info (continued) LABEL DESCRIPTION Receive This field displays the current receive speed of the N220 in megabits per Speed second (Mbps). Security This field displays whether data encryption is activated (WEP / 802.1x / WPA /WPA-PSK / WPA2 / WPA2-PSK) or inactive (DISABLE).
-
Page 53: Trend Chart
Chapter 4 Station Mode 4.3.1 Trend Chart Click Trend Chart in the Link Info screen to display a screen as shown below. Use this screen to view real-time data traffic statistics. Figure 30 Link Info: Trend Chart The following table describes the labels in this screen. Table 6 Link Info: Trend Chart LABEL DESCRIPTION... -
Page 54: The Site Survey Screen
Chapter 4 Station Mode 4.4 The Site Survey Screen Use the Site Survey screen to scan for and connect to a wireless network automatically. Figure 31 Site Survey The following table describes the labels in this screen. Table 7 Site Survey LABEL DESCRIPTION Available... -
Page 55: Security Settings
Chapter 4 Station Mode Table 7 Site Survey (continued) LABEL DESCRIPTION Network Type This field displays the network type (Infrastructure or Ad Hoc) of the wireless device. Channel This field displays the channel number used by each wireless device. Security This field shows whether data encryption is activated (WEP, WPA, WPA-PSK, WPA2, WPA2-PSK or 802.1x) or inactive (DISABLE). -
Page 56: Wep Encryption
Chapter 4 Station Mode Table 8 Security Setting: WEP (continued) LABEL DESCRIPTION Next Click Next to confirm your selections and advance to the Security Settings screen that corresponds to the one you select here. Exit Click Exit to return to the Site Survey screen without saving. 4.4.1.2 WEP Encryption Configure WEP security in this screen. - Page 57 Chapter 4 Station Mode Table 9 Security Setting: WEP (continued) LABEL DESCRIPTION Key x (where x Select this option if you want to manually enter the WEP keys. Enter the is a number WEP key in the field provided. between 1 and If you select 64 Bits in the WEP field.
- Page 58 Chapter 4 Station Mode The following table describes the labels in this screen. Table 10 Security Setting: WPA-PSK/WPA2-PSK LABEL DESCRIPTION Encryption Type The encryption mechanisms used for WPA/WPA2 and WPA-PSK/WPA2- PSK are the same. The only difference between the two is that WPA- PSK/WPA2-PSK uses a simple common password, instead of user- specific credentials.
- Page 59 Chapter 4 Station Mode The following table describes the labels in this screen. Table 11 Security Setting: WPA/WPA2 LABEL DESCRIPTION Encryption Type The encryption mechanisms used for WPA/WPA2 and WPA-PSK/WPA2- PSK are the same. The only difference between the two is that WPA- PSK/WPA2-PSK uses a simple common password, instead of user- specific credentials.
- Page 60 Chapter 4 Station Mode Note: The procedure to configure 802.1x is different in Windows Vista. See Section 4.7 on page 71 for information on setting up your N220 to use 802.1x in Vista. Figure 36 Security Setting: 802.1x The following table describes the labels in this screen. Table 12 Security Settings: IEEE 802.1x LABEL DESCRIPTION...
-
Page 61: Summary Screen
Chapter 4 Station Mode Table 12 Security Settings: IEEE 802.1x LABEL DESCRIPTION PEAP Inner EAP This field is only available when you select PEAP in the EAP Type field. The PEAP method used by the RADIUS server or AP for client authentication is MS CHAP v2. -
Page 62: The Profile Screen
The default profile is a profile that allows you to connect to any SSID that has no security enabled. Click the Profile tab in the ZyXEL utility program to display the Profile screen as shown next. The profile function allows you to save the wireless network settings in this screen, or use one of the pre-configured network profiles. -
Page 63: Adding A New Profile
Chapter 4 Station Mode The following table describes the labels in this screen. Table 14 Profile LABEL DESCRIPTION Profile List Click a column heading to sort the entries. denotes that the wireless device is in infrastructure mode and the wireless security is activated. denotes that the wireless device is in infrastructure mode but the wireless security is deactivated. - Page 64 Chapter 4 Station Mode Click Add in the Profile screen. An Add New Profile screen displays as shown next. Figure 39 Profile: Add a New Profile The following table describes the labels in this screen. Table 15 Profile: Add a New Profile LABEL DESCRIPTION Add New Profile...
- Page 65 Chapter 4 Station Mode Table 15 Profile: Add a New Profile (continued) LABEL DESCRIPTION Scan Click Scan to search for available wireless devices within transmission range. Select Select an available wireless device in the table and click Select to add it to this profile.
- Page 66 Chapter 4 Station Mode If you selected Infrastructure network type in the first screen, select WEP, WPA, WPA2, WPA-PSK, WPA2-PSK or 802.1x from the drop-down list box to enable data encryption. If you selected Ad-Hoc network type in the first screen, you can use only WEP encryption method.
- Page 67 To use this network profile, click the Activate Now button. Otherwise, click the Activate Later button. You can activate only one profile at a time. Note: Once you activate a profile, the ZyXEL utility will use that profile the next time it is started.
-
Page 68: The Adapter Screen
Chapter 4 Station Mode 4.6 The Adapter Screen To set the other advanced features on the N220, click the Adapter tab. Figure 45 Adapter The following table describes the labels in this screen. Table 17 Adapter LABEL DESCRIPTION Adapter Setting Power Saving Select Maximum or Normal to save power. -
Page 69: Wps: Pbc (Push Button Configuration)
Chapter 4 Station Mode Table 17 Adapter (continued) LABEL DESCRIPTION PIN - Use Select this to use the PIN (Personal Identification Number) WPS mode. the PIN Use this option when you want to enter the PIN from another WPS- From the AP enabled device in the N220. -
Page 70: Wps: Pin - Use The Pin From The Ap Or Wireless Router
Chapter 4 Station Mode and PIN - Use this Device’s PIN in the Adapter screen. The following screen displays. Figure 47 WPS: PIN - Use this Device’s PIN The following table describes the labels in this screen. Table 18 WPS: PIN - Use this Device’s PIN LABEL DESCRIPTION This device’s PIN... -
Page 71: Security Settings In Windows Vista
Chapter 4 Station Mode PIN from the AP or Wireless Router in the Adapter screen. The following screen displays. Figure 48 WPS: PIN - Use the PIN from the AP or Wireless Router The following table describes the labels in this screen. Table 19 WPS: PIN - Use the PIN from the AP or Wireless Router LABEL DESCRIPTION... -
Page 72: Using Peap In Vista
Chapter 4 Station Mode 4.7.1 Using PEAP in Vista Take the following steps to set up WPA, WPA2 or 802.1x security using PEAP in Windows Vista. Either select the AP to which you want to connect in the Site Survey screen (see Section 4.4 on page 54), or configure a profile in the normal way (see Section 4.5... -
Page 73: Using Tls In Vista
Chapter 4 Station Mode Click OK. The Enter Credentials screen disappears and the N220 tries to connect to the network. The ZyXEL utility’s Link Info screen displays, showing the connection status (see Section 4.3 on page 51). If the Link Info screen displays an active connection, you have successfully completed the procedure. - Page 74 Chapter 4 Station Mode Click OK. The Select Certificate screen disappears and the N220 tries to connect to the network. The ZyXEL utility’s Link Info screen displays, showing the connection status (see Section 4.3 on page 51). If the Link Info screen displays an active connection, you have successfully completed the procedure.
-
Page 75: Ap Mode
Computer A provides an Internet connection to the wireless LAN, so wireless stations B and C can access the Internet. Select the AP Mode option the ZyXEL Utility to have the device function as an access point. Figure 54 ZyXEL Utility: Setting AP Mode . -
Page 76: What You Can Do In This Section
5.1.3 Before You Begin Make sure the ZyXEL Utility is already installed. See the Quick Start Guide for more. To bridge your wired and wireless network using the N220, the following requirements must be met: •... -
Page 77: Ap Mode Screen Summary
Chapter 5 AP Mode 5.2 AP Mode Screen Summary This section describes the ZyXEL Utility screens while in AP Mode. Figure 55 ZyXEL Utility Menu Summary The following table describes the menus. Table 20 ZyXEL Utility Menu Summary DESCRIPTION Link Info Use this screen to see your current connection status, configuration and data rate statistics. -
Page 78: The Configuration Screen
Chapter 5 AP Mode The following table describes the labels in this screen. Table 21 Link Info LABEL DESCRIPTION Status SSID This field displays the name that identifies your N220 in the wireless LAN network. Current This field displays the radio channel the N220 is currently using. Channel Transmis- This field displays the current transmission rate of the N220 in megabits... - Page 79 Chapter 5 AP Mode The following table describes the labels in this screen. Table 22 Configuration LABEL DESCRIPTION Wireless Set- tings SSID Enter a name for your AP This name is broadcast to all wireless-capable devices in range and can be used to connect to your AP. You can enter up to 32 printable ASCII characters in this field.
-
Page 80: Security Settings
Chapter 5 AP Mode 5.4.1 Security Settings When you configure the N220 to act as an AP and wireless security is activated, the Configuration screen varies according to the encryption method used by your network. 5.4.1.1 Disable This option indicates that no security services are enabled. Anyone within range of your AP can connect to it without having to enter a pre-shared key. - Page 81 Chapter 5 AP Mode Table 23 Security Setting: WEP (continued) LABEL DESCRIPTION Key 1-4 Select this option if you want to manually enter a transmit key. Enter the key in the field provided. If you select 64 Bits in the WEP field. Enter either 10 hexadecimal digits in the range of “A-F”, “a-f”...
-
Page 82: The Mac Filter Screen
Chapter 5 AP Mode Table 24 Security Setting: WPA-PSK/WPA2-PSK LABEL DESCRIPTION Pre-Shared Key Type a pre-shared key (same as the AP or peer device) of between 8 and 63 case-sensitive ASCII characters (including spaces and symbols) or 64 hexadecimal characters. Save Click to save the changes. - Page 83 Chapter 5 AP Mode The following table describes the labels in this screen. Table 25 MAC Filter LABEL DESCRIPTION Filter Type Define the filter action for the list of MAC addresses in the MAC address filter table. Select Disable to deactivate the MAC filter feature. Select Reject all to block access to the N220, MAC addresses not listed will be allowed to access the N220.
- Page 84 Chapter 5 AP Mode N220 User’s Guide...
-
Page 85: Maintenance
“kernel”) level. Doing so could irreparably damage your installation. 6.1.3 Before You Begin • Disconnect the N220 if you are going to uninstall or upgrade the ZyXEL utility, save your work in any other open programs, and then close them. -
Page 86: The About Screen
This field displays the version number of the ZyXEL utility. 6.3 Uninstalling the ZyXEL Utility Follow the steps below to remove (or uninstall) the ZyXEL utility from your computer. Note: Before you uninstall the ZyXEL utility, take note of your current wireless configurations. -
Page 87: Upgrading The Zyxel Utility
Note: Before you uninstall the ZyXEL utility, take note of your current wireless configurations. To perform the upgrade, follow the steps below. Download the latest version of the utility from the ZyXEL web site and save the file on your computer. Follow the steps in Section 6.3 on page 86... - Page 88 Chapter 6 Maintenance N220 User’s Guide...
-
Page 89: Troubleshooting And Specifications
Troubleshooting and Specifications Troubleshooting (91) Product Specifications (95) -
Page 91: Troubleshooting
This chapter offers some suggestions to solve problems you might encounter. The potential problems are divided into the following categories. • Power, Hardware Connections, and LEDs • Accessing the ZyXEL Utility • Link Quality • Problems Communicating with Other Computers 7.1 Power, Hardware Connections, and LEDs... -
Page 92: Accessing The Zyxel Utility
Chapter 7 Troubleshooting 7.2 Accessing the ZyXEL Utility I cannot access the ZyXEL Utility Make sure the N220 is properly inserted and the LEDs are on. Refer to the Quick Start Guide for information on how to properly connect the N220. -
Page 93: Problems Communicating With Other Computers
Chapter 7 Troubleshooting 7.4 Problems Communicating with Other Computers The computer with the N220 installed cannot communicate with the other computer(s). In Infrastructure Mode • Make sure that the AP and the associated computers are turned on and working properly. •... - Page 94 Chapter 7 Troubleshooting N220 User’s Guide...
-
Page 95: Product Specifications
H A P T E R Product Specifications Table 27 Product Specifications PHYSICAL AND ENVIRONMENTAL Product Name N220 Wireless N-lite USB Adapter Interface USB 2.0 Standards IEEE 802.11b IEEE 802.11g IEEE 802.11n Operating Frequency 2.4GHZ Antenna Type Chip Operating Temperature 0 - 50 degrees Celsius Storage Temperature -30 - 70 degrees Celsius... - Page 96 Chapter 8 Product Specifications Table 27 Product Specifications (continued) Transmit Power 802.11b: (+/- 1.5 dB) 1/2/5.5/11M: 18.5 dBm 802.11g: 54/48M: 15dBm 24/36M: 15dBm 12/18M: 16dBm 6/9M: 16.5 dBm 802.11n: @ HT20 MCS0~MCS07: 15.5 dBm @ HT40 MCS0~MCS07: 15.5 dBm Receiver Sensitivity 802.11b: 11Mbps at -82dBm 802.11g: 54Mbps at -68dBm 802.11n: HT20 at -64dBm...
- Page 97 Chapter 8 Product Specifications Table 27 Product Specifications (continued) Operation Channels N. America & Taiwan HT20 2.412GHz~ 2.462GHz 1-11 N. America & Taiwan HT40 2.422GHz~ 2.452GHz 3-9 Euro ETSI HT20 2.412GHz~ 2.472GHz 1-13 Euro ETSI HT40 2.422GHz~ 2.462GHz 3-11 Networking Mode Infrastructure, Ad-Hoc, SoftAP Support Approvals Safety...
- Page 98 Chapter 8 Product Specifications Table 27 Product Specifications (continued) Wireless QoS Wi-Fi Multi Media (WMM) Wi-Fi Protected Setup Push button configuration (WPS) Use device's PIN Use AP or Router's PIN Other WMM power-saving support Compatible with Windows Zero Configuration N220 User’s Guide...
-
Page 99: Appendices And Index
Appendices and Index Note: The appendices provide general information. Some details may not apply to your N220. Setting Up Your Computer’s IP Address (101) Wireless LANs (131) Windows Wireless Management (147) Wireless for Windows 7 (173) Legal Information (179) Index (183) -
Page 101: Appendix A Setting Up Your Computer's Ip Address
P P E N D I X Setting Up Your Computer’s IP Address Note: Your specific N220 may not support all of the operating systems described in this appendix. See the product specifications for more information about which operating systems are supported. This appendix shows you how to configure the IP settings on your computer in order for it to be able to communicate with the other devices on your network. - Page 102 Appendix A Setting Up Your Computer’s IP Address Click Start > Control Panel. Figure 64 Windows XP: Start Menu In the Control Panel, click the Network Connections icon. Figure 65 Windows XP: Control Panel N220 User’s Guide...
- Page 103 Appendix A Setting Up Your Computer’s IP Address Right-click Local Area Connection and then select Properties. Figure 66 Windows XP: Control Panel > Network Connections > Properties On the General tab, select Internet Protocol (TCP/IP) and then click Properties. Figure 67 Windows XP: Local Area Connection Properties N220 User’s Guide...
- Page 104 Appendix A Setting Up Your Computer’s IP Address The Internet Protocol TCP/IP Properties window opens. Figure 68 Windows XP: Internet Protocol (TCP/IP) Properties Select Obtain an IP address automatically if your network administrator or ISP assigns your IP address dynamically. Select Use the following IP Address and fill in the IP address, Subnet mask, and Default gateway fields if you have a static IP address that was assigned to you by your network administrator or ISP.
-
Page 105: Windows Vista
Appendix A Setting Up Your Computer’s IP Address In the Command Prompt window, type "ipconfig" and then press [ENTER]. You can also go to Start > Control Panel > Network Connections, right-click a network connection, click Status and then click the Support tab to view your IP address and connection information. - Page 106 Appendix A Setting Up Your Computer’s IP Address Click the Network and Sharing Center icon. Figure 71 Windows Vista: Network And Internet Click Manage network connections. Figure 72 Windows Vista: Network and Sharing Center Right-click Local Area Connection and then select Properties. Figure 73 Windows Vista: Network and Sharing Center Note: During this procedure, click Continue whenever Windows displays a screen saying that it needs your permission to continue.
- Page 107 Appendix A Setting Up Your Computer’s IP Address Select Internet Protocol Version 4 (TCP/IPv4) and then select Properties. Figure 74 Windows Vista: Local Area Connection Properties N220 User’s Guide...
- Page 108 Appendix A Setting Up Your Computer’s IP Address The Internet Protocol Version 4 (TCP/IPv4) Properties window opens. Figure 75 Windows Vista: Internet Protocol Version 4 (TCP/IPv4) Properties Select Obtain an IP address automatically if your network administrator or ISP assigns your IP address dynamically. Select Use the following IP Address and fill in the IP address, Subnet mask, and Default gateway fields if you have a static IP address that was assigned to you by your network administrator or ISP.
- Page 109 Appendix A Setting Up Your Computer’s IP Address In the Command Prompt window, type "ipconfig" and then press [ENTER]. You can also go to Start > Control Panel > Network Connections, right-click a network connection, click Status and then click the Support tab to view your IP address and connection information.
- Page 110 Appendix A Setting Up Your Computer’s IP Address Click Change adapter settings. Figure 78 Windows 7: Network And Sharing Center Double click Local Area Connection and then select Properties. Figure 79 Windows 7: Local Area Connection Status Note: During this procedure, click Continue whenever Windows displays a screen saying that it needs your permission to continue.
- Page 111 Appendix A Setting Up Your Computer’s IP Address Select Internet Protocol Version 4 (TCP/IPv4) and then select Properties. Figure 80 Windows 7: Local Area Connection Properties N220 User’s Guide...
- Page 112 Appendix A Setting Up Your Computer’s IP Address The Internet Protocol Version 4 (TCP/IPv4) Properties window opens. Figure 81 Windows 7: Internet Protocol Version 4 (TCP/IPv4) Properties Select Obtain an IP address automatically if your network administrator or ISP assigns your IP address dynamically. Select Use the following IP Address and fill in the IP address, Subnet mask, and Default gateway fields if you have a static IP address that was assigned to you by your network administrator or ISP.
- Page 113 Appendix A Setting Up Your Computer’s IP Address The IP settings are displayed as follows. Figure 82 Windows 7: Internet Protocol Version 4 (TCP/IPv4) Properties Mac OS X: 10.3 and 10.4 The screens in this section are from Mac OS X 10.4 but can also apply to 10.3. Click Apple >...
- Page 114 Appendix A Setting Up Your Computer’s IP Address In the System Preferences window, click the Network icon. Figure 84 Mac OS X 10.4: System Preferences When the Network preferences pane opens, select Built-in Ethernet from the network connection type list, and then click Configure. Figure 85 Mac OS X 10.4: Network Preferences N220 User’s Guide...
- Page 115 Appendix A Setting Up Your Computer’s IP Address For dynamically assigned settings, select Using DHCP from the Configure IPv4 list in the TCP/IP tab. Figure 86 Mac OS X 10.4: Network Preferences > TCP/IP Tab. For statically assigned settings, do the following: •...
- Page 116 Appendix A Setting Up Your Computer’s IP Address • In the Router field, type the IP address of your device. Figure 87 Mac OS X 10.4: Network Preferences > Ethernet Click Apply Now and close the window. Verifying Settings Check your TCP/IP properties by clicking Applications > Utilities > Network Utilities, and then selecting the appropriate Network Interface from the Info tab.
- Page 117 Appendix A Setting Up Your Computer’s IP Address Mac OS X: 10.5 and 10.6 The screens in this section are from Mac OS X 10.5 but can also apply to 10.6. Click Apple > System Preferences. Figure 89 Mac OS X 10.5: Apple Menu In System Preferences, click the Network icon.
- Page 118 Appendix A Setting Up Your Computer’s IP Address When the Network preferences pane opens, select Ethernet from the list of available connection types. Figure 91 Mac OS X 10.5: Network Preferences > Ethernet From the Configure list, select Using DHCP for dynamically assigned settings. For statically assigned settings, do the following: •...
- Page 119 Appendix A Setting Up Your Computer’s IP Address • In the Router field, enter the IP address of your N220. Figure 92 Mac OS X 10.5: Network Preferences > Ethernet Click Apply and close the window. N220 User’s Guide...
- Page 120 Appendix A Setting Up Your Computer’s IP Address Verifying Settings Check your TCP/IP properties by clicking Applications > Utilities > Network Utilities, and then selecting the appropriate Network interface from the Info tab. Figure 93 Mac OS X 10.5: Network Utility Linux: Ubuntu 8 (GNOME) This section shows you how to configure your computer’s TCP/IP settings in the GNU Object Model Environment (GNOME) using the Ubuntu 8 Linux distribution.
- Page 121 Appendix A Setting Up Your Computer’s IP Address Click System > Administration > Network. Figure 94 Ubuntu 8: System > Administration Menu When the Network Settings window opens, click Unlock to open the Authenticate window. (By default, the Unlock button is greyed out until clicked.) You cannot make changes to your configuration unless you first enter your admin password.
- Page 122 Appendix A Setting Up Your Computer’s IP Address In the Authenticate window, enter your admin account name and password then click the Authenticate button. Figure 96 Ubuntu 8: Administrator Account Authentication In the Network Settings window, select the connection that you want to configure, then click Properties.
- Page 123 Appendix A Setting Up Your Computer’s IP Address The Properties dialog box opens. Figure 98 Ubuntu 8: Network Settings > Properties • In the Configuration list, select Automatic Configuration (DHCP) if you have a dynamic IP address. • In the Configuration list, select Static IP address if you have a static IP address.
- Page 124 Appendix A Setting Up Your Computer’s IP Address If you know your DNS server IP address(es), click the DNS tab in the Network Settings window and then enter the DNS server information in the fields provided. Figure 99 Ubuntu 8: Network Settings > DNS Click the Close button to apply the changes.
- Page 125 Appendix A Setting Up Your Computer’s IP Address tab. The Interface Statistics column shows data if your connection is working properly. Figure 100 Ubuntu 8: Network Tools Linux: openSUSE 10.3 (KDE) This section shows you how to configure your computer’s TCP/IP settings in the K Desktop Environment (KDE) using the openSUSE 10.3 Linux distribution.
- Page 126 Appendix A Setting Up Your Computer’s IP Address Click K Menu > Computer > Administrator Settings (YaST). Figure 101 openSUSE 10.3: K Menu > Computer Menu When the Run as Root - KDE su dialog opens, enter the admin password and click OK.
- Page 127 Appendix A Setting Up Your Computer’s IP Address When the YaST Control Center window opens, select Network Devices and then click the Network Card icon. Figure 103 openSUSE 10.3: YaST Control Center When the Network Settings window opens, click the Overview tab, select the appropriate connection Name from the list, and then click the Configure button.
- Page 128 Appendix A Setting Up Your Computer’s IP Address When the Network Card Setup window opens, click the Address tab Figure 105 openSUSE 10.3: Network Card Setup Select Dynamic Address (DHCP) if you have a dynamic IP address. Select Statically assigned IP Address if you have a static IP address. Fill in the IP address, Subnet mask, and Hostname fields.
- Page 129 Appendix A Setting Up Your Computer’s IP Address If you know your DNS server IP address(es), click the Hostname/DNS tab in Network Settings and then enter the DNS server information in the fields provided. Figure 106 openSUSE 10.3: Network Settings Click Finish to save your settings and close the window.
- Page 130 Appendix A Setting Up Your Computer’s IP Address Verifying Settings Click the KNetwork Manager icon on the Task bar to check your TCP/IP properties. From the Options sub-menu, select Show Connection Information. Figure 107 openSUSE 10.3: KNetwork Manager When the Connection Status - KNetwork Manager window opens, click the Statistics tab to see if your connection is working properly.
-
Page 131: Appendix B Wireless Lans
P P E N D I X Wireless LANs Wireless LAN Topologies This section discusses ad-hoc and infrastructure wireless LAN topologies. Ad-hoc Wireless LAN Configuration The simplest WLAN configuration is an independent (Ad-hoc) WLAN that connects a set of computers with wireless adapters (A, B, C). Any time two or more wireless adapters are within range of each other, they can set up an independent network, which is commonly referred to as an ad-hoc network or Independent Basic Service Set (IBSS). - Page 132 Appendix B Wireless LANs with each other. When Intra-BSS is disabled, wireless client A and B can still access the wired network but cannot communicate with each other. Figure 110 Basic Service Set An Extended Service Set (ESS) consists of a series of overlapping BSSs, each containing an access point, with each access point connected together by a wired network.
- Page 133 Appendix B Wireless LANs An ESSID (ESS IDentification) uniquely identifies each ESS. All access points and their associated wireless clients within the same ESS must have the same ESSID in order to communicate. Figure 111 Infrastructure WLAN Channel A channel is the radio frequency(ies) used by wireless devices to transmit and receive data.
- Page 134 Appendix B Wireless LANs hidden node. Both stations (STA) are within range of the access point (AP) or wireless gateway, but out-of-range of each other, so they cannot "hear" each other, that is they do not know if the channel is currently being used. Therefore, they are considered hidden from each other.
-
Page 135: Fragmentation Threshold
Appendix B Wireless LANs Fragmentation Threshold A Fragmentation Threshold is the maximum data fragment size (between 256 and 2432 bytes) that can be sent in the wireless network before the AP will fragment the packet into smaller data frames. A large Fragmentation Threshold is recommended for networks not prone to interference while you should set a smaller threshold for busy networks or networks that are prone to interference. -
Page 136: Wireless Security Overview
Appendix B Wireless LANs several intermediate rate steps between the maximum and minimum data rates. The IEEE 802.11g data rate and modulation are as follows: Table 28 IEEE 802.11g DATA RATE MODULATION (MBPS) DBPSK (Differential Binary Phase Shift Keyed) DQPSK (Differential Quadrature Phase Shift Keying) 5.5 / 11 CCK (Complementary Code Keying) 6/9/12/18/24/36/... - Page 137 Appendix B Wireless LANs IEEE 802.1x In June 2001, the IEEE 802.1x standard was designed to extend the features of IEEE 802.11 to support extended authentication as well as providing additional accounting and control features. It is supported by Windows XP and a number of network devices.
- Page 138 Appendix B Wireless LANs • Access-Challenge Sent by a RADIUS server requesting more information in order to allow access. The access point sends a proper response from the user and then sends another Access-Request message. The following types of RADIUS messages are exchanged between the access point and the RADIUS server for user accounting: •...
- Page 139 Appendix B Wireless LANs However, MD5 authentication has some weaknesses. Since the authentication server needs to get the plaintext passwords, the passwords must be stored. Thus someone other than the authentication server may access the password file. In addition, it is possible to impersonate an authentication server as MD5 authentication method does not perform mutual authentication.
-
Page 140: Wpa And Wpa2
Appendix B Wireless LANs Dynamic WEP Key Exchange The AP maps a unique key that is generated with the RADIUS server. This key expires when the wireless connection times out, disconnects or reauthentication times out. A new WEP key is generated each time reauthentication is performed. If this feature is enabled, it is not necessary to configure a default encryption key in the wireless security configuration screen. - Page 141 Appendix B Wireless LANs If the AP or the wireless clients do not support WPA2, just use WPA or WPA-PSK depending on whether you have an external RADIUS server or not. Select WEP only when the AP and/or wireless clients do not support WPA or WPA2. WEP is less secure than WPA or WPA2.
- Page 142 Appendix B Wireless LANs keys. This prevent all wireless devices sharing the same encryption keys. (a weakness of WEP) User Authentication WPA and WPA2 apply IEEE 802.1x and Extensible Authentication Protocol (EAP) to authenticate wireless clients using an external RADIUS database. WPA2 reduces the number of key exchange messages from six to four (CCMP 4-way handshake) and shortens the time required to connect to a network.
- Page 143 Appendix B Wireless LANs The RADIUS server distributes the PMK to the AP. The AP then sets up a key hierarchy and management system, using the PMK to dynamically generate unique data encryption keys. The keys are used to encrypt every data packet that is wirelessly communicated between the AP and the wireless clients.
- Page 144 Appendix B Wireless LANs The AP and wireless clients use the TKIP or AES encryption process, the PMK and information exchanged in a handshake to create temporal encryption keys. They use these keys to encrypt data exchanged between them. Figure 114 WPA(2)-PSK Authentication Security Parameters Summary Refer to this table to see what other security parameters you should configure for each authentication method or key management protocol type.
- Page 145 Appendix B Wireless LANs Antenna Overview An antenna couples RF signals onto air. A transmitter within a wireless device sends an RF signal to the antenna, which propagates the signal through the air. The antenna also operates in reverse by capturing RF signals from the air. Positioning the antennas properly increases the range and coverage area of a wireless LAN.
- Page 146 Appendix B Wireless LANs • Omni-directional antennas send the RF signal out in all directions on a horizontal plane. The coverage area is torus-shaped (like a donut) which makes these antennas ideal for a room environment. With a wide coverage area, it is possible to make circular overlapping coverage areas with multiple access points.
-
Page 147: Appendix C Windows Wireless Management
P P E N D I X Windows Wireless Management This appendix shows you how to manage your N220 using the Windows Vista and Windows XP wireless configuration tools. Windows Vista Take the following steps to connect to a wireless network using the Windows Vista wireless configuration tool (WLAN AutoConfig). - Page 148 Appendix C Windows Wireless Management Connecting to a Wireless Network In the Windows Vista taskbar, click Start ( ) > Connect To. Figure 115 Vista: Start Menu The Connect To window displays, showing all available networks. Figure 116 Vista: The Connect To Window The security status of each wireless network displays, as well as an indication of its signal strength.
- Page 149 Appendix C Windows Wireless Management Figure 117 Vista: Additional Information Double-click the network’s name to join the network, or select a network and click Connect. Note: If the network to which you want to connect does not display, see the section on setting up a connection manually on page 151.
- Page 150 Appendix C Windows Wireless Management If security is enabled, you may be prompted to enter your security key. Figure 118 Vista: Enter Security Key Your computer tries to connect to the wireless network. Figure 119 Vista: Connecting If your computer has connected to the wireless network successfully, the following screen displays.
- Page 151 Appendix C Windows Wireless Management Figure 120 Vista: Successful Connection If you will use this network again, ensure that Save this network is selected. If you save the network, you do not have to configure its settings again. Select Start this connection automatically if you want Windows to always try to use this network when you start up your computer.
- Page 152 Appendix C Windows Wireless Management Click Set up a connection or network at the bottom of the Connect to screen. The following screen displays. Figure 121 Vista: Choose a Connection Option N220 User’s Guide...
- Page 153 Appendix C Windows Wireless Management Click Manually connect to a wireless network. The following screen displays. Figure 122 Vista: Connect Manually The following table describes the labels in this screen. Table 32 Vista: Connect Manually LABEL DESCRIPTION Network name Enter your network’s SSID (Service Set IDentifier). Security type Select the type of security used by the network to which you want to connect.
- Page 154 Appendix C Windows Wireless Management Table 32 Vista: Connect Manually LABEL DESCRIPTION Next Click this to save your settings and move on to the next page. Cancel Click this to stop setting up your network. When you have finished filling in the fields, click Next. the following screen displays.
- Page 155 Appendix C Windows Wireless Management Click Start ( ) > Connect To. In the Connect to screen, click Set up a connection or network. The following screen displays. Figure 124 Vista: Set Up An Ad-hoc Network Select Set up a wireless ad hoc (computer-to-computer) network and click Next.
- Page 156 Appendix C Windows Wireless Management Enter the Security key/Passphrase. Everybody on the network must enter this key in their computer’s wireless client in order to access the network. If you want to see the characters you entered, select the Display characters box. Otherwise, leave it empty (dots display instead of the characters).
- Page 157 Appendix C Windows Wireless Management Activating Wireless Zero Configuration Click Start, Control Panel and double-click Network Connections. Double-click on the icon for wireless network connection. The status window displays as shown below. Click Properties. Figure 127 Windows XP SP1: Wireless Network Connection Status Figure 128 Windows XP SP2: Wireless Network Connection Status N220 User’s Guide...
- Page 158 Appendix C Windows Wireless Management The Wireless Network Connection Properties screen displays. Click the Wireless Networks tab. Make sure the Use Windows to configure my wireless network settings check box is selected. Figure 129 Windows XP SP1: Wireless Network Connection Properties Figure 130 Windows XP SP2: Wireless Network Connection Properties N220 User’s Guide...
- Page 159 Appendix C Windows Wireless Management If you see the following screen, refer to article 871122 on the Microsoft web site for information on starting WZC. Figure 131 Windows XP SP2: WZC Not Available Connecting to a Wireless Network Double-click the network icon for wireless connections in the system tray to open the Wireless Network Connection Status screen.
- Page 160 Appendix C Windows Wireless Management Windows XP SP2: In the Wireless Network Connection Status screen, click View Wireless Networks to open the Wireless Network Connection screen. Figure 133 Windows XP SP2: Wireless Network Connection Status Windows XP SP1: In the Wireless Network Connection Status screen, click Properties and the Wireless Networks tab to open the Wireless Network Connection Properties screen.
- Page 161 Appendix C Windows Wireless Management Windows XP SP2: Click Refresh network list to reload and search for available wireless devices within transmission range. Select a wireless network in the list and click Connect to join the selected wireless network. Figure 135 Windows XP SP2: Wireless Network Connection The following table describes the icons in the wireless network list.
- Page 162 Appendix C Windows Wireless Management Figure 136 Windows XP SP1: Wireless Network Connection Properties 4.Windows XP SP2: If the wireless security is activated for the selected wireless network, the Wireless Network Connection screen displays. You must set the related fields in the Wireless Network Connection screen to the same security settings as the associated AP and click Connect.
- Page 163 Appendix C Windows Wireless Management security settings for more information. Otherwise click Cancel and connect to another wireless network without data encryption. If there is no security activated for the selected wireless network, a warning screen appears. Click Connect Anyway if wireless security is not your concern. Figure 137 Windows XP SP2: Wireless Network Connection: WEP or WPA-PSK Figure 138 Windows XP SP2: Wireless Network Connection: No Security...
- Page 164 Appendix C Windows Wireless Management Association Select a network in the Preferred networks list and click Properties to view or configure security. Figure 139 Windows XP: Wireless (network) properties: Association The following table describes the labels in this screen. Table 36 Windows XP: Wireless (network) properties: Association LABEL DESCRIPTION Network name...
- Page 165 Appendix C Windows Wireless Management Table 36 Windows XP: Wireless (network) properties: Association (continued) LABEL DESCRIPTION This is a If this check box is selected, you are connecting to another computer computer-to- directly. computer (ad hoc) network; wireless access points are not used Click OK to save your changes.
- Page 166 Appendix C Windows Wireless Management Table 37 Windows XP: Wireless (network) properties: Authentication (continued) LABEL DESCRIPTION Properties Click this button to open the properties screen and configure certificates. The screen varies depending on what you select in the EAP type field. Authenticate as Select this check box to have the computer send its information to the computer when...
- Page 167 Appendix C Windows Wireless Management The following table describes the labels in this screen. Table 38 Windows XP: Protected EAP Properties LABEL DESCRIPTION Validate server Select the check box to verify the certificate of the authentication certificate server. Connect to Select the check box and specify a domain in the field below to have these servers your computer connect to a server which resides only within this...
- Page 168 Appendix C Windows Wireless Management Smart Card or other Certificate Properties Figure 142 Windows XP: Smart Card or other Certificate Properties The following table describes the labels in this screen. Table 39 Windows XP: Smart Card or other Certificate Properties LABEL DESCRIPTION Use my smart...
- Page 169 Appendix C Windows Wireless Management Ordering the Preferred Networks Follow the steps below to manage your preferred networks. N220 User’s Guide...
- Page 170 Appendix C Windows Wireless Management Windows XP SP2: Click Change the order of preferred networks in the Wireless Network Connection screen (see Figure 135 on page 161). The screen displays as shown. Figure 143 Windows XP SP2: Wireless Networks: Preferred Networks Windows XP SP1: In the Wireless Network Connection Status screen, click Properties and the tab to open the screen as shown.
- Page 171 Appendix C Windows Wireless Management Whenever the N220 tries to connect to a new network, the new network is added in the Preferred networks table automatically. Select a network and click Move up or Move down to change it's order, click Remove to delete it or click Properties to view the security, authentication or connection information of the selected network.
- Page 172 Appendix C Windows Wireless Management N220 User’s Guide...
-
Page 173: Appendix D Wireless For Windows 7
P P E N D I X Wireless for Windows 7 Follow these steps to connect to a wireless network for a computer with the Windows 7 Operating System (OS). You should know the network name (SSID) of the wireless network to which you want to connect. - Page 174 Appendix D Wireless for Windows 7 In the Control Panel, click View network status and tasks under the Network and Internet category. Figure 146 Windows 7: Control Panel Click Change adapter settings. Figure 147 Windows 7: Network And Sharing Center Right click Wireless Network Connection and select Enable.
- Page 175 Appendix D Wireless for Windows 7 A progress indicator appears. Figure 149 Windows 7: Enabling the Wireless Network Connection When it shows Enabled, you are ready to connect to your wireless network. Connecting to a Wireless Network Once the computer’s wireless adapter has been enabled, do the following to connect to a wireless network.
- Page 176 Appendix D Wireless for Windows 7 Select a wireless network and click Connect. Figure 151 Windows 7: Connect to the Wireless Networks • If the wireless network is not password-protected, you should see a progress indicator as follows. Figure 152 Windows 7: Wireless Connection Progress Indicator •...
- Page 177 Appendix D Wireless for Windows 7 Verifying the Settings Open a web browser and try to access a website, such as www.zyxel.com. Additionally, do the following to check your wireless network connection status. Click Start > Control Panel. Figure 154 Windows 7: Start Menu In the Control Panel, click View network status and tasks under the Network and Internet category.
- Page 178 Appendix D Wireless for Windows 7 Check the Connections under View you active networks. If the wireless network name displays and the icon is green, you have successfully connected to the wireless network. Figure 156 Windows 7: Network and Sharing Center N220 User’s Guide...
-
Page 179: Legal Information
Published by ZyXEL Communications Corporation. All rights reserved. Disclaimers ZyXEL does not assume any liability arising out of the application or use of any products, or software described herein. Neither does it convey any license under its patent rights nor the patent rights of others. ZyXEL further reserves the right to make changes in any products described herein without notice. - Page 180 Appendix E Legal Information This device has been tested and found to comply with the limits for a Class B digital device pursuant to Part 15 of the FCC Rules. These limits are designed to provide reasonable protection against harmful interference in a residential installation.
- Page 181 Appendix E Legal Information Industry Canada Statement This device complies with RSS-210 of the Industry Canada Rules. Operation is subject to the following two conditions: 1) this device may not cause interference and 2) this device must accept any interference, including interference that may cause undesired operation of the device This device has been designed to operate with an antenna having a maximum gain of 3dBi.
- Page 182 Cet appareil numérique de la classe B est conforme à la norme NMB-003 du Canada. Viewing Certifications Go to http://www.zyxel.com. Select your product on the ZyXEL home page to go to that product's page. Select the certification you wish to view from this page. N220 User’s Guide...
- Page 183 Index Index About Basic Service Set, See BSS about your ZyXEL Device Access Point (AP) Access point (AP) Access Point. See also AP. ACT LED activating a profile 41, 139 adapter CCMP Ad-Hoc Certificate Authority 20, 65 See CA. Advanced Encryption Standard See AES.
- Page 184 Index dynamic WEP key exchange IEEE 802.1x 40, 59, 71 Independent Basic Service Set See IBSS infrastructure initialization vector (IV) installation EAP (Extensible Authentication Protocol) interface EAP Authentication Internet access EAP authentication IP address EAP type dynamic EAP-PEAP EAP-TLS EAP-TTLS encryption encryption type 40, 59...
- Page 185 Index real-time data traffic statistics receive rate receive speed online help related documentation Output power RTS (Request To Send) threshold 133, 134 packet collisions Pairwise Master Key (PMK) 141, 143 safety warnings passphrase 40, 56, 80 Save power password save power PEAP 71, 72 scan...
- Page 186 52, 53 wireless station mode TTLS adapter security settings 55, 80 site survey trend chart wireless tutorial uninstalling the ZyXEL utility WLAN upgrading the ZyXEL utility interference important step security parameters user authentication 41, 58, 71, 140 utility installation key caching...
- Page 187 Index accessing driver version number exiting help reactivating status system tray icon upgrading version number N220 User’s Guide...
Need help?
Do you have a question about the N220 - V1.0 and is the answer not in the manual?
Questions and answers
I accidentally deleted my device from my PC. How do I download it again without the CD?