Table of Contents
Advertisement
Quick Links
Advertisement
Table of Contents

Related Manuals for Delorean DM600

Summary of Contents for Delorean DM600
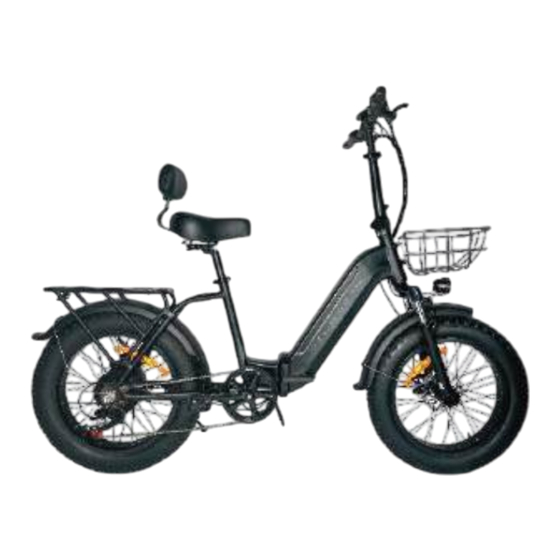
- Page 1 User Manual Delorean E-Bike Made to be Unleashed...
-
Page 2: Table Of Contents
Contents RIDING SAFETY ............ 01 WARNING ..............02 UNBOXING .............. 04 DIAGRAM ..............05 ASSEMBLY ............... 06 BATTERY & CHARGING ........13 GET READY TO RIDE .......... 16 DISPLAY ..............17 OPERATION ............18 SETTINGS ............... 19 MAINTENANCE ............. 21 TIRE INFLATION &... -
Page 3: Riding Safety
RIDING SAFETY Please understand that you can reduce the risk by following all instructions Before you ride the product on road, please learn how to ride safely and make sure you practice until you master the riding skill, to avoid collision, falling, and warnings in this manual, but you cannot eliminate all the risks. -
Page 4: Warning
WARNING! 01. Before riding the bike, always wear helmet that t properly with the 06. To reduce the risk of injury, you must read and follow all chinstrap in place and provides the protection for the back of your CAUTION and WARNING notices in this manual. head. - Page 5 WARNING! 11. Do not attempt to charge your bike if, the charger or the power outlet is 17. Always place the bike on its stand on a at and stable surface. The bike must be placed with the stand against the slope to prevent it wet.
-
Page 6: Unboxing
UNBOXING 01. Remove your bike from the box and place it on a bench or stools where wheel can spin freely. Carefully remove the protection material from the bike and set it aside. 02. Please check if all the items are included. If there are any components missing, please contact your dealer or support center via S u p p o r t @ e M o b i l i t y . -
Page 7: Diagram
DIAGRAM... -
Page 8: Assembly
ASSEMBLY STEP 1: Unfold/Fold the Bike Fold: A. Push the safety button on the latch to the Right as the photo. B. Push the folding latch outward to unlock the folding mechanism. Unfold: Push the folding latch inward to lock the folding mechanism as the photo... -
Page 9: Step 2 : Assemble The Front Wheel
ASSEMBLY STEP 2 : Assemble the Front Wheel a. Put the safety hook (hook in the hole), spring and nut on the b. Push the latch on the right side of the wheel to lock it. wheel shaft in order, and tighten the nut. Use the wrench as you prefer. - Page 10 ASSEMBLY STEP 3 : Assemble the Fender a. Remove the spacer and nut on the top of the front fork. c. Reinstall the spacer and nut in order. Tighten the nut with Allen key wrench. b. Slide the fender through the fork, align the fender bracket and front light bracket with the screw hole.
- Page 11 ASSEMBLY STEP 4 : Assemble the Headset a. Adjust the handlebar to make sure it is perpendicular to the front c. use the screws in the tool bag, and tighten the handlebad on the stem, wheel. mount the display in the center of the handlebar, tighten the screws on the display mounts as above show b.
- Page 12 ASSEMBLY STEP 5 : Assemble the Seat a. Insert the seat in the seat post. b. Adjust the height to your liking, and lock the latch. Note: Make sure the seat post and seat are properly adjusted before riding. DO NOT lift the seat post too high, the seat post or frame may break which could cause an incident...
- Page 13 ASSEMBLY STEP 6 : Assemble the Pedals b. Install the pedals on the crank, twist the right a. Identify the right and left side pedal by the c. Check the chain alignment. Rotate the right pedal clockwise, and the left pedal anti- marking on the padel.
- Page 14 ASSEMBLY STEP 7 : Adjust the Suspension The suspension fork can move up and down up to 80mm to cushion bumps, which makes riding on a rough road or trail smoother. Depending on a rider's preference, the suspension fork can be locked out as a rigid fork, which will typically yield higher e ciency while pedaling.
-
Page 15: Battery & Charging
Battery Key Position Key hole is on the left side of the bike When the key is in the 45 degree position means battery is lock, and battery can not moved... - Page 16 Battery Remove & Install Remove: Install: insert the key to the key hole, and contrarotate 180 degree the key, then Push back the battery, you can hear there is sound mean battery in the battery is unlock, you can see battery case is open, then move out the the right position, after this, clockwise rotation 180 degree the key,you battery from the bike can see battery is move inside a litte, if the battery still unlock condition,...
- Page 17 Charging Battery Charge the Bike a. Ensure the battery is lock in the bike. b. Remove the rubber cover on the charging port on the left side of the bike(as the photo show) c. Plug the charger into the charging port and connect the DC output plug.
-
Page 18: Get Ready To Ride
BATTERY & CHARGINGGET READY TO RIDE NOTE: Before your rstride, please make sure the bike has been assembled properly and strictly according to the manual. We suggest you to get it checked by a mechanic. 1. CHECK THE BATTERY IF WELL LOCK. 2. -
Page 19: Display
DISPLAY 6. Speed 7. Work mode: Auto/Manual 8. Light 9. Multi function display: a. TRIP: Mileage of a single trip b. ODO: Total Mileage c. TM: Riding Time d. VOL: Voltage e.RM: Rest Mileage 1. AVG: Average speed in a single trip f: CUR: Working currency MAX: Max speed in a single trip 10.Mileage display... -
Page 20: Operation
OPERATION Functions Settings Power On/O When the bike is stationary for 10 minutes (the length can be ON: Long press the power button for approximately 2 changed in settings), it will automatically turn o . seconds. OFF: Long press the power button for approximately 2 seconds. -
Page 21: Settings
SETTINGS Functions Settings Long press UP DOWN buttons simultaneously to enter Enter setting mode for more settings below. Enter Setting Mode or quit the setting. Or it will automatically exit the setting if there is no operation after 10 seconds. Switch between Backlight brightness, Matrix, Voltage level, Automatic turn When the display is on, long press M button for 3 seconds... - Page 22 SETTINGS Functions Settings 1: Kick start; 0: Zero start Kick-Start: Pedal to taxi the bike until the speed reach 3KM/H, then press the throttle to accelerate Zero-Start: Directly press the throttle to accelerate 0: PAS Drive Mode (Assistance depends on PAS level, Drive mode throttle is inactive) 1: Electric Drive Mode (Assistance is controlled by...
-
Page 23: Maintenance
MAINTENANCE Screw Tightening Battery Storage 1. Check the screws before rst ride, and 1. Store your bike in a cool and dry place. The 1. The ideal battery level is 70% for long check them every few months to make sure storage temperature needs to be between term storage. - Page 24 MAINTENANCE Regular inspection and maintenance are key to ensure bike function as intended, and to reduce wear and tear on their systems. Recommend- ed service intervals are meant to be used as guidelines. Real-world wear and tear, and the need for service will vary with conditions of use. We recommend inspections, service, and necessary replacements be performed at the time or mileage interval that comes rst in the following table.
-
Page 25: Tire Inflation & Replacement
TIRE INFLATION & REPLACEMENT This ebike is rubber tires with inner tubes. The tires are designed for durability and safety for regular cycling activities and need to be checked before each use for proper maintained, and unsafe conditions avoided. We recommend 20 PSI for the stock tires. Always stay within the manufacturer's recommended air pressure range as listed on the tire sidewall. It is critically important that proper air pressure is always maintained in pneumatic tires. -
Page 26: Safety Checklist
SAFETY CHECKLIST Before every ride, and after every 25-45 miles(40-72 km), we advise following the pre-ride safety checklist. Safety Check 1. Brakes Ensure front and rear brakes work properly; Check brake pads for wear and ensure they are not overworn. Ensure brake pads are correctly positioned in relation to the rims. Ensure brake cables are lubricated, correctly adjusted, and display no obvious wear. -
Page 27: Troubleshooting
TROUBLESHOOTING Possible Causes Most Common Solutions 1. Insu cient battery power 1. Charge the battery 2. Faulty connections 2. Clean and repair connectors 3. Battery not fully seated in tray 3. Install the battery correctly The bike does not work 4. -
Page 28: Specifications
SPECIFICATIONS SPECIFICATIONS ITEM Model DM600 Product Dimensions 1750x570x1300mm Package Dimensions 1455×310×730 mm 330 Ibs (150kg) Max Load 65KG Min Load 92.59 Ibs (42kg) Package Weight 71.65 Ibs (32.5kg) E Bike Weight 20MPH Max Speed Guangzhou Ji Yin Power Electronics Co Ltd...
Need help?
Do you have a question about the DM600 and is the answer not in the manual?
Questions and answers
How can I get OEM replacement batteries, and how much is the battery for my Delorean DM 600/750-Watt ebike, (I have 2 red and 1 black Delorean DM 600's)??? What is the part number for the replacement battery? More importantly, what is the price for the original equipment manufactured battery? Thank you.....
how can I