Advertisement
Quick Links
Advertisement

Subscribe to Our Youtube Channel
Related Manuals for Midea MF210W95WB


Summary of Contents for Midea MF210W95WB
- Page 1 MODEL: MF210W95WB MF210W105WB...
- Page 2 CONTENTS SAFETY INSTRUCTIONS SPECIFICATIONS PRODUCT OVERVIEW QUICK START GUIDE PRODUCT INSTALLATION OPERATION INSTRUCTIONS APP SETUP AND OPERATION CLEANING AND MAINTENANCE TROUBLE SHOOTING DISPOSAL AND RECYCLING Read all instructions and explanations before use.Follow the instructions carefully. Keep the operation instructions handy for later use. if the appliance is sold or passed on then ensure that the new owner always receives these operation instructions.
- Page 3 • Do not install the machine on a carpet floor. • The obstruction of the openings by a carpet can damage the machine. Model Washing Capacity MF210W95WB 9.5kg MF210W105WB 10.5kg For countries other than EU: • The appliance is not to be used by persons (including children) with reduced physical, sensory or mental capabilities, or lack of experience and knowledge, unless they have been given supervision or instruction.
- Page 4 Explanation of Symbols DANGER This symbol indicates that there are dangers to the life and health of persons due to extremely flammable gas. WARNING OF ELECTRICAL VOLTAGE This symbol indicates that there is a danger to life and health of persons due to voltage.
- Page 5 Installation Location and Surrounding • All washing and additional substances are to be kept in a safe place out of the reach of children. • Keep the appliance clear from heating sources and direct sunlight to avoid plastic and rubber parts to corrode. •...
- Page 6 Water Connections • Check the connections of the water inlet tubes, the water tap and the outlet hose for possible problems due to changes of water pressure. If the connections loosen or leak, close the water tap and get it repaired. •...
- Page 7 SPECIFICATIONS Model MF210W95WB MF210W105WB Power Supply 220-240V~,50Hz MAX. Current Standard Water Pressure 0.05MPa~1MPa Washing Capacity 9.5kg 10.5kg Dimension 595mm 850mm 535mm Weight 68kg Rated Power 1900W Reference Dimension 470mm 445mm 935mm 135mm...
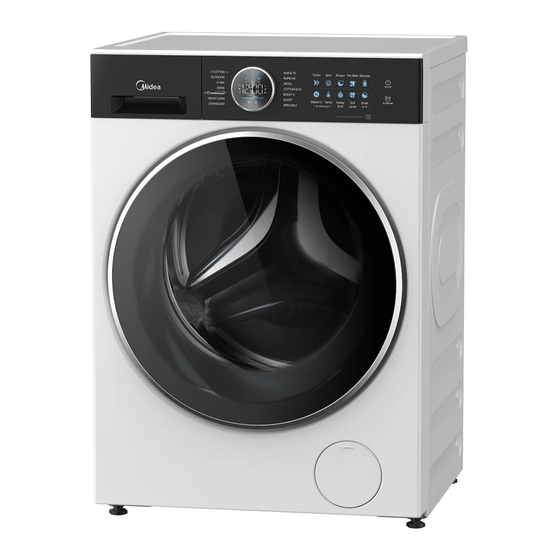
- Page 8 PRODUCT OVERVIEW Door Drain hose Power supply cord Detergent dispenser Service flap Control panel NOTE The product picture is for illustration only, please refer to real product as reference. Accessories 4 x Cover 1 x Owner’s 1 x Supply hose Acoustic panel (optional) caps...
- Page 9 QUICK START GUIDE CAUTION • Before washing, please make sure the machine is installed properly. • Your appliance was thoroughly checked before it left the factory. To remove any residual water and to neutralize potential odors, it’s recommended to clean your appliance before first use.
- Page 10 1. Before Washing 1. Plug in 2. Open tap 3. Load 4. Close door 5. Add detergent PRE WASH MAIN WASH DETERGENT SOFTENER NOTE Detergent need to be added in compartment PRE WASH if the Pre Wash • function is selected. When closing the door, please make sure that your clothes are not caught •...
- Page 11 2. Washing 1.Power on 2.Select programme 3.Select function or remain 4.Press Start/Pause to default settings start the program NOTE 1 : If default is selected, step 3 can be skipped. 2: The function button line chart is for reference only, please refer to real product as standard.
- Page 12 PRODUCT INSTALLATION Tools Needed If Installation By Yourself (not include) Installation Area WARNING • Stability is important to prevent the product from wandering! • Make sure the machine is standing leveled and stable. • Make sure that the product does not stand onto the power cord. •...
- Page 13 Unpacking the Machine WARNING • Packaging material (e.g. Films, Styrofoam) can be dangerous for children. • There is a risk of suffocation ! Keep all packaging well away from children. 1. Remove the cardboard box and styrofoam packing. 2. Lift the machine and remove the base packaging. 3.
- Page 14 Levelling the Machine WARNING The lock nuts on all four feet must be screwed tightly against the housing. 1. Loosen the lock nut. 2. Turn the foot until it reaches the floor. 3. Adjust the legs and lock the nuts with a spanner. Make sure the machine is level using a spirit level.
- Page 15 There are two ways to place the end of drain hose: 1.Put it into the water trough. 2.Connect it to the branch drain pipe of the trough. Water trough Acoustic Panel NOTE • Please make sure to assemble the acoustic panel, which can effectively reduce the noise caused by the machine while working, in order to provide you with a more peaceful and quiet living environment.
- Page 16 OPERATION INSTRUCTIONS Before Each Washing • The ambient temperature of the machine should be 5 °C -40°C. If used under 0°C, the inlet valve and draining system may be damaged. If the machine is installed under freezing conditions, it should be transferred to normal ambient temperature to ensure the water supply hose and drain hose can unfreeze before use.
- Page 17 Detergent Dispenser PRE WASH Release button to MAIN WASH pull out the dispenser DETERGENT SOFTENER CAUTION • Detergent only need to be added in “case PRE WASH” after selecting Pre Wash for machines with this function. • Do not put laundry beads into the detergent dispenser. Programme Programme COTTON ECO...
- Page 18 Control Panel Display The display shows settings, estimated remaining time, options and status messages. Option Press buttons to change program parameters or select additional functions. On/Off Power on or off machine. Start/Pause Start or pause your program. Program Choose appropriate program according to the laundry type. NOTE •...
- Page 19 Display Display Wash Time Delay End Speed Error Temp. Remote Wireless Network Delay End Door Lock Child Lock Pre Wash Rinse+ Turbo Steam...
- Page 20 Programmes Programme Load(kg) Display Time 10.5 COTTON 10.5 1:28 OUTDOOR 1:20 10.5 1:30 JEANS 10.5 1:35 HealthGuard 2:39 DRUM CLEAN 1:18 DOWNLOAD 0:47 SPIN ONLY 0:12 DUVET 1:27 BULKY 1:48 COTTON ECO 2:17 WOOL 1:03 RAPID 45' 0:45 QUICK 15' 0:15 SPORTS 0:47...
- Page 21 Programmes are available according to the laundry type. Programmes Hard-wearing textiles, heat-resistant textiles made of cotton or linen. COTTON Mixed load consisting of textiles made of cotton and synthetics. Hard-wearing textiles, heat-resistant textiles made of cotton or linen. COTTON ECO Energy-saving programme.
- Page 22 Option Default Default spin Additional Cycle speed(rpm) Temp.(℃) functions 1400 Soil COTTON Soak Level Soil OUTDOOR Soak Level Soil Soak 1400 Level Soil JEANS Soak Level Soil HealthGuard Level DRUM CLEAN Soil DOWNLOAD Soak Level SPIN ONLY 1000 Soil DUVET Soak Level Soil...
- Page 23 Spin Spin When needed, the spinning speed can be adjusted pressing the Speed button in the following steps: 1400:0-400-600-800-1000-1200-1400. Remote This is the switch of remote control, if you want to use your smartphone to control the appliance remotely, you need to hold [Remote] button.
- Page 24 Rinse+ The laundry will undergo an extra rinse after selecting this function. Turbo The function can decrease the washing time. Soil Level Soil Level The washing time will increase or decrease after you select it. Steam Steam is the function added before main wash, which will generate warm steam to sterilization and greater washing performance.
- Page 25 Reload This operation can be executed during the washing progress. When the drum is still rolling and there is large amount of water with high temperature in the drum. The state is unsafe and the door cannot be opened forcefully. To Press[3s for Reload]3sec.
- Page 26 APP SETUP AND OPERATION Use Your Appliance With the SmartHome App Before you start, make sure that: 1. Your smartphone is connected to home wireless network,and you know the network password. 2. Make sure you are near the home appliance. 3.
- Page 27 Start the Remote Control Rotate the knob randomly to indicate one of the programs, and press [ continuously until the remote control icon light up in the knob display, which means it has entered the remote control state and you can start to control remotely. Wireless Network Status Light Slowly flashing Waiting for connection...
- Page 28 CLEANING AND MAINTENANCE Cleaning and Care WARNING • Always unplug the appliance and close the water tap before cleaning and maintenance. Cleaning the Cabinet Proper maintenance on the machine can extend its working life. The surface can be cleaned with diluted non- abrasive neutral detergents when necessary.
- Page 29 Cleaning the Inlet Filter NOTE • Diminishing water flow is a sign that the filter needs to be cleaned. 1. Close the tap and remove 2. Clean the filter with a brush. the water supply hose from it. 3. Unscrew the water supply 4.
- Page 30 Cleaning the Detergent Dispenser 1. Press down the release [ ] on the softener cover and pull the dispenser drawer out of the recess. Clean the inside of the recess with a brush. 2. Lift the softener cover off the dispenser drawer and wash both items with water. 3.
- Page 31 Cleaning the Drain Pump Filter WARNING • Make sure that the machine has finished the washing cycle and is empty. Switch it off and unplug it before cleaning the drain pump filter. • Be careful of hot water. Wait for water cooling down. Risk of scalding! •...
- Page 32 TROUBLE SHOOTING Whenever there is a problem with the appliance, check if you can solve it following the tables below. If the problem persists, please contact the customer service. Description Possible Cause Solution Appliance does Door is not closed Close the door properly not start and restart.
- Page 33 DISPOSAL AND RECYCLING Important Instructions for Environment Compliance with the WEEE Directive and Disposing of the Waster Product: This product complies with EU WEEE Directive (2012/19/EU). This product bears a classification symbol for waster electrical and electronic equipment (WEEE). This symbol indicates that this product shall not be disposed with other household wastes at the end of its service life.
- Page 34 Customer Service In case of questions, please contact our local customer service center. WARNING Risk of electric shock • Never try to repair an appliance which is defective or presumed to defective. You may put your own and future users' lives in danger. Only authorised specialists are allowed to carry out this repair work.
- Page 35 V1.0 16238000A *****...
Need help?
Do you have a question about the MF210W95WB and is the answer not in the manual?
Questions and answers