Advertisement
Quick Links
Advertisement

Subscribe to Our Youtube Channel
Related Manuals for Vauxhall Mokka 2021


Summary of Contents for Vauxhall Mokka 2021
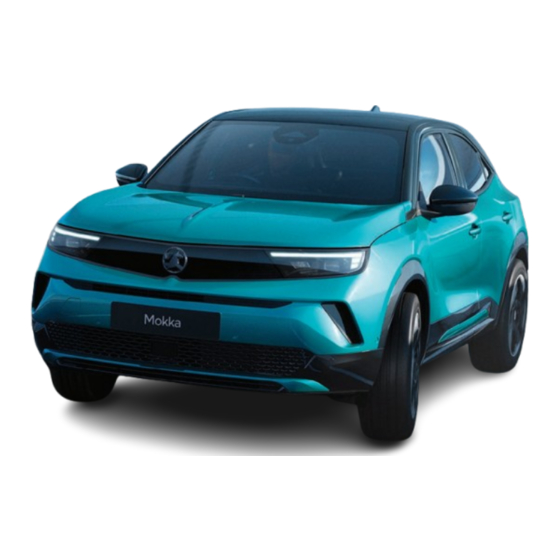
- Page 1 Mokka Owner’s Manual...
- Page 3 Contents Introduction..........2 Getting to know your vehicle....4 Dashboard instruments and controls..47 Infotainment...........69 Starting and operating......77 Advanced Driving Assistance Systems..........108 In case of emergency......142 Maintenance and vehicle care.....154 Technical specifications.......173 Consumer information......179...
- Page 4 Thank you for choosing a Vauxhall. Additionally, video tutorials for some We wish you many hours of pleasurable vehicle functions can be viewed in the driving.
- Page 5 Introduction Propulsion types section shows where the information is Warning located. Internal combustion engine vehicle ● The index will enable you to search for Text marked Warning provides (ICE) specific information. information on risk of accident or injury. An ICE vehicle is propelled by an internal Disregarding this information may lead ●...
- Page 6 Getting to know your vehicle Getting to know your Removing......... 18 Lighting control......... 38 Installing........... 18 Daytime running lights......39 vehicle Front seats..........18 Guide me home / Welcome Front seats position......18 lighting..........39 Keys............5 Manual front seats adjustment..19 Adaptive Light Control...... 39 Key with foldaway section....
- Page 7 Getting to know your vehicle Electronic Key With Keyless Warning Entry And Start Keys Once the built-in key is ejected, always Using the built-in key. keep it with you, so that you can CAUTION carry out the corresponding back-up Warning procedures.
- Page 8 Getting to know your vehicle ● card. It must be quoted when ordering a tailgate unlocking ð page 45 The electronic key simply needs to be on replacement adapter. the driver's person. ● power windows ð page 13 Wheel changing ð page 144 For reasons of security, the electronic ●...
- Page 9 Getting to know your vehicle Note Note Touch the sensor of the driver's door The electronic key may not operate if A short time after automatic unlocking, handle to unlock or to lock. placed close to electronic devices such the vehicle is relocked if no door has Unlocking and opening the tailgate as mobile phones or laptop computers.
- Page 10 Getting to know your vehicle Central locking button Manual unlocking Manually unlock the left front door by inserting and turning the key in the lock Locks or unlocks all doors, the load cylinder. compartment and fuel filler flap from inside the passenger compartment. The other doors can be opened by pulling the interior handle.
- Page 11 Getting to know your vehicle If one of the doors or the tailgate is open, the remote control or electronic key, the automatic central locking does not provided vehicle has not been opened. take place. This is signalled by the sound of the locks rebounding, accompanied Child locks by illumination of...
- Page 12 Getting to know your vehicle ● Electric child locks Electronic key is out of reception range. Remotely operated system to prevent ● The battery voltage is too low. opening of the rear doors via the interior door handles and the use of the rear ●...
- Page 13 Getting to know your vehicle Anti-Theft Alarm System This is not possible with the central control or by touching the sensor on the locking button. driver's door handle. The anti-theft alarm system is combined Activating Central locking system ð page 7 with the central locking system.
- Page 14 Getting to know your vehicle ultrasonic signals or movements simultaneously. The number and duration allowed to be started with the key being triggering the alarm. of alarm signals are stipulated by used. legislation. Also, switch off when the vehicle is on a The immobiliser is activated ferry or train.
- Page 15 If there are children on the rear seats, performed accurately according to detent then releasing: window moves switch on the child safety system for the Vauxhall specifications. Otherwise, up or down automatically with safety power windows. these systems may not work properly function enabled.
- Page 16 Getting to know your vehicle Rear Windows second. Note that the window closes only a few centimetres after each pull Child safety system for rear windows of the switch. 5. Repeat for each window. Note During this manoeuvre the safety function is deactivated.
- Page 17 Getting to know your vehicle Mirrors Sun Visor Depending on climate control system, is located at a different position. The sun visors can be folded down or Convex Mirrors swivelled to the side to prevent dazzling. The shape of the mirror makes objects If the sun visors have integral mirrors, appear smaller, which will affect the the mirror covers should be closed when...
- Page 18 Getting to know your vehicle Folding Mirrors Heated Mirrors Move to the centre position. Pull rearwards. Both exterior mirrors are folded. Pull rearwards again. Both exterior mirrors return to their original position. If an electrically folded mirror is manually unfolded, pulling rearwards will only unfold the other mirror electrically.
- Page 19 Getting to know your vehicle Inside Rearview Mirror Automatic anti-dazzle The upper edge of the head restraint Dazzle from following vehicles is should be at upper head level. If this To adjust the mirror, move the mirror automatically reduced when driving in the is not possible for extremely tall people, housing in the desired direction.
- Page 20 Getting to know your vehicle ● Pull the head restraint upwards or press Press lug A to release the head Warning the catch to release and push the head restraint and push it down. restraint downwards. ● Adjust the height of the head restraint. Never adjust seats while driving as they Head restraints on rear seats could move uncontrollably.
- Page 21 Getting to know your vehicle ● Backrest inclination of all display instruments. There should Adjust the lumbar support so that be at least one hand of clearance it supports the natural shape of the between head and the roof frame. spine.
- Page 22 Getting to know your vehicle Lumbar Support Adjustment Armrest down seat lower Power Front Seats Adjustment Warning Care must be taken when operating the power seats. There is a risk of injury, particularly for children. Objects could become trapped. Keep a close watch on the seats when adjusting them.
- Page 23 Getting to know your vehicle Folding down/up rear backrests Adjust heating to the desired setting by massage is performed in six cycles with breaks in between. ● pressing for the respective seat one Check that the seat belts are not or more times.
- Page 24 Getting to know your vehicle Seat belts Front Seat Belts The backrests are properly engaged The seat belt of the centre seat could be when the red marks near the release blocked when the backrest is folded up levers are no longer visible. too quickly.
- Page 25 Getting to know your vehicle Three-Point Seat Belt Periodically check all parts of the belt front seat belts and the outer rear seat system for damage, soiling and proper belts are tightened. Fasten functionality. Warning Have damaged components replaced. After an accident, have the seat belts and Incorrect handling (e.g.
- Page 26 Getting to know your vehicle Using the seat belt while pregnant Loose or bulky clothing prevents the seat The airbag system consists of a number belt from fitting snugly. Do not place of individual systems depending on the objects such as handbags or mobile scope of equipment.
- Page 27 Getting to know your vehicle ES: NUNCA utilice un sistema de Child restraint systems on front Warning retención infantil orientado hacia atrás passenger seat with airbag systems en un asiento protegido por un AIRBAG Keep the area in which the airbag FRONTAL ACTIVO.
- Page 28 Getting to know your vehicle jonka edessä on AKTIIVINEN Niezastosowanie się do tego zalecenia saj pri tem obstaja nevarnost RESNIH ali TURVATYYNY, LAPSI VOI KUOLLA tai może być przyczyną ŚMIERCI lub SMRTNIH POŠKODB za OTROKA. VAMMAUTUA VAKAVASTI. POWAŻNYCH OBRAŻEŃ u DZIECKA. SR: NIKADA ne koristiti bezbednosni NO: Bakovervendt barnesikringsutstyr TR: Arkaya bakan bir çocuk emniyet...
- Page 29 Getting to know your vehicle by dojít k VÁŽNÉMU PORANĚNÍ nebo GA: Ná húsáid srian sábháilteachta linbh ÚMRTÍ DÍTĚTE. cúil RIAMH ar shuíochán a bhfuil mála aeir ag feidhmiú os a chomhair. Tá baol SK: NIKDY nepoužívajte detskú sedačku BÁIS nó GORTÚ DONA don PHÁISTE otočenú...
- Page 30 Getting to know your vehicle Lateral Airbags The inflated airbags cushion the impact, The inflated airbags cushion the impact, thereby reducing the risk of injury to the thereby reducing the risk of injury to the The side airbag system consists of an upper body and pelvis in the event of a head in the event of a side-on impact airbag in each front seat backrest.
- Page 31 Getting to know your vehicle Child Restraints When a child restraint system is being used, pay attention to the following usage and installation instructions and also Child Restraints Systems those supplied with the child restraint system. The given restrictions in the Warning table refer to a test body, which is the maximum envelope of all existing child...
- Page 32 Getting to know your vehicle Top-tether anchors Selecting The Right System ISOFIX brackets are indicated by a label on the backrest. To get access to the The rear seats are the most convenient ISOFIX brackets, first pull the zip. location to fasten a child restraint system. When fastening ISOFIX child restraint Children should travel facing rearwards systems on adjustable passenger seats,...
- Page 33 Getting to know your vehicle Graco Booster for children from 15 kg For semi-universal or vehicle specific and universally approved as well as the to 36 kg. child restraint system (ISOFIX or belted larger ISOFIX and i-Size child seats child restraint system), see the vehicle on seat positions equipped with ISOFIX ●...
- Page 34 Getting to know your vehicle Child restraint system Front passenger seat Front passenger seat Rear outer seats Rear centre seat categories with activated airbag ON with deactivated airbag Universal belted child re‐ 3) 4) 4) 5) straint system i-size child restraint sys‐ 3) 6) 5) 6) Position equipped with a...
- Page 35 Getting to know your vehicle Child restraint system Front passenger seat Front passenger seat Rear outer seats Rear centre seat categories with activated airbag ON with deactivated airbag Booster seat - full width: Child restraint system installation is not allowed on rear centre seat. Universal child seat: chiId seat that can be installed in all vehicles using the seat belt.
- Page 36 Getting to know your vehicle ● R3 means full size of rearward-facing child restraint fixture for mass group 0+ up to 13 kg and mass group 1 from 9 to 18 kg, age around two to four years. ● F2, F2X mean reduced height of forward-facing child restraint fixture for mass group 1 from 9 to 18 kg, age around six to seven years.
- Page 37 Getting to know your vehicle Deactivating Front Passenger switched on, the front passenger airbag continuously in the centre system will inflate in the event of a Airbag console collision. front passenger airbag is The side airbag and curtain airbag If the control indicator OFF illuminates active systems, the belt pretensioners and all after the ignition is switched on,...
- Page 38 Getting to know your vehicle Windscreen wiper with rain sensor at a speed above 6 mph. When the Switch off in car washes. outside temperature is above +3°C, the To activate interval wiping mode the next windscreen wiper activates immediately. time the ignition is switched on, press Note the lever downwards to position OFF and...
- Page 39 Getting to know your vehicle Windscreen Wipers (Including Do not use if the windscreen is frozen. Automatic Control) Switch off in car washes. Turn the adjuster wheel to adjust the sensitivity. Rear Wiper Windscreen washer Rear window wiper Keep the sensor free from dust, dirt and : off ice.
- Page 40 Getting to know your vehicle Rear window washer Fog Lights (rear and front) Rear fog light Select Washer fluid is sprayed onto the rear window and rear view camera and the wiper wipes as long as is selected. Washer fluid ð page 163 Vehicle care ð...
- Page 41 Getting to know your vehicle ● Turn signals Within one minute after switching The lighting switches off immediately off the ignition, operate the lighting when the ignition is switched on. control stalk upwards or downwards, The function can be activated or depending on the side of the traffic deactivated in the settings app in the...
- Page 42 Getting to know your vehicle between daytime running lights and To activate or deactivate the high beam, Control indicator headlights automatically depending on pull the lever beyond the resistance High beam assist switches automatically the external lighting conditions and point. to low beam when: information given by the wiper system.
- Page 43 Getting to know your vehicle Headlights when driving abroad Operate rocker switch: : automatic switching on and When driving in countries where traffic drives on the opposite side of the road, the headlights do not have to be : on §...
- Page 44 Getting to know your vehicle ● Reading Lights Vehicle Locator Lighting turn lights ● sidelights This function makes it possible to locate the vehicle, e.g., in weak lighting The lighting switches off immediately conditions, using the remote control. when the ignition is switched on. The function can be activated or Press two times on the remote...
- Page 45 Getting to know your vehicle Glove Box Cup Holders Slide armrest backwards, push button and fold upwards. Under the armrest there is a storage compartment. A storage compartment is located in the Pull lever to open the glovebox. Cup holders are located in the centre centre console.
- Page 46 Getting to know your vehicle Do not exceed the maximum power Note This system allows wireless charging of consumption of 120 W. The sockets must always be kept clean a portable device, such as a smartphone, and dry. using the magnetic induction principle in The 12 V power outlet is deactivated in accordance with the Qi standard.
- Page 47 Getting to know your vehicle Closing Warning When using applications for a long time in combination with wireless charging, some smartphones may switch to thermal safety and cause some functions to stop. Tailgate Opening/Closing Opening When the portable device is detected, the Use the interior handle.
- Page 48 Getting to know your vehicle The rear floor cover can be lifted and CAUTION removed. Use opening to raise the rear floor cover and then remove it. Before opening the tailgate, check overhead obstructions, e.g. a garage Tyre repair kit ð page 148 door, to avoid damage to the tailgate.
- Page 49 Dashboard instruments and controls Dashboard instruments Brake and clutch system....58 Door open.........63 Parking brake........58 Vehicle range........63 and controls Electric parking brake fault....58 Climate controls........63 Anti-lock brake system (ABS)...59 Electronic climate control system..63 Instrument panel overview....48 Gear shifting........
- Page 50 Dashboard instruments and controls Instrument panel overview 21 22 23 24 25 26...
- Page 51 Dashboard instruments and controls Steering wheel and 17. Interior lights ð page 41 Power windows ð page 13 controls 18. Seat belt reminder, airbag Exterior mirrors ð page 15 deactivation ð page 22 Steering Wheel Adjustment Side air vents ð page 67 19.
- Page 52 Dashboard instruments and controls Horn Tip: Activation is indicated by the LED in the button. Driving information and infotainment are Steering Wheel Controls available on a 10-inch and a 16-inch screen. Some driver assistance systems, The instrument panel information is Infotainment system and a connected visible above the steering wheel, for mobile phone can be operated via the...
- Page 53 Dashboard instruments and controls Instrument cluster Pages Trip odometer The recorded distance since the last reset is displayed. The following trip odometer pages are selectable in the trip / autonomy information menu: ● trip in progress with instantaneous fuel consumption In addition to warning lights, gauges and ●...
- Page 54 Dashboard instruments and controls Fuel Level Gauge Speedometer High-Voltage Battery Charge Status POWER km/h km/h CHARGE 12580 Indicates vehicle speed. Control indicator illuminates yellow if Displays the high-voltage battery state of Hybrid 48 V vehicle: If the vehicle is the fuel level is low. charge.
- Page 55 Dashboard instruments and controls The power indicator gauge informs about Displays the coolant temperature. Confirm the engine oil level by using the current energy situation of the the dipstick and top up engine oil engine operating vehicle. respectively. temperature not yet Engine oil ð...
- Page 56 Dashboard instruments and controls Warning and control Simultaneously symbol illuminates indicator lights temporary as reminder. If service is required in less than 600 The control indicators described are not miles, the remaining distance to the present in all vehicles. The description next service due, the distance travelled applies to all instrument versions.
- Page 57 Dashboard instruments and controls 2: information and warning Stop engine ð page Parking assist ð page 3: seek the assistance of a workshop 4: stop engine and seek the assistance Hybrid system fault ð Parking assist off ð of a workshop page 58 page 59 5: have the cause of the fault remedied...
- Page 58 Dashboard instruments and controls Apply footbrake ð page Active emergency brak‐ ing ð page 62 High-voltage battery Traffic sign assist ð temperature high ð page 62 page 61 Driver drowsiness de‐ Autostop ð page 61 tection ð page 63 Door open ð page 63 1/3 Stop-start system deac‐...
- Page 59 Dashboard instruments and controls illuminates whilst driving, there is a fault certain time of driving, illuminates illuminates yellow. in the airbag system. constantly in red until the seat belt of The front passenger airbag is activated. Seek the assistance of a workshop. the respective seat has been fastened.
- Page 60 Dashboard instruments and controls Illuminates when the engine is running chime and a corresponding message on Warning the cluster. Fault in the emission control system.The permitted emission limits may be Stop the engine immediately and seek Stop. Do not continue your journey. exceeded.
- Page 61 Dashboard instruments and controls If the control indicator does not Warning illuminate, the system extinguish after a few seconds, or if it has a fault. Seek the assistance of a illuminates while driving, there is a fault Have the cause of the fault remedied workshop.
- Page 62 Dashboard instruments and controls Engine output may be reduced and the Flashes flashes yellow as soon as an vehicle may be braked automatically to a Fault in the system. Consult a workshop. obstacle gets closer to the vehicle. small degree. Tyre deflation detection system ð...
- Page 63 Dashboard instruments and controls Charging ð page 99. chime and a corresponding message in Warning the cluster. Vehicle Ready Stop engine immediately and evacuate When the engine is off, considerably the vehicle. more force is needed to brake and illuminates green. steer.
- Page 64 Dashboard instruments and controls Low Beam Rain Sensor In this case, active emergency braking is deactivated. illuminates green. illuminates green. Flashes Illuminated when low beam is on. Illuminates when rain sensor position on The system is actively engaged and wiper lever is selected. brakes automatically the vehicle.
- Page 65 Dashboard instruments and controls Traffic sign assistant ð page 138. Controls for: The electronic climate control system is only fully operational when the engine is ● Driver Drowsiness Detection temperature on driver side running. ● MENU enters the climate control Climate control settings menu illuminates yellow.
- Page 66 Dashboard instruments and controls Automatic mode AUTO Manual settings Climate control system settings can be changed by activating the following functions: Fan speed Basic setting for maximum comfort: ● Press AUTO, the air distribution and fan speed are regulated automatically. Three different pre-set fan speeds can Press MENU to enter the menu.
- Page 67 Dashboard instruments and controls Air conditioning A/C Maximum air conditioning AC/MAX Press MENU to enter the climate control settings menu. Touch A/C MAX to activate/ deactivate maximum air conditioning. The maximum air conditioning function Set the preselected temperature to the sets the temperature as low as possible desired value using the left or the right and adjusts the distribution to all air...
- Page 68 Dashboard instruments and controls ● Temperature and air distribution are Activation by switching on the fan or Warning set automatically and the fan runs at pressing AUTO. high speed. The exchange of fresh air is reduced in Auxiliary Heater ● Switch on air conditioning by pressing air recirculation mode.
- Page 69 Dashboard instruments and controls Note To delete a timer, press at the top The temperature preconditioning is only of the Information Display and delete the activated if the ignition is off and the desired timer. vehicle is locked. Confirm the deletion. If the charging level of the high voltage The heating / ventilation procedure battery is below 30%, the temperature...
- Page 70 Dashboard instruments and controls Outer air vents in the instrument panel Fixed air vents Additional air vents are located beneath the windscreen and door windows and in the foot wells. Information Display 24°C 20.5 AUTO 10:42 20.5 AUTO Direct the flow of air by tilting and swivelling the slats.
- Page 71 Infotainment Infotainment Control Elements Overview Introduction Control panel Introduction......... 69 Control elements overview....69 Important information on operation Basic operation........70 and traffic safety Personalisation.........72 Profiles..........73 Warning Audio...........73 Navigation...........74 The Infotainment system must be used Navigation System......74 so that the vehicle can be driven safely Voice assistant........75 at all times.
- Page 72 Infotainment Steering wheel controls Touch 4: Short press: activate the voice assistant of the Infotainment system. Long press: activate the voice assistant of the connected mobile phone. Basic operation Screen operations The display of the Infotainment system has a touch-sensitive surface that allows Touch and hold direct interaction with the displayed menu controls.
- Page 73 Infotainment ● ● Swipe Bluetooth activation language ● ● mobile reception date and time, time format, date format ● ● activated functions, e.g. heated unit for distance and consumption steering wheel ● unit for outside temperature Apps overview ● restore the factory settings ●...
- Page 74 Infotainment ● Personalisation Wi-Fi networks: activate or deactivate When the installation has been failed, a Wi-Fi, search for nearby Wi-Fi corresponding message will be displayed The cluster, the head-up display and the networks and connect the system to a on the screen. Contact an assistance Information Display can be personalised.
- Page 75 Infotainment be created. The head-up display belongs Some widgets are available in different Once a new profile is created, the profile to the cluster page. sizes. The bigger a widget is, the less settings can be changed at any time by widgets can be displayed on a page.
- Page 76 Infotainment ● Switching the radio stations Saving radio stations volume settings: system voice, ringtone, phone call, system sounds Saved radio stations will be displayed or Touch briefly to perform an automatic hidden by touching . The saved radio search for the next radio station. Navigation stations will be lined up in the lower part of the screen.
- Page 77 Information Display To pair a mobile phone, open the settings routes (toll roads, unpaved roads, etc.). menu in the phone app in the Information ● say "Hey Vauxhall" Display. Touch to set the types of voice prompts, alerts and sounds.
- Page 78 Infotainment Using smartphone Select the mobile phone from the list The phone projection screen displayed in the Information Display. Follow the depends on the smartphone and applications instructions on the mobile phone. software version. Once the mobile phone is successfully Using the voice assistant of the Phone projection paired, it will be connected automatically...
- Page 79 Starting and operating Starting and operating Charging status......103 Vehicle loading......... 103 Driving hints Roof bars........104 Driving hints........77 Loading information......105 Control of the vehicle......77 Control Of The Vehicle Trailer towing........106 Steering..........77 New vehicle running-in....... 78 Never coast with engine not running Ignition Switch Positions....78 Many systems will not function in this Starting procedure......
- Page 80 Starting and operating New vehicle running-in Starting procedure 0 : ignition off: some functions remain active until key is removed or driver's Do not brake unnecessarily hard for the Vehicles with power button door is opened, provided the ignition first few journeys. was on previously During the first drive, smoke may 1 : ignition on power mode: ignition...
- Page 81 Starting and operating ● Automatic transmission: during an warming phase of approx. five minutes. Autostop, the engine can be started by The selector lever must be in position P. releasing the brake pedal ð page 87 Turbo engine warm-up Emergency shut off during driving Upon start-up, engine available torque may be limited for a short time, especially If the engine needs to be switched off...
- Page 82 Starting and operating ● Autostop Conditions for an Autostop by certain settings of the climate control system ð page 63 The stop-start system checks if each of Vehicles with manual transmission ● the following conditions is fulfilled. immediately after higher speed driving Activate an Autostop as follows: ●...
- Page 83 Starting and operating ● Restart of the engine by the driver vehicle is driven or rolls at least at Warning walking speed Vehicles with automatic transmission ● climate control system requests engine In the event of a malfunction of the key The engine is restarted in the following start battery, the steering wheel lock remains...
- Page 84 Starting and operating ● Parking This option is intended for emergencies The engine cooling fans may run after only. Replace the electronic key battery the engine has been switched off ð as soon as possible ð page 7 page 58. Warning For unlocking or locking the doors, see CAUTION...
- Page 85 Starting and operating ABS starts to regulate brake pressure as Fault soon as a wheel shows a tendency to lock. The vehicle remains steerable, even Warning during hard braking. If there is a fault in the ABS, the wheels ABS control is made apparent through a may be liable to lock due to braking that pulse in the brake pedal and the noise of is heavier than normal.
- Page 86 Starting and operating Do not operate electric parking brake parking brake system will decelerate the ● illuminates on the cluster and a system too often without engine running, vehicle. As soon as the switch display message pops up to confirm as this will discharge the vehicle battery.
- Page 87 Starting and operating release electric parking brake and try 5. Release the parking brake switch Warning applying it again. Brake Assist Depending on the engine braking force 6. Depress and hold the brake pedal. the brake lights are illuminated. If brake pedal is depressed quickly 7.
- Page 88 Starting and operating Transmission When D or R is engaged, the vehicle slowly begins to creep when the brake is released. Electric Drive Unit Park mode P The vehicle uses an electric drive unit with a 1-gear transmission. To engage P, press button P when vehicle is stationary.
- Page 89 Starting and operating Neutral mode N and move the selector forwards or backwards. In this mode, the propulsion system does not transfer torque to the wheels. 3. Release the brake pedal and switch on ignition. Automatic mode D This mode is for normal driving. 4.
- Page 90 Starting and operating Gear selector When D or R is engaged, the vehicle Neutral mode N slowly begins to creep when the brake is In this mode, the propulsion system does released. not transfer torque to the wheels. Park mode P Automatic mode D To engage P, press button P when Note...
- Page 91 Starting and operating Electronic driving programmes Pull steering wheel paddles to select 5. Release the brake pedal and switch gears manually. off ignition. Following a cold start, the operating Pull right paddle + to shift to a higher A message is displayed on the cluster temperature programme increases gear.
- Page 92 Starting and operating Seek the assistance of a workshop. A warning is displayed in the Driver Reactivate by pressing again. Information Centre. Release the clutch. Interruption of power supply Manual Transmission CAUTION In the event of an interruption of power supply, it is not possible to select another It is not advisable to drive with the hand mode when P is engaged.
- Page 93 Starting and operating Eco mode Exhaust filter Reduces fuel consumption by optimising Automatic cleaning process the operation of the heating and air The exhaust filter system filters soot conditioning and, depending on the particles out of the exhaust gases. version, the accelerator pedal, the automatic transmission and the gear The start of saturation of the exhaust shifting indicator.
- Page 94 Starting and operating Fuel Catalytic converter CAUTION The catalytic converter reduces the amount of harmful substances in the Compatibility Of Fuels Use of fuel with a lower octane rating exhaust gases. than the lowest possible rating could Fuel for petrol engines lead to uncontrolled combustion and CAUTION engine damage.
- Page 95 Starting and operating The fuel filler cap can be attached to the DANGER hook on the fuel filler flap. Place the nozzle in straight position to Fuel is flammable and explosive. the filler neck and press with slight force No smoking. No naked flames or to insert.
- Page 96 Starting and operating Charging General information The charging cable connects the vehicle's high-voltage battery with an For the values specific to your vehicle, external charging device providing General Information refer to the Certificate of Conformity electric power. This may be a domestic provided with your vehicle or other electrical outlet, a Green'Up outlet, a wall national registration documents.
- Page 97 If the vehicle has been damaged or ● Avoid charging the vehicle at low Contact a Vauxhall dealer or a qualified affected by a moderate to severe temperatures (except if the vehicle ran workshop. crash, it must be inspected as soon more than 20 minutes) or above 30 °C.
- Page 98 Starting and operating Charging at DC charging stations emitted being flammable and could cause a fire. ● Too low a coolant level must be topped up and the cause of the coolant loss remedied by a workshop. Charging Types There are different types of charging the vehicle's high-voltage battery.
- Page 99 Starting and operating Charging at domestic electrical Charging Cable Warning outlets Depending on the charging type, different Read all the safety warnings and charging cables are used. instructions before using this product. Failure to follow the warnings and the Warning instructions may result in electric shock, fire and / or serious injury.
- Page 100 Starting and operating Important information about portable Status indicators Warning electric vehicle charging Wall plug There is a risk of electric shock that ● Charging an electric vehicle can stress may cause personal injury or death. Basic domestic cables (mode 2) are used a building's electrical system more than for charging at domestic electrical outlets.
- Page 101 Starting and operating Mode 3 charging cable Mode 4 charging cable Type 2 plug or outlet used for AC charging Note Only use DC charging cables shorter than 30 metres. Mode 4 charging cables are used for DC charging. Since mode 4 charging cables are integrated within DC charging stations, they only provide a vehicle plug.
- Page 102 Starting and operating Warning Warning When charging at a domestic electrical The engine does not start if the outlet, only use an outlet that is properly charging cable is connected to the earthed and protected by a 30 mA vehicle. A warning is displayed in the differential switch.
- Page 103 Starting and operating the charging port and at the control box Press twice to cancel the charging of the charging cable if available. process at any time if the function driver's door only is activated in the vehicle personalisation. Stop charging The high-voltage battery is fully charged if the status indicator on the charging port permanently illuminates green.
- Page 104 Starting and operating 3. Close the charging port flap by Touch pressing firmly in the centre to latch properly. 5. Define the number of hours and minutes after which the charging 4. Disconnect the charging cable from process starts. the external power source. 6.
- Page 105 Starting and operating Charging Status domestic cable (mode 2) / enhanced domestic cable (mode 2). Charging cable ð page 97. Programmable charging ð page 102. Vehicle loading Load compartment cover Do not place any objects on the cover. Removing cover Lift cover at the front and push it upwards at the rear.
- Page 106 Starting and operating ● Rear floor storage cover Lashing eyes lower position above the rear floor storage cover ● upper position interlocked into back panel trim To remove, use opening to raise the rear floor cover and lift it up. If mounted in the upper position, the space between the load floor and the spare wheel well cover can be used as...
- Page 107 Starting and operating freedom of movement of the driver. Do not place any unsecured objects in the interior. ● Do not drive with an open load compartment. ● The payload is the difference between the permitted gross vehicle weight (see identification plate ð...
- Page 108 Starting and operating Driving characteristics and towing The permissible roof load is 75 kg. The the actual coupling socket load with the roof load is the combined weight of the trailer coupled. tips roof rack and the load. The permissible trailer loads are Before attaching a trailer, lubricate the specified in the vehicle documents.
- Page 109 Starting and operating Always aim for the maximum vertical coupling load, especially in the case of heavy trailers. The vertical coupling load should never fall below 25 kg. Rear axle load When the trailer is coupled and the towing vehicle fully loaded, the permissible rear axle load (see identification plate or vehicle documents) may be exceeded by 60 kg, the gross...
- Page 110 Advanced Driving Assistance Systems Advanced Driving Tyre Pressure Monitoring System (TPMS)........ 140 Assistance Systems Driving recommendations / Driving recommendations / manoeuvring aids manoeuvring aids......108 Collision Avoidance Assistance System..........109 Warning Active Emergency Braking (AEB)...109 Forward Collision Warning Driver assistance systems are (FCW)..........112 developed to support the driver and not Vehicle Stability Assistance...
- Page 111 Advanced Driving Assistance Systems deactivated on the Information Display The system can be activated or Warning until the next time the ignition is deactivated on the Information Display reactivated. The system is automatically This system is not intended to replace activated by default every time the via the vehicle settings the driver's responsibility for driving the...
- Page 112 Advanced Driving Assistance Systems ● Forward collision warning (FCW) ð page cases, the driver may wish to override the seat belts of the front seats and the automatic braking provided by the depending on version of the rear seats active emergency braking system. Firmly are fastened Automatic braking apply the accelerator pedal or firmly...
- Page 113 Advanced Driving Assistance Systems ● ● ● damaged or deformed front bumper vehicle battery voltage out of range when carrying long objects on roof bars or front bumper covered with foreign or a roof rack ● wet road reflecting lights items, e.g.
- Page 114 Advanced Driving Assistance Systems ● and an audible signal is given. Consult a Level 2: A warning message is Warning displayed on the cluster and a warning workshop. illuminates on the cluster chime sounds, when a collision is accompanied by a message indicating Forward collision warning is just a imminent and immediate driver's action that the sensors or the camera may be...
- Page 115 Advanced Driving Assistance Systems Selecting the alert sensitivity The system performance may be desired path, within the limits of the laws degraded or not available in the following of physics. Note cases: If the alert sensitivity setting with the These systems are activated longest distance is set, the system warns ●...
- Page 116 Advanced Driving Assistance Systems Electronic Stability Control as soon as the control indicator Warning (ESC) extinguishes. ASR/DSC Electronic Stability Control (ESC) When ESC and traction control system These systems enhance safety during improves driving stability when operate, flashes. normal driving, but should not necessary, regardless of the type of road encourage the driver to take extra risks surface or tyre grip.
- Page 117 Advanced Driving Assistance Systems acceleration based on the available in the cluster extinguishes when ● snow mode traction. Recommended in cases of deep ESC and traction control system are snow and steep inclines. reactivated. ESC and traction control ● mud mode This mode is active up to a speed of 31 system are also reactivated the next time mph.
- Page 118 Advanced Driving Assistance Systems Sport mode Functionality front and rear bumper on both sides of the vehicle. Sport mode adapts the settings of some vehicle systems to a sportier driving Warning style. Activation Side blind spot alert is only a lane changing aid and does not replace The system can be activated in the driver vision.
- Page 119 Advanced Driving Assistance Systems ● Deactivation Lane Departure Warning the sensors are not covered by mud, ice or snow (LDW) The system can be deactivated in ● the warning zones in the door mirrors the customisation menu on the cluster, or the detection zones on front and accessing the menu with steering wheel rear bumper are not covered with...
- Page 120 Advanced Driving Assistance Systems ● When the system recognises an For further information see: ð page 108 vehicle modifications, e.g. tyres unintended lane departure, the control ● roads with poor lane markings If the system is activated, indicator rapidly flashes yellow. Fault the cluster is not illuminated.
- Page 121 Advanced Driving Assistance Systems Activation Turn steering wheel gently into opposite Note direction, if lane change is intended. The system might be inactive if it detects Depending on version, the system is lanes that are too narrow, too wide or too When the system steers to correct the automatically active by default every time curved.
- Page 122 Advanced Driving Assistance Systems ● winding or hilly roads Warning illuminates in the cluster ● poor lighting conditions accompanied by a message indicating Always keep your attention on the road that the front camera may be covered. ● sudden lighting changes and maintain proper vehicle position Stop the vehicle and check, if the ●...
- Page 123 Advanced Driving Assistance Systems Required precondition It steers the vehicle inside the detected If the system is activated, lane. The driver will notice a turning ● Adaptive cruise control must be the cluster is not illuminated. The movement of the steering wheel. activated.
- Page 124 Advanced Driving Assistance Systems ● ● The steering wheel is held too tight or vehicle modifications, e.g. tyres Warning moved too dynamically. ● roads with poor lane markings ● The brake pedal or the accelerator Always keep your attention on the road A warning message may appear when pedal are applied.
- Page 125 Advanced Driving Assistance Systems Parking and Reverse between the sounds becomes shorter as the vehicle gets closer to that obstacle. Operations Assistance When the distance is less than approx. 30 cm, the sound is continuous. System If the vehicle stops for more than three Parking Assist seconds, if the automatic transmission is in P position, or if no further obstacles...
- Page 126 Advanced Driving Assistance Systems automatic transmission is in P position, When the obstacle is very close, the vehicle speed exceeds 6 mph or if no danger is displayed. further obstacles are detected, no audible signals are given and no visual feedback Muting the sound / closing the display is displayed in the Information Display.
- Page 127 Advanced Driving Assistance Systems ● warning message appears, the system no further obstacles are detected Warning has a failure. Additionally, the distance to obstacles is Deactivation displayed by changing distance lines in Only fixed obstacles are indicated correctly. the Information Display ð page 68. The system is switched off when reverse gear is disengaged.
- Page 128 Advanced Driving Assistance Systems CAUTION CAUTION Warning In the case of a severe failure of Special conditions apply if there are Under certain circumstances, various the vehicle with the need to stop the taller vehicles in the vicinity (e.g. off- reflective surfaces on objects or vehicle, the system is deactivated.
- Page 129 Advanced Driving Assistance Systems performance of the parking assist may be The parking sensors complete the Warning reduced if the licence plate is bent or a information on the view from above the licence plate support is used. vehicle. The rear view camera does not replace Low curbs and surface irregularities, e.g.
- Page 130 Advanced Driving Assistance Systems ● horizontal lines represent distances of camera covered by snow, ice, slush, the engine is started, even if it was about 1 m and 2 m. mud, dirt, or affected by windscreen deactivated during the last ignition cycle. damage or foreign items, e.g.
- Page 131 Advanced Driving Assistance Systems Driver drowsiness and distraction If the trajectory of the vehicle suggests a The visual signs of drowsiness or certain level of drowsiness or inattention distraction may be the following: detection by the driver, an alert is triggered. Depending on version the system uses ●...
- Page 132 Advanced Driving Assistance Systems ● Speed control assistance the speed remains below 40 mph for a In the following situations, the system few minutes with driver monitoring camera may not system operate properly or even not operate at ● the driver's seat belt has been all: unfastened and the driver's door has The speed limiter prevents the vehicle...
- Page 133 Advanced Driving Assistance Systems Activation of the functionality The system maintains the vehicle speed the final point. In this case, the pre-set at the pre-set speed by the driver, without speed value flashes. Setting speed by the driver any action on the accelerator pedal. Release the accelerator pedal and the The pre-set speed can be exceeded speed limiter function is reactivated once...
- Page 134 Advanced Driving Assistance Systems ● Switching off the system Vehicle speed is below 25 mph the additional feature of maintaining a certain following distance to the vehicle ● The traction control system or ahead. Press : the cruise control mode Electronic Stability Control is operating is deselected and the cruise control ●...
- Page 135 Advanced Driving Assistance Systems Switching on the system a slower vehicle, the adaptive cruise Activation of cruise control in control allows the vehicle to temporarily progress approach the vehicle ahead to help passing it. However, the set speed will Use the speed suggested by the never be exceeded.
- Page 136 Advanced Driving Assistance Systems Resuming stored speed When the vehicle ahead drives away, the following distance selected by the depress the accelerator pedal or press i driver. Press or OK to reactivate the to resume adaptive cruise control. The following distance can be set to adaptive cruise control at the stored If the vehicle stays stopped for more close (1 bar), normal (2 bars) or far (3...
- Page 137 Advanced Driving Assistance Systems ● Deactivation of the functionality in tyre traction (wheel spinning), so that The adaptive cruise control considers you could lose control of the vehicle. stopped vehicles only at low speed. Press ● ● Do not use the adaptive cruise control Do not use the adaptive cruise control during rain, snow or heavy dirt, as when towing a trailer.
- Page 138 Advanced Driving Assistance Systems ● Radar unit when the vehicle ahead sharply Warning decelerates ● when a vehicle cuts in sharply between The usage of a licence plate support on your vehicle and the vehicle ahead the front bumper may affect the proper radar unit functionality.
- Page 139 Advanced Driving Assistance Systems Activation of the functionality downhill. The pre-set speed can be the final point. In this case, the pre-set exceeded temporarily by pressing the speed value flashes. Setting speed by the driver accelerator pedal firmly. The status and Release the accelerator pedal and the pre-set speed limit are displayed on the speed limiter function is reactivated once...
- Page 140 Advanced Driving Assistance Systems Hill Start Assist (HSA) Speed limit system 2 (compliant Information Display ð page 68 with the European General Safety If the system is activated but does not The system helps prevent unintended Regulation) detect a speed limit sign, the following movement when driving away on sign is displayed: This system displays permanently...
- Page 141 Adaptive cruise control ð page 132 This is not impacted by the privacy Fault settings of Vauxhall Connect. Note In case of failure, illuminates on It is possible to report a permanent speed the cluster, a message is displayed and limit misinformation on our website.
- Page 142 Advanced Driving Assistance Systems ● Tyre Pressure Monitoring This system can be activated traffic signs do not comply with the or deactivated in the vehicle Vienna Convention on Road Signs and System (TPMS) personalisation. Signals ● Information Display ð page 68 depending on version, the navigation The tyre deflation detection system map data may be outdated...
- Page 143 Advanced Driving Assistance Systems pressure with cold tyres and initialise the System has to be reinitialised when: system. ● Tyre pressure has been changed ● CAUTION Load condition has been changed ● Wheels have been swapped or Deflation detection system warns just exchanged about low tyre pressure condition and does not replace regular tyre...
- Page 144 In case of emergency In case of emergency GLONASS satellite link. Depending on equipment, a backup battery is used. Hazard warning flashers Note Hazard warning flashers....142 Assist and SOS.........142 The service is only available for markets Emergency call.......142 where it is legally required. Automatic SOS.......143 Furthermore, it depends on the Warning triangle........143...
- Page 145 Vauxhall emergency call is established and an Distributor with the order form. automatic crash notification will be transmitted to the next PSAP.
- Page 146 In case of emergency Jacking the vehicle and Tightening torque for steel wheel rims is Warning 115 Nm. wheel changing Use the correct wheel bolts for the Do not grease wheel bolts. respective wheels. Make the following preparations and Tightening torques observe the following information: Jacking positions ●...
- Page 147 In case of emergency The front arm position of the lifting The tools are located either in the tool To use the chock, fold apart and stick platform is centrically under the relevant bag on the carpet or in the toolbox under together.
- Page 148 In case of emergency Spare Wheel label on the temporary spare wheel is only valid for the factory-fitted tyre size. The spare wheel can be classified as Removing A Wheel a temporary spare wheel depending on the size compared to the other mounted Make the following preparations and wheels and country regulations.
- Page 149 In case of emergency ● ● No people or animals may be in the Note that the spare wheel is secured installing the wheel wrench. The vehicle when it is jacked up. by the conical contact of each bolt if adapter is located in the tool bag.
- Page 150 In case of emergency 10. Stow the replaced wheel, the vehicle tools and the adapter for the locking wheel nuts. ð page 144. 11. Check the tyre pressure of the installed tyre and the wheel nut torque as soon as possible. Stowing a damaged full size wheel in the load compartment The spare wheel well is not designed for...
- Page 151 In case of emergency compartments on the underside of the Warning compressor. Do not drive faster than 50 mph. Do not use for a lengthy period. Steering and handling may be affected. In the case of a flat tyre: Apply the parking brake and engage first 4.
- Page 152 In case of emergency 10. Connect the compressor plug to the 14. The prescribed tyre pressure should Do not run the compressor longer 12 V power outlet. be obtained within 10 minutes. than 10 minutes. 15. Detach the tyre repair kit. Remove the To avoid discharging the vehicle Tyre pressure ð...
- Page 153 In case of emergency tyre pressure with the button on Dispose of the bottle as prescribed by The tyre pressure data refers to cold the air hose. If tyre pressure hasn't applicable laws. tyres. It applies to summer and winter decreased under 29 psi, set it to the tyres.
- Page 154 In case of emergency ● Use a booster battery with the same CAUTION Warning voltage (12 V). Its capacity (Ah) must not be much less than that of the Only jump start another vehicle with an For specific tyres the recommended discharged vehicle battery.
- Page 155 In case of emergency To start the engine: 1. Start the engine of the vehicle providing the jump. 2. After five minutes, start the other engine. Start attempts should be made for no longer than 15 seconds at an interval of one minute. 3.
- Page 156 Maintenance and vehicle care Maintenance and Tyres and wheels......165 Tyre safety information....165 vehicle care General information Tyre markings / designations..165 Winter tyres........166 In order to ensure economical and safe General information......154 Tyre pressure......... 167 vehicle operation and to maintain the Accessories and vehicle Tread depth........
- Page 157 (including, without telephone. driving. limitation, software modifications, modifications of the electronic control Failure to do so could invalidate the units) may invalidate the warranty offered vehicle type approval. by Vauxhall. Furthermore, such changes may affect driver assistance systems, may impact...
- Page 158 Maintenance and vehicle care High-voltage battery Warning Warning The high voltage battery is designed Operation of radio equipment and The cold protection covers must be for the life of the vehicle if the mobile telephones that fail to meet removed when one of the following recommendations are followed.
- Page 159 Maintenance and vehicle care Warning DANGER Warning Only perform engine compartment Electric or Hybrid versions: Never try Electric or Hybrid versions: Only checks when the ignition is off. to perform maintenance work on high- perform engine compartment checks voltage components yourself. You may when the vehicle is off.
- Page 160 Maintenance and vehicle care Closing The maximum engine oil consumption is 0.6 l per 600 miles. Check with the vehicle on a level surface. The engine must be at operating temperature and switched off for at least five minutes. CAUTION It is the owner's responsibility to maintain the proper level of an appropriate quality oil in the engine...
- Page 161 Maintenance and vehicle care CAUTION CAUTION Warning Overfilled engine oil must be drained or Using the wrong engine coolant can Insert dipstick fully up to the stop on the suctioned out. If the engine oil exceeds cause severe damage to the high- handle.
- Page 162 Maintenance and vehicle care Brake Fluid CAUTION Warning Only washer fluid with a sufficient Warning Allow the engine to cool before opening antifreeze concentration provides the cap. Carefully open the cap, protection at low temperatures or a Brake fluid is poisonous and corrosive. relieving the pressure slowly sudden drop in temperature.
- Page 163 Maintenance and vehicle care Discharge Protection Short-distance driving and frequent When the vehicle battery is being engine starts can discharge the battery. replaced, ensure that there are no open Battery voltage Avoid the use of unnecessary electric ventilation holes in the vicinity of the consumers.
- Page 164 Maintenance and vehicle care Warning Label High-Voltage Battery discharging of the vehicle battery. These consumers, such as the infotainment To preserve the range and the durability system, windscreen wipers, low beam of the high-voltage battery, the following headlights, courtesy light, etc. can be is recommended: used for a total maximum time of about 40 minutes after ignition is switched off.
- Page 165 Maintenance and vehicle care fluids either immediately or later. The they comply with the required engine oil Warning following is recommended: quality and viscosity. ● In the event of an incident, always Use of engine oils for all petrol engines Operating materials are hazardous and with only ACEA quality is prohibited, inform the fire and emergency services...
- Page 166 Maintenance and vehicle care Wiper Blade Replacement Rear window The brake fluid should therefore be replaced at the specified interval. Windscreen Use only brake fluid approved for the vehicle. Consult a workshop. Coolant And Antifreeze Use only antifreeze approved for the vehicle.
- Page 167 Maintenance and vehicle care Have exterior and interior lights repaired 2 Slightly press down the bulb, turn it : wheel diameter, inches by a workshop in case of failure. anticlockwise and remove it from the : load index e.g. 98 is equivalent to socket.
- Page 168 Maintenance and vehicle care by a symbol (e.g. an arrow) on the sidewall. Winter Tyres Winter tyres improve driving safety at temperatures below 7 °C and should therefore be fitted on all wheels. In accordance with country-specific regulations, affix the speed sticker in the driver's field of view, if the tyre speed code is below the maximum speed of the vehicle.
- Page 169 Maintenance and vehicle care Tyre Pressure Engine Tyres Vehicle with up to 3 people With full load front rear front rear [kPa/bar] [kPa/bar] [kPa/bar] [kPa/bar] ([psi]) ([psi]) ([psi]) ([psi]) ICE Hybrid 48 V 220/2.2 (32) 220/2.2 (32) 270/2.7 (39) 270/2.7 (39) 215/65 R16, 215/60 R17, 215/55 R18...
- Page 170 Maintenance and vehicle care Tread Depth We recommend tyre replacement every 6 Warning years. Check tread depth at regular intervals. Changing tyre and wheel size Use of unsuitable tyres or wheel covers For safety reasons, it is recommended could lead to sudden pressure loss and If tyres of a different size than those that the tread depth of the tyres on one thereby accidents.
- Page 171 Maintenance and vehicle care ● ● ● For 18 inch tyres, only use Polaire Clean and preserve the rubber seals. Adjust tyre pressure to the value 0112 PSSD tyre chains. specified for full load. ● Fill up fuel tank completely. ●...
- Page 172 Maintenance and vehicle care ● trickle charge from the positive (+) and Fit the number plate if necessary. If you wash your vehicle by hand, negative (−) terminals in the engine make sure that the insides of the wheel Propulsion types ð page 3 compartment.
- Page 173 Maintenance and vehicle care or caustic agents, do not use an ice Ice residues, pollution and continuous Before and after winter, wash the scraper and do not clean them dry. wiping on dry windows will damage or underbody and have the protective wax even destroy the wiper blades.
- Page 174 Maintenance and vehicle care ● The original equipment floor mats CAUTION were designed for this vehicle. If the floor mats need to be replaced, it Close Velcro fasteners as open Velcro is recommended to buy certified floor fasteners on clothing could damage mats that fit properly and are fixed by seat upholstery.
- Page 175 Technical specifications Technical specifications Vehicle identification Vehicle identification......173 Vehicle Identification Number Vehicle identification number (VIN) (VIN)..........173 Identification plate......173 Engine identification....... 174 Vehicle data........175 Dimensions........176 Engine data........177 Fluid capacities......... 178 Information on identification label: 1 : manufacturer 2 : type approval number 3 : vehicle identification number 4 : permissible gross vehicle weight...
- Page 176 Technical specifications The combined total of front and rear axle loads must not exceed the permissible gross vehicle weight. Vehicle's kerb weight depends on the specification of the vehicle, e.g. optional equipment and accessories. Refer to the Certificate of Conformity provided with your vehicle or other national registration documents.
- Page 177 Technical specifications Engine Identification The technical data tables show the engine identifier code. Engine data ð page 177 To identify the respective engine, refer to the engine power in the Certificate of Conformity provided with your vehicle or other national registration documents.
- Page 178 Technical specifications Vehicle data Dimensions Length [mm] 4150 Width with two exterior mirrors folded [mm] 1791 Width with two exterior mirrors [mm] 1987 Height (without antenna) [mm] 1535 / 1515 Length of load compartment floor [mm] Length of load compartment with folded second row [mm] 1418 Load compartment width between wheel arches [mm] 1021...
- Page 179 Technical specifications Engine Data Engine identifier code EB2LTD EB2ADTS EB2ADTSM EB2LTDH2 BEV ZAE / BEV 1.2 T 1.2 T 1.2 T 1.2 T Hybrid 48 V Electric / electric long range 1199 1199 1199 1199 Piston displacement [cm 100 / 115 Engine power [kW] at rpm 5500...
- Page 180 Technical specifications Fluid capacities Engine oil Engine EB2LTD EB2ADTS EB2LTDH2 including filter [l] between MIN and MAX [l] Fuel tank Petrol (ICE), refilling quantity [l] Petrol (MHEV), refilling quantity [l] Other fluids ð page 163 Tyre pressure ð page 167...
- Page 181 Importer is Vauxhall Motors Limited, MP As an integral part of the service UK 1-101-135, Chalton House, Luton related to the performance of subscribed Road, Chalton, Luton, Bedfordshire, LU4 connected service contracts, necessary 9TT, United Kingdom.
- Page 182 Consumer information Depending on the equipment of the end of a trip, with an option of If the update has failed, seek the vehicle, connection configuration must immediate installation or postponement assistance of a workshop. be set to Connected vehicle to allow of installation.
- Page 183 Consumer information Vehicle data recording technical data related to the system's (GDPR). Third parties to which data has operation. been communicated shall be notified of and privacy any rectification, erasure or restriction The recipients of the processed data carried out in accordance with the are the emergency call handling centres Emergency Call Data aforementioned directive, unless doing...
- Page 184 Consumer information information as to which specific data website (including contact data for the This data includes, for example: is uploaded, stored and passed on manufacturer and its data protection ● vehicle status information (e.g.speed, to third parties and for what purpose officer).
- Page 185 Consumer information ● ● information on events damaging the appropriate, together with the vehicle multimedia data such as music, videos vehicle identification number. The manufacturer or photos for playback in an integrated is also subject to product liability. multimedia system ●...
- Page 186 Consumer information Proprietary services Onboard fuel consumption meter the same time, specific information is transmitted to your smartphone. (OBFCM) In the case of the manufacturer's Depending on the type of integration, this online services, the relevant functions This function will be provided for the includes data such as position data, day / are described by the manufacturer in entire life cycle of the vehicle.
- Page 187 It is also used in connection with ● the speed of the vehicle conveniences such as radio remote ● the status of some driving and driver controls for door locking / unlocking and assistance systems. starting. RFID technology in Vauxhall...
- Page 188 Index Special Characters Speed limiter ........137 Steering wheel, controls ...... 50 (Advanced driving assistance system) ..Tyre repair kit ........148 Accessories ........155 ADAS ..........108 Vehicle battery ........160 Airbag ..........24 Vehicle battery, replacing ....161 Blanking screen (snow shield) ... 156 Warning and indicators light ....
- Page 190 Copyright by Vauxhall Motors Ltd. The information contained in this publication is effective as of the date indicated below. Vauxhall Motors Ltd. reserves the right to make changes to the technical specifications, features and design of the vehicles relative to the information contained in this publication, as well as changes to the publication itself.
Need help?
Do you have a question about the Mokka 2021 and is the answer not in the manual?
Questions and answers