Advertisement
Quick Links
Advertisement

Summary of Contents for SimRep Engineering DDUXX1
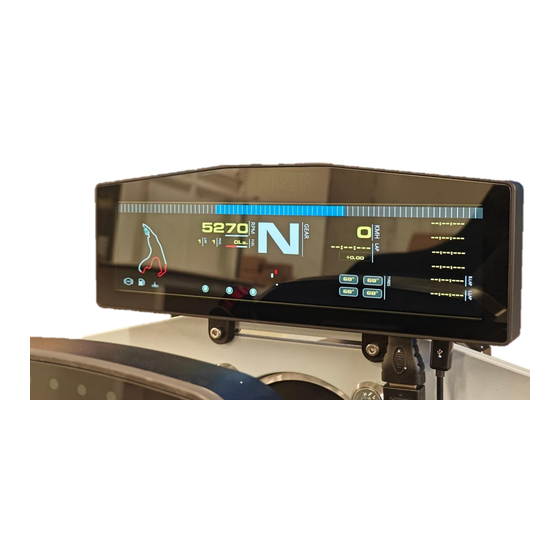
- Page 1 DDUXX1 USER MANUAL V1.0 Version 1.0 last updated 20-09-2023...
- Page 2 We would like to thank you for your purchase. With your purchase, we can keep developing more awesome Sim Racing products. This user manual will provide you with the information needed, on how to set up your DDUXX1 dashboard. If you have any questions, or need help setting up your wheel, please contact customer support at info@simrep-enginering.com.
- Page 3 This ensures the DDUXX1 maintains its resale value, as worn-out or damaged parts from extensive use can be readily replaced. We trust that the DDUXX1 Sim Dashboard will provide you with a satisfying simulation experience. If you enjoy using it, please consider leaving a Google...
- Page 4 Packaging contents 1x DDUXX1 Sim Dashboard 1x HDMI to mini-HDMI cable 1x Micro-USB cable 2x Screen bracket (alu or carbon) 2x M3 fastner 4x Nylon washer M3 2x nylon washer M5 2x T-nut + bolts (M6x12mm) 1x Microfiber glass cloth...
- Page 5 Table of contents Inhoud Hardware installation....................... 6 1.1. Display mouting ........................7 Electronical installation ......................8 Software installation ........................ 9 3.1. SimHub ..........................9 3.1.1. Installing SimHub software ................... 9 3.1.2. SimHub configuration ....................13 Troubleshooting......................... 18 Page 5 | 18...
- Page 6 1. Hardware installation To connect the DDUXX1 to you PC, you have to mount the display to your sim. This can be done with the provided brackets. It’s possible to mount them on various wheelbases and directly to a Alu profile.
- Page 7 1.1. Display mounting The brackets can easily be mounted on the display. Use the included M3 fasteners in combination with the nylon rings. Use a nylon ring on both sides of the bracket. Because of the slot design, the display can easily be mounted at various heights. Page 7 | 18...
- Page 8 2. Electronical installation The connection to the DDUXX1 from the computer is through the HDMI-cable (1). The micro-USB cable (2) can be connected to the computer or an external adapter (at least 500mA). Both have to be connected. Page 8 | 18...
- Page 9 3. Software installation 3.1. SimHub SimHub can be used to control the display. Download the latest version of SimHub from https://www.simhubdash.com/download-2/. Installation instructions may be slightly different depending on the SimHub software version. 3.1.1. Installing SimHub software Accept the agreement and press “Next”. Page 9 | 18...
- Page 10 Specify where you want to install the software and press “Next”. Check all boxes and press “Next”. Make sure the “Download and install USB displays drivers (Vocore, USBD480, AX206)” box I checked, otherwise the display won’t work. Page 10 | 18...
- Page 11 Press “Install”. The installation may take up to 5 minutes. Page 11 | 18...
- Page 12 After the installation press “Finish”. Page 12 | 18...
- Page 13 3.1.2. SimHub configuration Download the standard device file from: www.simrep-engineering.com/downloads Click on “Devices” (1) and “Import device from file”(2). Select the file you just downloaded. Page 13 | 18...
- Page 14 Download now the “Dashboard template” from: www.simrep-engineering.com/downloads Dubble click on the downloaded file to import it to simhub. You will get this pop-up Click on “Import into SimHub libary”. Page 14 | 18...
- Page 15 If this doesn’t work, you can also go to “Dash studio” inside Simhub. And then click on “Import dashboard” and select the downloaded file. Page 15 | 18...
- Page 16 Now you can add the dashboard to the DDUXX1 screen. Select the dropdown menu (2) and select the DDUXX dashboard.t At last, select the screen. Click on “Target monitor” (1) and select the DDUXX screen. Page 16 | 18...
- Page 17 Go to the “Games” tab (1) , select your game (2) and click “Start Game” (3) Page 17 | 18...
- Page 18 4. Troubleshooting • Screen is not working o Make sure you have the HDMI cable connected. Also use a HDMI port in you GPU (the motherboard HDMI does not always work). o Make sure you have the Micro USB connected as well, to a PowerSource of at least 500mA (0.5A).
Need help?
Do you have a question about the DDUXX1 and is the answer not in the manual?
Questions and answers