Advertisement
Quick Links
.
D-ILA
PROJECTOR
DLA-NZ700
DLA-NZ500
DLA-RS2200
DLA-RS1200
.
https://manual3.jvckenwood.com/projector/mobile/global/
The Mobile User Guide can be viewed on mobile internet devices including
smartphones and tablets.
.
For Customer use :
Enter below the serial No. which is located on the side of the cabinet. Retain this information for future reference.
DLA-NZ700BK, DLA-NZ500BK, DLA-NZ700BE, DLA-NZ500BE,
DLA-RS2200K, DLA-RS1200K, DLA-RS2200E, DLA-RS1200E
Model No.
Serial No.
.
Not suitable for household room illumination.
INSTRUCTIONS
Mobile User Guide
B5A-4685-01
Advertisement

Subscribe to Our Youtube Channel
Related Manuals for JVC DLA-NZ500


Summary of Contents for JVC DLA-NZ500
- Page 1 INSTRUCTIONS D-ILA PROJECTOR DLA-NZ700 DLA-NZ500 DLA-RS2200 DLA-RS1200 Mobile User Guide https://manual3.jvckenwood.com/projector/mobile/global/ The Mobile User Guide can be viewed on mobile internet devices including smartphones and tablets. For Customer use : Enter below the serial No. which is located on the side of the cabinet. Retain this information for future reference.
- Page 2 FCC INFORMATION (U.S.A. only) WARNING: TO PREVENT FIRE OR SHOCK HAZARDS, DO CAUTION: NOT EXPOSE THIS APPLIANCE TO RAIN OR Changes or modification not approved by JVC could MOISTURE. void the user’s authority to operate the equipment. NOTE: WARNING: This equipment has been tested and found to comply THIS APPARATUS MUST BE EARTHED.
- Page 3 IMPORTANT SAFEGUARDS 150 mm (6 in) and above Electrical energy can perform many useful functions. This unit has been engineered and manufactured to assure your personal safety. But IMPROPER USE 300 mm 300 mm CAN RESULT IN POTENTIAL ELECTRICAL (12 in) and (12 in) and above above...
- Page 4 Doing so would have serious effects on the human body. authorized JVC service center. Do not detach or attach the projection lens with the power When fixing the unit to the ceiling, Please note that we do connected.
- Page 5 European directives and standards regarding electromagnetic compatibility and electrical safety. The batteries included with this product comply with European representative of EU battery regulations. JVC KENWOOD Corporation is: Type : R03(NWC) JVCKENWOOD Deutschland GmbH Manufacturer : Panasonic Energy Co., Ltd.
- Page 6 ENGLISH Information for Users on Disposal of Old Equipment and Batteries [European Union only] These symbols indicate that equipment with these symbols should not be disposed of as general household waste. If you want to dispose of the product or battery, please consider the collection systems or facilities for appropriate recycling.
- Page 7 CLASS 1 LASER PRODUCT PRODUIT LASER DE CLASSE 1 PRODUCTO LÁSER DE CLASE 1 LASERPRODUKT DER KLASSE 1 PRODOTTO LASER DI CLASSE 1 KLASSE 1 LASERPRODUCT PRODUKT LASEROWY KLASY 1 LASER CAUTION LABEL ÉTIQUETTE DE MISE EN GARDE POUR LE LASER ETIQUETA DE PRECAUCIÓN DEL LÁSER LASERWARNSCHILD ETICHETTA DI ATTENZIONE LASER...
- Page 8 WARNING/ATTENTION/ADVERTENCIA/WARNUNG/AVVERTENZA/WAARSCHUWING/UWAGA Do not look into the lens while in use. Ne regardez pas dans l’objectif pendant son utilisation. No mire directamente a la lente mientras está en uso. Schauen Sie während der Verwendung nicht in die Linse. Non guardare nell’obiettivo mentre è in uso. Kijk niet in de lens terwijl deze in gebruik is.
- Page 9 CAUTION/PRUDENCE/PRECAUCIÓN/ACHTUNG/ATTENZIONE/VOORZICHTIG/UWAGA Do not stare into the projector beam at any distance from the projector. Ne regardez pas dans le faisceau du projecteur à n’importe quelle distance du projecteur. No mire directamente al haz del proyector a ninguna distancia del mismo. Blicken Sie nicht direkt in den Lichtstrahl vom Projektor, egal aus welcher Entfernung.
- Page 10 IEC62471-5 Location information of the mark / Informations d’emplacement du repère / Información de la ubicación de la marca / Informationen zur Lage der Markierung / Informazioni sulla posizione del marchio / Locatie-informatie van de markering / Informacje lokalizacji etykiety As with any bright light source, do not stare into the beam, RG2 IEC 62471-5:2015 Tout comme pour n’importe quelle source lumineuse brillante, ne regardez pas fixement le faisceau, RG2 IEC 62471-5: 2015 Al igual que con cualquier fuente de luz brillante, no mire directamente al haz, RG2 IEC 62471-5:2015...
- Page 11 Symbols used in this manual S indicates a function that is supported by DLA-NZ700. T indicates a function that is supported by DLA-NZ500. U indicates a function that is supported by DLA-RS2200. V indicates a function that is supported by DLA-RS1200.
- Page 12 Accessories Check the Accessories Lens cover ................1 piece * It is attached to the main unit at the time of shipment. Remote control ............... 1 piece AAA-size batteries (for operational check) ......2 pieces Power cord (for USA) (about 2 m (about 78.7 in)) ....1 piece Power cord (for UK) (about 2 m (about 78.7 in)) .....
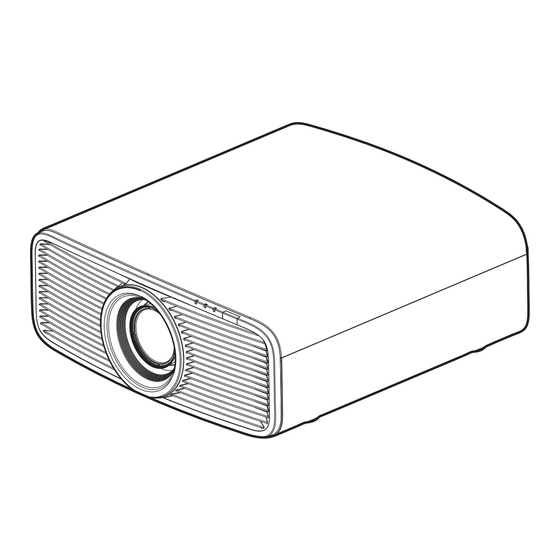
- Page 13 Controls and Features Main Unit - Front A Lens C Remote Sensor (front) This is a projection lens. Do not look through the lens Please aim the remote control at this area when using while an image is projected. * There is also a remote sensor at the rear. B Indicator D Air Inlets Refer to “Indicator Display on the Main Unit”P.
- Page 14 Main Unit - Rear F Input terminals I Power input terminal For more details, please refer to the “Main Unit -Input Connect the supplied power cord to this terminal. Terminals”P. 14 in the diagram below. J Exhaust vent G A Power Button Warm air is discharged to cool down the internal temperature.
- Page 15 Remote Control A B [STANDBY] L [PICTURE MODE] Displays the picture mode Turns off the power. (P. 26) selection menu. (P. 29) B C [ON] M [COLOR PROFILE] Turns on the power. (P. 25) Displays the color profile selection C [INPUT] menu.
- Page 16 Loading Batteries into the Remote Control If the remote control has to be brought closer to the unit Loading the batteries to operate, it means that the batteries are wearing out. Replace the batteries with new ones (AAA). Insert the batteries according to the t s marks. Be sure to insert the s end first.
- Page 17 Menu Pressing the [MENU] button on the remote control displays the menu. There are three types of settings in the menu (“Picture Settings”, “HDMI Settings” and “Installation Settings”). Use “Setting Menu Select” at the top right corner of the screen to switch the menu. MEMO You can press and hold the [ADVANCED MENU] button on the remote control while a menu is being displayed to register the menu to the [ADVANCED MENU] button.
- Page 18 HDMI Settings Menu A HDMI 1 Settings B HDMI 2 Settings C Information D Setting Menu Select Installation Settings Menu A Installation Settings B Network Settings C Display Settings D ECO Settings E System Settings F Information G Setting Menu Select...
- Page 19 Installing the Projector Precautions during Installation Please read the following carefully before installing this Using the unit unit. Please refrain from projecting in the following circumstances. Otherwise, it may cause fire or When carrying this unit malfunction. Projection with the unit stood vertically Take care not to drop this unit while carrying it.
- Page 20 Take the necessary actions to prevent the main unit from falling off such as during an earthquake. Regardless of the warranty period, JVC is not liable for When this unit is to be mounted to a fixed position for any product damage caused by mounting the unit with use, install it horizontally.
- Page 21 Adjusting the Position Adjusting the elevation angle of the projector The height and inclination of the unit can be adjusted by turning the feet. Lift the unit and adjust the four feet. * Do not pull the feet more than 10 mm. Feet may fall off. 4 Locations Extend Contract...
- Page 22 Connecting the Projector Do not turn on the power until connection is complete. Before connecting the cables, turn off the power of each device. Making connection with each device being turned on may cause this unit to malfunction. Before connecting the cables, remove any static electricity from your body by touching the wall with the palm of your hand.
- Page 23 Connecting via HDMI-DisplayPort conversion cable Desktop PC, etc. This Unit To [HDMI 1] or [HDMI 2] input terminal DisplayPort Terminal HDMI-DisplayPort Conversion Cable (Sold Separately) If noise occurs, move the desktop PC away from this unit. If the video is not displayed, try to reduce the length of the cable or lower the resolution of the video transmitting equipment.
- Page 24 Connecting the Power Cord (Supplied Accessory) A Connect the power cord supplied to the power input terminal on the main unit B Insert the supplied power plug into the wall outlet. Power Cord (Supplied) Precautions to prevent fire and electric shock When you are not using the projector, please unplug the power cord from the outlet.
- Page 25 Viewing Videos MEMO Make sure to remove the lens cover. Connect the power cord, and ensure that the “STANDBY/ON” indicator lights up in red. During standby in the “ECO Mode”, the “STANDBY/ON” indicator does not light up even when the power cord is correctly connected. In this case, cancel the standby mode by pressing any button on the remote control unit, or use the A button on the projector unit when you are turning on the power.
- Page 26 Turn off the power Remote control: press the B [STANDBY] button Projector unit: press the A button While the “Are you sure you want to turn off?” message is displayed, press the button again. The light of the LD block goes off, and the “STANDBY/ON” indicator switches from a green light to a red blinking light.
- Page 27 Adjusting the Projector Screen Adjusting the Lens According to the Projection Position Press the [LENS CONTROL] button, and use the [JKH I] keys to adjust Focus, Zoom (screen size), and Shift (screen position) Focus Pressing the [LENS CONTROL] or [OK] button each time switches the mode in the following sequence: “Focus”...
- Page 28 Adjusting the Screen Size (Aspect) The screen size of the projected image can be adjusted optimally according to the original screen size (aspect) that has been input. Press the [MENU] button to display the menu Select “Installation” " “Aspect” in the menu, then select the setting and press [OK] Installation Settings Installation Mode Lens Control...
- Page 29 Tuning the Image Quality Setting the Picture Mode You can adjust the image quality according to the type of video image you are viewing. Press the [PICTURE MODE] button, use the [JK] keys to select “Picture Mode” and press [OK] You can also perform the setting by pressing the [MENU] button to display the menu followed by selecting “Picture Settings”...
- Page 30 Setting the Color Profile By setting the “Color Profile” (color space information) according to the “Picture Mode”, you can fine-tune the image quality according to the movie you are viewing. * When “Picture Mode” is set to “HDR10+”, the setting is fixed at BT.2020(Normal). After configuring “Picture Mode”...
- Page 31 List of selectable “Color Profile” according to “Picture Mode” Picture Mode Color Profile Natural Auto BT.709 BT.2020(Wide) S U BT.2020(Normal) S U BT.2020 T V Video Anime. S U Cinema Cinema BT.709 BT.2020(Wide) S U BT.2020(Normal) S U BT.2020 T V Video Anime.
- Page 32 Picture Mode Color Profile SDR 1, SDR 2 Auto BT.709 BT.2020(Wide) S U BT.2020(Normal) S U BT.2020 T V Video Anime. S U Cinema Off (Wide) S U Off (Normal) S U Off T V Custom1 to Custom4 HDR 1, HDR 2 Auto BT.709 BT.2020(Wide) S U...
- Page 33 Adjusting the Output Value of the Projected Image (Gamma/Tone Mapping) You can adjust the output value of the projected image with respect to the video signal input. * This feature is not available when “Picture Mode” is configured to “Frame Adapt HDR 1”/“Frame Adapt HDR 2”/ “FILMMAKER MODE”...
- Page 34 List of Selectable “Gamma/Tone Mapping” According to “Picture Mode” Picture Mode Gamma/Tone Mapping Vivid Vivid, Custom 1 to Custom 3 Cinema Natural SDR 1, SDR 2 Cinema 1 Cinema 2 Custom 1 to Custom 3 HDR(HLG) Custom 1 to Custom 3 HDR 1, HDR 2 HDR(PQ) Custom 1 to Custom 3...
- Page 35 Adjustments and Settings in the Menu Pressing the [MENU] button displays the menu. Press the [JKH I] keys to select an item, followed by pressing the [OK] button to confirm the selection. List of Menu Items Picture Settings P. 39 Mode Settings Picture Mode P.
- Page 36 P. 47 Color Temp. Color Temp. P. 39 Correction Value P. 47 Gain Red P. 47 Gain Green P. 47 Gain Blue P. 47 Offset Red P. 47 Offset Green P. 47 Offset Blue P. 47 Reset P. 48 Gamma/Tone Mapping Gamma/Tone Mapping P.
- Page 37 Installation Settings P. 54 Installation Settings Installation Mode P. 54 Load P. 54 Save P. 54 Name Edit P. 54 Lens Control P. 55 Focus P. 27 Zoom P. 27 Shift P. 27 Image Pattern P. 55 Lock P. 55 Lens Center P.
- Page 38 P. 62 Network Settings P. 63 Display Settings Back Color P. 63 Menu Position P. 63 Signal Display P. 63 Logo P. 63 Language P. 63 P. 64 ECO Settings Off Timer P. 64 ECO Mode P. 64 Hide Mode P.
- Page 39 Picture Settings Mode Settings Picture Mode You can adjust the image quality according to the type of video image you are viewing. Æ “Setting the Picture Mode” (P. 29) You can further configure the detailed settings in the “Picture Adjust” tab. “ Picture Adjust”P.
- Page 40 List of selectable “Color Temp.” according to “Picture Mode” Picture Mode Color Temp. Natural 5500K Vivid 6500K SDR 1, SDR 2 7500K 9300K High Bright Custom 1 to Custom 2 Cinema 5500K 6500K 7500K 9300K Xenon 1 S U Xenon 2 S U High Bright Custom 1 to Custom 2 Frame Adapt HDR 1...
- Page 41 Gamma/Tone Mapping This item adjusts “Gamma/Tone Mapping” according to the preconfigured “Picture Mode” (output value of the projected video with respect to the video signal input). Æ “Adjusting the Output Value of the Projected Image (Gamma/Tone Mapping)” (P. 33) You can further configure the detailed settings in the “Gamma/Tone Mapping” tab. “ Gamma/Tone Mapping”P.
- Page 42 When “Picture Mode” is set to “HDR10+” Setting Description Displays the tone map when the overall brightness is configured to the high level. High This is suited for large-sized screens. Displays the tone map when the overall brightness is configured to the medium level.
- Page 43 This is a feature for adjusting the sharpness of the displayed image. It employs an original algorithm to create a natural impression that is sharper at areas in focus and softer at areas that are not in focus, enabling you to enjoy highly expressive images with a greater sense of depth.
- Page 44 Picture Adjust You can further configure the detailed settings for “Picture Mode”. Picture Mode You can adjust the image quality according to the type of video image you are viewing. Æ “Setting the Picture Mode” (P. 29) LD Power Controls the brightness of the light source by controlling the LD current. Setting range: 0 to 100 Dynamic CTRL Expands the dynamic range of video expression through controlling the brightness of the light source based on image...
- Page 45 User Name Edit You can edit the name of the picture mode “SDR 1”/“SDR 2”/“HDR 1”/“HDR 2”. Characters that are usable include alphabets (upper or lower case), numeric characters, symbols and blank (space) character. (However, blank (space) cannot be used for the first and last characters.) Enter not more than 10 characters.
- Page 46 Color Profile You can further configure the detailed settings for “Color Profile”. Color Profile Configures “Color Profile” according to the preconfigured “Picture Adjust”. Æ “Setting the Color Profile” (P. 30) Color Management Based on the setting of the selected “Color Profile”, you can adjust each of the following colors according to your preference: Red, Magenta, Cyan, Yellow, Green, and Blue.
- Page 47 Color Temp. You can further configure the detailed settings for “Color Temp.”. Color Temp. Configures “Color Temp.” according to the preconfigured “Picture Adjust”. Æ “Color Temp.” (P. 39) Correction Value Configures the color temperature based on which “Gain Red” / “Gain Green” / “Gain Blue” / “Offset Red” / “Offset Green” / “Offset Blue”...
- Page 48 Gamma/Tone Mapping You can further configure the detailed settings for“Gamma/Tone Mapping”. * This feature is not available when “Picture Mode” is configured to “Frame Adapt HDR 1”/“Frame Adapt HDR 2”/ “FILMMAKER MODE” during HDR signal input. * This item is not available when “Picture Mode” is set to “HDR10+”. Gamma/Tone Mapping This item adjusts “Gamma/Tone Mapping”...
- Page 49 When “Correction Value” is set to “Import” By selecting “Import” for “Correction Value”, the gamma data created externally can be selected as the base setting value for adjustment. The factory setting for “Import” is “2.2”. You can use the calibration software to customize the gamma data adjustment, and import the created gamma data. For details, contact your authorized dealer.
- Page 50 For users seeking to obtain a gamma curve that is more faithful to the original PQ curve This unit has been adjusted to display the projector images on the screen in the optimal quality in the default setting based on the original PQ curve. For users who wish to obtain results more faithful to the original PQ curve, please adjust manually with reference to the values below.
- Page 51 HDMI Settings HDMI 1 Settings / HDMI 2 Settings Input Level For setting the dynamic range (gradation) of the video input. If the image is not displayed properly even after selecting “Auto”, select an appropriate setting. If the dynamic range is not appropriate, the bright areas become overexposed, and the dark areas become underexposed.
- Page 52 HDR10 For configuring the “Picture Mode” to switch to automatically during input of HDR10 signal. Setting Description Last Setting Switches to the “Picture Mode” that was last configured when viewing HDR10 content. Frame Adapt HDR 1 Switches the “Picture Mode” automatically to “Frame Adapt HDR 1”. Frame Adapt HDR 2 Switches the “Picture Mode”...
- Page 53 Content Type For configuring the type of video content used for selecting an image quality mode. If the image is not displayed properly even after selecting “Auto”, select an appropriate setting. Item Description Auto Switches the video type automatically according to the input video system. After switching automatically, the picture mode switches to the setting preconfigured in “Auto Pic.Mode Select”.
- Page 54 Installation Settings Installation Settings Installation Mode Collectively manages the setting values of “Lens Control”, “Pixel Adjust”, “Mask”, “Anamorphic”, “Screen Setting”, “Installation Style”, “Keystone” and “Aspect”. * The lens position may be shifted slightly with respect to the position that was saved. Load Applies the saved settings to the current settings.
- Page 55 Lens Control Focus / Zoom / Shift For adjusting the lens according to the projection position Æ “Adjusting the Lens According to the Projection Position” (P. 27) Image Pattern For setting whether to display the lens adjustment pattern. Setting Description Displays external signals, and does not display the lens adjustment pattern.
- Page 56 Pixel Adjust For correcting the phase shifting between each RGB color by adjusting the pixel. Adjust For setting the adjustment feature to On or Off. Adjust Area Setting Description Whole Adjusts the entire image. Zone Enables fine adjustment of each area by dividing the screen evenly into 10 vertical and horizontal zones.
- Page 57 Whole Adjust (Pixel) Operation Procedure For making general adjustments to slight color fringing in the horizontal/vertical directions of the video image. A Set “Adjust Area” to “Whole” B Select “Adjust Color” and “Adjust Pattern Color” C Select “Adjust (Pixel)”, and press the [OK] button The Adjustment mode is activated, and the selected adjustment pattern and Adjustment (Pixel) window are displayed.
- Page 58 Whole Adjust (Fine) Operation Procedure For making general adjustments on the misalignment of the entire screen using “Adjust (Pixel)”, followed by making fine adjustments. A Set “Adjust Area” to “Whole” B Select “Adjust Color” and “Adjust Pattern Color” C Select Adjust (Fine), and press the [OK] button The Adjustment mode is activated, and the selected adjustment pattern and Fine window are displayed.
- Page 59 Zone Adjust Operation Procedure For fine-tuning misalignments on a part of the screen after adjusting the overall screen misalignment using “Adjust (Pixel)” and “Adjust (Fine)”. The screen can be divided vertically and horizontally into 10 sections for partial adjustments to be made. A Set “Adjust Area”...
- Page 60 Mask For hiding the peripheral area of the image with a mask (black strip). Setting Description Not masked. Hides the ranges specified in “Top”, “Bottom”, “Left” and “Right” by masking (with black strips). Mask: black strip around the periphery “Top” / “Bottom” / “Left” / “Right” For specifying the ranges to hide by masking (with black strips).
- Page 61 This item cannot be set when “Screen Adjust” is set to “Off”. For information on the screen and the corresponding correction mode, please visit our website. https://www.jvc.com/global/projector/screen MEMO You can utilize the optional optical sensor and dedicated projector calibration software to make finer adjustments.
- Page 62 Network Settings For specifying the settings for external control from a PC or smartphone. Setting Description DHCP Client Obtains the IP address automatically from the DHCP server inside the connected network. For configuring the network settings manually. IP Address For configuring the IP address. Subnet Mask For configuring the subnet mask.
- Page 63 Display Settings Back Color For setting the color of the background to “Blue” or “Black” when there is no signal input. Menu Position For setting the display position of the menu. Signal Display For setting the display of the input information to “On” or “Off”. Setting Description Not displayed.
- Page 64 ECO Settings Off Timer For setting the duration before the power turns off automatically when the projector is not operated. Setting values: “Off”, “1 Hour”, “2 Hours”, “3 Hours” and “4 Hours” * The setting will be retained even after the Off Timer operation has completed. ECO Mode Setting Description...
- Page 65 System Settings Remote Code For changing the remote control code. Setting Description Sets the remote control code to “A”. Sets the remote control code to “B”. You need to configure the remote control according to the settings of this unit. On the remote control unit, press the [MENU] button for three seconds or longer while pressing and hold the [BACK] button to switch the code.
- Page 66 For restoring the settings of this unit to the factory default. However, the following settings will not be reset. Gamma data saved in “Gamma” " “Correction Value” " “Import”. Color profile data saved in “Color Profile” " “Custom1 to Custom4”. Software Update For performing a software update. For the latest information on the software, refer to https://www.jvc.com/global/support/.
- Page 67 Information Information Setting Description Input Displays the currently selected video input terminal. Source Displays the input source. (Displayed only during video signal input) Resolution Displays the image resolution. (Displayed only during PC signal input) H Frequency Displays the horizontal frequency. V Frequency Displays the vertical frequency.
- Page 68 Maintaining the Cabinet and Remote Control Gently wipe off dirt on the cabinet with a soft cloth. If it is extremely dirty, wet a cloth in water, wring dry and use it to wipe off the dirt, followed by wiping again with a dry cloth.
- Page 69 Troubleshooting Before sending the unit to your authorized dealer for repair, please check the following points. The following symptoms are not malfunctions. You do not need to worry about the following symptoms if there is no abnormality on the screen. A part of the top or front surface of the unit is hot.
- Page 70 Video image does not appear Check Action Refer to Is the correct external input selected? Select the correct external input terminal. P. 25 Is the power of the AV device or PC Turn on the power of the AV device or PC and play the P.
- Page 71 Video image flickers Check Action Refer to Has “Dynamic CTRL” been configured? Set “Dynamic CTRL” to “Off” P. 44 Has “C.M.D.” been configured? Set “C.M.D.” to “Off”. P. 34 Video format changes Check Action Refer to Is the cable in use an HDMI-certified Depending on the quality of the cable in use, the signal from P.
- Page 72 Remote control does not work Check Action Refer to Are the batteries correctly installed? Match the polarities (t s) correctly when loading the P. 16 batteries. Are the batteries exhausted? Replace with new batteries. P. 16 Is there an obstructing object between Remove any obstructing object.
- Page 73 When the Following Messages Appear... Message Description Action No device is connected to the input Input the video signals. terminal. No Input The input terminal is connected but there is no signal. The video signal input is not supported Input video signals that can be used. Out of Range on this unit.
- Page 74 External Control The projector can be controlled by connecting it to a PC through the computer network with a LAN cable for control commands to be sent to the projector. Æ “ Network Settings” (P. 62) Please use it after you have gained proper understanding from professional books or consulting the system administrator.
- Page 75 Command Format The command between this unit and the computer consists of “Header”, “Unit ID”, “Command”, “Data” and “End”. Header (1 byte), Unit ID (2 bytes), Command (2 bytes), Data (n bytes), End (1 byte) Header This binary code indicates the start of communication. Binary Code Type Description...
- Page 76 Remote Control Code Binary code is sent during communication. Remote Control Button Binary Code Remote Control Button Binary Code Name Name STANDBY 37 33 30 36 37 33 32 46 37 33 30 35 MENU 37 33 32 45 INPUT 37 33 30 38 BACK 37 33 30 33...
- Page 77 Communications Example Shows the communication examples. Operating command Type Command Description Connection check PC " This unit: 21 89 01 00 00 0A Connection check This unit " PC: 06 89 01 00 00 0A Power (On) PC " This unit: 21 89 01 50 57 31 0A When power is turned on from the Standby mode This unit "...
- Page 78 Specifications Product Name D-ILA Projector Model Name DLA-NZ700BK, DLA-NZ700BE, DLA-NZ500BK, DLA-NZ500BE, DLA-NZ500WE, DLA-RS2200K, DLA-RS2200E, DLA-RS1200K, DLA-RS1200E Display Panel/Size D-ILA device *1, 2 0.69” 4K D-ILA (4096 x 2160 pixels) x 3 Projection Lens 1.6 x power zoom lens, motorized zoom and focus Light Source Laser Diode Screen Size...
- Page 79 This unit has acquired the certification of the “HDR10+” standard set by HDR10 + Technologies, LLC. Tone mapping is optimally performed for each scene according to the dynamic metadata to faithfully reproduce HDR video images for viewing according to the intentions of the video producer.
- Page 80 Screen Size and Projection Distance Screen Projection Distance (m) Size 17:9 Screen 16:9 Screen 2.35:1 Screen 2.40:1 Screen 4:3 Screen Diagonal Wide-end Tele-end Wide-end Tele-end Wide-end Tele-end Wide-end Tele-end Wide-end Tele-end (inch) 1.68 2.72 1.77 2.85 1.87 3.02 1.87 3.03 2.17 3.50 1.97...
- Page 81 Screen Projection Distance (m) Size 16:9 image on a 2.35:1 aspect screen 16:9 image on a 2.40:1 aspect screen Diagonal Wide-end Tele-end Wide-end Tele-end (inch) 1.40 2.27 1.38 2.23 1.64 2.66 1.61 2.61 1.88 3.04 1.85 2.99 2.13 3.43 2.09 3.37 2.37 3.82...
- Page 82 Screen Projection Distance (inch) Size 17:9 Screen 16:9 Screen 2.35:1 Screen 2.40:1 Screen 4:3 Screen Diagonal Wide-end Tele-end Wide-end Tele-end Wide-end Tele-end Wide-end Tele-end Wide-end Tele-end (inch) 66.1 106.9 69.6 112.4 73.5 118.7 73.8 119.1 85.6 138.0 77.5 125.0 81.5 131.4 86.1 138.9...
- Page 83 Screen Projection Distance (inch) Size 16:9 image on a 2.35:1 aspect screen 16:9 image on a 2.40:1 aspect screen Diagonal Wide-end Tele-end Wide-end Tele-end (inch) 55.2 89.3 54.1 87.7 64.7 104.6 63.5 102.7 74.2 119.8 72.9 117.6 83.7 135.0 82.2 132.6 93.3 150.2...
- Page 84 Types of Possible Input Signals Video Digital Video Signal 480p 576p 720p 50/60 Hz 1080p 24/25/30/50/60 Hz 2K (2048×1080) 24/25/30/50/60 Hz* 4K (3840×2160) 24/25/30/50/60 Hz 4K (4096×2160) 24/25/30/50/60 Hz * If the input signal is 2K (2048x1080) 24/25/30/50/60Hz, configure “HDMI Format Setting” setting to “Option 1”. (P.
- Page 85 Indicator Display on the Main Unit Meaning of the front panel indicators The indicator is solid. The indicator appears blinking. Operation mode display Displays using the different colors and solid/blinking light of the indicator on the projector unit. “STANDBY/ON” lights up (red) “STANDBY/ON”...
- Page 86 Warning display You can tell the details of a warning from the (repeated) displays of the “WARNING” and “LIGHT” indicators. The “STANDBY/ON” indicator will light up or appear blinking according to the operation mode of the projector unit. (Please refer to ““Operation mode display”P. 85”.) The Warning mode is activated once the message is displayed.
- Page 87 Dimensions (Unit: mm (in)) Top Surface Bottom Surface 337 (13-9/32) 41 (1-5/8) 37 (1-15/32) 450 (17-23/32) Front Rear Surface 111 (4-3/8) 205 (8-3/32) 111 (4-3/8) 120 (4-3/4) 173 (6-13/16) 125 (4-15/16) 40 (1-19/32)
- Page 88 Index A Accessories............12 E ECO Mode ............64 Adjust (Fine) ............56 ECO Settings............64 Adjust (Pixel Adjust)..........56 Enhance ...............43 Adjust (Pixel) ............56 Export Settings............. 66 Adjust Area ............56 External Control............ 74 Adjust Color ............56 F Factory Reset ............66 Adjust Pattern ............
- Page 89 L LAN Terminal..........14, 23, 74 S Saturation .............46 Language .............63 Save..............54 LD Power ............. 44 Screen Adjust ............61 Lens..............13 Screen Aspect ............. 61 Lens Center ............55 Screen No............61 Lens Control ...........27, 55 Screen Setting ............. 61 Lens Cover............
- Page 90 1124KSH-SW-XX © 2024...
Need help?
Do you have a question about the DLA-NZ500 and is the answer not in the manual?
Questions and answers