Table of Contents
Advertisement
Quick Links
Download this manual
See also:
Quick Manual
Advertisement
Table of Contents

Related Manuals for LENCO DVT-1932


Summary of Contents for LENCO DVT-1932
- Page 2 DVT-1932 USER MANUAL BENUTZERHANDBUCH GEBRUIKSAANWIJZING...
-
Page 3: Table Of Contents
TO THE CUSTOMER: Thank you for purchasing this LCD TV. When opening the box for the first time, please check whether all the accessories are present. Before connecting parts and power, please carefully read the user manual and always keep these instructions handy and close by your LCD TV. -
Page 4: Safety Precaution
1.Safety precaution Notes: The lightning flash with arrowhead symbol, within an equilateral triangle, is intended to alert the user to the presence of insinuated WARNING dangerous voltage within the product's enclosure that may be of sufficient magnitude to constitute a risk of electric shock RISK OF ELECTRIC SHOCK DO NOT OPEN CAUTION:... -
Page 5: Accessories
SAFETY WARNINGS Before using this product, read and follow all warnings and instructions. This product is not intended for use by young children. Young children should be properly supervised. This product is intended for household use only and not for commercial or industrial use. -
Page 6: Remote Control Manual
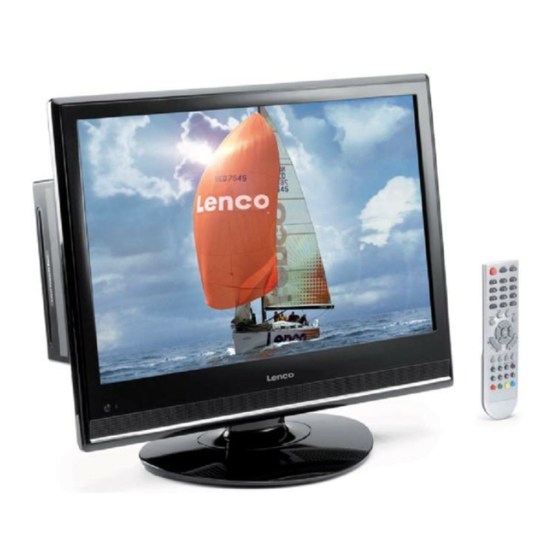
3.Remote control manual Power button Mute button Sleep button Numeric button SUBTITLE/Return channel button ASPECT/DVD 10+ button ASPECT Picture mode button Sound mode button TV setup menu Signal source selection button ENTER LEFT RIGHT DOWN Volume adjusting button Channel selection button Information button DVD SETUP/Favourite button Open/Close/Exit the OSD... -
Page 7: Remote Control Functions
4.Remote control functions POWER: Power on/off button , press once to turn the TV on and press again to turn the TV off. SLEEP: Sleep button , setting TV power off time. MUTE: Mute button , press once to disable the audio and press again to enable the audio. 0,1-9: TV channel selection button. -
Page 8: Teletext Function Buttons
5.TELETEXT function buttons Press this button once, turn on the teletext function, Press twice, enter picture and text mix mode. Press once more, turn off the teletext function. After searching for some page, press this key once to go back to the text mode. While the searching result will be displayed at the top of the TV picture, press again to go back to the text mode. -
Page 9: Lcd Tv Panel Overview
6.LCD TV panel overview TV Control Panel to back 1.On/off button. 2.Selecting exterior signal input. 3.Main menu display and confirm. 4.Channel selecting. 5.Volume adjusting. 6.PLAY/PAUSE 7.OPEN/CLOSE button Insert DVD with Label to the Back TV Terminal connections 1. DC 12V power input. 2. -
Page 10: Connecting To External Devices
7.Connecting to external devices RCA terminal is used to connect the output device of DVD HDMI The rear of TV YPBPR S Video COAXIAL AUDIO RF(75 ) S-VIDEO DC-12V HDMI SCART Notes: 1.VGA/YPBPR/ S-Video use a common PC Audio in. 2.SCART to SCART from a VCR. -
Page 11: The Osd Menus
8.The OSD menus Menu Setup TV (When using for the first time only) 1. Turn on TV, Please press"OK" to start the wizard 2. Please select your language select your country Please 4. Connect antenna and Press "OK " key start channel scan... - Page 12 Menu Operation Under TV Input 1 VIDEO MENU a. The following picture is the sketch map of the video menu. b. The definition of each option: b-1. Picture Mode: Change the picture mode in the sequence as: Sta nda rd Cinema Sport Vivid Hi-Bright User b-2.
- Page 13 2 AUDIO MENU a. The following picture is the sketch map of the audio menu. b. The definition of each option: b-1. Balance: Change the value of Balance with the key / in the range of -50 to +50. b-2. Bass: Change the value of Bass with the key / in the range of 0 to 100.
- Page 14 The submenu of Channel Item b-3-1. Channel Scan Auto channel searching. b-3-2. Update Scan Searching added channel. b-3-3. Manual Scan: manual channel searching b-3-4. Channel Skip Set skip function. b-3-5. Channel Sort Sorting channel. b-3-6. Channel Edit Edit channel information. b-3-7.
- Page 15 b-3-4. The submenu of Channel Skip The channel skip is used for skipping the channel. b-3-5. The submenu of Channel Sort Item The channel sort is used for changing the channel. b-3-6. The submenu of Channel Edit The channel edit is used for editing the channel items.
- Page 16 b- 3- 7. The submenu of Analog Channel Decode The channel decode is used for decoding the channel. b-3-8. The submenu of Analog Channel Fine Tune This item shows the frequency of each program.
- Page 17 4 Setup MENU a. This menu is used to set the function b. The definition of each option: b-1. OSD Language: Change the OSD language in the sequence as: English Espanol Francais Deutsch Nederlands . b-2. Screen Mode: Change the screen mode in the sequence as: Auto 16:9 4:3.
- Page 18 The Submenu of Time Setup b-5-1. Time Zone: Change the time zone by user. b-5-2. Time set the time. and set power on/off time. The submenu of Subtitle Item. b -6-1. Analog Subtitle: Change the analog subtitle in the sequence as: Off On b-6-2.
- Page 19 5 . Parental menu a. This menu is used to set the block function. Password set the child lock password, the initial password is 0000. b. The Submenu after You Enter the Correct Password. b-1. Hotel block Hotel mode set b-2.
- Page 20 b-2. The submenu of channel block. If you select any of the channel, the channe l can not receive signal unless you unblock it. b-3 . The submenu of program block. Age Rating: The program will be blocked if the age you set is below that the program confine.
- Page 21 b-5. The submenu of change password. You need to input the new password and confirm it. b-6. The submenu of Clean All. Press OK to clean your set or cancel to return the previous menu.
- Page 22 Main menu under VGA Input a. When system signal source switch to VGA, there will be a VGA mark in the up- left corner of the screen, it is in the VGA menu ,and you can setup the item. a-1. Auto Adjust: set position and size of the picture automaticlly.
- Page 23 DVD Operation...
-
Page 24: Basic Operation
Basic operation 1. Turn ON and OFF the DVD function - Turn on the LCD TV and then press SOURCE repeatedly to select DVD mode. 2. Insert Disc to DVD - Insert the Disc to the Disc slot (Data side of the disc has to face towards front of the unit), the player will load the disc automatically. -
Page 25: Supporting Dvd Format
Supporting DVD format This products can play the following format of DVD disc. Disc Type Disc Size (Diameter) Recorded Time Recorded Content Remarks DVD format: Single side:120mins. Approx Compressed digital 12cm Double side:240mins. Approx audio and video MPEG2 Super VCD 45mins. -
Page 26: Dvd Functions Operating Instructions
1. Play (for DVD/ Super VCD/ VCD/ CD/ CD-G/HD-CD and Mp3/ JPEG discs) - For DVD disc, press button from root or title menu; while playing the DVD, you may play your favorite title directly with title selection by pressing the TITLE button. - For Super VCD &... - Page 27 For DVD discs, (2 pages) Press INFO button once to display first page as shown below: Disc Type Chapter -/-(Current/Full) Elapsed disc time Tiltle -/- (Current/ Full) INFO Press the button again to display the second page shown below: Audio Language Audio Type Angle ON/OFF...
-
Page 28: Mp3/Jpeg Playback
10. Mute (for DVD/ Super VCD/ VCD/ CD/ CD-G/HD-CD and Mp3/ JPEG discs) - Press MUTE button to mute the audio output. There will have an on screen symbol indicate “MUTE”. Press again to cancel, or Press VOL+/VOL - to cancel and adjust the volume. - In case there is no audio output, try to press MUTE button to cancel mute. -
Page 29: Function Settings
- Using the navigation buttons to check you favorite folder and playback the first file or move to the your favorite file. NOTE: - Press buttons to move the highlight to folders, documents or mode selection. - Press numeric buttons to select the contents directly. For number over 10, press -/-- button first. (e.g. File number 15, press -/-- then 5.) - When playback MP3 files, there is no picture display, only audio output. - Page 30 NOTE: PAL format is generally used for TVs in the UK. Check your TV user guide for supported formats. If NTSC is selected with a non-compatible television PARENTAL you may experience interference or picture scrolling. TV Type DVDs are produced in a variety of screen aspect ratios. This menu enables you to select one of the three aspect ratios: 4:3 PS (Normal) 4:3 LB (Normal) 16:9 (Wide)
- Page 31 NOTE: Only editable when password is unlocked. And only can function when password is locked. It does not, however, reset either the Password or the PARENTAL PARENTAL setting. Default Setting PARENTAL - Press ok button to restore factory default. Language Setup Press SETUP button to enter the DVD OSD menu.
- Page 32 NOTE: If the selected language is not included in you DVD disc content, it will select the default language of the disc automatically. The default language setting is English. MENU Language GERMAN SPANISH FRENCH NETHERLANDS - Use navigation buttons to select the MENU LANG setup icon, press OK button to confirm.
- Page 33 Dolby Digital Setup Dynamic Range - When switch the compress mode to “Audio output”, adjust the compress ratio for different effect. When selected FULL, the peak signal value is smallest. When selected OFF, the peak signal value is biggest. Dual Mono - You can select four different audio output, STEREO, MONO L, MONO R, MIX MONO.
-
Page 34: Trouble Shooting
Trouble shooting Before contrast the service technician, perform the following simple checks. If any program still persists, unplug the LCD TV and calling for serving. PROBLEM POSSIBLE SOLUTION - Check that the main plug has been connected to a wall let. No sound and picture - Check that you have pressed the POWER button on the front of TV set. -
Page 35: Maintenance
NOTE: There is a problem in VGA mode.(Only VGA mode applied) PROBLEM POSSIBLE SOLUTION - Adjust resolution, horizontal frequency, or vertical frequency. The signal is out of range. - Check it whether the signal cable is connected or loose. - Check the input source. Vertical bar or stripe on - Work the auto configure or adjust clock, phase, or H/V position. -
Page 36: Specifications
Specifications Panel Features 19 inch Screen Size 408.24mm(H) X 255.15mm(V) Active Area Aspect Ratio 16:10 Panel Resolution 1440 X 900 Brightness 300 cd/m² 1000:1 Contrast Ratio Viewing Angle 150º(H) X 130º (V) 0.243mm(H) X 0.243mm(V) Dot Pitch Maximum Colour 16.7M Response Time Black-White (R&D) OSD Languages English, French Spanish German Dutch...
Need help?
Do you have a question about the DVT-1932 and is the answer not in the manual?
Questions and answers