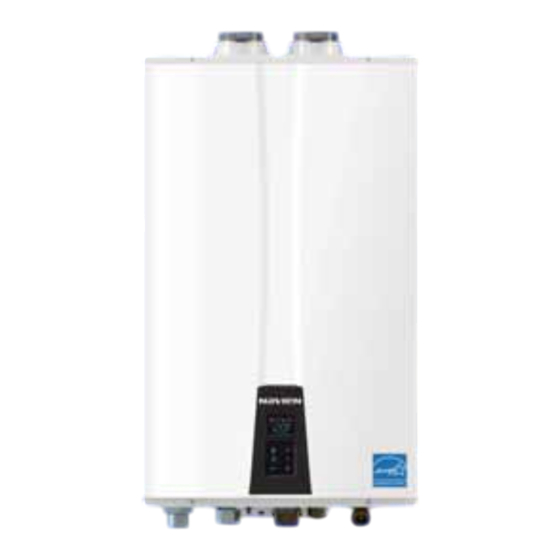
Navien NPE-150S Installation Manual
Condensing combi-boilers
Hide thumbs
Also See for NPE-150S:
- Service manual (171 pages) ,
- Installation & operation manual (103 pages) ,
- Installation manual (71 pages)
Advertisement
Quick Links
Installation Manual
NPE Condensing Water Heaters
Model
NPE-180A
NPE-210A
NPE-240A
NPE-150S
NPE-180S
NPE-210S
NPE-240S
WARNING
If the information in these instructions is not followed exactly, a fire or explosion may result, causing
property damage, personal injury or death.
Do not store or use gasoline or other flammable vapors and liquids in the vicinity of this or any other
appliance.
What to do if you smell gas
Do not try to light any appliance.
Do not touch any electrical switch; do not use any phone in your building.
Immediately call your gas supplier from a neighbor's phone. Follow the gas supplier's instructions.
If you cannot reach your gas supplier, call the fire department.
Installation and service must be performed by a qualified installer, service agency or the gas supplier.
The installation must conform with local codes or, in the absence of local codes, the National Fuel Gas Code,
ANSIZ223.1/NFPA 54 and/or CSA B149.1, Natural Gas and Propane Installation Code.
When applicable, the installation must conform with the Manufactured Home Construction and Safety
Standard, Title 24 CFR, Part 3280 and/or CAN/CSA Z240 MH Series, Mobile Homes.
Keep this manual near this water heater for future reference
whenever maintenance or service is required.
* The wetted surface of this product contacted by consumable water contains
less than one quarter of one percent (0.25%) of lead by weight.
* Lead Free
Advertisement

Related Manuals for Navien NPE-150S


Summary of Contents for Navien NPE-150S
- Page 1 Installation Manual NPE Condensing Water Heaters Model NPE-180A NPE-210A NPE-240A NPE-150S NPE-180S NPE-210S NPE-240S Keep this manual near this water heater for future reference whenever maintenance or service is required. * The wetted surface of this product contacted by consumable water contains less than one quarter of one percent (0.25%) of lead by weight.
- Page 2 2.2 Accessories 6.5 Component Assembly Diagrams and Parts Lists 2.3 Specifications 6.6 Installation Check list 2.5 Components 6.7 Navien H2Air Add-on Controller Kit (Optional) 2.6 Dimensions 6.8 Navien HotButton Kit (Optional) 2.7 Rating Plate 6.9 Requirements for the State of Massachusetts 3.
- Page 3 1. Safety Information The following safety symbols are used in this manual. Read and follow all safety instructions in this manual precisely to avoid DANGER unsafe operating conditions, fire, explosion, property damage, personal injury, or death. DANGER Indicates an imminently hazardous situation which, if not avoided, could result in severe injury or death.
- Page 4 CAUTION WARNING Do not turn on the water heater unless the water and gas supplies are fully opened. Doing so may damage the water heater. Do not turn on the water if the cold water supply shut- off valve is closed. Doing so may damage the water heater.
- Page 5 2. About the Water Heater 2.1 Items Included 2.2 Accessories When you open the box, you will nd the following items with the The following optional accessories are available for the water water heater. Check the box for each of the following items before heater: installing the water heater.
- Page 6 2.3 Specifications The following table lists the specifications for the water heater. Additional specifications about water, gas, electric, and air supplies (venting) appear in the Installation section. Item NPE-150S NPE-180(A) NPE-180S NPE-210(A) NPE-210S NPE-240(A) NPE-240S Heat 18,000- Natural Gas 15,000-150,000 BTU/H...
- Page 7 2.4 The Front Panel The front panel allows you to adjust the water temperature and view the operating status or error codes. Remove the protective sheet from the front panel before using it. Error Master Unit A code will appear on the display Cascade operation Hot Water Recirculation Display...
- Page 8 2.5 Components The following diagram shows the key components of the water heater. Component assembly diagrams and particular parts lists are included in the Appendixes. Exhaust Duct Exhaust Limit Temperature Sensor Intake Air Duct Exhaust Body Fan Motor Ignition Transformer Burner Dual Venturi Primary Heat Exchanger...
- Page 9 Freeze Protection Switch Front Panel APS (Air Pressure Sensor) Condensate Trap PCB Box Gas Valve Flow Sensor Water Adjustment Valve Mixing Valve Gas Inlet Fitting Water Inlet Filter DHW Supply Fitting Condensate Drain Fitting Condensate Drain Lid [NPE-150S] About the Water Heater...
- Page 10 Exhaust Duct Exhaust Limit Temperature Sensor Intake Air Duct Exhaust Body Fan Motor Ignition Transformer Burner Dual Venturi Primary Heat Exchanger Gas Pipe Secondary Heat Exchanger APS (Air Pressure Sensor) Freeze Protection Switch Front Panel Condensate Trap Gas Valve PCB Box Flow Sensor Water Adjustment Valve Mixing Valve...
- Page 11 2.6 Dimensions The following diagrams show the dimensions of the water heater and the table lists the supply connections. Supply Connections Description Diameter Air Intake 2 in Exhaust Gas Vent 2 in Hot Water Outlet Recirculation Inlet Cold Water Inlet Gas Inlet Condensate Outlet Overhead View...
- Page 12 Condensate Outlet Overhead View Supply Connections 1.5 in (38 mm) 14.3 in (364 mm) 4.5 in (115 mm) 6.7 in (170 mm) 2.3 in (60 mm) 11.3 in (289 mm) 17.3 in (440 mm) [NPE-150S/180S/ 210S/ 240S] About the Water Heater...
- Page 13 à des altitudes de 0 à 4,500 pieds (1,370 m) conformément aux toutes les procédures d’installation à haute altitude CAN/CGA 2.17 à une pression normale. Pour les installations à élévations en haut de 4,500 pieds, appeler le bureau de Navien.
- Page 14 3. Installing the Water Heater 3.1 Choosing an Installation Location Adequate drainage The water heater produces a significant amount of condensate When choosing an installation location, you must ensure that the location provides adequate clearance for the water heater, Maintain proper clearances from any openings in the building. adequate venting and drainage options, and sufficient access to Install the water heater with a minimum clearance of 12 in gas, water, and electrical supplies.
- Page 15 3.2 Mounting the Water Heater to the Wall Install the water heater in an area that allows for service and Navien water heaters come with an upper mounting bracket that maintenance access to utility connections, piping, filters, and traps. is pre-drilled at 16 in on center for easy installation on standard Based on the installation location, ensure the following clearances wall studs.
- Page 16 Navien gas conversion kit. Do not attempt a field conversion of this water heater without a Navien gas conversion kit. Doing so will result in dangerous operating conditions and will void the warranty.
- Page 17 When using rigid pipe, Navien recommends the installation of a union on the gas supply line close to the water heater, to facilitate any future maintenance or service.
- Page 18 3.3.1 Gas Pipe Sizing Tables (Referenced from 2012 National Fuel Gas Code) These tables are for reference only. Please consult the gas pipe manufacturer for actual pipe capacities. Maximum Natural Gas Delivery Capacity in Cubic Feet (ft ) per Hour (0.60 Gravity;...
- Page 19 Maximum Liquefied Propane Delivery Capacity in Thousands of BTU/H (0.5 in WC Pressure Drop) Length (including fittings) Pipe Size 10 ft 20 ft 30 ft 40 ft 50 ft 60 ft 80 ft 100 ft 125 ft 150 ft 175 ft 200 ft 250 ft (3 m)
- Page 20 2. Open a hot water faucet. The water heater should turn on and 8. When the water heater reaches its maximum firing rate, check the gas in the gas supply line will be purged. the inlet gas pressure reading on the manometer. The gas pressure must fall within the ranges specified on page 19.
- Page 21 210S/ 240S models. 3.4.2 Selecting a Recirculation Mode ("A" model only) On all “A“ model Navien water heaters, you can choose from two pre-heating modes: internal recirculation mode or external recirculation mode. To select a recirculation mode, you must set the DIP switches on the front panel, and set the position of the 2-way valve inside the water heater.
- Page 22 When using external recirculation mode with the Note built-in pump, observe the following maximum CAUTION recirculation pipe lengths including fittings ( in pipe is recommended): Do not remove recirculation cap. (Internal Recirculation Mode) in Copper Pipe- 100 ft (30 m) of equivalent length in Copper Pipe- 500 ft (150 m) of equivalent length Lengths in excess of these limits will require an The following diagram shows the internal recirculation flow for...
- Page 23 3. Set the front panel DIP switches at the far left (set of ten) to: 3.4.3 External Pump Wire Connection 1—OFF; 2—ON. An external pump may be connected to the water heater for recirculation applications. When selecting a circulator, it shall be sized to maintain a flow of 2-4 GPM through the water heater.
- Page 24 2. Locate the power switch on the right side of the front panel 6. Remove the plastic insulation from the external pump wire and switch the system off. with a wire stripper before connecting it to the pump. Turn the switch off. 7.
- Page 25 Pressure relief valve Shut-off Valve Hot water Cold water Condensate Domestic Domestic Cold Water Hot Water Domestic Recirculation Return Recirculation Using Two Pumps (Navien Internal Pump & External Pump) Installing the Water Heater...
- Page 26 3.5 Connecting the Condensate Drain Ensure that the discharge capacity of the pressure relief valve The Navien Condensing Water Heater creates condensation when is equal to or greater than the maximum pressure rating of the it operates. This condensation has an acidic pH of 3-5. Follow all water heater.
- Page 27 Before connecting the condensate drain, choose one of the To connect the condensate drain: following disposal options: 1. Connect a drain line to the in fitting at the bottom of the water heater. Use only corrosion-resistant material for the drain line, such as PVC or CPVC.
- Page 28 Do not connect more than one appliance to the neutralizer. If option 'b' is selected for condensate disposal, the Navien condensate neutralizer kit is recommended. The condensate from the appliance flows through the neutralizing media and increases Figure 1.
- Page 29 Navien also recommends installing a new vent system with this use direct venting to supply air from outside the building. We appliance. If reusing an existing vent system, thoroughly inspect...
- Page 30 Description Canadian Direct Vent Installations US Direct Vent Installations Clearance above grade, veranda, porch, deck, or balcony 12 in (30 cm) 12 in (30 cm) Clearance to window or door that may be opened 36 in (91 cm) 12 in (30 cm) Clearance to permanently closed window Vertical clearance to ventilated soffit located above the terminal within a horizontal distance of 2 ft (61 cm) from...
- Page 31 Navien warranty. If there is any question about the possibility of back drafting in the installation location, use a direct venting system for the water heater.
- Page 32 Canadian Non-Direct Vent US Non-Direct Vent Description Installations Installations Clearance above grade, veranda, porch, deck, or balcony 12 in (30 cm) 12 in (30 cm) 48 in (120 cm) below or to side Clearance to window or door that may be opened 36 in (91 cm) of opening;...
- Page 33 This water heater has a built-in control to limit the exhaust Use a 2 in snap fit coupler or the InnoFlue® Single Wall temperature to 149°F (65°C). As a result, the Navien water Residential vent pipes to connect the InnoFlue® Flex 2 in vent heater can be vented with Schedule 40 PVC.
- Page 34 3.6.3 Measuring Vent Length 3.6.4 Terminating the Vent The maximum vent length when using 2 in exhaust ducts is 60 ft. Before installing the water heater, determine what type of The maximum vent length when using 3 in vent ducts is 150 ft. vent termination is appropriate for the installation location The intake duct length can be of equal length to the exhaust duct and situation.
- Page 35 Intake Air Non-concentric Sidewall Venting – Air is drawn from a different location at a minimum of 12 in (300 mm) from the exhaust Exhaust Gas termination. Try to minimize the length of the intake air pipe with this venting. Interior View Do not vertically stack terminations on...
- Page 36 36 in Vent When installing a water heater outdoors, follow these guidelines: The Navien Outdoor Vent Kit must be used to ensure proper operation of the water heater. Ensure that there is plenty of clearance around the air intake and that it is adequately protected to prevent any debris, liquids, or flammable gases from entering the air intake.
- Page 37 3.7 Connecting the Power Supply 3.8 Setting the DIP Switches The water heater has two DIP switch locations: on the main circuit board (PCB) and on the front panel. Each location has two sets WARNING of DIP switches that control the functionality of the water heater. Set the DIP switches appropriately, based on the installation Improperly connecting the power supply can result in electrical environment.
- Page 38 Propane. To use the water heater at a specific altitude, the DIP switches should be set as described above. CAUTION Do not configure the system for DHW recirculation when it is configured to run an air handler using the H2Air controller. DHW recirculation and Navien H2Air configurations cannot be used at the same time. 2-switch Panel: Switch...
- Page 39 Multiple NPE-S Units: Union Communication Ball Valve Cable Check Valve Faucet Expansion Tank Pressure Relief Valve Gas Supply Line DHW Supply Line Cold Water Supply Line [NPE-150S/ 180S/ 210S/ 240S] Installing a Cascade System...
- Page 40 4.2 Connecting the Communication Cables When plumbing a cascade system, consider the following pipe Up to 16 water heaters can be connected with Navien Ready-Link diameters and flow rates. Note that flow rates above 6.6 ft/s may communication cables. Select one of the water heaters in the cause pipe erosion.
- Page 41 2. On the slave water heater, press and hold the Diagnostic and Down(-) buttons for more than 2 seconds. “SL.01” will appear on the display to confirm that this water heater is set as a slave. 3. Repeat step 2 to configure the rest of the slave water heaters in the system.
- Page 42 The Navien Common Vent System* provides an easy way to install Check to see if all contents are included in the package (refer to the vent system for up to 8 Navien NPE water heater units. By the “Included Items” on page 46).
- Page 43 Clearances Between Multiple Units <Clearance Chart for Common Vent Applications> Ensure that the installed water heaters satisfy all installation clearances provided in the manual. It is essential that there is sufficient clearance space for the common vent system to work properly.
- Page 44 Risk Guidelines Connecting Pipes with Cement Ensure that all common vent system components are manufactured and installed in accordance with valid standards, CAUTION regulations, and safety engineering rules. To avoid risk, the common vent system must be installed and The vapors from primers and solvent cements can make you used only for the original purpose described in this manual.
- Page 45 The following illustration depicts an example of a common vent Follow the instructions listed below to determine the length of a system installed for a cascade system of 8 Navien NPE heater units. common vent. 1. Add the BTU/H input ratings for each unit in the cascading system to determine the total BTU/H rating.
- Page 46 Navien Backflow Damper (Back-draft Maintenance Port Damper) Navien Backflow Damper has a maintenance port to allow you to easily inspect the operating condition of the damper plate. The Navien backflow damper prevents backflow (back-draft) at the exhaust vent while the water heater unit operates.
- Page 47 Starting the Common Vent System 3. Connect the backflow damper to the exhaust duct of the water heater unit. Backflow Damper Assembly Follow the instructions below to assemble the backflow damper on the NPE water heater units: 1. Remove the screws from the exhaust vent adapter. 4.
- Page 48 Connecting the Pipe to the Damper Assembling the T Joint 1. Insert 2” vent pipe to the backflow damper to start the vent 1. Connect an 8”-to-2” reducer to the 8” tee. Apply solvent run. cement to the mating surfaces. Apply Cement 8”-to-2”...
- Page 49 Connecting and Terminating the Vent Pipe Refer to the following example to install the common vent system. The installation area should be measured to ensure that sufficient space is available to install the water heater units and the common vent system. Ensure that the common vent system is installed near the water heater units while satisfying all clearance requirements that are specified in this manual as well as the Installation Manuals supplied with the water heater units.
- Page 50 Setting Up the Common Vent System DANGER Incorrect DIP switch settings may lead to severe personal injury, death, or property damage. Refer to the following figures when setting DIP switches. Switch Function Setting (10–Switch DIP) 0 – 1,999 ft 9-OFF, (0 –...
- Page 51 Common Vent Termination Clearances Direct Vent Application – Horizontal Installation Direct Vent Application – Vertical Installation 36" (91cm) min. Exhaust Exhaust Intake 12" (30cm) min. 12" (30 cm) min. Maximum length 20’ (6 m) Minimum length 36” Intake (91 m) Venting Intake and Exhaust to Different Locations The illustration is intended for reference purposes Note...
- Page 52 Exhaust Vent Termination Clearances (For Direct Vent) Description Canadian Direct Vent Installations1 U.S. Direct Vent Installations2 Clearance above grade, veranda, porch, deck, or 12 in (30 cm) 12 in (30 cm) balcony Clearance to window or door that may be opened 12 in (30 cm) 12 in (30 cm) Clearance to permanently closed window...
- Page 53 Maintenance 5. Reinstall the gasket and maintenance port cover, and then fix them with a set screw. Periodically check the damper condition inside the backflow damper through the maintenance port to ensure optimal performance of the system. Follow the instructions to check the damper condition and replace the backflow damper if necessary.
- Page 54 WARNING Gas Pressure and Conversion Kit Number Labels This conversion kit shall be installed by a qualified service agency* in accordance with Navien’s instructions and all Procedure: applicable codes and requirements of the authority having jurisdiction. The information in these instructions must be 1.
- Page 55 Figure 3. Detaching Gas Valve from could result in damage to the valve, causing potential severe Gas Inlet Pipe and Fan Motor Assembly personal injury, death or substantial property damage. Navien water heaters are shipped ready to fire natural gas ONLY. Appendixes...
- Page 56 Failure to comply will cause a gas leak, resulting in severe Gas Orifice personal injury or death. O-ring NPE-150S NPE-180A/ 210A/ 240A/ 180S/ 210S/ 240S Figure 6. Orifice identification 7. Remove the Gas Orifice, ensure that the packing is properly seated inside the port, and then install the new Gas Orifice for use with LP gas.
- Page 57 High fire Low fire Water Fuel Heater NPE-150S 10.2 10.8 NPE-180A NPE-180S 10.2 10.8 NPE-210A NPE-210S 10.2 10.8 DANGER NPE-240A When conversion is required, be sure to set the Front Panel NPE-240S 10.2 10.8 DIP switches according to the supply gas type.
- Page 58 Model Kit Part No. Gas Typ death or substantial property damage. NAC-N6 -0.03 in ± 0.01 in NPE-150S NAC-L6 -0.04 in ± 0.01 in ave been c d, apply the 12. Once the CO included conversion stickers to show that the appliance has NAC-01 -0.03 in ±...
- Page 59 1-stage MIN (“MIN.1”). 5. To set the water heater to operate at 2-stage MAX (1-stage MAX for NPE-150S), press the + (Up) button 3 times or until “MAX.2 (MAX.1 for NPE-150S)” is displayed. 6. To exit the Operation Mode and return the water heater to normal operation, press the Reset button twice.
- Page 60 6.2 Technical Data Pressure Drop Curve [NPE-240A/ 240S] [NPE-210A/ 210S] [NPE-180A/ 180S] [NPE-150S] Appendixes...
- Page 61 Outlet Flow Data [NPE-240A] [NPE-210A] [NPE-180A] At altitudes above 2,000 ft (610m), the outlet flow will be reduced by 4% for each 1,000 ft (305 m) of altitude gain. Note Appendixes...
- Page 62 Outlet Flow Data [NPE-240S] [NPE-210S] [NPE-180S] [NPE-150S] At altitudes above 2,000 ft (610m), the outlet flow will be reduced by 4% for each 1,000 ft (305 m) of altitude gain. Note Appendixes...
- Page 63 6.3 Wiring Diagram [NPE-180A/ 210A/ 240A] Appendixes...
- Page 64 [NPE-150S/180S/ 210S/ 240S] Appendixes...
- Page 65 6.4 Ladder Diagram NEUTRAL EXT_PUMP Relay 1 FILTER VENTURI Relay 2 Relay 3 IGNITER Relay 4 PUMP Primary Primary SMPS Speed Control DC15V Secondary DC24V DC12V Water Adjust 200V FSA Power Valve DC5V Switch Flow Control Flame Rod Flow Sensor H.T.L WD-PSS Hall Sensor...
- Page 66 Outlet MCU 1 MGV1 MCU 2 Thermistor 2 MGV2 Inlet Relay 1 Thermistor 1 Relay 2 Inlet Relay 4 Thermistor 2 Exhaust Thermistor Communication Interface UART FRONT Communication PANEL Interface Ready Link Ready Link Interface [NPE-150S/ 180S/ 210S/ 240S] Appendixes...
- Page 67 6.5 Component Assembly Diagrams and Parts Lists 6.5.1 Case Assembly Appendixes...
- Page 68 Description Part # Remark Intake Air Duct Assembly 30008662B Intake Air Filter 20007667A 20019078C NPE-180A/210A/240A Case 20026559B NPE-150S/180S/210S/240S Air Pressure Sensor 30010346A Panel Bracket 20018388A 30008678B NPE-180A/210A/240A Cover 30011694A NPE-150S/180S/210S/240S Case Lower Bracket 20007643B 30011969A Power Switch 30009482A Front Panel...
- Page 69 6.5.2 Burner Assembly(NPE-180A/ 210A/ 240A) 17-1 11-1 Appendixes...
- Page 70 Description Part # Remark 30009189A NPE-180A Heat Exchanger Assembly 30010812A NPE-210A/240A Fan Packing 20022744A Fan Bracket(F) 20022095A Flow Sensor Assembly 30008571A Thermistor 30008366A Fan Braket(R) 20022096A 30009166D NPE-180A Cold Inlet Pipe 30010805D NPE-210A/240A O-Ring (Φ17.5x2.7t) 20006947A WPA-A (Clip) 20018344A Thermistor 30008366A WPA-B 20018343A...
- Page 71 6.5.3 Burner Assembly(NPE-150S/180S/ 210S/ 240S) 10 4 10 5 Appendixes...
- Page 72 Description Part # Remark Ignition Transformer 30010455A Fan Bracket (R ) 20022096A Thermistor 30009478A Exhaust 30214351A NPE-150S Heat Exchanger Assembly 30011706A NPE-180S 30011705A NPE-210S/240S 30214183A NPE-150S Ignitor 30012226A NPE-180S/210S/240S Packing (Φ26.5x2.4t) 20006868A 30014326A NPE-150S Heat Exchanger Outlet Pipe 30011519A NPE-180S...
- Page 73 6.5.4 Waterway Assembly(NPE-180A/210A/240A) 12-5 12-4 12-2 12-3 12-1 Description Part # Remark Buffer Tank 30010953A Hot Water Outlet Pipe Assembly 30008338A Pipe Adapter 30008349A O-RING (P20) 20017212A Thermistor (Red) 30008366A O-RING (P16) 20006947A Pipe Clip 20007733A Return Pipe Assembly 30008350A Pipe adapter 30008349A Appendixes...
- Page 74 Description Part # Remark O-RING (P20) 20017212A O-RING (P19) 20017211A Water Filter 30008351A Pipe Clip 20007733A Circulation Pump 30010346A Pump Air Seperator 30006831A Drain Plug 30003550B O-RING (P18) 20006947A Fastner 20017726A Water adjustment valve (WAV) 30008245A WAV Outlet Pipe Assembly 30008624B O-Ring (P16) 20011438A...
- Page 75 6.5.5 Waterway Assembly(NPE-180S/ 210S/ 240S) Appendixes...
- Page 76 Description Part # Remark Bracket 20026489A Thermistor 30008366A Water Filter 30008171A Cold Water Inlet Adapter 30011597A O-Ring (P15) 20017217A Fastner 20007859A Flow Sensor 30011534A O-Ring (P16) 20017210A Flow Sensor Outlet Adapter 20025959A Outlet Adapter 20025961A Fastner 20017726A Water Adjustment Valve (WAV) 30011532A Inlet Adapter 20025962A...
- Page 77 6.5.6 Fan(Gas) Assembly 9 11 9 14 9 13 9 10 9 10 [NPE-180S/180A/210S/210A/240S/240A] [NPE-150S] Appendixes...
- Page 78 Silence Adapter 20019141A NPE-210S/210A/240S/240A O-Ring (P20) 20006934A O-Ring (G70) 20007001A NPE-150S O-Ring (G75) 20018079A NPE-180S/180A/210S/210A/240S/240A Fan Packing 20022744A 20029420B NPE-150S (NG) 20034178A NPE-150S (LP) 20024159A NPE-180S/180A (NG) Gas Orifice 20024190A NPE-180S/180A (LP) 20019144A NPE-210S/210A/240S/240A (NG) 20024189A NPE-210S/210A/240S/240A (LP) 20030893A NPE-150S...
- Page 79 Owner’s Manual. If you have additional questions or need assistance with installation, contact Technical Support at 1-800-519-8794 or 1-949-420-0420, or refer to the technical support section of Navien’s website (www.navien.com). Installing the Water Heater Have you maintained the required clearances from building openings and intake air vents?
- Page 80 Connecting a Pressure Relief Valve Have you installed the pressure relief valve on the hot water outlet pipe near the water heater? Have you installed a discharge drain tube from the pressure relief valve to within 6–12 in (150–300 mm) of the floor? Connecting the Condensate Drain Have you installed a condensate drain line from the water heater to a drain or laundry tub? Venting the Water Heater...
- Page 81 6.7 Navien H Air Add-on Controller Kit (Optional) functions to the NPE-A series water heaters for a combination application where space heating and domestic hot water (DHW) are supplied simultaneously. With this add-on controller, a thermostat (1 or 2-stage) and an outdoor sensor can be installed along with a hydronic air handler to add space heating functionality to the system.
- Page 82 This device is designed to work with the NPE-A series models ONLY. Basic Principles The following diagram shows the basic operation of an NPE-A series water heater system with the Navien HotButton kit. CAUTION The Navien HotButton can be used ONLY with a water heater system configured for DHW recirculation.
- Page 83 6.9 Requirements for the State of Massachusetts NOTICE BEFORE INSTALLATION This appliance must be installed by a licensed plumber or gas fitter in accordance with the Massachusetts Plumbing and Fuel Gas Code 248 CMR Sections 4.00 and 5.00. IMPORTANT: In the State of Massachusetts (248 CMR 4.00 & 5.00) For all side wall horizontally vented gas fueled equipment installed in every dwelling, building or structure used in whole or in part for residential purposes, including those owned or operated by the Commonwealth and where the side wall exhaust vent termination is less than seven (7) feet above finished grade in the area of the venting, including but not limited to decks and porches, the following requirements shall...
- Page 84 Memo...
- Page 86 Getting Service If your water heater requires service, you have several options for getting service: Contact Technical Support at 1-800-519-8794 or on the website: www.navien.com. For warranty service, always contact Technical Support Contact the technician or professional who installed your water heater.
Need help?
Do you have a question about the NPE-150S and is the answer not in the manual?
Questions and answers