Advertisement
Quick Links
www.costway.com
USER'S MANUAL
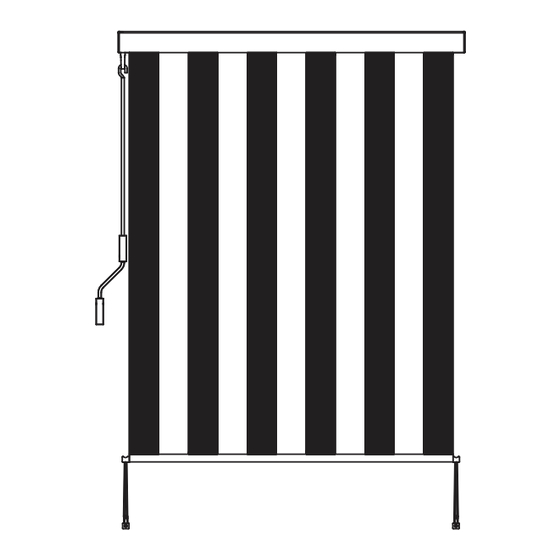
Roller Shade
HW63835
THIS INSTRUCTION BOOKLET CONTAINS IMPORTANT SAFETY INFORMATION. PLEASE READ AND KEEP FOR FUTURE REFERENCE.
Follow Costway
Please give us a chance to make it right and do better!
Visit us: www.costway.com
Contact our friendly customer service department for help first.
Replacements for missing or damaged parts will be shipped ASAP!
EN
DE
FR
ES
IT
PL
Advertisement

Related Manuals for Costway HW63835


Summary of Contents for Costway HW63835
- Page 1 THIS INSTRUCTION BOOKLET CONTAINS IMPORTANT SAFETY INFORMATION. PLEASE READ AND KEEP FOR FUTURE REFERENCE. Follow Costway Please give us a chance to make it right and do better! Visit us: www.costway.com Contact our friendly customer service department for help first. Replacements for missing or damaged parts will be shipped ASAP!
- Page 2 Contact Us! Do NOT return this item. Contact our friendly customer service department for help first. E-mail US: cs.us@costway.com UK: cs.uk@costway.com Before You Start Before You Start Please read all instructions carefully. Retain instructions for future reference. Seperate and count all parts and hardware.
- Page 3 M5x16...
- Page 4 Fig.2 FIG.1...
- Page 5 Cross section Of ground 5 cm 8mm masonry drill...
- Page 6 Cross section Of ground 5 cm 8mm masonry drill...
- Page 8 HANDBUCH Senkrechtmarkise HW63835 DAS HANDBUCH ENTHÄLT WICHTIGE SICHERHEITSHINWEISE. BITTE LESEN UND BEWAHREN SIE FÜR DIE ZUKÜNFTIGE VERWENDUNG AUF. Folgen Costway Bitte geben Sie uns eine Chance, es zu korrigieren und besser zu machen! Besuchen uns:www.costway.de Wenden Sie sich zunächst an unseren freundlichen Kundendienst.
- Page 9 Kontaktieren uns! Senden Sie diesen Artikel NICHT zurück. Wenden Sie sich zunächst an unseren freundlichen Kundendienst. E-mail DE:cs.de@costway.com Vor dem Beginnen Bitte lesen Sie alle Anweisungen sorgfältig durch. Bewahren Sie die Anweisungen zum zukünftigen Verwendung auf. Separieren und zählen Sie alle Teile und Hardware.
- Page 10 Wir empfehlen, diesen Schirm von zwei Personen zu installieren. Dieser Senkrechtmarkise ist für den Innen- und Außenbereich geeignet. Bewahren Sie diese Anleitung für eine spätere Verwendung auf. Eine Bohrmaschine, ein Maßband, ein Nivelliergerät und ein Kreuzschlitzschraubendreher werden für die Installation empfohlen (nicht im Lieferumfang enthalten).
- Page 11 Handbuch ( 1 Stk.) Montageschritt Schritt 1: Ring einbauen Befestigen Sie den Ring mit der Ringschraube (Kreuzschraube M5x16) am Getriebe. Schritt 2: Installieren Sie die Klammern. Bestimmen Sie die Art Ihrer Installation. Ihr Sonnenschutz kann an eine Wand oder Decke gehängt werden.
- Page 12 Querschnitt des Bodens 5 cm 8mm Steinbohrer Führen Sie in jedes der Löcher ein Expansionsrohr aus Kunststoff mit einem Durchmesser von 8 x 45mm ein. Tighten den Klammern mit ST4,8x50 Kreuzschlitzschrauben. Warnung: Stellen Sie bei einer Wandmontage sicher, dass die Plastiklaschen an Ihren Halterungen zum Boden zeigen.
- Page 13 Querschnitt des Bodens 5 cm 8mm Steinbohrer Führen Sie in jedes der Löcher ein Expansionsrohr aus Kunststoff mit einem Durchmesser von 8 x 45mm ein. Tighten den Klammern mit ST4,8x50 Kreuzschlitzschrauben. Warnung: Ihr Sonnenschutz sollte bei windigem Wetter aufgerollt sein. Das...
- Page 15 CE MANUEL D’INSTRUCTIONS CONTIENT DES INFORMATIONS IMPORTANTES SUR LA SÉCURITÉ. VEUILLEZ LIRE ET CONSERVER POUR LA RÉFÉRENCE FUTURE. Suivez Costway VEUILLEZ NOUS DONNER UNE OCCASION DE L’AMELIORER ET FAIRE MIEUX! Consultez-nous : www.costway.fr Contactez d’abord notre service à la clientèle amical pour l’aide. Les replacements pour les pièces manquantes ou endommagées seront envoyés le plus vite possible!
- Page 16 Contactez-nous ! Ne retournez pas cet article. Contactez d’abord notre service à la clientèle amical pour l’aide. E-mail FR : cs.fr@costway.com Avant de Commencer Veuillez lire attentivement toutes les instructions. Conservez les instructions pour la référence future. Séparez et comptez toutes les pièces et les outils de matériel.
- Page 17 Nous recommandons à deux personnes d’installer ce store. Ce store est en sécurité pour une utilisation intérieure et extérieure. Conservez ces instructions pour une utilisation ultérieure. Une perceuse électrique, un ruban à mesurer, un dispositif de mise à niveau et un embout de tournevis cruciforme sont recommandés pour l’installation (non inclus).
- Page 18 Manuel d’instruction (1 pièce) Étapes d’Installation Étape 1 : Installer l’anneau À l’aide de la vis à anneau (vis croisée M5x16), fixez l’anneau à la boîte à engrenages. Étape 2 : Installez les supports. Déterminez votre type d’installation. Votre store peut être suspendu à un mur ou à un plafond.
- Page 19 Section transversale du sol 5 cm Foret à maçonnerie 10mm Insérez un tube d’expansion en plastique Φ8 x 45mm dans chaque trou Fixez le support avec les vis autotaraudeuses ST4,8x55. Avertissement : pour une installation murale, assurez-vous que les languettes en plastique de vos supports sont dirigées vers le sol.
- Page 20 Section transversale du sol 5 cm Foret à maçonnerie 10mm Insérez un tube d’expansion en plastique Φ8 x 45mm dans chaque trou Fixez le crochet avec les vis autotaraudeuses ST4,8x55. Avertissement : Il faut enrouler votre store quand le vent souffle. Le système à...
- Page 22 MANUAL DEL USUARIO Toldo Vertical HW63835 ESTE MANUAL DE INSTRUCCIONES CONTIENE IMPORTANTES INFORMACIONES DE SEGURIDAD, POR FAVOR LO LEA Y GUARDE PARA REFERENCIAS FUTURAS. Siga Costway ¡Por favor dénos la oportunidad de hacerlo bien y mejorar! Primero póngase en contacto con nuestro amable departamento de Visítenos: www.costway.es...
- Page 23 ¡Contáctenos! NO devuelva este artículo. Primero póngase en contacto con nuestro amable departamento de servicio al cliente para obtener ayuda. Antes de Empezar Por favor lea todas instrucciones con mucha atención. Retenga instrucciones para referencias futuras. Separe y cuente todas las piezas y accesorios.
- Page 24 Recomendamos que dos personas instalen este toldo. Este toldo es segura para uso en exteriores. Conserve estas instrucciones para uso futuro. Se recomienda un taladro eléctrico, cinta métrica, dispositivos de nivelación y una punta de destornillador Phillips para la instalación (no incluida).
- Page 25 Manual de instrucciones (1 pieza) Pasos de instalación Paso 1: Para instalar el anillo Use el tornillo de anillo (tornillo cruzado M5 x16), fije el anillo a la caja de engranajes. Paso 2: Para instalar soportes Determine su tipo de instalación. El toldo se puede colgar de una pared o un techo.
- Page 26 5 cm 8 mm taladro de albañilería Inserte un tubo de expansión de plástico 8 x 45 mm en cada de los agujeros. Sujeta el soporte con ST 4,8 x 50 tornillos de rosca cruzada Advertencia: Para el montaje de pared, asegúrese de que las pestañas de plástico sean apuntando...
- Page 27 5 cm 8 mm taladro de albañilería Inserte un tubo de expansión de plástico 8 x 45 mm en cada uno de los agujeros Fije el gancho con tornillos de rosca cruzada ST4.8 x 55.
- Page 29 MANUALE UTENTE Tendalino HW63835 QUESTO MANUALE DI ISTRUZIONI CONTIENE IMPORTANTI INFORMAZIONI SULLA SICUREZZA. SI PREGA DI LEGGERE E CONSERVARE PER RIFERIMENTO FUTURO. Seguire Costway Vi preghiamo di darci la possibilità di fare bene e fare di meglio! Visitateci: www.costway.it Per prima cosa contatta il nostro servizio di assistenza clienti.
- Page 30 Contattaci! NON restituire questo articolo. Per prima cosa contatta il nostro servizio di assistenza clienti. E-mail IT: cs.it@costway.com Prima di iniziare Si prega di leggere attentamente tutte le istruzioni. Conservare le istruzioni per riferimento futuro. Separare e contare tutte le parti e l'hardware.
- Page 31 Consigliamo a due persone di installare questa tenda. Questa tenda è sicura per uso interno ed esterno. Conservare queste istruzioni per uso futuro. Per l'installazione sono consigliati un trapano elettrico, un metro a nastro, un dispositivo di livellamento e un cacciavite di Phillips (non inclusa).
- Page 32 Manuale (1 pezzo) Passi di installazione Passo 1: installare l'anello Utilizzando la vite ad anello (vite a croce M5x 16), fissare l'anello alla scatola degli ingranaggi. Passo 2: installare le staffe Determinare il tipo di installazione. La tua tenda può essere appesa a una parete o un soffitto.
- Page 33 Sezione trasversale del terreno 5 cm Trapano per muratura da 8 m Inserire un tubo di espansione in plastica da Ф8x45mm in ciascuno dei fori. Fissare la staffa con le viti a croce autofilettanti ST4,8x50. Avvertenza: per un'installazione a parete, assicurarsi che le linguette di plastica sulle staffe siano rivolte verso il terreno.
- Page 34 Sezione trasversale del terreno 5 cm Trapano per muratura da 8 m Inserire un tubo di espansione in plastica da Ф8x45mm in ciascuno dei fori. Fissare il gancio con le viti autofilettanti ST4,8x50. Avvertenza: la tenda dovrebbe essere arrotolata in caso di vento. Il sistema elastico...
- Page 36 NINIEJSZA INSTRUKCJA ZAWIERA ISTOTNE INFORMACJE DOTYCZĄCE BEZPIECZEŃSTWA. PROSIMY O ZAPOZNANIE SIĘ Z NIĄ I ZACHOWANIE JEJ DO WGLĄDU W PRZYSZŁOŚCI. Śledź Costway W razie kłopotów skontaktuj się z nami! Odwiedź nas: www.costway.pl Jeśli potrzebujesz pomocy skontaktuj się z naszym przyjaznym działem obsługi klienta.
- Page 37 Skontaktuj się z nami! Nie zwracaj tego produktu. Jeśli potrzebujesz pomocy, skontaktuj się z naszym przyjaznym działem obsługi klienta. E-mail PL: sklep@costway.pl Zanim Zaczniesz Zapoznaj się z instrukcją. Zachowaj instrukcję do wglądu. Upewnij się, że zestaw jest kompletny. Zapoznaj się ze sposobem montażu i postępuj zgodnie z instrukcją.
- Page 38 Zalecamy, aby w montażu produktu udział wzięły 2 osoby dorosłe. Produkt ten jest odpowied- ni do użytku wewnętrznego i zewnętrznego. Instrukcję tę należy zachować do późniejszego użytku. Do instalacji zaleca się użycie wiertarki elektrycznej, miarki taśmowej, niwelatora i końcówki wkrętaka krzyżakowego (nie znajdują się w zestawie). Przed montażem należy rozplanować...
- Page 39 Instrukcja obsługi (1 sztuka) Kroki instalacyjne Krok 1: Instalacja pierścienia. Za pomocą śruby pierścieniowej (śruba krzyżowa M5xl6) przymocuj pierścień do przekładni. Krok 2: Montaż wsporników. Określ preferowany przez siebie rodzaj instalacji. Produkt może być zawieszony na ścianie lub suficie. Rys.1 ilustruje instalację ścienną. Rys. 2 ilustruje instalację sufitową.
- Page 40 Przekrój poprzeczny gruntu 5 cm 5 cm Wiertło do murów 8 mm Do każdego z otworów należy włożyć jedną plastikową rurkę rozprężną o wymiarach 8x45mm. Przymocuj wspornik za pomocą wkrętów gwintowanych krzyżowo ST4.8x50. Ostrzeżenie: W przypadku instalacji ściennej należy upewnić się, że plastikowe wypustki na wspornik- ach są...
- Page 41 Przekrój poprzeczny gruntu 5 cm 5 cm Wiertło do murów 8 mm Do każdego z otworów należy włożyć jedną plastikową rurkę rozprężną o wymiarach 8x45mrn. Zamocuj hak za pomocą gwintowanych śrub krzyżowych ST4.8x55. Ostrzeżenie: Produkt powinien być zwinięty podczas wiatru. System Bungee jest...
Need help?
Do you have a question about the HW63835 and is the answer not in the manual?
Questions and answers