Table of Contents
Advertisement
Quick Links
Operating instructions
– Translation of the original operating instructions –
MPX dosing system
2024/07
1005463
MPX SOLO 7-1 dosing system
1006090
MPX DUO 4-2 dosing system
1005472
MPX SMART 7-1 dosing system
1005478
MPX SMART 7-7 dosing system
1005477
MPX SMART 13-1 dosing system
1005479
MPX SMART 13-7 dosing system
Advertisement
Table of Contents

Summary of Contents for SAIER MPX SOLO 7-1
- Page 1 Operating instructions – Translation of the original operating instructions – MPX dosing system 2024/07 1005463 MPX SOLO 7-1 dosing system 1006090 MPX DUO 4-2 dosing system 1005472 MPX SMART 7-1 dosing system 1005478 MPX SMART 7-7 dosing system 1005477 MPX SMART 13-1 dosing system...
- Page 3 The information is provided without guarantee. Details in these operating instructions are subject to change without prior notice due to ongoing product development. © 2024 SAIER Dosiertechnik GmbH All rights, including photomechanical reproduction and storage in electronic media, reserved by SAIER Dosiertechnik GmbH.
-
Page 4: Table Of Contents
Contents Intended use ........................... 6 Disclaimer ..........................6 EC/EU – Declaration of Conformity ..................7 About these instructions ......................8 Transportation and storage ....................10 Items supplied ........................10 Technical specifications ......................11 Description ..........................13 The system ................................13 Components ................................ - Page 5 14.1 Replacing the tube kit and the rotor ......................47 14.2 Replacing the tube ............................50 14.3 Confirm and document maintenance tasks ..................... 53 Event log ..........................54 15.1 Types of events ..............................54 Faults ..........................55 Replacement parts and support..................57 Dismounting and disposal ....................
-
Page 6: Intended Use
Only a qualified specialist may open the device. The dosing system must be installed by a trained specialist who is responsible for compliance with applicable standards and regulations. Only accessories that have been tested together with this device and approved by SAIER Dosiertechnik GmbH may be used. If third-party accessories are used, SAIER Dosiertechnik does not guarantee that the device will operate or function safely or reliably. -
Page 7: Ec/Eu - Declaration Of Conformity
EC/EU Directives, harmonised standards and national standards. Product: MPX dosing system Type: MPX SOLO 7-1 dosing system MPX DUO 4-2 dosing system MPX SMART 7-1 dosing system MPX SMART 7-7 dosing system MPX SMART 13-1 dosing system... -
Page 8: About These Instructions
About these instructions About these instructions Important information Read these operating instructions before using the device. Please observe and comply with the following points: • All instructions relating to the safety of the operator and protection of the surroundings must be followed. •... - Page 9 About these instructions Types of hazard The following types of hazard may arise during installation, operation, repair or disposal of the device: Danger of death, electricity Before opening the device housing, disconnect the power supply to the device and make sure it cannot be switched back on. Crush hazard Before operating the pump, ensure that all provided covers are properly fitted.
-
Page 10: Transportation And Storage
Transportation and storage Transportation and storage • Handle the device with care as it contains sensitive parts. • Store the device in a dry and secure place. • The storage temperature for the device should be between 10 °C and 45 °C. •... -
Page 11: Technical Specifications
Technical specifications Technical specifications MPX SOLO Performance data Maximum flow rate: 350 ml/min Number of washing machines: Number of chemical products: Electrical data Operating voltage: 100 … 230 V Frequency: 50 / 60 Hz Input power: 55 VA Control input voltage: 12 …... - Page 12 Technical specifications General data Water supply pressure: 0.5 … 6 bar Water temperature: 4 … 40 °C Separation from potable water supply: DIN EN 1717 cat. 5 Suction height: 1.7 m Dosing programs: 80 dosing programs Program steps: 426 program steps Product dosings: 2304 product dosings Operating modes:...
-
Page 13: Description
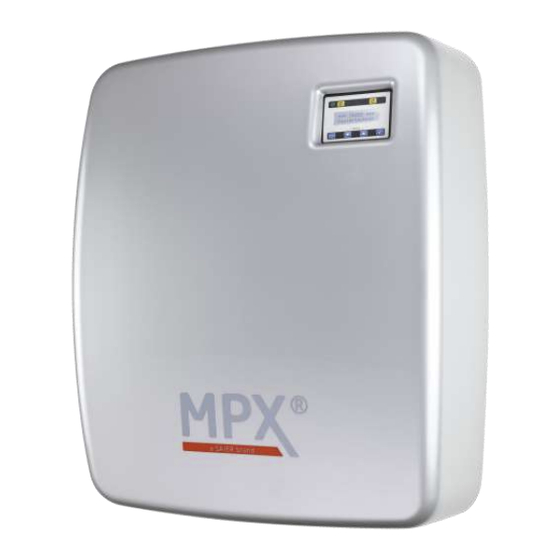
Description Description The MPX dosing system doses several washing chemicals into one or more washing machines. The system Figure 1: System Item Component Function Control unit • Controls the dosing pump • Stores actions and faults Dosing pump Doses the washing chemical MPX multiplexer •... -
Page 14: Components
Description Components MPX SOLO MPX DUO MPX SMART Figure 2: MPX dosing system components MPX multiplexer 1 for washing chemical connection MPX SMART multiplexer 2 for washing chemical connection MPX SMART de-multiplexer for washing machines connection Water reservoir with solenoid valve Electrical connection box MPX SMART dosing pump MPX SMART control unit... -
Page 15: Indicators And Control Elements
Indicators and control elements Indicators and control elements Display Figure 3: Control panel Item Description Function Operation indicator Lights up green when operating voltage is present “Operating mode” Switch between operating modes: button MPX system activated MPX system deactivated* ✓ indicator Flashes when pump is running ... -
Page 16: Multiplexer
Indicators and control elements Status of control inputs After pressing the button, the “control inputs status” display appears: M 1o2o3o4o5o6o7o o o o o o o o The first column shows the number of the machine. The status of the control inputs is shown in the other columns. -
Page 17: Installation
Installation Installation 10.1 Installation location An installation location should be chosen that is not exposed to humidity, water, vapours, alkalis, • acids or extreme hot or cold temperatures. The mounting surface should be flat and distortion-free. • The mounting surface should be free of vibrations and shocks. •... - Page 18 Installation Lift the cover upwards. Remove the cover. ■ Mounting the device Hold the drilling template against the wall. Drill the three mounting holes. Insert the wall plugs (screw anchors) into the holes. Mount the device with the screws. ...
- Page 19 Installation ■ Fresh water connection Connect the water hose to the tap. Connect the water hose to the MPX water tank. IMPORTANT INFORMATION The pipes and hoses used for the water supply must conform to local regulations! ■ Connecting the washing chemicals Connect the lines from the washing chemicals to the multiplexer and secure with hose clips.
- Page 20 Installation MPX SOLO and MPX SMART Multiplexer connection (seen from below) Multiplexer 1 connection Multiplexer 2 connection MPX DUO Multiplexer connection (seen from below) Multiplexer connection Washing machine 2 Washing machine 1 Chemicals 2 - 4 have to be connected twice. Make sure that the same chemicals are connected to the same connection numbers...
- Page 21 Installation ■ Connecting the washing machine MPX SOLO MPX DUO MPX SMART Multiplexer connection (seen from below) De-multiplexer connection 2024/07 Operating instructions MPX dosing system 21 / 60...
-
Page 22: Electrical Installation
Installation 10.3 Electrical installation Danger of death, electricity Before opening the device housing, disconnect the power supply to the device and make sure it cannot be switched back on. Important information The electrical installation may only be carried out by an authorised electrician. •... - Page 23 Installation ■ Mains power connection The supply voltage is connected via the pre-fitted Europlug. ■ 24 V DC control voltage connection for washing machine 1 24 V DC control voltage for washing machine 1. The control signals for dosing are sent to the MPX by the washing machine via floating (dry) normally open contacts.
- Page 24 Installation ■ SD bus external connection Device damage! Incorrect connection of the bus will cause permanent malfunction! ■ Bus termination The SDB-HLED flashing warning light is a terminating device and should be connected at the beginning or end of the bus. This means that only the other end of the bus needs to be terminated.
- Page 25 Installation ■ SD bus external connection options Device damage! Incorrect connection of the bus will cause permanent malfunction! The following components can be connected to the external SD bus: • MPX program selector The MPX program selector is used to select and start dosing programs for a washing machine.
- Page 26 Installation ■ Connect SAIER router to MPX (optional) Plug the terminating resistor (1) into the left socket on the control unit. Plug the router cable plug connector (2) into the right socket on the control unit. Plug the connection terminal on the router cable (3) into the router.
- Page 27 Change settings Polling interval: 10 min SDDB account test: ✓ Repeat test Enter username, password and organisation (you will receive this access data from your SDDB administrator). SAIER Communicatin Module Konfiguration SDDB Account Name: Username Passwort: xxxxxxxxx Organisation: Firmenname Intervall:...
-
Page 28: Operating Modes
Operating modes Operating modes ■ General information on dosing programs • A dosing program contains one or more dosing steps (e.g. prewash, main wash, bleaching, final rinse). • A dosing step contains none, one or more product dosings. • Each start of a dosing program is logged with an event in the event memory. •... - Page 29 Operating modes Weighing signal Dosing quantity with Dosing quantity Dosing quantity with 2.5% 10% resolution with 5% resolution resolution > 19.5 s 100% 100% 100% 19.1 s – 19.5 s 100% 100% 97.5% 18.6 s – 19.0 s 100% 18.1 s – 18.5 s 100% 92.5% 17.6 s –...
- Page 30 Operating modes ■ APD mode Start dosing Weighing signal In1 – In4: Program detection signal pattern (APD). In5: Weighing signal (optional). In6: Starting dosing step. If a signal at In6 starts a new dosing step before a running dosing step is finished, the running dosing step is aborted.
-
Page 31: Mpd" Operating Mode
Operating modes 11.2 “MPD” operating mode An MPX program selector must be installed for MPD (Manual Program Detection) operating mode. Dosing programs are selected manually using the MPX program selector and also started manually depending on the MPD mode. MPX program selector Electrical installation Terminating resistor The following wires need to be run from the washing machine to the In terminals on the MPX:... - Page 32 Operating modes ■ MPD mode 2 The selected dosing program is started at the program selector. A signal at In1 – In6 starts the first dosing step of the dosing program. Further signals at In1 – In6 start the next dosing steps. Dosing steps within the dosing program can be skipped.
- Page 33 Operating modes ■ MPD mode 4 In6 = Drain valve In7 = Door contact Closing the door starts the selected dosing program. A signal at In1 – In5 starts the first dosing step of the dosing program. Before the next dosing step can be started, the signal for the drain valve at control input In6 has to be switched on once and then switched off again.
-
Page 34: Direct" Operating Mode
Operating modes ■ MPD mode 6 A signal at In7 starts the selected dosing program. A signal at In1 – In5 starts the first dosing step of the dosing program. Further signals at In1 – In5 start the next dosing steps. Dosing steps within the dosing program can be skipped. -
Page 35: Menu
Menu Menu 12.1 Display The display shows the following information: Status display (e.g. flushing) • Error messages (e.g. tube rupture) • Input displays (e.g. input dosing) • ■ Symbols on the display Symbols are shown on the display. These symbols explain the displayed values. Symbol Description Meaning... - Page 36 Menu ■ Arrows Top arrow: Press the button to open the menu. - Select menus Display Bottom arrow: Press the button - Change values to confirm the value. ■ Button functions Button Navigate through the menu Enter values Exit the menu Back to the previous value...
-
Page 37: Menu Structure
Menu 12.2 Menu structure Press the button MPX system deactivated Press the buttons simultaneously Start operations Flush line Enter number of the machine manually Start flushing line Drain Enter number of the machine water reservoir Start draining water reservoir Initial flush Enter number of the machine Start initial flushing Manual... - Page 38 Info MPX name Display date and time Enter PC baud rate Select baud rate for PC * Press the ENTER key to confirm the servicing/maintenance work, which then appears in the Saier Device Database (SDDB). 2024/07 Operating instructions MPX dosing system...
- Page 39 Menu ■ Flush line If a dosing procedure is cancelled, there is washing chemical in the line. For this reason, the line has to be flushed manually. If the line is not flushed, the system remains in “MPX system deactivated” mode and the dosing system cannot be started.
- Page 40 Menu ■ Water reservoir reference measurement The MPX monitors the tube ageing process and adjusts the parameters accordingly (automatic compensation for tube ageing). This compensation ensures that dosing remains consistent. In order for the compensation to be carried out correctly, a reference measurement for the tube must be carried out during initial setup.
- Page 41 Menu ■ Purging air from a dosing line Trained personnel only! Purging air may only be carried out by a trained person. Before purging air, all dosing lines must be connected on the washing machine and MPX dosing system. After purging, the line must be flushed with water. Requirements •...
-
Page 42: Startup
Startup Startup Installation Mount the MPX unit. Install I/O modules. Install the program selector. Install the flashing warning light. Connect potable water supply to MPX. Connect washing machines to MPX with hoses. Connect suction lances to MPX with hoses. Electrical installation Connect supply voltage. - Page 43 Startup Remote control configuration Create account in the SDDB web platform for the service technician (administrator). Give the login data (name and password) to the service technician. Switch on the router and wait a few minutes. Plug in the MPX’s mains power plug. Press the “on/off”...
-
Page 44: Calibration
Startup 13.1 Calibration Chemical burn hazard from chemicals Calibration of the dosing pump may be carried out only by instructed personnel who have been informed of all hazards and who have received documented training for this activity. Wear eye protection. Wear protective clothing. - Page 45 Startup The MPX system performs a water check and pre-flushes the line. ► Press the button until the line to the collecting container is filled with chemical. Insert the chemical hose into the measurement beaker and fix in place. Avoid contaminating the surrounding area with chemical from the hose.
-
Page 46: Maintenance
Maintenance Product name Product x Product number Maximum flow rate … % Density … g/ml Calibration value 100% … ml/min … g/min Calibration value 75% … ml/min … g/min ... -
Page 47: Replacing The Tube Kit And The Rotor
Maintenance 14.1 Replacing the tube kit and the rotor Escape of liquid! Carry out the “Drain water reservoir” command before replacing the tube! MPX SOLO Tube kit and rotor MPX DUO Replace the tube kit and the rotor after 400 operating hours. - Page 48 Maintenance Remove the shroud cover. Remove the pump housing cover. Remove the rotor cover. Use long-nose pliers or a rotor key to rotate the rotor clockwise into the “D” position. Pull the tube holder down out of the fitting. ...
- Page 49 Maintenance Replace the rotor. Rotate the rotor into angled “D” position. Place new tube in position to the left of the rotor. Slide the tube holder into the guide on the left (). Continue turning the rotor clockwise. ...
-
Page 50: Replacing The Tube
Maintenance 14.2 Replacing the tube Escape of liquid! Carry out the “Drain water reservoir” command before replacing the tube! MPX SMART Replace the tube after 400 operating hours. Crush hazard Before replacing the tube, switch off the device and make sure it cannot be switched back on. - Page 51 Maintenance Drain the water reservoir. Remove the housing cover (1). Remove the retaining ring (2). Rotate and pull the rotor (3) to remove it from the pump housing. Remove screw (1) from the tube holder (2). ...
- Page 52 Maintenance Bend the tube downwards. Fit the rotor onto the shaft. Push the tube into place to the left of the rotor. Place the rotor key onto the rotor. The rotor key is not supplied with the unit. It is an accessory (art.
-
Page 53: Confirm And Document Maintenance Tasks
Maintenance 14.3 Confirm and document maintenance tasks Confirm maintenance task After carrying out maintenance tasks, confirm them in the MPX menu. The following maintenance tasks can be documented in the MPX menu (see page 37): Replace pump tube • Replace solenoid valve •... -
Page 54: Event Log
Event log Event log The dosing system has an internal memory (data logger). This memory logs errors, faults and work steps of the dosing system. A maximum of 1,400 events per day and a total of 41,000 events can be stored. 15.1 Types of events Events with time stamp... -
Page 55: Faults
Faults Faults Error messages on the MPX display: Error message Cause Remedy Deactivated Standby mode. Press the button. Press “Operating mode”. Empty signal! Container empty. Provide new container. Container No suction lance connected. Check suction lance is ... - Page 56 Faults Error message Cause Remedy No connection to an I/O module. Check electrical connection. I/O module error Not connected correctly. Check jumpers (ensure correct bus termination). Jumper in wrong position or not fitted. Check configuration in the SSC ...
-
Page 57: Replacement Parts And Support
Replacement parts and support Replacement parts and support Device type and serial number required When ordering replacement parts, always specify the exact device type and the serial number. This information is provided on the device’s nameplate. For warranty reasons, use only original replacement parts! ■... -
Page 58: Dismounting And Disposal
The device must not be disposed of with household waste. The device can be returned in accordance with the WEEE Directive 2012/19/EU. For more information: https://www.saier.eu/en/unternehmen/support 2024/07 Operating instructions MPX dosing system 58 / 60... -
Page 59: Appendix
23 – 100xxxxx- xxxxxxxx x products, x machines, xxxxx ml/min 100-240V~50/60Hz; xx VA; Tmax: 40°C SAIER / MPX logo Note: Device is double-insulated UKCA marking Note: Do not dispose of device with household waste! CE marking Type designation... - Page 60 SAIER Dosiertechnik GmbH Gewerbestrasse 71 79194 Gundelfingen Germany Phone +49 761 59252-0 Fax +49 761 58490-9 info@saier.eu 1005469...
Need help?
Do you have a question about the MPX SOLO 7-1 and is the answer not in the manual?
Questions and answers