
Summary of Contents for PowerFlex Liteon 48
- Page 1 Installation Guide Copyright © 2022 PowerFlex Systems, Inc. All Rights Reserved.
-
Page 2: Getting Technical Assistance
This manual contains important instructions for the safe installation, operation, and maintenance of SC48, IC48, and IC48 POS chargers. Unless stated, the Liteon 48 instructions apply to all three models. This guide contains important instructions for the Liteon 48 that must be followed during installation and maintenance. - Page 3 Caution. Changes or modifications to this unit not expressly approved by the party responsible for compliance could void the equipment's warranty. Copyright © 2024-2025 PowerFlex Systems, Inc. All Rights Reserved.
-
Page 4: Table Of Contents
Mounting the Liteon 48 on a wall What’s next Mounting the Liteon 48 on a pedestal Finishing up with cable management Step 3: Inspection Step 4: Validation Installation checklist Appendix A: Technical Specifications Index Copyright © 2024-2025 PowerFlex Systems, Inc. All Rights Reserved. -
Page 5: Getting Started
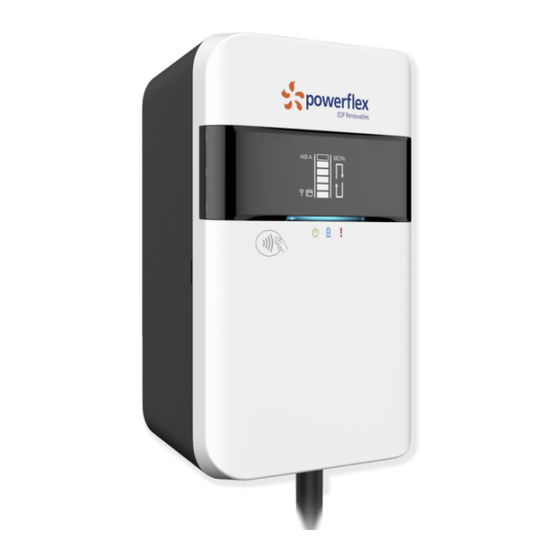
SC48, IC48, and IC48 POS EV chargers. An overview of the Liteon 48 The Liteon 48 is an EV charger designed and distributed by PowerFlex. It has an LCD screen and one preinstalled charging cable for charging EVs. -
Page 6: How To Use This Guide
How to use this guide To complete the installation of a Liteon 48 EV charger to a wall or pedestal, there are four steps: 1. Planning: Inspect the Liteon 48 box contents and gather the tools necessary to install the EV charger. -
Page 7: Setting Up The Liteon 48
Setting up the Liteon 48 Step 1: Planning What’s in the box Liteon 48 chargers are shipped with the following components. Carefully remove from the shipping box (holster is included but not used): Cable for charging EVs Liteon 48 charger... -
Page 8: What You'll Need
What you’ll need You can install the Liteon 48 charger on a wall or pedestal. Check your site plan and before installing the wall-mounted charger, gather the following tools and equipment: M4 T-20 Torx screwdriver (or drill insert) ▪ 4x M6 screws for masonry or #12 tapping screws (for walls with wood studs) (not supplied by ▪... -
Page 9: Step 2: Installation
Most wall-mounting instructions in the next section will apply even if you plan to mount the charger to a pedestal. (So, don’t skip the following section entitled “Mounting the Liteon 48 on a wall.”) Mounting the Liteon 48 on a wall This picture shows how the EV charger, charging cable, and charging nozzle in a mounted holster would look once installed on a wall. - Page 10 To comply with ADA standards, the bottom of the LCD screen should be no higher than 48" ▪ (1.21 m). This means that the bottom of the Liteon 48 charging station should be no higher than 41" (1.04 m). Always verify with regulatory authorities to ensure compliance.
- Page 11 2 (or 4) screws on the wall (R). Note: For best results, use a torpedo level and if only two screws are used, always mark the middle holes. Copyright © 2024-2025 PowerFlex Systems, Inc. All Rights Reserved.
- Page 12 Then drop the charger down so that the locking screw is aligned with the mounting bracket. Note: The protruding lip must be at the top. Copyright © 2024-2025 PowerFlex Systems, Inc. All Rights Reserved.
- Page 13 Splicing wires inside the junction box is not recommended when using a liquid-tight conduit. Note: PowerFlex recommends that the junction box be located within 24 inches of the charger for both types of wiring installation. You can use a single junction box for two Liteon 48 chargers.
- Page 14 Lift the orange tabs on the inside of the charger (L) and insert the ferrules into the terminal block (each is appropriately labeled in the photo). Close the orange tabs and perform a “pull test” to ensure each wire is secure (R). Copyright © 2024-2025 PowerFlex Systems, Inc. All Rights Reserved.
-
Page 15: What's Next
For safety reasons, always make sure to close the front opening of the junction box. Now that the Liteon 48 has been mounted on a wall, go ahead and remove the plastic film over the LCD panel (just above the front cover panel you just attached). In the next section, “Mounting the Liteon 48... -
Page 16: Mounting The Liteon 48 On A Pedestal
Mounting the Liteon 48 on a pedestal Note: The mounting instructions for the Liteon 48 charger on a pedestal are nearly the same as those used in mounting a charger to a wall (see the previous section “Mounting the Liteon 48 on a wall”). - Page 17 Installation notes specific to pedestal mounts: PowerFlex recommends that the base of the station should be between 48" and 58" (1.219 m ▪ to 1.473 m) from the ground. To be ADA compliant, the bottom of station’s LCD screen panel should be no higher than 48"...
-
Page 18: Finishing Up With Cable Management
At the end of a charging cable is a charging connector that is inserted into a vehicle for charging. For safety reasons, the charging connector should be hung up when not in use. Instead of the holster included in the Liteon 48 box, two holsters are offered by PowerFlex. Direct holster Z holster Both holsters come with two sets of screws to be used depending on where it will be installed. - Page 19 Place the retractor and the washers on the bolts and secure by tightening the nuts with a wrench socket. Note: If mounting on a pedestal, use the four short bolts to secure the cable retractor. PowerFlex does not recommend installing the retractor on drywall or plasterboard. Copyright © 2024-2025 PowerFlex Systems, Inc. All Rights Reserved.
- Page 20 Give the cable slack to the bottom of the charger (not shown in the picture): Ensure the cable is not twisted between the charger and the cable clamp. It is possible to mount two charger units onto one pedestal facing opposite directions. Copyright © 2024-2025 PowerFlex Systems, Inc. All Rights Reserved.
- Page 21 Before proceeding to the next step … Confirm that the Liteon 48 charger is securely mounted to a wall or pedestal. ▪ Perform a quick verification that all cables to the charger enclosure are fully connected.
-
Page 22: Step 3: Inspection
Step 3: Inspection Inspection is performed once the entire PowerFlex system is ready to be energized, commissioned, and validated. Inspection is where installation information is recorded and a request for commissioning with PowerFlex is initiated. PowerFlex uses a customized mobile app, available from either Google Play or Apple Store, called FastField Forms (FFF). -
Page 23: Step 4: Validation
Step 4: Validation Once the Liteon 48 charger information is entered along with the rest of the PowerFlex site information is recorded in the app, the installer submits the forms to PowerFlex for review and commissioning. After the approval from PowerFlex, the final validation step should be performed. -
Page 24: Installation Checklist
Done Task Step 1: Planning Identify the location where the Liteon 48 EV charger will be installed at the site Unbox the Liteon 48 and verify everything is included Gather all the required tools before going onsite for the installation Step 2: Installation ... -
Page 25: Appendix A: Technical Specifications
Appendix A: Technical Specifications The technical specifications for Liteon 48 is available online for viewing at: Liteon SC48 and IC48 Liteon IC48 POS Copyright © 2024-2025 PowerFlex Systems, Inc. All Rights Reserved. -
Page 26: Index
Liteon (provided), 3 technical specifications, 21 Z (holster), 3, 14 technical support, ii inspection step, 2, 18 validation step, 2, 18 installation step, 2, 5 wall mounting, 5, 12 junction box, 9 Copyright © 2024-2025 PowerFlex Systems, Inc. All Rights Reserved.
Need help?
Do you have a question about the Liteon 48 and is the answer not in the manual?
Questions and answers