
Related Manuals for NIRx NIRSport 2

Summary of Contents for NIRx NIRSport 2
- Page 1 NIRSport 2 Troubleshooting with Static Phantom Getting Started Guide © 2019 by NIRx Medical Technologies. All rights reserved.
- Page 2 Troubleshooting with Static Phantom Overview Placement of the optodes into the static phantom for testing ........................ 4 Static phantom calibration test ..................................6 Interpretation of the results ....................................8 Example of results when optodes are damaged or misplaced ....................... 10 Appendix ..........................................
- Page 3 Troubleshooting with Static Phantom NIRSport 2 is built to ensure outstanding performance and durability. However, when not handled properly or when exceeding their life expectancy, some parts may not function as expected. All NIRx systems are provided with static phantoms that allow to assess whether the optodes (sources and detectors) are functioning as expected.
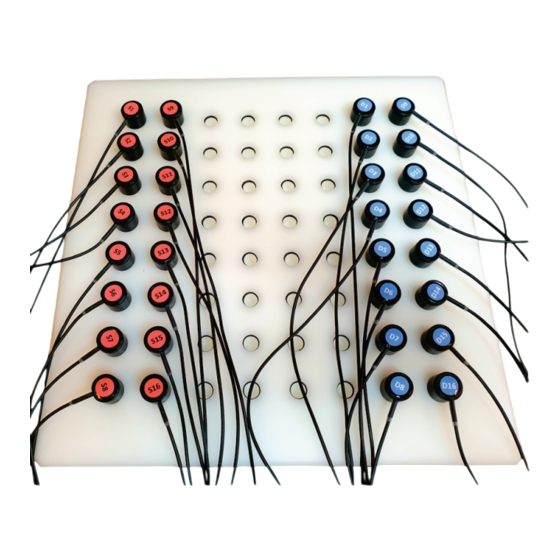
- Page 4 Troubleshooting with Static Phantom Placement of the optodes into the static phantom for testing The static phantom is designed to maximize light transmission and provides 64 slots, in an arrangement of 8x8. These slots accommodate the optodes. 1. The slots of the static phantom have been designed to exactly fit the optodes, so their placement should be straightforward.
- Page 5 Troubleshooting with Static Phantom 2. Place the optodes into the phantom according to the diagrams shown above. Before running any test, it is essential that the phantom is completely shielded from any light source. Each static phantom is provided with a fitting case (similar to the one in the picture below). The phantom needs to be placed in this fitting case, in order to shield the optodes from any possible external light source.
- Page 6 The static phantom provides an optimal environment for light propagation, making it ideal to test correct functioning of the optodes. 1. Make sure to connect all available source and detector bundles to your NIRSport 2 device. 2. Please place the optodes into the static phantom as described the previous section.
- Page 7 Troubleshooting with Static Phantom 6. Aurora per default installs configuration for the phantom test. Select the configuration named Phantom1616 (or Phantom88 for an 8x8 system). If not found, a phantom measurement configuration can be created as explained in the appendix of this document. 7.
- Page 8 Troubleshooting with Static Phantom Interpretation of the results Upon completion of the signal optimization routine, signal quality results for all possible source-detector combinations are presented in a grid-like fashion. It is important that your results do not qualitatively differ from what shown here. Slight quantitative variations might be possible due to ambient light and other testing environment variables.
- Page 9 Troubleshooting with Static Phantom Additionally, dark noise values for each detector are visualized under the ‘Details’ tab. The dark noise measure characterizes a detector’s sensitivity, by evaluating the amplitude and variance of its reading when no input (i.e., zero incident light intensity) is present. The residual signal variation is caused by the noise of the light sensor and the electronics itself, and is a measure of the fundamental optical detection limit of the device.
- Page 10 Troubleshooting with Static Phantom Example of results when optodes are damaged or misplaced In the shown images, all channels formed by Detector 4 indicate critical signal quality. The same can be said about Source 8 in the second image. Such cases, where majority of channels formed by a source or detector indicate critical signal quality, possibly point to a faulty or misplaced optode.
- Page 11 If not found under the list of configurations, a phantom measurement configuration file can be created as follows: 1. Start by creating a copy of any .ncfg configuration file found under C:\Users \Documents\NIRx\Configurations. 2. Rename the file to Phantom.ncfg. Ensure to save the file in the same folder.
- Page 12 Troubleshooting with Static Phantom And modify it by removing the above highlighted part of the montage path: "montage_path": "", 4. Save the changes.
- Page 13 Troubleshooting with Static Phantom This page is intentionally left blank.
- Page 14 Troubleshooting with Static Phantom This page is intentionally left blank.
- Page 15 Troubleshooting with Static Phantom NIRX is a world-leader in providing integrated solutions for fNIRS neuro-imaging. In 1988 we introduced the concept of tomographic imaging (i.e., multi-distance measurements) in dense scattering media based on diffusely scattered light. This approach has since been widely adapted and has served to launch the modern-day field of fNIRS tomography.
- Page 16 Troubleshooting with Static Phantom...
Need help?
Do you have a question about the NIRSport 2 and is the answer not in the manual?
Questions and answers