Advertisement
Quick Links
Koenig Machinery PTY LTD
ABN 93167018117
42/7 Dalton Rd
sales@koenigmachinery.com.au
Thomastown VIC 3074
(03) 9037 0826
K20FMO/C – USER MANUAL
Fiber Marking Machine
Machine – 20/30W Fiber marking machine
1064um laser
230V 50Hz 10amp power
K20FMC - Class 1 laser when door is closed, class 4 laser if door is open.
K20FMO - Class 4 laser
www.koenigmachinery.com.au
Advertisement

Subscribe to Our Youtube Channel
Summary of Contents for Koenig K20FMO
- Page 1 K20FMO/C – USER MANUAL Fiber Marking Machine Machine – 20/30W Fiber marking machine 1064um laser 230V 50Hz 10amp power K20FMC - Class 1 laser when door is closed, class 4 laser if door is open. K20FMO - Class 4 laser www.koenigmachinery.com.au...
- Page 2 Fiber laser – 10.6um wavelength The K20FMO is out open bed machine and is a class 4 laser. The K20FMC is a class 4 laser in a class 1 laser housing. Fiber laser safety goggles must be work during use of class 4 laser machines where no class 1 housing in place.
- Page 3 Koenig Machinery PTY LTD ABN 93167018117 42/7 Dalton Rd sales@koenigmachinery.com.au Thomastown VIC 3074 (03) 9037 0826 K20FMC – Front panel interface K20FMC – Back panel interface www.koenigmachinery.com.au...
- Page 4 Koenig Machinery PTY LTD ABN 93167018117 42/7 Dalton Rd sales@koenigmachinery.com.au Thomastown VIC 3074 (03) 9037 0826 5.0 Operation components Galvanometer: Encases a pair of mirrors reflecting the beam from the fiber optic line down to your workpiece Optical lens: focusses the beam onto the workpiece – requires cleaning using isopropyl alcohol, min every week.
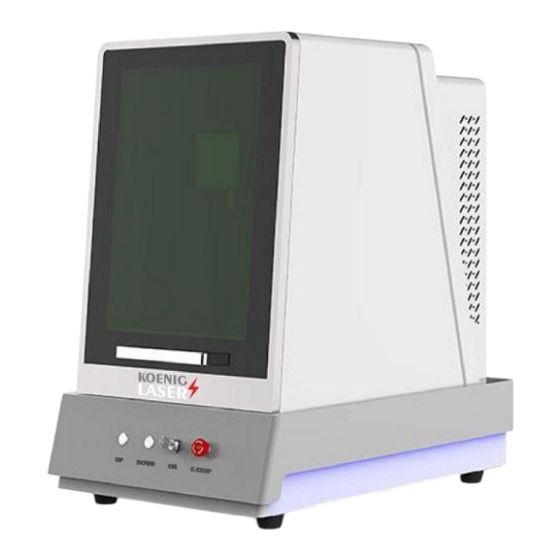
- Page 5 Koenig Machinery PTY LTD ABN 93167018117 42/7 Dalton Rd sales@koenigmachinery.com.au Thomastown VIC 3074 (03) 9037 0826 Turn on the “LIGHT”, “FAN” to assist extraction, then use your keys to engage the laser “POWER”. If the machine does not turn on, the Emergency “STOP” button can be turned clockwise to release. During use of the machine, if there is any error or flame occurring, the emergency stop button can be pressed to interrupt the power to the laser source and disengage the laser.
- Page 6 Koenig Machinery PTY LTD ABN 93167018117 42/7 Dalton Rd sales@koenigmachinery.com.au Thomastown VIC 3074 (03) 9037 0826 7.0 – Set up EZCAD software on your computer 7.1 In your accessory bag you will find the USB storage device. Plug this into your computer. Copy all files from the device into a folder on your desktop.
- Page 7 Koenig Machinery PTY LTD ABN 93167018117 42/7 Dalton Rd sales@koenigmachinery.com.au Thomastown VIC 3074 (03) 9037 0826 7.4 Navigate to the “JZCDriverAllinOne folder” and press OK. The warning sign should now be removed in the device manager. 7.5 Go the Software folder and open the EZcad program file. Click “AGREE” to the terms and conditions.
- Page 8 Koenig Machinery PTY LTD ABN 93167018117 42/7 Dalton Rd sales@koenigmachinery.com.au Thomastown VIC 3074 (03) 9037 0826 7.6 Now EZcad should open as shown below. Please open the PARAM tab. You will have 4-5 image files provided on the USB driver with the machine you MUST copy the settings in each of these images into the PARAM settings. Please note the PORT settings must be matched exactly to ensure the door sensors engages.
- Page 9 Koenig Machinery PTY LTD ABN 93167018117 42/7 Dalton Rd sales@koenigmachinery.com.au Thomastown VIC 3074 (03) 9037 0826 8.0 – Connecting your rotary device Mount your rotary device to the machine tabletop with the orientation desired. Plug the rotary device into the plug shown in the below image.
- Page 10 Koenig Machinery PTY LTD ABN 93167018117 42/7 Dalton Rd sales@koenigmachinery.com.au Thomastown VIC 3074 (03) 9037 0826 1.2 Affix the rotary tool to the bed using the available screws and supplied Allen-key www.koenigmachinery.com.au...
- Page 11 Koenig Machinery PTY LTD ABN 93167018117 42/7 Dalton Rd sales@koenigmachinery.com.au Thomastown VIC 3074 (03) 9037 0826 1.3 Plug the rotary tool into the applicable socket at the rear of the machine 1.4 Open the Rotary Mark function inside your EzCAD software 1.5 Once you have opened the Rotary Mark function you will need to check and edit several important values.
- Page 12 Koenig Machinery PTY LTD ABN 93167018117 42/7 Dalton Rd sales@koenigmachinery.com.au Thomastown VIC 3074 (03) 9037 0826 1.6: First change your split size down to about 0.05mm for typical cylindrical surface 1.7: Second make sure to adjust the part diameter to match the diameter of the part you are engraving...
- Page 13 Koenig Machinery PTY LTD ABN 93167018117 42/7 Dalton Rd sales@koenigmachinery.com.au Thomastown VIC 3074 (03) 9037 0826 1.9: next check your parameters 2.0:once inside this menu check the x-axis is selected and enabled and that rotate axis is active: www.koenigmachinery.com.au...
- Page 14 Koenig Machinery PTY LTD ABN 93167018117 42/7 Dalton Rd sales@koenigmachinery.com.au Thomastown VIC 3074 (03) 9037 0826 2.1 Next ensure that the zero parameters match the picture below. this example shows a configuration for an x-axis rotation matching the rotary tool position below...
- Page 15 Koenig Machinery PTY LTD ABN 93167018117 42/7 Dalton Rd sales@koenigmachinery.com.au Thomastown VIC 3074 (03) 9037 0826 This is considered the primary “x” position, if the rotary tool is facing the opposite direction ensure the “invert” box is ticked in Parameters as shown below If engraving in the Y-axis, simply change the ID to “Y”...
- Page 16 Koenig Machinery PTY LTD ABN 93167018117 42/7 Dalton Rd sales@koenigmachinery.com.au Thomastown VIC 3074 (03) 9037 0826 9. Affixing the part for Engraving Next we look at inserting and affixing the part for our rotary engrave: With the rotary tool secured to the bed and aligned to the centre of the plate, now we need to loosen the teeth of the tool with the T-shaped Allen-Key so we can insert our material www.koenigmachinery.com.au...
- Page 17 Koenig Machinery PTY LTD ABN 93167018117 42/7 Dalton Rd sales@koenigmachinery.com.au Thomastown VIC 3074 (03) 9037 0826 With the tool sufficiently loosened, insert the part into the tool, ensuring that the surface you wish to work is visible and not obscured by the teeth of the tool ` Once the part is in the correct position, tighten each of the fastening points on your rotary tool to ensure the part is secure.
- Page 18 Koenig Machinery PTY LTD ABN 93167018117 42/7 Dalton Rd sales@koenigmachinery.com.au Thomastown VIC 3074 (03) 9037 0826 10. Rotary Engraving your part Once the part is properly secured, align the desired artwork close to the centre of the worksheet in EzCAD A good way to check your alignment is to use the standard “Light”...
- Page 19 Koenig Machinery PTY LTD ABN 93167018117 42/7 Dalton Rd sales@koenigmachinery.com.au Thomastown VIC 3074 (03) 9037 0826 You may see your text or artwork exceed the bounds of the rotation workspace. This may mean your artwork will wrap around itself and overlap, ensure your artwork fits within the bounding box to ensure it doesn’t overlap itself: Note: the rotation axis will always display as if it was rotating on the x-axis, even when the y axis is selected.
- Page 20 Koenig Machinery PTY LTD ABN 93167018117 42/7 Dalton Rd sales@koenigmachinery.com.au Thomastown VIC 3074 (03) 9037 0826 Whilst inside the rotary mark menu double check that your settings match those describe in part 1.5. Once this is done select “light” and the rotary device should rotate to the starting position of the engrave. If this doesn’t line up as you except you can manually rotate the tool to the desired position, or change the setting describe in part 1.5.
- Page 21 5. Clean the lens with isopropyl alcohol wipes once per week at a minimum. If dirt or dust builds up on the lens it may damage the lens coating Equipment is equipped with accessories at the factory: Foot Switch one Total Power Cord one rotate the work desk one (optional) Inner hexagon Wrench one (annex) Straight ruler one If found missing accessories, please contact Koenig Machinery www.koenigmachinery.com.au...
- Page 22 Koenig Machinery PTY LTD ABN 93167018117 42/7 Dalton Rd sales@koenigmachinery.com.au Thomastown VIC 3074 (03) 9037 0826 K20FMO – Enclosure Assembly and Installation Guide www.koenigmachinery.com.au...
- Page 23 Koenig Machinery PTY LTD ABN 93167018117 42/7 Dalton Rd sales@koenigmachinery.com.au Thomastown VIC 3074 (03) 9037 0826 Step 1) Unpack the package contents and ensure all parts are Step 2) Decompress the enclosure and slot the enclosure accounted for. box into the recess on the bed frame. (Ensure the enclosure box is seated in the correct orientation with the “TOP”...
- Page 24 K20FMO (The door is to sit flush with the face of the K20FMO with the bed and secure it down using the x4 M3*10 bolts.
- Page 25 Koenig Machinery PTY LTD ABN 93167018117 42/7 Dalton Rd sales@koenigmachinery.com.au Thomastown VIC 3074 (03) 9037 0826 Step 10) In EZCAD open the Param settings, then in the “PORT” Step 9) Insert the extraction duct up through the back of the Tab, change the “Door IO”...
Need help?
Do you have a question about the K20FMO and is the answer not in the manual?
Questions and answers