Advertisement

Wearing The Device

The Basics

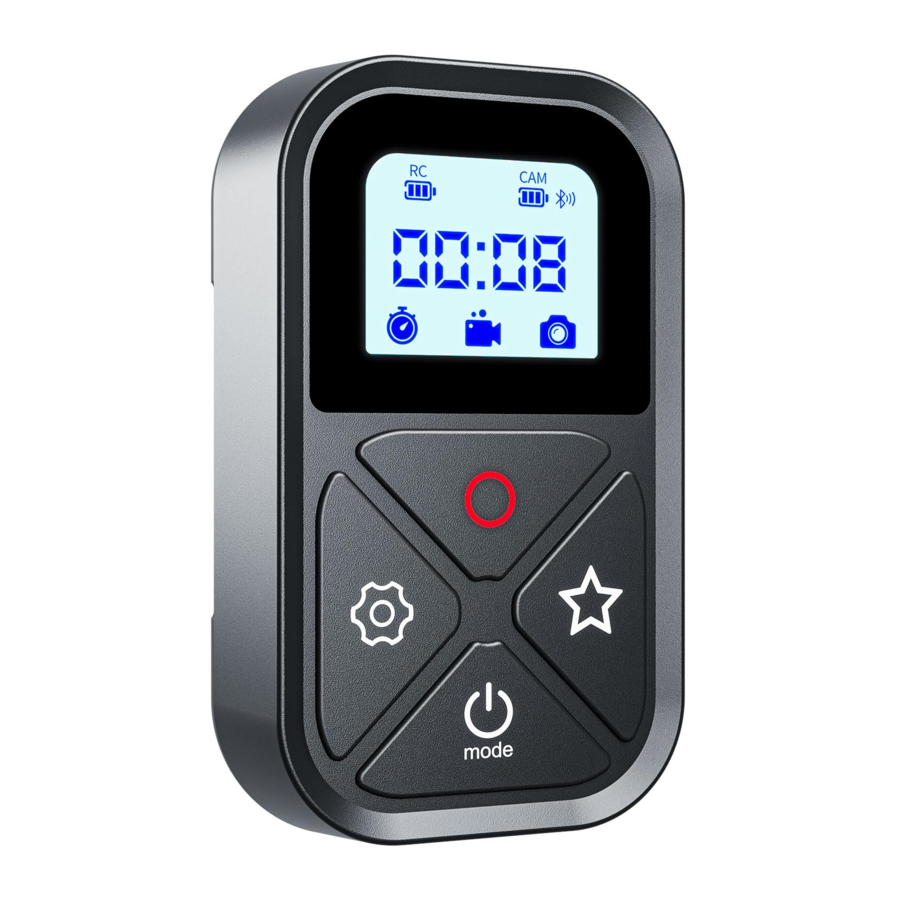
LCD Display

Button
 | Shutter/Select Button | ||
 | Shoot photo, turn on/off recording | ||
 | Enter phone pairing mode, only photo function in phone mode, Bluetooth name is "T-10" | ||
 | Star Button When in the three main modes "Video", "Photo", "Time lapse" | ||
 | Set the current main mode to "Quick mode" | ||
 | Enter to the "Quick mode" | ||
 | Mode Button [Power/Mode Switching] | ||
 |  |  | |
| Power On | Power Off | Mode Switching | |
| (After pairing, you can control the camera on and off) | |||
 | Setting Button [Pairing, small mode switching] | ||
 | The camera switches among the sub-modes. | ||
Pairing
 | The remote control enters pairing mode, and the Bluetooth indicator flashes |
 | Select Connections > Connected Devices > Remote Control. Put the camera into pairing mode. Wait for a successful pairing message to appear on the camera screen. |
- If the pairing fails, select Reset Connection in the camera settings and repeat the process.
If the camera has already been paired, you don't need to pair it again when you connect the remote control next time, just make sure the wireless connection of the camera has been turned on, and it will be connected automatically after a few moments.
When the camera is not used for a long time, the wireless connection may be turned off completely, so please unplug the camera battery and plug it back in to activate the wireless connection.
Pair up to 5
- Cameras mode
In the state of the first camera connected, long press the [pairing button 3 seconds remote control Bluetooth [indicator] flashing, you can connect the second camera and so on, the maximum number of connected 5 - Status Display
The display status of the first camera connected - Power On/Off
All the connected cameras can be controlled at the same time to [On/Shutdown]
Charging

Plug the charging cable into the charging slot. Connect the other end of the cable to a computer or other USB power source
 | 2.5h |  | 10h |

- When charging, the screen lights up and the power indicator starts to work
Electricity Level
| Remaining Power | CAM Display | RC Display |
| 0~5 | Side Blinking | Side Always On |
| 5~24 | Side Always On | |
| 2~49 | 1/3 Power | 1/3 Power |
| 50~74 | 2/3 Power | 2/3 Power |
| 75~100 | Full Power | Full Power |
Documents / ResourcesDownload manual
Here you can download full pdf version of manual, it may contain additional safety instructions, warranty information, FCC rules, etc.
Advertisement


Need help?
Do you have a question about the 11 and is the answer not in the manual?
Questions and answers