Advertisement
ABOUT THE PRODUCT
This 4-Channel Video Wall Controller distributes one HDMI or DVI device (computer, laptop, DVD player, console etc.) into maximum 4 displays to form a large dynamic image screen.
QUICK START

- Connect 1 HDMI and/or 1 DVI Input Source
- Connect up to 4 HDMI Display Devices
- Plug in External Speaker/Soundbar (Optional)
- Plug in 12V Power Adapter
- Power on the Controller
TECHNICAL SPECIFICATIONS
HDMI Version
HDMI 1.4
HDCP Version
HDCP 1.4
Supported Input Video Formats
3840 x 2160p @ 25Hz/ 30Hz
1920 x 1080p @ 25Hz/ 30Hz/ 50Hz/ 601-lz
1920 x 1080i @ 50Hz/ 60Hz
Supported Output Video Formats
1920 x 1080p @ 60Hz
Supported Audio Format
PCM 2.0
Power Adapter
Input - AC (50HZ, 60HZ) loov-240V
Output - DC 12V 2A
REMOTE CONTROL

Input Switch
Select between HDMI or DVI input.
Brightness
Decrease or increase image brightness.
Contrast
Define or reduce underexposed parts of image.
Sharpness
Adjust image blurring issues to highly sharpened issues.
Colour
Change image chroma.
Tint (G/R)
Change image tint between green and red.
180º Flip
Rotate output image.
Bezel
Bezel compensation.
Mode
Switch between modes: 2x2, 1x2, and Loop. Loop allows you to switch between display modes.
FEATURES
180º Rotation
Supports 180 Degree Rotation for Outputs 1 & 2.
- Without this adjustment feature; Screen logo border (Thickest edge) can obstruct image and viewing quality. This feature allows you to install your displays in an orientation that has the thinnest edges.
Example of 2x2 orientation

Before - Thick mid-border layout - After displays are installed in desired layout; use function on remote.

*Reference connection guide
Press the specific output buttons until images are fully unified.


Edge Mask
Due to the physical border on all screens; 2x2 mode will display images to the constraints of screens (fig. 1).

Fig. 1 Standard Distorted image With and without screen borders mage edges are separated
Edge Masking will correct the bezel issues and align your image edges to create a seamless visual experience (fig. 2).

Fig. 2 Edge Mask - Corrected image with and without screen borders mage edges are aligned
Bezel and Image Edge Adjustment

On your remote press either + or —to close in or separate image edges in order to achieve results depicted in Fig. 2.
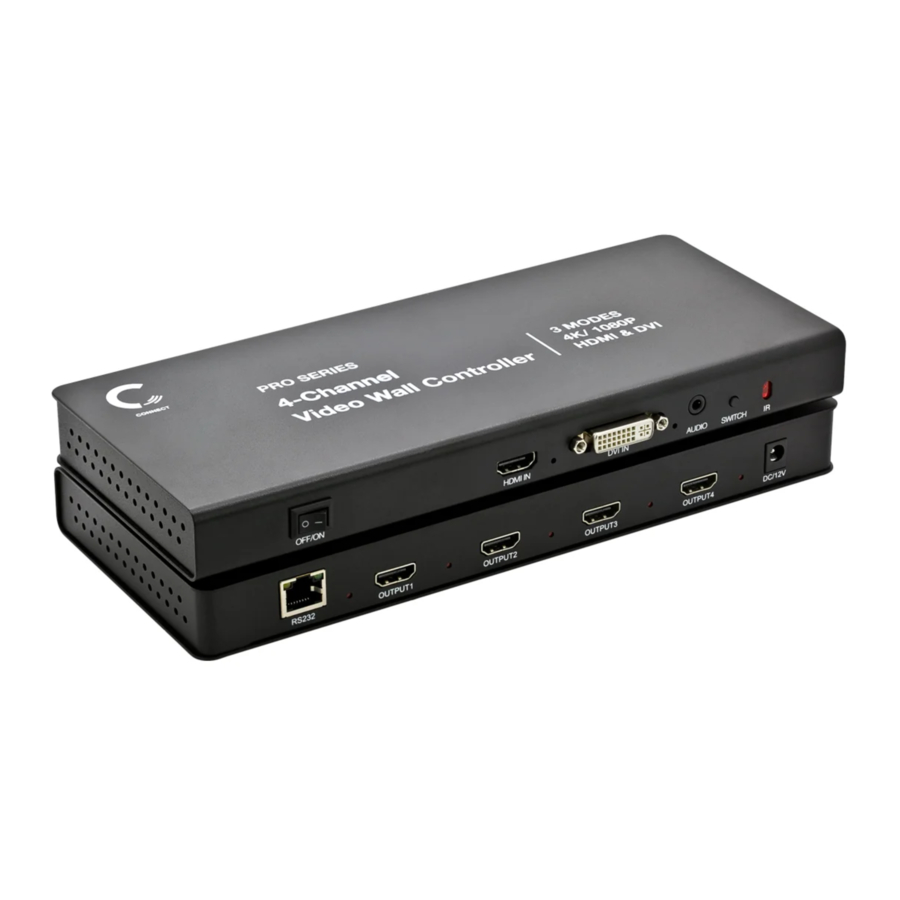
OVERVIEW

- Power Switch
- HDMI Input
- HDMI Input Signal Indicator
- DVI Input
- DVI Input Signal Indicator
- 3.5mm Audio Output
- Input Switch
- Infrared Sensor
- Firmware Update Connection
- HDMI Output Signal Indicators
11-14. HDMI Outputs
15-16. Power Indicator & Socket
CONNECTION GUIDE
Option 1
*Out = Output port on the product unit

Option 1
*Out = Output port on the product unit

Option 3
*Out = Output port on the product unit

CASCADING
2x4 - 8 Channels
3 units of Video Wall Controllers are required

2x8 - 16 Channels
5 units of Video Wall Controllers are required

 Note: Lower screen diagram is set as if you are facing video wall. Refer to Unit Key.
Unit 2 will output image display starting on the left, followed by outputs of units 3, 4, & 5.
CUSTOMER SUPPORT
info@expertcom.com
(562) 630 - 3002
Office Hours Mon to Fri 9-5 pm. PST
Documents / Resources
References

Download manual
Here you can download full pdf version of manual, it may contain additional safety instructions, warranty information, FCC rules, etc.
Advertisement

Need help?
Do you have a question about the PRO Series and is the answer not in the manual?
Questions and answers