Advertisement
Table of Contents
Contents
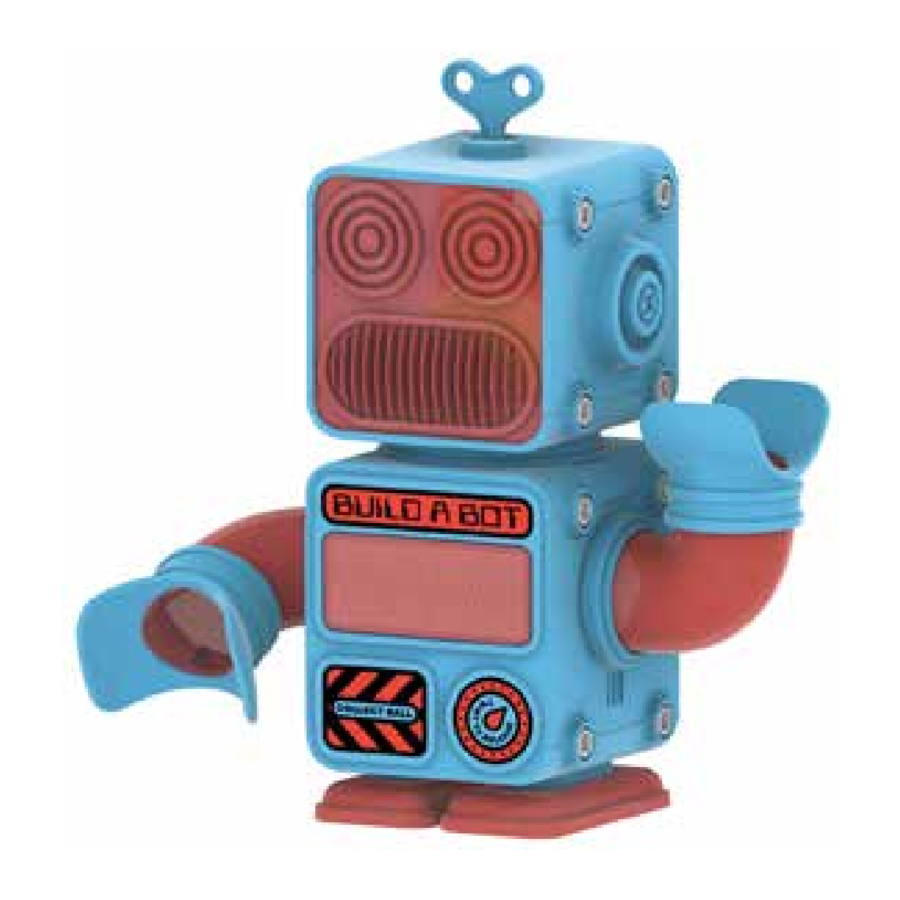
Discovery MINDBLOWN Manual
SAFETY WARNINGS
- Adult supervision and guidance is required.
- Use this item only for its intended purpose.
- Thoroughly inspect products before every use. If the product appears worn, frayed/splintered, cracked, or broken in any manner, discontinue use and discard immediately.

CHOKING HAZARD – Toy contains small balls. Not for children under 3 years of age.
CONTENTS

HOW TO BUILD

- Use the clockwork-inspired wrench to tighten the bolts – no other tools required!
- ImageTurn the wrench clockwise to tighten bolts.
- ImageTurn the wrench counterclockwise to loosen bolts.

Do not overtighten or force the bolts. You could break the bolts or the robot!
ASSEMBLY
- Line up each foot (x2) to the bottom body plate and attach with the bolts.
![]()

- With the 3 cutout lines facing the robot's feet, line up the side body plate (L) to the L-side of the bottom body plate and attach with the bolts. Repeat for the side body plate (R) to the R-side of the bottom body plate.

- Insert the left arm into the side body plate (L) and secure from the outer side by twisting an arm holder clockwise. Repeat for the right arm on the side body plate (R).
![]()

- Slide the left hand onto the left arm and the right hand onto the right arm. Check the slots in the hands and make sure they match the picture. The hands will click into place.

- With the decals facing out and in the correct directions, slide the front body plate and back body plate into the grooves in the side body plates. Place the capsule conveyer gear on top making sure to line up the ramp built into the top body plate with the opening in the right arm. Attach with the bolts.

- With the circles facing out, line up each side head plate (x2) to the holes in the bottom head plate and attach with the bolts in the bottom holes only.

- With the face markings facing out, slide the face plate into the grooves in the front of the side head plates. With the hole at the top, slide the back head plate into the grooves in the back of the side head plates. Place the top head plate on top and attach with the bolts. After the bolts are tightened, place the wrench in the hole on the top head plate for a pretend clockwork key.


PLAY

Insert the capsules through the back of the robot's head.

Twist the arm 3-4 times in 70-80° to dispense capsules.

Open each capsule to nd mini robots parts and then build them all!
For customer support, please visit www.mscustomercare.com or call 1-800-374-2744.
Documents / Resources
References
Download manual
Here you can download full pdf version of manual, it may contain additional safety instructions, warranty information, FCC rules, etc.
Advertisement

Need help?
Do you have a question about the MINDBLOWN and is the answer not in the manual?
Questions and answers