Advertisement
- 1 Welcome to Sydney
- 2 How to follow this guide's instructions
- 3 Get to know your phone
- 4 Installing the battery
- 5 Removing the battery
- 6 Charging the battery
- 7 Inserting your SIM card
- 8 Inserting a memory card
- 9 Switching your phone on/off
- 10 Setting the backlight time
- 11 Locking and unlocking the screen
- 12 Using the touchscreen
- 13 Understanding the icons
- 14 Making and receiving calls
- 15 Sending messages
- 16 Receiving messages
- 17 Message settings
- 18 Adjusting the volume
- 19 Making contacts
- 20 Emailing
- 21 Choosing your profile
- 22 Adjusting the settings
- 23 Connectivity
- 24 Restore factory settings
- 25 Touchscreen calibration
- 26 Call history
- 27 Call settings
- 28 Using Bluetooth
- 29 Everyday tools
- 30 Keeping your fifes
- 31 Using applications
- 32 Media tools
- 33 Taking pictures
- 34 Filming videos
- 35 Choosing your camera settings
- 36 Internet options
- 37 Find a WLAN (wireless local area network)
- 38 Understanding exposure to radio frequency (RF) energy
- 39 Keeping you and your phone safe
- 40 Documents / Resources
Welcome to Sydney
Your new Sydney is a wonderfully intuitive phone to use, with all the advantages of a finger-friendly touchscreen, but none of the hassle of more complex mobiles.
Obviously there's stuff you need to know about how to install things and which button does what. So that's exactly what this guide is about — making everything crystal clear.
And yes, we agree that the safety bits are a bit boring... BUT (and as you can see, it's a BIG 'BUT') they're really worth reading for your own peace of mind. For instance, did you know that your phone has a label that changes colour if the phone or battery gets wet? No? We didn't either... Not until we read this illuminating guide.
As ever, if you've got any questions, don't hesitate to get in contact on 450 from Orange Mobile or 07973100450 from a non-Orange phone. We're always here to help (apart from those short breaks when we sleep and eat).
Take care and have fun.
How to follow this guide's instructions
In this guide, the steps you need to take to perform a task, or reach a menu, are shown in a straightforward condensed form, with arrows taking you from one to another. For example: Settings > Phone settings > Time and date.
When you're asked to 'press' key, it means pressing and releasing it immediately. Or if you're Using the touchscreen, a 'press' becomes a 'tap'.
And the instruct; on to 'hold' a key, means you should press the key for at least two seconds before releasing it.
That's it. Now it's time to...
Get to know your phone


Installing the battery
If you want, the lithium ion battery can be used straight from the pack. It should have a little charge in it. If not, see 'charging the battery' below.
- Pull the battery cover from the little notch on the bottom corner and remove the cover.
![]()
Remove the battery cover - Insert the battery by aligning the gold-coloured contacts with the contacts in the battery Sot.
- Push down the battery down into place.
![]()
Push down the battery - Replace the battery cover and close it gently until you hear a click.
![]()
Replace the battery cover


Removing the battery
- Make sure that your phone is switched off.
- Remove the battery cover.
![]()
Remove the battery cover - PUI the battery up and out.
![]()
Pull up the battery from here


Charging the battery
Your phone is powered by a rechargeable battery. For maximum battery performance, it is recommended that you first use up the battery power and then charge it completely. A new battery's full performance is achieved only after three complete charge and discharge cycles.
- Connect the USB end ef the cable to the plug cable.
- Then connect the other end to the right side of your mobile phone as shown in the diagram.
- Plug the charger into a mains socket and switch it or.
- Switch off and unplug the charger when the phone is fully Charged — as indicated by the screen's battery icon.
![]()

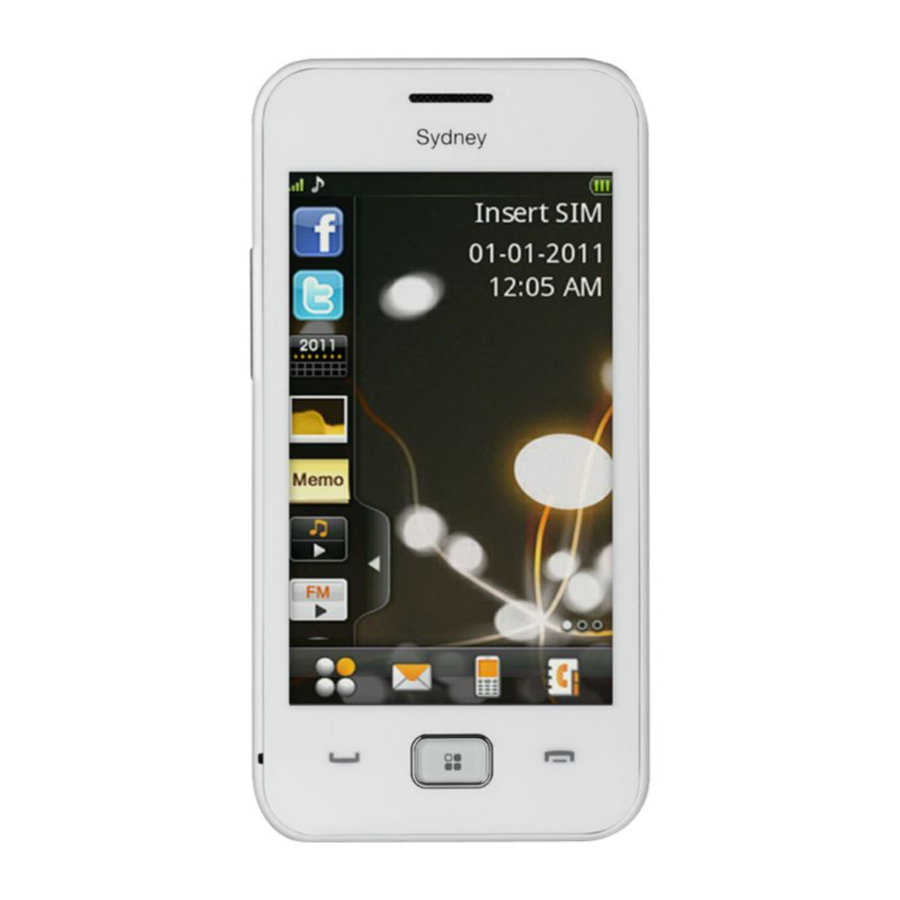
Inserting your SIM card

Try not to bend, scratch, or touch the SIM card's metal surface. It may damage the information stored on it.
Make sure the phone is switched off and the charger is disconnected from the phone.
- Remove the battery cover.
- Remove the battery if it's already installed.
- Slide the SIM into the slot as shown below with the gold contacts facing downwards.
- Replace the battery.
- Replace the back cover.
To remove the SIM. simply reverse the process.
 Note: If you already have contacts on your SIM card they can usually be transferred.

Inserting a memory card
A memory card expands the storage space for audio/video files and photos, etc on your phone.
- Remove the battery cover.
- With the metal contacts facing downwards, slide the memory card into the slot.
To remove the card, simply reverse the process.

Note: Don't remove the memory card or switch off your phone while transmitting or storing data. You could lose data and damage your phone or the card.
Switching your phone on/off
Once the SIM and battery have been installed (provided it's got a bit of charge), you're ready to go. Hold down the Power key and your phone will switch on. Holding it down again will switch the phone off.
If you don't use your phone for while, it 'goes to sleep' to save battery power. Just press the Power key, Volume keys or Center key to wake it up.
Setting the backlight time
Go to Menu > Settings > Phone settings > Misc.settings > LCD backlight. If the phone is not used within the time you choose, the screen will dim automatically.
Locking and unlocking the screen
Locking the screen will stop you from making unintentional 'in-pocket' calls, etc. Out it doesn't stop you from answering an incoming call as normal.
Go to Menu > Settings > Security settings > Auto keypad lock where you choose the length of standby time before the screen locks. Then, if the phone isn't operated within that time, the screen will lock. Alternatively, press the Power key to lock the screen in standby mode. To unlock the screen, drag the key icon in the bottom left corner of the screen from left to right.
Using the touchscreen
There are two basic rules for using the Sydney's touchscreen:
- Tap any application to open it.
- Drag your finger up or down to scroll.
Tap the  icon in the standby mode, end the Menu will appear. Or press the Center key.
The Menu gives you a choice of the following: files, contacts, application, calls, messaging, media, tools, settings, profiles, FM radio, camera, services, WIFI.
Understanding the icons
| icon | icon | ||
 | signal strength |  | now SMS (text), .. Blinks when message box full |
 | GPRS & EDGE |  | New MMS(picture message) |
 | roaming |  | call forward |
 | Bluetooth |  | missed call |
 | outdoor |  | alarm clock set |
 | meeting |  | battery charge |
 | silent |
Making and receiving calls
- Call from standby: press the Send key. Then tap in the number you wart to cal and press the Send key.
- Call from the phone book: go to Contacts. Search for the person you want to call, and press the Send key.
To make an emergency call: You don't need credit or even a SIM card. You just need to be in area with network coverage from any network provider. In the UK the emergency services can be reached on 999 or 112.
- To answer a call: press the Send key.
- To end a call: press the End key.
During a car, you can select Options where you can choose to:
- Use the speakerphone (h-free).
- Put a call on hold.
- Make a conference call.
- Open applications, such as Messaging and Phone book.
Sending messages
You have choice between text messages (SMS) and multimedia messages (MMS). The default rnessage type is text.
Texting
Go to Menu > Messaging > Write message where you can type it out. You have a choice how you write a message — using predictive text, normal single key typing, lower case, upper case, etc. To make that choice go frorn Write message > Options > Input method.
Sending an MMS
If you went to change to MMS (a media message), either press Options > Switch to MMS or select Options and choose from Add picture/Add sound/Add video/Add subject.
- To add new slide, select Options > Slide options.
- To insert an attachment, contact number, contact name, template or bookmark, go to Options > Advanced.
- To enter the recipient's number or add it from your contacts, select Options > Send to.
- To change the status of recipient from "To" to "Cc" or "Bcc", select Options > Change to Cc or Change to Bcc.
- To save for sending later then select Options > Save for a text or Options > Save to Drafts for an MMS.
AII done and ready to send? Then tap Options > Send.
Receiving messages
Your phone will alert you with a ringtone, prompt, or the new message icon  or
or  ...depending on what alert is currently set on your phone.
- Select View to see the message,
- While the message is open, use Options to reply, delete, or forward the message. You can also call or text the sender back.
In Messaging, tap on...
- Inbox to see received messages.
- Drafts to view unsent messages.
- Outbox to check messages that are waiting to be sent.
- Sent messages to look at messages that have been mailed.
- Templates to see available message templates.
Message settings
You can choose how messages are sent and received:
- For texts (SMS) go to Menu > Messaging > Message settings > Text message.
- For multimedia messages (MMS) go to Menu > Messaging > Message settings > Multimedia message.
Adjusting the volume
When you're on a call, listening to a song or watching a movie, just press the Volume keys (or the left side of your phone) to adjust the sound levels. They also control the volume of your ringtone and ail other sound effects.
Making contacts
There are some numbers that you're likely to call again and again. So it makes sense to add them to your phonebook. Just tap  in the bottom right corner of the phonebook screen to add a new contact.
Here are the other things you can do...
- Save number to contacts
Save a number that you've just used, or the number of someone who's contacted you - Quick search
Tap the contacts text box and enter the first letter of the name you want. - Delete one record
To delete someone from your Contacts list, first select the name, then select Options > Delete. - Copy record
Select Options > Copy to copy to file, phone or SIM. - View memory status
Select Options > Phonebook settings > Memory status.
Tip: Tap the text field on the screen and the keyboard will appear.
Emailing
The first thing you need to do set up your email account. Once that's sorted, you can choose how to send and receive emails, and where you want to store them for future reference.
Setting up your email account
Go to Menu > Messaging > Email > Email accounts.
- Select Options, and then select New account.
- Enter your email address, protocol, data account, and sender information, etc.
- Activate your email account.
Sending emails
Go to Menu > Messaging > Email > Write email to edit your email.
When you finish writing, select to send and/or save the email,
Receiving emails
If you want to see incoming emails, go to your account, then select Options > Retrieve email.
Storing emails
To select where you want to keep your emails, go to Email > Options > Email accounts > Options > Select storage
Choosing your profile
Here's how you can choose what your phone sounds like, how loud the ringtone it is, or whether you can hear it all, etc.
Go to Menu > Profiles. Then choose from the following: General, Silent, Meeting, Outdoor, My style. To set your favourite profile in My style, go to Options.
The default settings for each profile are preset at the factory. Just select Options > Customize to change them.
Adjusting the settings
You can adjust the various settings of your phone at Menu > Settings. There you have a choice...
Phone settings
Here you can set: Time end date, Schedule power on/off, Language, Input method, Encoding, Display, and Greeting text.
Network settings
This is where you choose how you want to to connect to the internet. There's a choice of four: GSM only, WLAN only, GSM preferred, or WLAN preferred.
You get there via Menu > Settings > Network settings > Preferred mode.
Security settings
Protect your phone from unauthorised use with Menu > Settings > Security settings >...
> Phone lock. Select On/Off to enable or disable.
> SIM lock. You'll need to input your PIN. If SIM lock is currently set to Off, select On, then input the PIN. The same PIN will unlock your SIM card the next time you switch on your phone.
Note: If you incorrectly input the PIN three times in a row, you'll need a PUK to unlock the SIM.
Both the PIN and the PUK may be supplied along with the SIM card. If not, contact Orange.
> Auto keypad lock. Select how much time you want between the phone not being used and the keys/touchscreen automatically being locked to prevent accidental use.
> Change password. Here you can also change PIN and PIN2.
> Certificate manager where you can choose between Auth. certificate and User certificate
Note: You may be required to input the phone password ir some of the security setting interfaces. The default phone password is 1122.
Connectivity
The choice you have here is between Bluetooth, (please see "using Bluetooth" for further details), Conn. Management where you can view internet connection activities, or Data account to set the data account for online use.
Restore factory settings
Enter the phone password to restore to the factory settings. Some personal information might be lost if you use this function, so be careful.
Note: The default phone password is 1122.
Touchscreen calibration
If you feel the touchscreen isn't performing quite as you'd like it to, go to Menu > Settings > Phone settings > Calibration. Complete the calibration according to the onscreen prompts. Tap the centre of the cross until the calibration is completed.
Call history
If you want to know who's called you or who you've called, go to Calls > Call history.
You'll find that your dialed, missed and received calls are saved there. Call history has a limit of 20 calls. As soon as it becomes full, the records of the earliest calls are deleted automatically to make room for the latest ones.
Choose Options to enter the submenu where you can select a call and...
- View the call details.
- Call back.
- Send a message to it.
- Save the number to your contacts.
- Add to blacklist.
- Edit before call.
- Delete from call history.
Finally in Advanced, you car see how long calls have taken, how much they've cost (if network support is available for this), and see the number of text messages made/taken, etc.
Call settings
Go to Menu > Calls > Call settings. There you can choose from...
- Caller ID: see who's calling and tet: others who you are
- Call waiting: switch this on if you want to know where you have another incoming call.
- Call divert: divert incoming calls to another number.
- Call barring: stop outgoing or incoming calls.
- Advance settings: set auto redial call time display and call time reminder, etc
Using Bluetooth
Bluetooth lets devices work with each other over a short distance — about 10 metes — without wires.
You can do lots of things with it — such as transferring files, phone numbers and pictures between your phone and other Bluetooth devices, or connect your phone to a Bluetooth headset.
Go to Settings > Connectivity > Bluetooth. Then select Power to turn Bluetooth on/off.
To connect, both devices need Bluetooth and 'visibility' turned on. So, if you want other Bluetooth devices to 'see' your phone, turn Visibility on. Then go Bluetooth > My device Search new device. All visible Bluetooth devices in range will be shown. Choose the one you want to Pair with.
Enter a password (up to 16 characters), and then press OK. When the opposite party enters the same password, the connection will be established. (Sometimes devices ere paired automatically without entering password.)
Now you're ready to exchange stuff using Bluetooth. For example, if you want to send a contact, find that contact, tap Options > Send business cad > Via Bluetooth, and then select the name of the device you went to send it to.
For hands-free phone conversations or to listen to music, you can use a Bluetooth headset.
Go to Bluetooth > Search audio device and simply select it as above to pair up.
Everyday tools
Your phone comes with a selection of tools to help make everyday life hard tasks easier. Go to Menu > Tools where you'll have the following options:
- Calendar shows the month with the current date highlighted. You can tap on the dates to see what tasks you've set yourself- Go to Options > Add event to set a task.
- Tasks where you can set yourself a reminder to do something at a certain time and date. Press Add to add event.
- Alarm. Here you can view, edit, enable and disable the alarm clock settings.
- World clock to see what lime it is in cities worldwide.
- Notes to make sure you don't forget things.
- Calculator for simple calculations — adding, subtracting, multiplying and dividing. Please note that the calculator has limited accuracy and might round numbers up or down, especially when dividing.
- Currency convener. Enter the type of foreign currency you want to convert to, then select OK and input a figure in the local field. Press OK again.
Keeping your fifes
By going to Menu > Files you can check all the folders in the phone or memory card, create new ones or rename, delete, or sort, etc. The files you download from the internet will be stored in these folders.
Note: When you select Format, the data will be lost, so please be careful with this function.
Using applications
There are applications pre loaded on your phone. To see and use them, tap Menu > Application.
Media tools
You have range of media tools at your disposal. Just tap Menu > Media > to choose from the following:
- Image viewer. This is where you can select and view your pictures, etc. But whatever pictures you want to look at here, they'll have to be saved to the ..\Photos folder on the phone or memory card first. Just tap
![]() then Storage — choosing either phone or memory card.
then Storage — choosing either phone or memory card. - Media player. This tool is for playing the audio and videos files that are stored on your phone or memory card.
- Photo editor. Here you can alter the size, colour, etc of pictures you've taken with your camera cr stored on the phone/memory card.
- Sound recorder. Just tap the red icon to start recording stuff. You can't record calls, but it's good for everything else, like making memos.
- FM radio. Scan the airwaves to find and store your favovrite radio channels, Then listen to them using the headphones. Both for scanning and listening you must have the headphones plugged in, because the headphone wire acts as your radio antenna.
 then Storage — choosing either phone or memory card.
And when someone calls while you're listening to the radio, it'll mute automatically. Which is useful.
Taking pictures
Menu > Camera will take you to where you need to be.
Tap  to take a picture.
Tap  for the camera settings.
Tap  to quit camera mode.
Filming videos
Go from Menu > Camera then tap  and choose video recorder...

Tap  to start the video. Tap
  to pause/restart or
  to save.
Choosing your camera settings
Tap the  to set your camera preferences. You can choose Capture mode, Scene mode, image size...

Internet options
Select Menu > Services > Internet service end you'll have the following options:
- Homepage to go io your homepage.
- Bookmarks to see your saved website addresses.
- Input address to go to a web page by entering the address.
- Last web address to view the last page you visited.
- Recent pages to see a list of pages you recently visited.
- Stored pages to view the pages are which saved to your phone
- Settings to choose your preferred online parameters.
Find a WLAN (wireless local area network)
Go to Menu > WIFI. Select Yes to turn WLAN on. Your phone will search for and list available networks. Highlight the WLAN Network you want and press Options > Connect. If you selected a secured network, YOU will need to enter the correct password. To disconnect from the network, turn off WLAN by pressing Options > Disable WLAN.
Understanding exposure to radio frequency (RF) energy
The Sydney is 3 low power radio transmitter and receiver. When the phone is on, it intermittently receives and transmits radio frequency (RF) energy (radio waves). That energy level varies in order to achieve optimum performance — so it's higher in areas with poor reception and lower in areas with good reception.
Your phone is designed to comply with safety requirements for exposure to radio waves. These requirements are based on scientific guidelines that include safety margins designed to assure the safety of all persons, regardless of age and health.
The guidelines employ a unit of measurement known as the Specific Absorption Rate (SAR). Tests for SAR are conducted using a standardised rnethod with the phone transmitting at its highest certified power level in all used frequency bands.
While there may be differences between the SAR levels of various network operator phone mode's, they are all designed to meet the relevant guidelines for exposure to radio waves.
The SAR limit recommended by the International Commission on Norßonizing Radiation Protection (ICNIRP) is 2.0 W/kg averaged over ten (10) grams of tissue.
The highest SAR value for this model phone tested for use at the ear is 0.951 W/kg (10g).
Keeping you and your phone safe
Before using your phone, please read this information on its safe and efficient use...
Operation
- Keep the phone at least one inch (about 2.5cm) from your body when making or receiving a call.
- Don't touch the antenna when you're on the phone — it'll affect call quality and possibly make it use more power than necessary
- Keep the phone out of the reach of small children. They could hurt themselves.
- Don't use other sharp objects to operate the keys or the touchscreen.
- Don't touch the phone with wet hands because this might give you an electric shock, possibly causing injury or damaging the phone.
- Don't use or leave your phone in a dusty or dirty environment.
Vehicles and driving
- Please obey the traffic laws and regulations on the use of your phone in the country where you are driving.
- If it is legal where you are driving, only make or receive calls using the hands-free feature of the phone.
- If you are not making or taking a legal hands-free call, pull off the road, park and switch off the engine before using your phone.
- Switch off your phone at petrol stations, even if you are not filling your own tank.
- Electronic systems in vehicles, such as anti-lock brakes, airbags, speed control and fuel injection equipment, aren't normally affected by the radio transmissions from your phone. The manufacturer of such equipment can tell you whether it's adequately shielded from radio transmissions. However, if you suspect that problems are being caused by radio transmissions, don't turn on the phone until the problem has been checked out by a qualified technician.
- Don't put your phone in the area over an airbag or where it could be deployed. An airbag inflates with great force and serious injury could result if you place your phone — or any other object, such as hands-free equipment — over it.
Medical
- When your phone is switched on, keep it more than eight inches (20cm+) from a pacemaker. If you have a pacemaker, don't carry the phone in your breast pocket. Also, use your ear furthest from the pacemaker to minimise the potential for interference. If you experience any problems at all, switch off the phone immediately.
- Some people are susceptible to epileptic seizures or blackouts when exposed to flashing lights when, for example, watching television or playing video games. If you've ever had seizures or blackouts, or if you have a family history of such occurrences, please consult your doctor before playing video games on your phone or using any feature that involves flashing lights.
- Hearing aids can be affected by phones. If that's happening to you, consult the hearing aid manufacturer to discuss alternatives.
- If you use any personal medical device, please consult the manufacturer to make sure it won't be affected by RF (radio frequency) energy.
- Whenever you're in a hospital or healthcare facility, pay attention to the restrictions on the use of your phone. Please switch it off if required.
Care and cleaning
- Only use original accessories or accessories approved by your phone's manufacturer. Using unauthorised accessories could affect your phone's performance, damage it, cause injury or break local telecoms regulations.
- Turn the phone off before you clean it. Use an anti-static cloth. Don't use an ordinary dry cloth or electrostatic cloth. Don't use chemical or abrasive cleaners, as they could damage it.
- Your phone can produce an electromagnetic field, so don't place it near magnetic items, such as computer disks.
- Using your phone near electrical devices such as TVs, telephones, radios and personal computers can cause interference. If you're concerned about how your phone might affect them, consult the manufacturers before using your phone.
- High temperatures can shorten phone life. Don't expose yours to direct sunlight or leave it in hot places — like on a radiator or the dashboard of a car parked in the sunshine.
- Keep your phone dry. Liquid may damage it. The colour of the label in the phone will change if the phone or battery gets wet. Then the warranty will become void, even if the warranty hasn't expired.
- Don't drop, knock or harshly treat your phone. It's a sensitive device.
- Don't take apart the phone or its battery.
- Don't store the phone with flammable or explosive articles.
- Don't charge your phone without its battery.
Explosives and inflammables
- Switch off your phone before entering any potentially explosive environments, such as petrol stations, chemical depots or storage facilities.
- Do not remove, install, or charge batteries in explosive environments.
- To avoid possible interference with blasting operations, switch off your phone when you are near electrical blasting caps, in a blasting area, cr any areas where signs ask you to switch off electronic devices.
- Obey all signs and instructions about phone usage.
Flying
- It is forbidden to use your mobile when flying, as it would interfere with the plane's communication systems. Please switch off your phone before take-off. You also need permission from a crew member to use your phone while the plane is on the ground.
- If your phone has en automatic power-on feature, please check that it won't automatically switch itself on during the flight.
Battery use
- Don't short-circuit the battery, as this can cause overheating or fire.
- Don't store the battery in hot places or throwing in a fire. It may explode.
- Don't take the battery apart. could leak chemicals, overheat, explode or ignite.
- If your don't intend to use it for a while, store the battery ir a cool, dry place.
- The battery can be recharged many times, but it will eventually wear out. When the operating time (talk time and standby time) is noticeably shorter than normal, the battery should be replaced.
- Stop using the charger and battery when either get damaged or show evidence of ageing.
- Dispose of the battery according to loca' environmental regulations. Don't throw it in your household rubbish.
- Always use the original rechargeable battery or a battery approved by the phone manufacturer. Using an unauthorised battery could be dangerous and costly damaging your phone and/or causing fi res.

In the unlikely event of a battery leak, keep the chemical discharge well away from your eyes and skin. If it does come into contact with either, immediately flush thoroughly with clean water and consult a doctor.
Documents / ResourcesDownload manual
Here you can download full pdf version of manual, it may contain additional safety instructions, warranty information, FCC rules, etc.
Advertisement


Need help?
Do you have a question about the Sydney and is the answer not in the manual?
Questions and answers