Advertisement
Table of Contents
Contents
Goldwood Acoustic Audio AA5102 Manual
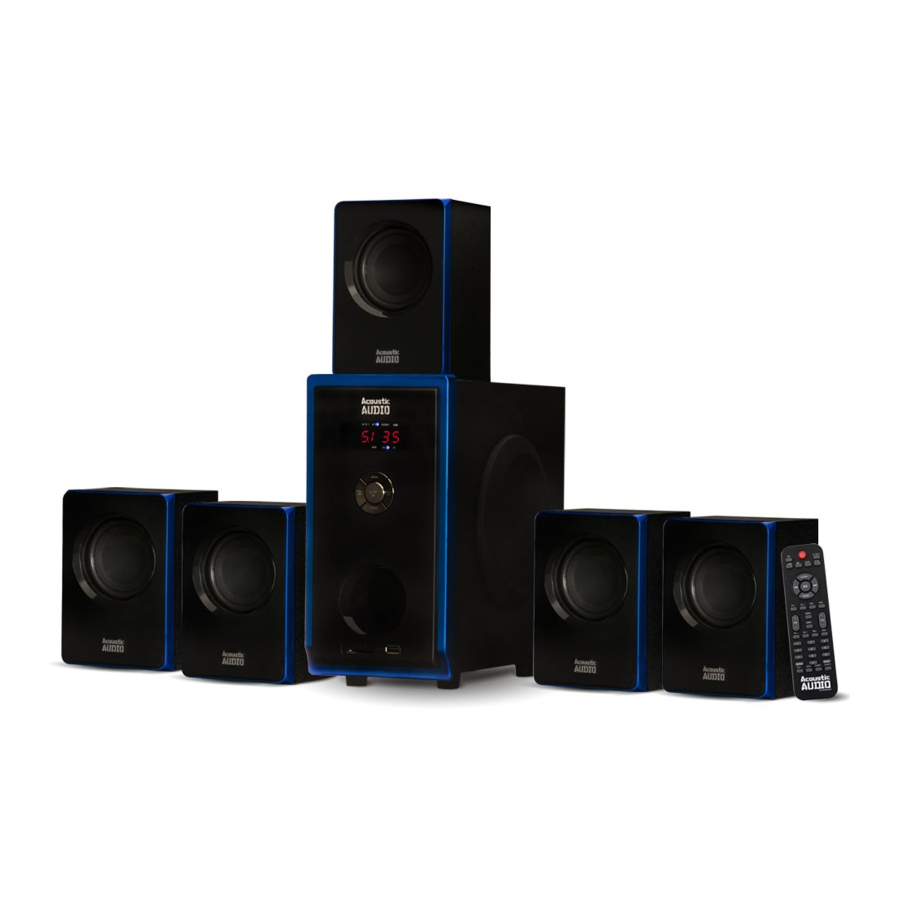
Package Contents
(1) Sub-woofer Cabinet
(5) Satellite Speakers
(1) Remote Control
(1) User Manual
(3) RCA Cables
(1) 3.5mm RCA Cable
Specifications
- Power Audio: 800 Watts Total System Power
- Drive Units: 3" x 5 full range magnetically shielded satellite speakers and powered sub-woofer
- Frequency Response: 40 - 20,000 Hz
- Power Supply: 120V
- Dimensions (W x H x D):
Sub-woofer - 5.5" x 10.75" x 11 "
Satellites - 3.5" x 3.25" x 5.25"
Features
- 5.1 channel multimedia speaker for computer or home system
- Full audio spectrum performances, ideal for your favorite entertainment movies and d igital playbacks such as MP3,
- Specially designed woofer cabinet for bass and resolution
- Comes with remote control and RCA stereo connection cables
Front Panel

- LED DISPLAY
- INPUT
- VOL+/
![]()
- ST-BY/
![]()
- USB INPUT
- VOL-/
![]()
- 5.1/2.1
- SD/MMC CARD INPUT


- LED DISPLAY indicates the chosen input mode, volume level and surround mode.
- INPUTallows you to switch between input modes. A blue light is illuminated under the chosen mode. The display will read "5.1"in 5.1 surround mode and "2.1"in 2.1 mode as well as the volume level which that particular mode is on.
- VOL+/
![]() allows you to both increase the volume (60dB maximum) and skip to the next song in USB/SD mode.
allows you to both increase the volume (60dB maximum) and skip to the next song in USB/SD mode.
- The system is on Stand By (ST-BY)mode when you switch on the power supply. The LED display will read "----". Press "ST-BY/PLAY/PAUSE" button once and it will default to DVD input mode and the LED display will read "5.1 35"; "5.1" being surround sound mode and "35" being the default volume at 35dB. Change back to "ST-BY"in any mode by pressing and holding the "ST-BY/ PLAY/ PAUSE"button. In USB/SD mode, press the "ST-BY/ PLAY/ PAUSE"button once to play or pause the music.
- USBINPUTallows you to connect mobile devices, laptops, tablets etc with a USBcord in order to use the remote control or front panel for function.
- VOL-/
![]() allows you to both decrease the volume (OdB minimum) and go to the previous song in USB/SD mode.
allows you to both decrease the volume (OdB minimum) and go to the previous song in USB/SD mode. - 5.1/2.1 allows you to change between 5.1 and 2.1 modes. In 2.1 mode the system will utilize the sub-woofer and 2 front satellite speakers only, and in 5.1 mode it will utilize the sub-woofer and all 5 satellite speakers.
- SD/MMC CARDINPUTallows you to insert an SD/MMC card with MP3,MP4 and other audible files in order to use the remote control or front panel for function.
Using The Remote Control

- ST-BY
- MUTE
- USB
- SD
- SLEEP +/-
- PREVIOUS
![]()
- FL +/-
- SW 4/
- 0-9 NUMBERS
- REPEAT
- EQ + /-

- 5.1/2.1
- DVD
- AUX
- NEXT
![]()
- PLAY/PAUSE
![]()
- FR
- CEN + /-
- VOL+/-
- SR +/-
- RESET
- DISP
Remote Control Functions
- ST-BY/ON/OFF: Usethe "ST-BY" button to start the system
- MUTE: Use "MUTE"to suspend and activate sound
- USB: Press"USB"to go into USB input mode
- SD: Press "SD" to go into SD input mode
- SLEEP+1-: Press "SLEEP+" a nd "SLEEP-n t o time system to turn off
- PREVIOUS
![]() : In USB/SDmode, use
: In USB/SDmode, use ![]() to play the previous song
to play the previous song - FL +/-: Use "FL+" and "FL-"to control the volume of the front left speaker
- SW +1-: Use "SW-Y" and "SW-Y' to control the volume of the sub-woofer
- SL +1-: Use "SL+" and "SL-"to control the volume of the surround left speaker
- 0-9 NUMBER BUTTONS: In USB/SD mode, use the number buttons to select the desired track
- REPEAT: In USB/SD mode, use "REPEAT "to repeat the track
- EQ +/-: In USB/SD mode, use "EQ+" and"EQ-"to turn equalizer on and off
- 5.1/2.1: Press "5.1/2.1 "to change from 2.1 to 5.1 surround sound
- DVD: Use "DVD" to go into DVD input mode
- AUX: Use "AUX"to go into AUX mode
- NEXT
![]() : In USB/SDmode, press
: In USB/SDmode, press ![]() to play the next song
to play the next song - PLAY/PAUSE: Press "
![]() " to play or pause the music
" to play or pause the music - FR +/-: Use "FR+" and "FR-"to control the volume of the front right speaker
- CEN +/-: Use "CEN+" and "CEN-" to control the volume of the center speaker
- VOL +/-: Use"VOL+" and "VOL-"to control the volume of all speakers
- SR +/-: Use "SR+" and "SR-" to control the volume ofthe surround right speaker
- RESET: Use "RESET"to reset all volume adjustments
- DISP+/-: Use"DISP+"and "DISP-"to adjust the display illumination
Note: if remote loses function, please replace the 2 AA batteries.
Rear Panel

- AUX Input
- FL/FR DVD Input
- CEN DVD Input
- SLISR DVD Input
- CENISW Output
- FL/FROutput
- SL/SROutput
- POWER ON-OFF
- AC Power Cord
System Connections

- Insert all satellite speaker cables into their respective output sockets located at the rear of the sub-woofer.
FL: Front Left Speaker, FR: Front Right Speaker, SL: Surround Left Speaker, SR: Surround Right Speaker, CEN: Center Speaker - For 5.1 surround sound, insert audio cables from your device into the respective DVD speaker sockets located at the rear of the sub-woofer above the satellite speaker sockets.
- For dimensional sound, insert audio cable into respective AUX socket.
- For clearer, stronger FM signal, insert antenna cord into Antenna socket.
- Once you've connected the system in your preferred method, insert the power plug into -120Vwall outlet and switch power to ON.
Note: Please avoid leaving magnetic objects near the system
Documents / ResourcesDownload manual
Here you can download full pdf version of manual, it may contain additional safety instructions, warranty information, FCC rules, etc.
Advertisement


Need help?
Do you have a question about the Acoustic Audio AA5102 and is the answer not in the manual?
Questions and answers