Advertisement
- 1 Features
- 2 Package Contents
- 3 Installation Instructions
- 4 General Operation Instructions
- 5 Maintenance and Care
- 6 Documents / Resources
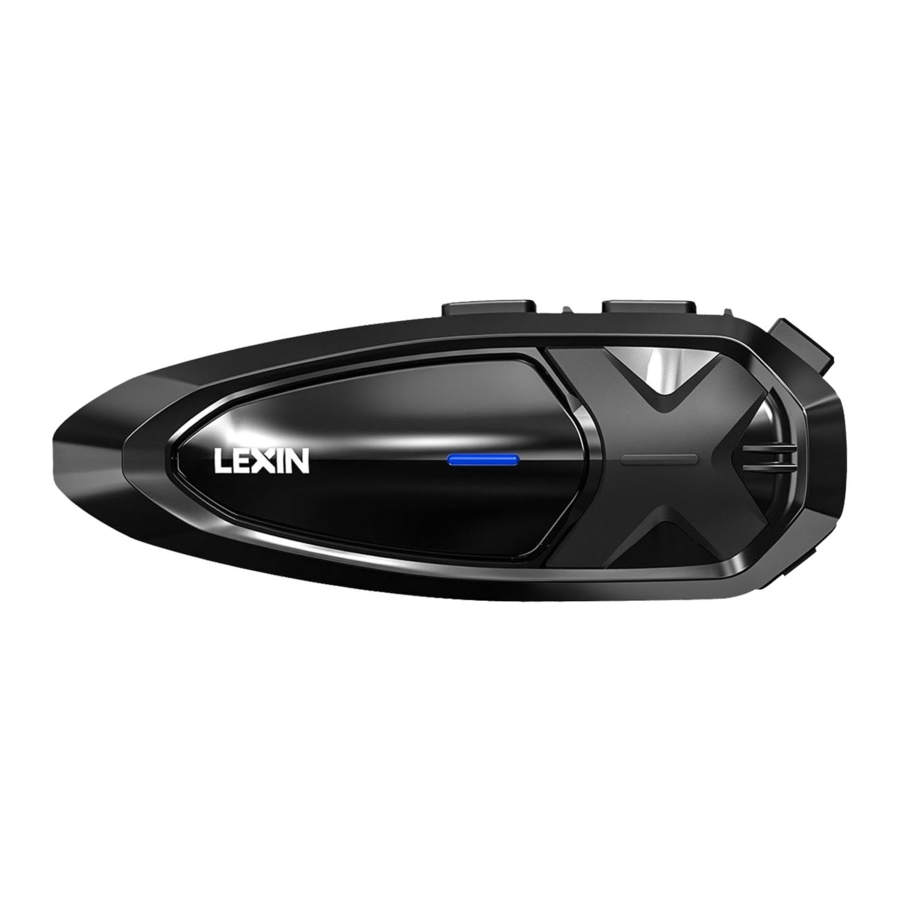
Features
Thank you for choosing the GTX Motorcycle Bluetooth Intercom.
- Bluetooth 5.0
- Connect to GPS Navigation
- Siri and other voice assistants
- USB-C quick charge equipped
- Universal pairing with most Bluetooth Intercom
- 10 ways Bluetooth intercom conference, Up to 2 kilometes/1.2 miles range
- Optional pattern shell
- Play music
- Hands-free calling
- Built-in CVC/DSP noise reduction
The GTX is compliant with Bluetooth Specification V5.0 supporting the following profiles:
Headset Profile (HSP), Hands-FreeProfile (HFP), and Advanced Audio Distribution Profile (A2DP).
It supports universal pairing with almost all Bluetooth headsets on the market.
Headset
The GTX has a high-definition 36MM stereo headset and an outstanding built-in CVC/DSP intelligent noise reduction microphone.
These designs are suitable for most open, face-off, full-face, and off-road helmets.
Battery
The GTX features an 800 mAh battery which can provide the intercom device with 18 hours of music or 13 hours of intercom conference with over one week of standby time.
Function Priority: (The GTX operates in the following order of priority)
- Mobile phone
- Intercom Talk
- Music/GPS
Note: A lower-priority function is a ways interrupted by a higher-priority function. For example, stereo music can be interrupted by an intercom call, intercom talk can be interrupted by an incoming phone call.

PLEASE CHECK ALL LOCAL LAWS AND REGULATIONS REGARDING THE USE OF IN-HELMET SPEAKERS WHILE OPERATING MOTORIZED VEHICLES.
Package Contents
- GTX Main Unit
- Package
- Speaker Pad
- Mounting Bracket
- Boom/Button Microphones
- 36MM HD Ultra-Slim Speakers
- Boom Microphone Holder
- USB-C Cable
- 3M TapeBracket
- User Manual
- Quick Guide
- Pattern Shell

Installation Instructions
Installing Bracket to Helmet
- Clamp installation:
Open the clamp and insert it into the helmet wall. (As shown below)

- lnstall by 3M Tape mounting bracket:
Except for using the clamp mounting bracket, you can also use the 3M mounting bracket instead. First, tear off the protective paper on the back of the 3M tape, then stick the 3M mounting bracket to a suitable position on the left side of the helmet. Press for 15 seconds to allow the glue 24 hours to dry. (As shown below)
![]()


Note: Even though the 3M Tape bracket is provided for convenience, LEXIN recommends using the bracket mounting. The 3M Tape bracket is an option that you may use at your own risk and responsibility. LEXIN does not assume any responsibility for its use.
Mounting the Unit

Align the square column on the back of the main unit with the square hole of the base. Slide the main unit down onto the bracket until it clicks firmly into the bottom portion of the bracket. (As shown)
Remove The Unit

To remove the main unit from the helmet, ensure the headset is not connect with the main unit then remove the main unit and the mounting bracket together (As shown below)
Installing Speakers
Note: The speaker with the shorter wire is for the left ear, and the speaker with the longer wire is for the right ear. This will also enhance the FMradio reception.
- Peel off the speaker 3M tape, stick it into the helmet's inner padding.
- Pushthe speakers firmly against the velcro pads. If the helmet has deep ear pockets, you can use the provided spacers to closer the speakers.
- Hide the wires between the helmet liner and shell.(As shown below)


Note: We are equipped with extra speaker pads. There may be some helmets with deep speaker pockets, so you can add the extra speaker pads to increase the thickness Ofthe speakers to make the speakers closer to your ears.
Installing Microphone
Note: The button microphone and boom microphone can be interchanged between full-face or open-face helmets. Choosing between the two is based on your preference and what fits best in the helmet(s).

Full-face Helmet/Button Microphone
- Locate an areain the center of the mouth section of the helmet to install and adhere half of the microphone velcro pad.
- Attach the button microphone to the attached velcro.
- Connect it to the headphone connector from the left.

Open Face Helmet/Boom Microphone
- Adhere one half of the velcro pad to the base of the microphone and the other half to the inside of the helmet underpadding.
- Adjust the microphone's direction so that the triangular mark points towards your mouth.
- Use the boom microphone holder for additional support to the microphone if necessary. (As shown on the left)

Replace the pattern shell
- Remove the old pattern shell from the unit;
- Tear the 3M tape of the new pattern shell;
- Attach the pattern shell to the unit.
General Operation Instructions

Power On/Off
Power On: Press and hold the Power Button for 1 second.
The LED will blink blue. Voice prompt "Power On "and the current battery life.
Power Off: Press and hold the Power Button for 1 second.
The LED will blink red. Voice prompt "Power Off."
Battery Charging
Plug the USB-C cable into the USB-C port to charge by any DC 5V power supply, such as mobile phone charger, computer, laptop or power bank, Etc. The LED turns red while charging and then turns blue when the main unit is fully charged. It takes about 2.5 hours to charge entirely.
Battery Life Prompt: While in standby mode, double-click the up Button, the GTX will prompt the current battery life.
It will prompt one of five levels: 100%, 80%, 50%, 30%, LOW.
Note: While the battery capacity is below 30%,the device will notify you every 20 minutes until the device powers off. It indicates that around 1-1.5h of use remains.
Pairing the Unit with Bluetooth Devices
Note: A single GTX can connect with two mobile phones and one other Bluetooth device at once. It can automatically connect to your last paired device as long as Bluetooth is enabled or in standby mode without being connected with any devices.
Pairing Phone
- With the unit powered off, press and hold the Power Button for 5 seconds until the led flashes red and blue, to enter pairing mode.
- Go to Bluetooth settings on your phone, Select "GTX". Some mobile phones may need a PIN. Enter "0000" for the PIN if required.
- Please confirm in your phone if the pairing is complete.
Note: The LED will blink blue and voice prompt pairing successfully, indicating the connection is complete.
Pairing Bluetooth GPS Navigation
- While powered off, press and hold the Power Button for about 5s until the LED light flashes blue and red alternately, the device will prompt "pairing" to enter pairing mode. When the pairing is completed, the indicator light will blink blue, and the voice prompt "pairing successful."
- Follow pairing instructions for your specific GPS Navigation to connect to GTX.
Note: You will be able to listen to the sound of GPS navigation once paired.
Phone Calls
Answer Phone Call: Click the Power Button to answer a phone call.
End Call: Click the Power Button to end the call.
Reject Phone Call: Double click the Power Button to reject the incoming phone call.
Answer The Second Call: When the phone is in a call, a second call comes in, click the ntercom Button to answer.
Reject The Second Call: When the phone is in a call, a second call comes in, double-click the Intercom Button to reject.
Voice Dial: While the device is paired with your phone, double-click the Power Button to activate Siri or S-Voice. Speak the name from your phone list to dial.
Preset On/Off Automatic Answering: In standby mode, press and hold the volume Up Button for about 6 seconds, the blue light quickly flashes three times, indicating that automatic answering is on.
In standby mode, press and hold the volume Up Button for about 6 seconds, the red light quickly flashes three times, indicating that automatic answering is off.
Auto Answer Phone Call: When the automatic answering mode is on, it will answer incoming calls after 12 seconds if no one picks up the phone.
Note: The default is to disable the automatic answering. After completing the automatic answering setting, it will save the setting memory, so next time you turn on the device don't need to set it again.
Music And Volume Control
Volume Control
Click the Up/Down Button to adjust the volume.
Note: In music playing status/GPS navigation status/lntercom status, When two audios are output simultaneously, adjust the volume to control the output volume of the two audio signals simultaneously.
If you want to control only one of the audio, Pause one audio output and adjusting the volume of another audio would work well.
(For example, when you are listening to music and in the intercom at the same time when adjusting the audio, the audio of the intercom and music increases or decreases simultaneously. If you only need to adjust the intercom volume, you need to pause the music. If you only need to adjust the music volume, You need to exit the intercom first.)
Note: Individual audio adjustment is not available for phone and intercom working simultaneously.
Play/Pause
With the unit powered on, click the Power Button to play a song.
When the music is playing, click the Power Button to pause.
Note: In multiple audio modes (when in intercom talk and playing music simultaneously), pausing music needs to double click the power button.
Change Song
When the music is playing, double click the UP button for the nextsong, double click the DOWN button for the previous song.
Turn on/off the multiple audio functions
In the standby state, long pressthe down button for about six seconds to activate/inactivate the multiple audio functions.
Note:
- The default isto inactivate the multiple audio functions. You need to reset everything while using.
- The multiple audio functions only support using a 2-ways intercom. It is unusable in more than two ways intercom.
Bluetooth Device Paring & Connection
GTX Bluetooth headsets are able to full-duplex Bluetooth intercom talk, a pre pairing group internal intercom, divided into 4-way intercom mode and multi-way intercom mode, multi-way intercom mode can achieve up to 10 riders to be connected.
Note: Before Bluetooth group intercom pairing, the devices must be in the same mode (four-way intercom mode or multi-way intercom mode). If the devices are not in the same mode, they will not be able to pair.
Clear Bluetooth Pairing Record
Press and hold the Up Button and the Down Button at the same time for 2 seconds. The indicator light flashes red.
Everytime you turn on the GTX device, the default is 4-way intercom mode, and to switch into the multi-way intercom mode which is for more than five riders (including five riders), in the standby state, you need to long press down button for about 6 seconds, there will be a beep and the indicator light flashes red quickly at the same time. There is no memory function for this operation, the default 4-way intercom mode is used every time you turn on the device, and you need to long press the down button for about 6 seconds to switch it into multi-way intercom mode every time when you need it.
Note: Prior to pairing units for communications before riding, we strongly suggest that existing connections be cleared from unit. To clear existing connections, Press and hold the Up Button and the Down Button at the same time for 2 seconds. The indicator light flashes red, all previous connections will be cleared from the unit.
Note: When 3-10 units are paired, due to the connection restriction only two of the units can connect with the mobile phone the other units will not be able to connect with the mobile phone.
2-4 Ways Device Pairing And Connection
The following pairing operations apply to Bluetooth group pairing parties of 2-4.

In the standby mode, press and hold the Intercom Button on all units, until the LED quick flashes red and blue. Voice prompt "pairing".

Click the Intercom Button on first unit to search other units, voice prompt "searching", and the LED light flashes blue quickly and the first unit will prompt pairing successful" then the other units prompt "searching", and about 6s later will prompt "pairing successful".
Once the pairing is complete, the LED will blink blue slowly on all units.
Start The Intercom Talk:
Once the pairing is successful, click the Intercom Button on one of the units to start an intercom talk. When in intercom mode, the LED light of all connected units will blink purple.

Exit The Intercom Talk:
Click the Power Button on any one of these units to make the device temporarily disconnect the current intercom. Click the intercom Button on any one of these units again to resume the intercom talk.

Note: Double click the Up Button to exit Bluetooth pairing mode. The device will return to standby mode.
5-10 Multi-Ways Device Pairing And Connection
Everytime you turn on the GTX device, the default is 4-way intercom mode, and to switch into the multi-way intercom mode which is for more than five riders (including five riders), in the standby state, you need to long press down button for about 6 seconds, there will be a beep and the indicator light flashes red quickly at the same time. There is no memory function for this operation, the default 4-way intercom mode is used every time you turn on the device, and you need to long press the down button for about 6 seconds to switch it into multi-way intercom mode every time when you need it.
The following pairing operations apply to Bluetooth group pairing parties of 5-10.
Note: Before Bluetooth group intercom pairing, the devices must be in the same mode (four-way intercom mode or multi-way intercom mode). If the devices are not in the same mode, they will not be able to pair.

To active the 5-10 Multi-Ways Intercom mode, in the standby mode, press and hold the Down Button for 6 seconds until the LED flash red on ALL units.

In the 5-10 Multi-Ways Intercom mode, press and hold the Intercom Button until the led quick flashes red and blue. Voice prompt "pairing'.

Click the Intercom Button on first unit to search other units, voice prompt "searching", and the LED light flashes blue quickly and the first unit will prompt "pairing successful" then the other units prompt "searching", and about 6s later will prompt "pairing successful.
Once the pairing is complete, the LED will blink blue slowly on all units.
Start The Intercom Talk:
Once the pairing is successful, click the Intercom Button on one of the units to start an intercom talk. When in intercom mode, the LED light of all connected units will blink purple.

Exit The Intercom Talk:
Click the Power Button on any one of these units to make the device temporarily disconnect the current intercom. Click the intercom Button on any one of these units again to resume the intercom talk.

Note: Double click the Up Button to exit Bluetooth pairing mode. The device will return to standby mode.
Universal Pairing
Pair With Another Bluetooth Intercom Headset
- With the unit powered on, press and hold the GTX intercom for 1 second, the indicator light flashes blue and red alternately, the voice prompts "pairing".
- Follow your other Bluetooth device pairing instructions to enter pairing mode.
- Click the Intercom Button on GTX to the other device, The LED light will flash blue and voice prompt searching.
- After the pairing is complete, the led light flashes blue, and the voice prompts "pairing successful"
- Double click the Intercom Button to start the intercom talk. The led light will flash purple.
- In the intercom conference, click the Power Button to quit the intercom talk.
Note: Mutiple audio function cannot be used when using Universal Pairing.
Maintenance and Care
The GTX should be treated with care, and the following suggestions will help maintain your warranty:
- Do not use or store the device in dusty or dirty environments. Moving parts and electronic components can be damaged.
- Do not store the device in high heat areas. High temperatures can shorten the life of electronic devices, damage batteries, and warp or melt certain plastics.
- Do not store the device in cold temperature areas. When the device returns to its average temperature, moisture can form and damage electronic circuit boards.
- Do not attempt to open the GTX case.
- Do not drop or knock the device. Rough handling can break internal circuit boards and fine mechanics.
- Do not use harsh chemicals, cleaning solvents, or strong detergents to clean the device.
- Do not paint the device. Paint can clog the moving parts and prevent proper operation. These suggestions apply equally to the headset, main unit, speaker-microphone clamp unit, and power charger.
Watch Instruction Video Online
Subscribe to our Youtube channel @lexinmoto, and find "GTX" instruction videos.
Lexin Electronics Inc.
1 (800) 380 - 8428
www.lexin-moto.com
Backed by 2-Year Warranty
For technical support:
tech@lexinmotorcycle.com

@lexinmoto
Documents / Resources
References
Download manual
Here you can download full pdf version of manual, it may contain additional safety instructions, warranty information, FCC rules, etc.
Advertisement

Need help?
Do you have a question about the GTX and is the answer not in the manual?
Questions and answers