Advertisement
- 1 Key Diagram
- 2 Button & Port Introduction
- 3 How to Transfer Music or Video
- 4 Music
- 5 Videos
- 6 Gallery
- 7 EBook
- 8 Recorder
- 9 FM Radio
- 10 Clock
- 11 File transfer
- 12 Calendar
- 13 WIFI
- 14 Bluetooth
- 15 Settings
- 16 FAQ
- 17 Common faults and Solutions
- 18 Specification
- 19 Warning
- 20 Contact us
- 21 Documents / Resources
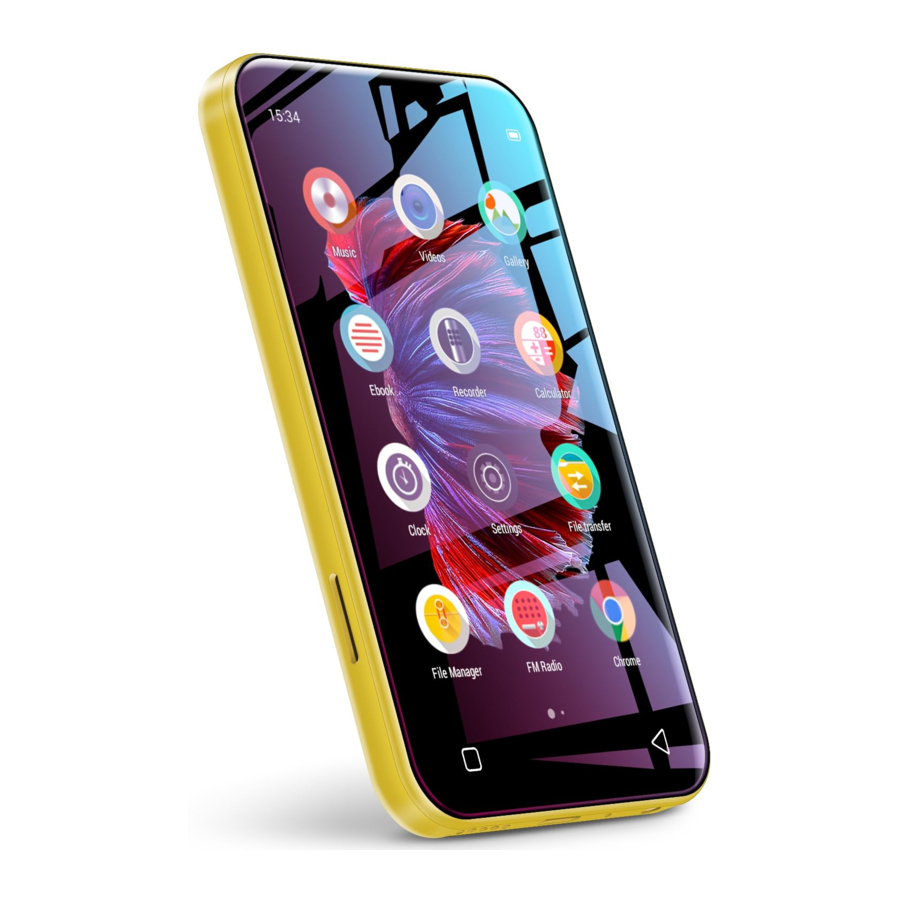
Key Diagram

Button & Port Introduction
Power:
- In shutdown state, press and hold for 3 seconds to turn on.
- In power-on state, long press for 3 seconds to activate the shutdown options: Power off, Restart, Airplane mode.
- Short press to turn off / on the screen.
Volume +/-: Press +/- to turn up/down the volume.
USB-C: Connect type-c cable for charging and file transfer.
Restart: Long press for 3 seconds with the pin, the device will be reboot.
Back: Click to come back to the previous page.
Home: Click to come back to homepage. Long press to open the background process management (Recently used apps), swipe left/ right to remove the selected process.
SD slot: Expand storage of the device, maximum support 512GB TF / Micro-SD card.
3.5mm output: Connect your headphones or external speakers as audio output.
How to Transfer Music or Video
Transfer from your computer
For Windows:
- Use the included USB cable to connect the player to your computer. The computer will automatically recognize the device and install the driver. After the installation is successful, Click "My Computer", you will find an MTP device named "Q5" in the list of devices and drives, click on it to access the player's internal/external SD card and its folders.
- Copy the downloaded music or videos, e-books and other files from your computer and paste them into the folder here, just like using a normal USB flash drive.
For MacOS:
- Please download and install the MTP device file transfer software. The recommended software is as follows:
OpenMTP: https://openmtp.ganeshrvel.com/
MacDroid: https://www.macdroid.app/ - Launch the installed OpenMTP or MacDroid software and follow the prompts to connect the player to the Mac device. You will find the device named "Q5" (or "MX2") and all its folders in the device list of the software.
- Copy the downloaded music, videos, e-books and other files from the Mac device and paste them into the target folder of the device "Q5" (or "MX2").
Transfer from your phone
For Android:
Transfer music or videos from Android smartphone to the player requires the MiniShare app. Please scan the following QR code to download and install MiniShare.

- Android phone ⇒ Q5 Player
- Click the "File transfer" icon on the desktop of the Q5 player to open the MiniShare App. And click the
![]() icon in the middle of the window to switch to Send/Receive mode, and then click the "Receive" icon, and the device will start hotspot and pop up a QR code for scanning.
icon in the middle of the window to switch to Send/Receive mode, and then click the "Receive" icon, and the device will start hotspot and pop up a QR code for scanning. - Open the MiniShare app on Android phone, also click the
![]() icon in the middle of the window to switch to Send/Receive mode, and click the "Send" icon, then select the music and videos to be transferred, and click the "Send" button that pops up below. Next, you can find the avatar and name of Q5 player in the search radar, click it to establish a connection and start transferring files (If you have set a hotspot password, you will be asked to enter it).lf not found in the search radar, you can also click the "Scan QR Code" button below to activate the camera scanning, and scan the QR code of Q5 player to establish a connection, and then start to transfer files.
icon in the middle of the window to switch to Send/Receive mode, and click the "Send" icon, then select the music and videos to be transferred, and click the "Send" button that pops up below. Next, you can find the avatar and name of Q5 player in the search radar, click it to establish a connection and start transferring files (If you have set a hotspot password, you will be asked to enter it).lf not found in the search radar, you can also click the "Scan QR Code" button below to activate the camera scanning, and scan the QR code of Q5 player to establish a connection, and then start to transfer files.
- Click the "File transfer" icon on the desktop of the Q5 player to open the MiniShare App. And click the
- Android phone ⇔ Q5 Player
- Click the "File transfer" icon on the desktop of the Q5 player to open the MiniShare app. And click the
![]() icon in the middle of the window to switch to Create Group/Join mode, and then click the "Create Group" icon, and the device will start hotspot and pop up a QR code for scanning.
icon in the middle of the window to switch to Create Group/Join mode, and then click the "Create Group" icon, and the device will start hotspot and pop up a QR code for scanning. - Open the MiniShare app on Android phone, and also click the
![]() icon in the middle of the window to switch to Create Group/Join mode, click the "Join Group" icon. Next, you can find the avatar and name of Q5 player in the search radar, click it to establish a connection and start transferring files (If you have set a hotspot password, you will be asked to enter it). If not found in the search radar, you can also click the "Scan QR Code" button below to activate the camera scanning, and scan the QR code of Q5 player to establish a connection, and then start to transfer files.
icon in the middle of the window to switch to Create Group/Join mode, click the "Join Group" icon. Next, you can find the avatar and name of Q5 player in the search radar, click it to establish a connection and start transferring files (If you have set a hotspot password, you will be asked to enter it). If not found in the search radar, you can also click the "Scan QR Code" button below to activate the camera scanning, and scan the QR code of Q5 player to establish a connection, and then start to transfer files.
Tips: In the Create Group/Join Group mode, multiple devices are allowed to join the same group to transfer files between each other.
- Click the "File transfer" icon on the desktop of the Q5 player to open the MiniShare app. And click the
 icon in the middle of the window to switch to Send/Receive mode, and then click the "Receive" icon, and the device will start hotspot and pop up a QR code for scanning.
 icon in the middle of the window to switch to Create Group/Join mode, and then click the "Create Group" icon, and the device will start hotspot and pop up a QR code for scanning.
For IOS:
Since IOS is a closed source system, the music stored on the iPhone cannot be transfer directly to the Q5 player you must first export the music to your computer from your iPhone with iTunes or other third-party software (such as iTools), and then transfer to the Q5 player from your computer (please refer to the " transfer from your computer" section).
* The pictures and videos the Photos App can be downloaded directly to the Q5 player. Please refer to the FAQ section (see "File Transfer")
Music
Know The Main Window of Music App
Click the Music app on the player's desktop to enter the main window. Here, there are 4 commonly used tabs for you to customize the function menu of the app, and manage songs and playlists. As below:
![]() Including User login, Function menu, Settings, etc.
Including User login, Function menu, Settings, etc. - Import Music Via WiFi: (only applicable to models with WiFi)Import music in batches from your computer and cellphone via WiFi. The player and the sending device must be under the same wifi.
- Music scan: Scan music in all folders or specific folders. Different scanning rules can be selected.
- Equalizer: Enable or disable equalizer, you can choose Pop, Blues, Classic, Jazz, Rock, Dance, Metal, Voice, Custom, etc.
- MSEB: enable/disable MSEB sound adjustment.
- Plugins: Add playback plugins.
- Sleep timer: Set the sleep time from O to 120 minutes, and once the set time is exceeded, it will stop playing music.
- Settings: More setting options can be found here, such as Show lyric, Resume play from last position, Font size, Language, Album cover display, etc.
- Quick guide: Guide you to operate the App
- Exit: Close and exit the music App
![]() Manage your songs according to different categories. For example:
Manage your songs according to different categories. For example: - Title: Show all local songs, including the device internal storage and external SD card. And sort in alphabetical order by default.
- Folder: Show all local folders, including device internal storage and external SD card. You can quickly access the target folder and add songs to the playlist in batches.
*If you want to display only the folders containing music, you can enable the "Filter non-musicnes and folders" Item in Music. - Album: Organize songs by album name
- Artist: Organize songs by artist name
- Genre: Organize songs by their genre type
- Album Artist: Organize songs by album+artist
![]() Manage all your lists, including:
Manage all your lists, including: - Favourite: List all songs marked as Favourite.
- Recently: List those recently played songs
- Playlist: List all playlists you have created. Here you can click
![]() to create a new playlist, or click
to create a new playlist, or click ![]() to import a playlist.
to import a playlist.
![]() Quickly search for Tracks, Artists, Albums or Genres.
Quickly search for Tracks, Artists, Albums or Genres.
Moreover, there are more shortcut menus under each song category to meet your different operating needs. For example:![]() Shuffle all: Click "Shuffle all" everytime, it will refresh the shuffle sequence.
Shuffle all: Click "Shuffle all" everytime, it will refresh the shuffle sequence.![]() : Click this icon under Title or Folder to activate the selection mode, and then click the check box in front of target files one by one to select it. Next, you can do in the shortcut bar at the bottom:
: Click this icon under Title or Folder to activate the selection mode, and then click the check box in front of target files one by one to select it. Next, you can do in the shortcut bar at the bottom:
![]() Enqueue(next track) → Assign the currently selected song as the next track.
Enqueue(next track) → Assign the currently selected song as the next track.![]() Add to playlist → Add the currently selected song to a specific playlist.
Add to playlist → Add the currently selected song to a specific playlist.![]() Send to → Unavailable
Send to → Unavailable![]() Delete → Delete the currently selected song
Delete → Delete the currently selected song
 Including User login, Function menu, Settings, etc.
  Manage your songs according to different categories. For example:
  Manage all your lists, including:
  to create a new playlist, or click
  to import a playlist.
 Quickly search for Tracks, Artists, Albums or Genres.
 Shuffle all: Click "Shuffle all" everytime, it will refresh the shuffle sequence.
 : Click this icon under Title or Folder to activate the selection mode, and then click the check box in front of target files one by one to select it. Next, you can do in the shortcut bar at the bottom:
 Enqueue(next track) → Assign the currently selected song as the next track.
 Add to playlist → Add the currently selected song to a specific playlist.
 Send to → Unavailable
 Delete → Delete the currently selected song
Note: To activate the selection mode under Album, Artist, Genre, Album Artist, long press any item under it.
- Long press any item under Title or Folder, you can:
![]() Enqueue (next track) → Assign the currently selected song as the next track.
Enqueue (next track) → Assign the currently selected song as the next track.![]() Enqueue (last track) → Add the current song to the playback sequence.
Enqueue (last track) → Add the current song to the playback sequence.![]() Add to playlist → Add the current song to the playlist.
Add to playlist → Add the current song to the playlist. ![]() Properties → View the details of the current song
Properties → View the details of the current song![]() Delete track → Delete the current song
Delete track → Delete the current song![]() Show album info → View the info of the album where the song is located.
Show album info → View the info of the album where the song is located.-
![]() Send to → Unavailable
Send to → Unavailable
 Enqueue (next track) → Assign the currently selected song as the next track.
 Enqueue (last track) → Add the current song to the playback sequence.
 Add to playlist → Add the current song to the playlist.
  Properties → View the details of the current song
 Delete track → Delete the current song
 Show album info → View the info of the album where the song is located.
 Send to → Unavailable
Know The Music Playing Window
Click the thumbnail bar at the bottom of the main window to access the music playing window. Here, you can view the album cover, lyrics, details (Samplerate, Bits, Bitrate, etc.), and control the playback process. The following are some commonly used keystrokes.
 | Switch between the linear progress bar and the circular progress bar |
 | Shuffle all Click it to switch to List loop, Loop single, sequential play. |
 | List loop |
 | Loop single |
 | Sequential play |
 | Click to switch to the next song |
 | Click to switch to the previous song |
 | Play/Pause |
 | View the playlist of the current song |
 | Enable shortcut menu: Add to playlist, Equalizer, Show album info, Properties, Obtain lyrics and cover art online |
Videos
Know the video management window
Click the Videos app on the player's desktop to enter the video management window. Here,
- All folders with videos are displayed. Click to open any folder and you can see all the videos in that folder.
- Click the icon
![]() in the upper right corner, you can get more menu options to help you better manage video files.
in the upper right corner, you can get more menu options to help you better manage video files. - Search → Search by the partial or complete video name and quickly locate the target video.
- View → Select the view type and sorting method of the video management window, and what information fields are displayed.
- Select → Activate the selection function to select folders or files and edit them, such as
![]() Mark as,
Mark as, ![]() Delete,
Delete, ![]() Rename, Share, Hide, etc.
Rename, Share, Hide, etc. - Settings → Set various functions and parameters of videos App, such as style, decoding, audio, subtitles, etc. (It is not recommended to modify frequently)
 in the upper right corner, you can get more menu options to help you better manage video files.
  Mark as,
  Delete,
  Rename, Share, Hide, etc.
 Know the video playback window
Click the video you want to play in the video management window to enter the playback window. Here, there are many shortcut buttons for you to watch the video better.
 | Rotate the screen to portrait or landscape |
 | Lock the operation on the window, all keys are invalid in this state. Click it again to restore. |
 | Choose the right decoder, such as HW decoder, SW decoder. |
 | Choose the audio track you want, if available. If you select "Disable", there will be no sound when playing the video. |
 | Click to switch to the next video; Long press, a pop-up menu will let you choose the playback mode: Loop one, Loop all, Shuffle. |
 | Click to switch to the previous video. |
 | Play/Pause |
 | Switch the viewing size: Fit to screen,  Stretch, Stretch,  CROP, CROP,  100% full screen 100% full screen |
In addition, click the icon  in the upper right corner, more menu options will give you more help.
- Speed → Select the "Speed" option in "Play" item to activate the speed adjustment bar, and you can speed up/slow down the playback speed by pressing the +/ keys.
- Background play → Check this option "Background play" in "Play" item, you can continue to operate other applications without exiting the video playback. To return to watching the video, please click the
![]() icon in the lower right corner of the video management window.
icon in the lower right corner of the video management window. - Video → Uncheck this option in "Display" item, the playback screen will be blocked, and only the audio track of the video will be played.
- Screen Rotation → Uncheck this option in "Display" item, the
![]() icon will disappear and you will not be able to rotate the screen.
icon will disappear and you will not be able to rotate the screen. - Video zoom → Click this option, you can change the viewing size, the options are: Fit to screen, Stretch, Crop, 100%, Custom. You can also change the viewing size with GMD gesture control.
- Subtitle → This option allows you to open the downloaded subtitles or search for subtitles online.
- Tools → This option allows you to Share, Delete, and Rename the current video.
 icon in the lower right corner of the video management window.
  icon will disappear and you will not be able to rotate the screen.
Gallery
Know the albums management window
Click the Gallery app on the player's desktop to enter the albums management window. Here,
- All folders with photos are displayed. Click to open any folder and you can see all the photos in that folder.
- The default view mode is "Albums". Ifthe pictures are grouped by location or time, you can also click the icon
![]() in the menu bar at the top of the window to select the view mode of Locations or Times.
in the menu bar at the top of the window to select the view mode of Locations or Times. - Click the
![]() icon in the upper right corner, and click "Select album" to activate the selection menu bar. Then you can select multiple or all albums to share or delete them.
icon in the upper right corner, and click "Select album" to activate the selection menu bar. Then you can select multiple or all albums to share or delete them. - Select one or more albums: Click the album you want to select.
- Select all albums: Click the
![]() icon at the top of the window, and then click the "Select all" option.
icon at the top of the window, and then click the "Select all" option. - Deselect: Click the
![]() icon at the top of the window to deselect.
icon at the top of the window to deselect. - Sharing: After selecting the album, click
![]() or
or ![]() to share by MiniShare or Bluetooth.
to share by MiniShare or Bluetooth. - Delete: After selecting the album, click the
![]() icon, and then select "Delete".
icon, and then select "Delete".
 in the menu bar at the top of the window to select the view mode of Locations or Times.
  icon in the upper right corner, and click "Select album" to activate the selection menu bar. Then you can select multiple or all albums to share or delete them.
  icon at the top of the window to deselect.
  or
or  to share by MiniShare or Bluetooth.
Know the photos management window
Click an folder in the album management window to enter the photos management window. All photos in the folder are displayed here. In this window, you can do:
- Select view: Click
![]() at the top of the window, you can choose "Filmstrip view" or "Grid view".
at the top of the window, you can choose "Filmstrip view" or "Grid view". - Slideshow: Click
![]() in the upper right corner and click "Slideshow" in the pop-up menu to show the photos one by one.
in the upper right corner and click "Slideshow" in the pop-up menu to show the photos one by one. - Group by: Click
![]() in the upper right corner and click "Group by", you can define photos as grouped by location or time.
in the upper right corner and click "Group by", you can define photos as grouped by location or time. - Select item: Click
![]() in the upper right corner and click "Select item" to activate the selection menu bar. Then you can select multiple or all photos and edit them.
in the upper right corner and click "Select item" to activate the selection menu bar. Then you can select multiple or all photos and edit them. - Select one or more photos: Click the photos you want to edit.
- Select all photos: Click the
![]() icon at the top of the window, and then click the "Select all".
icon at the top of the window, and then click the "Select all". - Deselect: Click the
![]() icon at the top of the window to deselect.
icon at the top of the window to deselect. - Sharing: After selecting the photos, click
![]() or
or ![]() to share by MiniShare or Bluetooth.
to share by MiniShare or Bluetooth. - Delete: After selecting the photos, click the
![]() icon, and then select "Delete".
icon, and then select "Delete". - Rotate: After selecting the photos, click the
![]() icon, and then select "Rotate left" or "Rotate right" to rotate the photos left or right in batch.
icon, and then select "Rotate left" or "Rotate right" to rotate the photos left or right in batch.
 icon at the top of the window to deselect.
Edit Photo
Click to open a photo in the photos management window. You can share or edit it as needed.
- Share: Click
![]() or
or ![]() to share to your friends by MiniShare or Bluetooth.
to share to your friends by MiniShare or Bluetooth. - Delete: Click the
![]() icon in the upper right corner, and then select "Delete" to delete the current photo.
icon in the upper right corner, and then select "Delete" to delete the current photo. - Edit: Click the
![]() icon in the lower left corner, or select "Edit" in the upper right menu to open the edit window. Then you can modify the Style, Color Saturation, Shadow, Exposure, Contrast, Stretching, Mirroring, etc. of the current photo.
icon in the lower left corner, or select "Edit" in the upper right menu to open the edit window. Then you can modify the Style, Color Saturation, Shadow, Exposure, Contrast, Stretching, Mirroring, etc. of the current photo. - Rotate: Select "Rotate left" or "Rotate right" in the upper right menu to rotate the current photos left or right.
- Crop: Select "Crop" in the upper right menu, then adjust the size of the crop box, click save to crop the current picture
- Set as wallpaper: Select "Set picture as" in the upper right menu to set the current photo as desktop wallpaper.
- Details: Select "Details" in the upper right menu to view information of the current picture, such as width, Height, Size, Path, Create time.
 icon in the lower left corner, or select "Edit" in the upper right menu to open the edit window. Then you can modify the Style, Color Saturation, Shadow, Exposure, Contrast, Stretching, Mirroring, etc. of the current photo.
EBook
Know the main interface of Ebook
Click the Ebook app on the player desktop for the first time to enter the main interface, and a pop-up window will show the entrances of 5 modules
- Recent list: Manage the books you have read recently
- My Shelf: Manage your favorite books
- My Files: Manage your local and network folders
- Net Library: Manage your online library
- Bookmarks: Manage all Bookmarks, Note, Highlight, etc.
Know the page operation layout
Open a book through the Ebook app for the first time, it will ask you to choose a page operation layout you are used to. There are 11 options in total. It determines the trigger area corresponding to Page up, Page down, Options, Bookmarks on the page when reading. For example, click on the right side of the page to jump to the next page, or click on the middle of the page to pop up the options task bar.
About Options and Reader bar
In the page operation layout, the options function is usually located in the middle area of the page. So when reading, tap the middle of the page to quickly pop up the Reader bar. When the options is triggered for the first time, the app will pop up a window to let you customize the buttons of the reader bar. You can tick the items you need. Using reader bar, you can get a better reading experience.
 Screen Orientation: Switch to horizontal / vertical screen display
 Day/Night mode: Switch to Day theme / Night theme
 Speak: Activate TTS voice reading (Need voice engine support)
 Autoscroll: Activate automatic scrolling, and no need to turn pages manually
 Chapters: Manage the chapters and bookmarks of the book, through which you can quickly click to access the target chapters or bookmarks.
 Bookmark: Add the current page as a new bookmark.
 Brightness: Adjust brightness and enable blue-light filter.
 Font Size: Adjust font size.
 Search: Search for text in the current book.
 Allow tilt device to turn page: Turn on or off the function of turning pages by tilting the device.
 Visual Options: Provide more text and page adjustment options, such as font, font size/color/ style, background color, paragraph spacing, line spacing, etc.
 Control Options: More options for page operation and screen control. Such as defining the action of clicking, sliding, long-pressing, etc.
 Miscellaneous: More reading auxiliary settings, such as full screen mode, screen awake, automatic scrolling mode.
 Options: More page adjustment and control options. It is equivalent to the shortcut button of the menu
  in the upper right corner of the page.
 Shutdown: Exit Ebook
Recorder
Know the recorder app interface
Click the Recorder app on the player's desktop to enter its main operation interface. here, you can do:
 | Start/pause recording |
 | Stop recording. After clicking, you can choose "Discard" or "Save" the current recording. |
 | Play/pause the current recording |
 | Recording list, where the recordings are saved |
Click the  icon in the upper right corner, you can also:
- Voice quality: Select "voice quality", you can set it to "Hight" or "Standard".
- Recording mode: Select "Recording mode", you can set the use occasion for recording, such as Normal, Meeting, Lecture.
FM Radio
Know the FM Radio app interface
Click the FM Radio app on the player's desktop to enter its main operation interface. Here, you can do:
- Channel list. Save all channels that have been searched.
- Quit FM Radio
- Previous channel / next channel.
- Manually adjust the frequency to search for channel
- Add / Remove the current channel to / from favorites. The favorite channels are marked with
![]() in the channel list.
in the channel list.
 in the channel list.
 Click the  icon in the upper right corner, you can also:
- Search: Click to automatically search for channels
- Speaker: Click to switch to the built-in speaker as the audio output (the wired earphones is still required to be connected as the antenna).
- Record FM: Activate the FM recording function.
Clock
Know the Clock app interface
Click the Clock app on the player's desktop to enter clock interface. Here, there are 4 clock-related modules.
 Alarm clock
- Add a new alarm:
Click the![]() icon at the bottom of the window, it will jump to the "HHI' dial by default, move the hour hand on the dial to the target position with your finger and let go. Then it will automatically jump to the "MM" dial, move the minute hand to the target position in the same way and let go. and click "Done".
icon at the bottom of the window, it will jump to the "HHI' dial by default, move the hour hand on the dial to the target position with your finger and let go. Then it will automatically jump to the "MM" dial, move the minute hand to the target position in the same way and let go. and click "Done".
* Click the HH: MM field above the dial to return to readjustment - Add label/Repeat date/Cesium for alarm clock
Click the![]() button under an alarm clock to expand the setting item:
button under an alarm clock to expand the setting item: - Lable → Click "Lable" and enter the label text, click "Ok". It is usually used to indicate the purpose of alarm clock.
- REPEAT → Check the "REPEAT" option, and then click on the day of the week when the alarm does not need to be repeated.
- CESIUM → Click "CESIUM", then select the one you like in the pop-up ringtone library.
- Enable / Delete alarm → Click the
![]() button on the right side of the alarm clock to enable/disable the alarm clock;
button on the right side of the alarm clock to enable/disable the alarm clock;
Click the![]() icon in the lower right corner of the alarm clock to delete the current alarm clock.
icon in the lower right corner of the alarm clock to delete the current alarm clock. - More alarm settings → Click the
![]() icon in the lower right corner of the window, and click "Settings", you can define more basic parameters, such as alarm style, ringing duration, interval duration, volume, etc.
icon in the lower right corner of the window, and click "Settings", you can define more basic parameters, such as alarm style, ringing duration, interval duration, volume, etc.
 icon at the bottom of the window, it will jump to the "HHI' dial by default, move the hour hand on the dial to the target position with your finger and let go. Then it will automatically jump to the "MM" dial, move the minute hand to the target position in the same way and let go. and click "Done".
 button under an alarm clock to expand the setting item:
  button on the right side of the alarm clock to enable/disable the alarm clock;
 icon in the lower right corner of the alarm clock to delete the current alarm clock.
  icon in the lower right corner of the window, and click "Settings", you can define more basic parameters, such as alarm style, ringing duration, interval duration, volume, etc.
  Global City Time Zone
Here, you can add time zones for multiple cities. Click the  icon at the bottom of the window, and then tick the city you want to display. You can find the target city by scrolling the screen or the search button
 Timer
Timer
- Add a new timer
- CIick the number in the numeral dial to set the timer time, and then click Start.
- CIick the
![]() button in the timer list to add and run multiple timers
button in the timer list to add and run multiple timers
- Label a timer
Click on the icon![]() above a timer to add a label to the timer to explain the purpose of the timer.
above a timer to add a label to the timer to explain the purpose of the timer. - Increase the duration of the timer
For a running timer, click the +1' button in the lower left corner to add I minute to it each time. - Stop or Resume timing
Click the STOP button on the timer to pause timing, and then click the STARTbutton to resume timing - Reset a timer
For the timer in the paused state, click the icon![]() in the lower corner to return to the initial state and restart the timer.
in the lower corner to return to the initial state and restart the timer. - Delete timer
Click the icon![]() in the lower right corner of the timer to delete the current timer.
in the lower right corner of the timer to delete the current timer.
 above a timer to add a label to the timer to explain the purpose of the timer.
 in the lower corner to return to the initial state and restart the timer.
 Stopwatch
In the stopwatch window, you can do:
- Start / Stop stopwatch: Click the "START" or "STOP" button in the dial
- Record a point in time: During running, each time you click the icon
![]() in the lower left corner, a time point will be recorded.
in the lower left corner, a time point will be recorded. - Reset stopwatch: Click the button
![]() in the lower right corner of the stopped stopwatch to reset the stopwatch.
in the lower right corner of the stopped stopwatch to reset the stopwatch.
 in the lower left corner, a time point will be recorded.
  in the lower right corner of the stopped stopwatch to reset the stopwatch.
File transfer
Know the main interface of MiniShare
Click the "File transfer" icon on the player's desktop to run the MiniShare app. This app is mainly used for file transfer between mobile phone and Q5 player. On the main interface, you can see the following function icons.

CIick the icon in the upperleft corner, you can do in the pop up window:
- Edit the device avatar: Click the icon
![]() , and click the "Modify" button, then select "Select from gallery". Find the target picture in the gallery and click it (If necessary, If necessary, you can adjust the size of the clipping box to select a part of the picture), and then click the SAVE button in the upper left corner.
, and click the "Modify" button, then select "Select from gallery". Find the target picture in the gallery and click it (If necessary, If necessary, you can adjust the size of the clipping box to select a part of the picture), and then click the SAVE button in the upper left corner. - Edit the device name: Click the default device name or
![]() on the right side of the avatar, enter new name and click OK.
on the right side of the avatar, enter new name and click OK.
*The personalized avatars and names allow you to better identify your device in the search radar: - Name WIFI hotspot: Click the button
![]() on the right of "Name WiFi hotspot with nickname " under "Settings", you can switch the hotspot name from the default d2b68RGRkZGZk to your device's nickname to better identify your device.
on the right of "Name WiFi hotspot with nickname " under "Settings", you can switch the hotspot name from the default d2b68RGRkZGZk to your device's nickname to better identify your device. - Set connection password: Click the button
![]() on the right of "Set connection password" under "Settings", and enter the 8-character alphanumeric password, then click Ok. This makes it necessary for others to enter the password when they want to connect to your device.
on the right of "Set connection password" under "Settings", and enter the 8-character alphanumeric password, then click Ok. This makes it necessary for others to enter the password when they want to connect to your device. - Set default storage: Click the button > on the right of "Default Storage" under Settings, You can specify internal storage or external storage as the default storage for receiving files.
 on the right side of the avatar, enter new name and click OK.
  on the right of "Name WiFi hotspot with nickname " under "Settings", you can switch the hotspot name from the default d2b68RGRkZGZk to your device's nickname to better identify your device.
  Click the icon in the upper right corner, you can get different menu options:
- Connect to Zapya: Guide you how to connect to Android device/Apple device/PC/Windows device
- Set WiFi Options: you can set the WiFi type used to establish the connection as WiFi Direct or WiFi Hotspot, and set a password for the hotspot. And you can also choose whether the WiFi channel is 5G or 2.4G

Click the icon  or
or  in the middle of the window, you can switch the file transfer mode to Send/Receive (one-way) or Group.

Click the " history" button, you can view all historical sending and receiving records.

Click the " Local File" button, you can view the photos, videos, and music in the local folder. Here, you can also quickly share them with friends follow the steps below.
- Click the check-box behind the file to select the photo/video/audio that needs to be shared.
- Then click the "Share" button at the bottom of the window, a QR code will pop up and create a Group named after the device name.
- Next, you have 2 ways to establish a connection to transfer files.
- Scan QR code: For iPhone, please install and open ZapyaGo app on your phone and scan the QR code. Then, click "Go to Settings" to jump to the WIFI settings of your iPhone, and set the currently connected WIFI to the hotspot of Q5 (If you have set a hotspot password, you will be asked to enter it). Then return to ZapyaGo to start transfer; For Android phones, Please install and open MiniShare app on your phone and scan the QR code. The app will automatically start transferring files.
- Join in Group: For Android phones, open MiniShare and click the icon to switch to Group mode, then select "Join Group", you will find the group created by the Q5 player in the search radar, click it to join (If you have set a hotspot password, you will be asked to enter it) and start transfer.
Calendar
In the calendar window, you can:
- Switch calendar view: Click the icon
![]() at the top of the window to switch the view to Day, Week, Month, Agenda.
at the top of the window to switch the view to Day, Week, Month, Agenda. - Add New event: Click the icon
![]() in the upper right corner, select "New event", enter the event name, location, time period, reminder and other information, and then click the "Done" button.
in the upper right corner, select "New event", enter the event name, location, time period, reminder and other information, and then click the "Done" button.
After the event is created, the date related to the event will be marked, so that you can check your itinerary in time. - Clear events: Click the icon
![]() in the upper right corner, select "Clear events", check the events you want to clear, and then click OK.
in the upper right corner, select "Clear events", check the events you want to clear, and then click OK. - Search events: Click the icon
![]() in the upper right corner, select "Search", and enter the keyword of the event, then click
in the upper right corner, select "Search", and enter the keyword of the event, then click ![]()
 at the top of the window to switch the view to Day, Week, Month, Agenda.
WIFI
Click the "Settings" icon on the main interface of the device to enter the settings window:
- Enable/Disable WIFI: Click the ON/OFF switch on the right side of "WiFi" to enable or disable the WiFi function.
- Establish Connection: After enabling WIFI, the device will automatically search for available WIFI hotspots around and display them in the list below. Find and click the target WIFI name in the list to establish a connection (if it is encrypted, you may be asked to enter the WIFI access password) to access the Internet.
- Disconnect WiFi: Click the name of the connected WIFI, and click "Forget" in the pop-up window to disconnect the WIFI.
- Refresh WiFi List: Click the refresh button
![]() in the lower left corner.
in the lower left corner. - Add WiFi Hotspot Manually: Click the + button below, and enter the Network SSID name and password and click "Save".
 in the lower left corner.
 For more WIFI options, please click the icon  in the lower right corner.
Bluetooth
Click the "Settings" icon on the main interface of the device to enter the settings window.
- Enable/Disable Bluetooth: Click the ON/OFF switch on the right side of "Bluetooth" to enable or disable the Bluetooth function.
- Pairing: After enabling Bluetooth, the device will automatically search for available Bluetooth devices around and display them in the list below. Find and click the name of the target Bluetooth device in the list of available devices to pair.
Note: Please make sure that the headphones, speakers or other Bluetooth devices that need to be paired are waiting for pairing. - Disconnect: Click the name of the paired device, and click "OK" in the pop-up window. The device is still in the paired list for you to reconnect at any time.
- Unpair: Click the icon
![]() on the right side of the paired device, and select the "Unpair" option in the pop up window. The device will disappear from the paired list. Here you can also rename the device.
on the right side of the paired device, and select the "Unpair" option in the pop up window. The device will disappear from the paired list. Here you can also rename the device. - Refresh The Devices List: Click "SEARCH FOR DEVICES" below to search for available devices again.
 on the right side of the paired device, and select the "Unpair" option in the pop up window. The device will disappear from the paired list. Here you can also rename the device.
 For more Bluetooth options, please click the icon in the lower right corner.
Settings
- WiFi
Please refer to the "WIFI" chapter. - Bluetooth
Please refer to the "Bluetooth" chapter. - Sound
- Volumes → Set the volume of music, video and other media, set the volume of notifications, and alarms.
- Default notification sound → Set notification ringtone
- Touch sounds →Enable/disable touch screen sounds.
- Screen lock sound → Enable/disable touch screen sounds
- Display
- Wallpaper → You can choose your favorite picture as the wallpaper from the Gallery, Live Wallpapers, Wallpapers
- Brightness → Set the brightness of the screen
- Sleep → Set when in the inactive state for how many minutes/second, the device will automatically sleep to save power
- Font size → Set the font size of the device, the options are: SmaII, Normal, Large, Extra Large
- Storage
Display the remaining space and occupancy of the device's internal storage and external SD card. - Disable App
In order to meet the specific needs of some users, some apps that can be disabled are listed here.
Including FM radio, Recorder, Ebook, Video, Browser.
After clicking the checkbox on the right to tick an APP, the icon of the App will disappear on the desktop. You will not be able to use it unless yw uncheck it.
Tips: This setting does not delete the App from the device it just disables it. - Language & Input
Set device language and keyboard and input method. - Factory data reset
Reset the device to factory settings. - Date & time
Set the date and time of the device, you can use time and time zone provided by the network or custom time. You can also set the date format and time format (12-hours / 24-hours).
How to sync time/time zone automatically by network.- Ensure your device connected to a working Wi-Fi.
- Enter settings → Date & Time → Automatic date & time → Use network provided time.
- Enter settings → Date & Time → Select Automatic time zone.
- Scheduled power on & off
Set the scheduled power on/off time and its repetition rules. Once set and enabled, the device will automatically turn on or off at the set time.
FAQ
Music
- How to create a playlist
Click "![]() New playlist" in the "Playlist" of the list-tab
New playlist" in the "Playlist" of the list-tab ![]() , then enter the name you want, and click Ok.
, then enter the name you want, and click Ok. - How to add songs to the playlist
- Add single: Long press the target track, and select "Add to playlist" in the pop-up menu, Next, Select an existing playlist or click "New Playlist" to create a new playlist for store.
- Add in batch: Click this icon
![]() under Title or Folder to activate the selection mode, and then click the check box in front of target files one by one to select it. Next, Then select "Add to playlist" in the bottom toolbar.
under Title or Folder to activate the selection mode, and then click the check box in front of target files one by one to select it. Next, Then select "Add to playlist" in the bottom toolbar.
- How to view lyrics
Swipe left in the middle of the playing window to switch between the album cover, lyrics page, and details page. Lyrics come from your local.lrc file. If.lrc is missing, you can also click the icon![]() in the upper right corner and select "Obtain lyrics and cover art online" to get.
in the upper right corner and select "Obtain lyrics and cover art online" to get.
 New playlist" in the "Playlist" of the list-tab
  , then enter the name you want, and click Ok.
  under Title or Folder to activate the selection mode, and then click the check box in front of target files one by one to select it. Next, Then select "Add to playlist" in the bottom toolbar.
Videos
- How to fast forward or rewind
- Press and hold in the playing window and drag the progress bar forward or backward to the target osition.
- Click the target position you want to play on the progress bar.
- Can I speed up or slow down the playing speed? How to do?
Yes, you can. Click the icon![]() in the upper right corner of the playing window to open the menu, and select "Play-speed", and then use the +/- key in the pop-up speed adjustment bar to speed up or slow down the playback speed.
in the upper right corner of the playing window to open the menu, and select "Play-speed", and then use the +/- key in the pop-up speed adjustment bar to speed up or slow down the playback speed. - If shuts down unexpectedly during playing, after restarting, can the player continue to play from where it stopped last time?
Yes it can. The player has the feature of memorizing the playing position. When you come back again, the app will ask you to choose "START OVER" or "RESUME". Click "RESUME" to continue play from where it stopped last time. - My video has audio tracks in different languages, such as English, Portuguese, can I choose one of them to play.
Yes. There are several ways to choose or open your audio tracks:- Click the
![]() icon in the play window, and then select the target audio track in the pop-up window
icon in the play window, and then select the target audio track in the pop-up window - Click the
![]() icon in the upper right corner of the playback window, and click "Audio ⇒ Audio track", and then select the target audio track in the pop-up window.
icon in the upper right corner of the playback window, and click "Audio ⇒ Audio track", and then select the target audio track in the pop-up window. - If your audio track is a separate file, you can also click "Audio ⇒ Open", then find its path and open it.
- Click the
 icon in the play window, and then select the target audio track in the pop-up window
 Gallery
- H ow to zoom in and out of pictures
The player provides GMD gesture control function, which allows image zooming through 2 finger gestures.
EBook
- How to select text in the book to copy, annotate, highlight or add special processing?
In the reading page, long press the target text, the app will pop up an option window, you can do:
 | Add background color to selected text |
 | Underline selected text |
 | Add strikethrough to selected text |
 | Add wavy-underline to selected text |
- Copy: Copy selected text
- Highlight: Highlight selected text
- Note: Annotate selected text
- Wikipedia: Jump to Wikipedia to view the selected text.
- Google: Jump to Google to search for the selected text.
Tips:
- You can change the range of the selected text by dragging the cursor:
- You can click on the color block to change the preset color
- To cancel the above text processing, just click the
![]() button in the column.
button in the column.
 button in the column.
 - Can I quickly locate a chapter or page of the book?
Yes it is. You can do it in the following ways:- Click the Options area of the page to trigger the reader bar, and then drag the reading progress bar to the target position, or click < > to jump page by page or chapter by chapter.
- Click the icon
![]() of the Reader bar, and click to select the target chapter or bookmark (if available).
of the Reader bar, and click to select the target chapter or bookmark (if available).
 of the Reader bar, and click to select the target chapter or bookmark (if available).
Recorder
- How to delete/delete in batch recording files
Click the![]() icon to open the recording list, and long-press any recording to activatethe check box, checkthe recording that needs to be deleted, and then click the
icon to open the recording list, and long-press any recording to activatethe check box, checkthe recording that needs to be deleted, and then click the ![]() icon below.
icon below.
 icon to open the recording list, and long-press any recording to activatethe check box, checkthe recording that needs to be deleted, and then click the
  icon below.
FM Radio
- Can I edit the name of my favorite channel
Yes it is. Click![]() to enter the channel list, long press the marked
to enter the channel list, long press the marked ![]() channel, then click "Edit" in the pop-up window, and type in the name you want.
channel, then click "Edit" in the pop-up window, and type in the name you want.
 to enter the channel list, long press the marked
  channel, then click "Edit" in the pop-up window, and type in the name you want.
File transfer
- How to get MiniShare or ZapyaGo App
- For Android Cellphone
Please scan the following QR code to download and install MiniShare.
- For Android Cellphone

- For iPhone
Please search for "Zapya Go" in the App store or scan the following QR code to download and install.


ZapyaGo can only be used to transfer pictures and videos those in the Photos App, not to directly transfer music from iPhone.
- How to transfer files between cellphones and Q5 players
- For Android:
Please refer to the " transfer from your phone" topic in the "How to transfer Music or Video" section. - For IOS:
- iPhone ⇒ Q5 Player
- Click the "File transfer" icon on the desktop of the Q5 player to open the MiniShare App. And click the
![]() icon in the middle of the window to switch to Send/Receive mode, and then click the "Receive" icon, and the device will start hotspot and pop up a QR code for scanning.
icon in the middle of the window to switch to Send/Receive mode, and then click the "Receive" icon, and the device will start hotspot and pop up a QR code for scanning. - Open the ZapyaGo on iPhone, and also click the
![]() icon in the middle of the window to switch to Send/Receive mode, click the "Send" icon, then select the photos or videos to be transferred, and click the "Send" button that pops up below. Next, click "Scan to connect now" in the pop up window to activate the camera scanning function, and scan the QR code on Q5 player.
icon in the middle of the window to switch to Send/Receive mode, click the "Send" icon, then select the photos or videos to be transferred, and click the "Send" button that pops up below. Next, click "Scan to connect now" in the pop up window to activate the camera scanning function, and scan the QR code on Q5 player. - According to the pop up prompt, Click "Go to Settings" to jump to the WIFI settings of your iPhone, and set the currently connected WIFI to the hotspot of Q5 (If you have set a hotspot password, you will be asked to enter it). Then return to ZapyaGo, and the app will starts transfer files to the player.
- Click the "File transfer" icon on the desktop of the Q5 player to open the MiniShare App. And click the
- iPhone ⇔ Q5 Player
- Click the "File transfer" icon on the desktop of the Q5 player to open the MiniShare App. And click the
![]() icon in the middle of the window to switch to Create Group/Join mode, and then click the "Create Group" icon, and the device will start hotspot and pop up a QR code for scanning.
icon in the middle of the window to switch to Create Group/Join mode, and then click the "Create Group" icon, and the device will start hotspot and pop up a QR code for scanning. - Open the ZapyaGo on iPhone, and also click the
![]() icon in the middle of the window to switch to Join mode, click the "Join" icon, Next, click "Scan to connect now" in the pop up window to activate the camera scanning function, and scan the QR code on Q5 player.
icon in the middle of the window to switch to Join mode, click the "Join" icon, Next, click "Scan to connect now" in the pop up window to activate the camera scanning function, and scan the QR code on Q5 player. - According to the pop-up prompt, Click "Go to Settings" to jump to the WIFI settings of your iPhone, and set the currently connected WIFI to the hotspot of Q5 (If you have seta hotspot password, you will be asked to enter it). Then return to Zapya Go, The mutual connection is successfully estab lished. In this way, you can either transfer files from iPhone to the player, or transfer files from the player to iPhone.
- Click the "File transfer" icon on the desktop of the Q5 player to open the MiniShare App. And click the
- iPhone ⇒ Q5 Player
- For Android:
 icon in the middle of the window to switch to Send/Receive mode, and then click the "Receive" icon, and the device will start hotspot and pop up a QR code for scanning.
 icon in the middle of the window to switch to Create Group/Join mode, and then click the "Create Group" icon, and the device will start hotspot and pop up a QR code for scanning.
 In File Manager, you can directly access / manage internal storage and external SD card and all their folders and files. And you can:
 Add new folder
 Search files
Click the icon  in the lower right corner of the window, more menus you can choose.
- Select file or folder
Click this option to activate the selection & editing window. Then you can do:- Select 1 or more files and folders → Click the file or folder you want to select
- Select all files and folders → Clic kthe icon
![]() at the top of the window, and then click the "Select all" option.
at the top of the window, and then click the "Select all" option. - Share → After selecting the files, click the icon
![]() at the bottom of the window to share to your friends by MiniShare or Bluetooth.
at the bottom of the window to share to your friends by MiniShare or Bluetooth. - Copy and Paste → After selecting the files and folders, click the icon
![]() at the bottom of the window to copy files. Then find the folder you want to paste into, and click the icon
at the bottom of the window to copy files. Then find the folder you want to paste into, and click the icon ![]()
- Delete → After selecting the files and folders, click the icon
![]() at the bottom of the window, and click "Ok".
at the bottom of the window, and click "Ok". - Cut and Paste → After selecting the files and folders, click the icon
![]() at the bottom of the window to cut files. Then find the folder you want to paste into, and click the icon
at the bottom of the window to cut files. Then find the folder you want to paste into, and click the icon ![]()
- Rename → Selecta target file or folder, Click the icon
![]() in the lower right corner and select "Rename" to edit the name of the file or folder.
in the lower right corner and select "Rename" to edit the name of the file or folder. - Cancel selection → please click
![]() in the upper left corner to exit the selection window.
in the upper left corner to exit the selection window.
- Hide/Show hidden files
Select "Hide hidden files" option to hide or show hidden files. - Sort
Select "Sort" option to choose the sorting rules of folders and files.
 at the top of the window, and then click the "Select all" option.
  at the bottom of the window to share to your friends by MiniShare or Bluetooth.
  at the bottom of the window to copy files. Then find the folder you want to paste into, and click the icon
 at the bottom of the window, and click "Ok".
 at the bottom of the window to cut files. Then find the folder you want to paste into, and click the icon
  in the lower right corner and select "Rename" to edit the name of the file or folder.
  in the upper left corner to exit the selection window.
Common faults and Solutions
-
The unit can't be charged
In the off state, when the USB cable is connected for charging, the player usually will light up and display the brand logo and remaining battery.
Troubleshooting:
- Check whether it is caused by poor contact.
In most cases, charging failure is caused by poor contact. You can repeatedly plug and unplug the USB cable to test whether the charging can be resumed. If it can be charged at a certain moment, it indicates that there is poor contact. - Check whether USB port is damaged.
Connect the player to a computer with an available USB port by using a proven USB cable. If the fault persists, it indicates USB port of the player has been damaged. - Check if the USB cable is damaged.
- You can replace a proven USB cable to connect the player to check whether it can be charged. If it can, it means that the previous cable has been damaged.
- You can also use the USB cable to try to charge other devices, such as cellphones, to check whether it can charge other devices. If not, it means also that the cable has been damaged.
If it is confirmed that both the USB cable and the charging port are normal, it can be determined that it is the fault of the player itself. Please contact after-sales support for replacement or refund.
Tips: If turned off and not used for a long time (more than 3 months or even longer), the player may not be able to turn on or be charged.
This is usually an illusion caused by the device being in an over-discharge protection state, rather than a real failure. In this case, please make sure to charge it for at least 2 hours before trying to turn it on.
- Nothing happens when the player is connected to computer with USB cable.
Usually, use a USB cable to connect the player to the computer, the top of the player will appear with the icon![]() . And an MTP device named Q5 will appear in the device and drive list of your computer.
. And an MTP device named Q5 will appear in the device and drive list of your computer.
Troubleshooting:- Check whether it is caused by poor contact.
In most cases, such failure is caused by poor contact. You can repeatedly plug and unplug the USB cable to test whether the connection can be resumed. - Check whether the USB port is damaged
Connect the player to a computer with an available USB port by using a proven USB cable. If the fault persists, it means USB port of the player has been damaged - Check if the USB cable is damaged.
- You can replace a proven USB cable to connect the player to Check if the connection can be restored. If it can, it means that the previous cable has been damaged.
- You can also try to use the USB cable to connect other devices. If there is also no response, it means also that the USB cable has been damaged.
- Check whether it is caused by poor contact.
-
FM radio cannot be turned on
 . And an MTP device named Q5 will appear in the device and drive list of your computer.
The FM radio needs to be plugged into a wired headset/headphones as an antenna to turn on. If the headset is plugged in and the fault persists, it is likely that the 3.5mm port is in poor contact. Please replace one headset and try again.
-
I want to delete some unnecessary apps
How to do it?
Long press the App you want to delete on the desktop and drag it to the trash icon  at the top of the window, and then confirm to delete. The Apps you can delete include: FM radio, Recorder, Ebook, Video, Browser.

- Deleting the app is irreversible. Unless you reset the device to factory settings. Please be cautious.
- If you just don't want to use an app for the time being, you can disable it in "Settings--Disable App", instead Of deleting it.
- Some Android built-in APPs cannot be delete or uninstall, such as Music, Gallery, Clock, Calendar, etc.
-
How to take screenshots
Press and hold the volume down button + the power button at the same time for 2 seconds. You can find your screenshots in Pictures--Screenshots in the device storage.
-
How to clear apps running in the background
Long press the Home button of the device, and swipe right one by one in the pop up application list to clear the program.
Specification
Bluetooth version: 4.2
Product Size: 4.2 x 2.4 x 0.5 inch
Weight: 3.7 oz
Screen Size: 4.0 inch
Battery Capacity: 1800mAh Input: 5V=1A
Charging Time: 90 Minutes
Internal Memory: 1G RAM+8GB ROM
Music Playtime: 50 hours
Video Playtime: 10 hours
Expansion slot: Micro SD/TF Card (up to 512GB)
Music format: MP3, WAV, FLAC, APE, OGG, M4A, AAC, WMA, MP2
Video format: AVI, MKV, MPG, MPEG, RM, RMVB, VOB, MOV, FLV, ASF, DAT, MP4, 3GP
Photos format: JPEG, BMP, GIF
Ebook format: EPUB, TXT, PDF, DOCX, FB2, MOBI
Recording format: 3Gpp
FM Receiving Frequency: 87.5 MHz ~ 108 MHz
Warning
- Do not leave the device in an environment where the temperature is too low or too high (below -10°C or above 50°C) for a long time.
Extreme temperature environments will cause the device to deform and shorten the service life of the device; - Do not use the equipment under thunderstorm weather;
- Do not place the device in the water for a long time;
- Do not expose the equipment to the sun for a long time.
Contact us
Email: estron@szestron.comf
Online support:
Https://www.facebook.com/EstronCSS/

Scan QR Code
We promise to reply you as soon as possible within 24 hours.
Documents / Resources
References
OpenMTP | Android File Transfer for macOS - Samsung phone, Garmin, FujiFilm, Macbook Apple Silicon M1/M2 (arm64) and Intel (x64) support
![www.macdroid.app]() Connect Android to Mac easily (USB, Wi-Fi) | MacDroid app
Connect Android to Mac easily (USB, Wi-Fi) | MacDroid app![apps.apple.com]() App Store 上的“Zapya Go”
App Store 上的“Zapya Go”
Download manual
Here you can download full pdf version of manual, it may contain additional safety instructions, warranty information, FCC rules, etc.
Advertisement
Need help?
Do you have a question about the Q5 and is the answer not in the manual?
Questions and answers