Advertisement
- 1 Welcome
- 2 Part list
-
3
Installation Guide
- 3.1 Remove X-Axis and Y-Axis Drag Chain
- 3.2 Remove X-Axis Motor
- 3.3 Remove Z-Axis Motor
- 3.4 Remove Y1-Axis Motor
- 3.5 Remove Y2-Axis Motor
- 3.6 Installation of X-Axis Motor
- 3.7 Installation of Z-Axis Motor
- 3.8 Installation of Y1 - Axis Motor
- 3.9 Installation of Y2-Axis Motor
- 3.10 Installation of Drag Chain
- 4 Wiring
- 5 Documents / Resources
Welcome
For technical support, please email us at support@sainsmart.com. Help and support is also available from our Facebook group (SainSmart Genmitsu CNC Users Group)
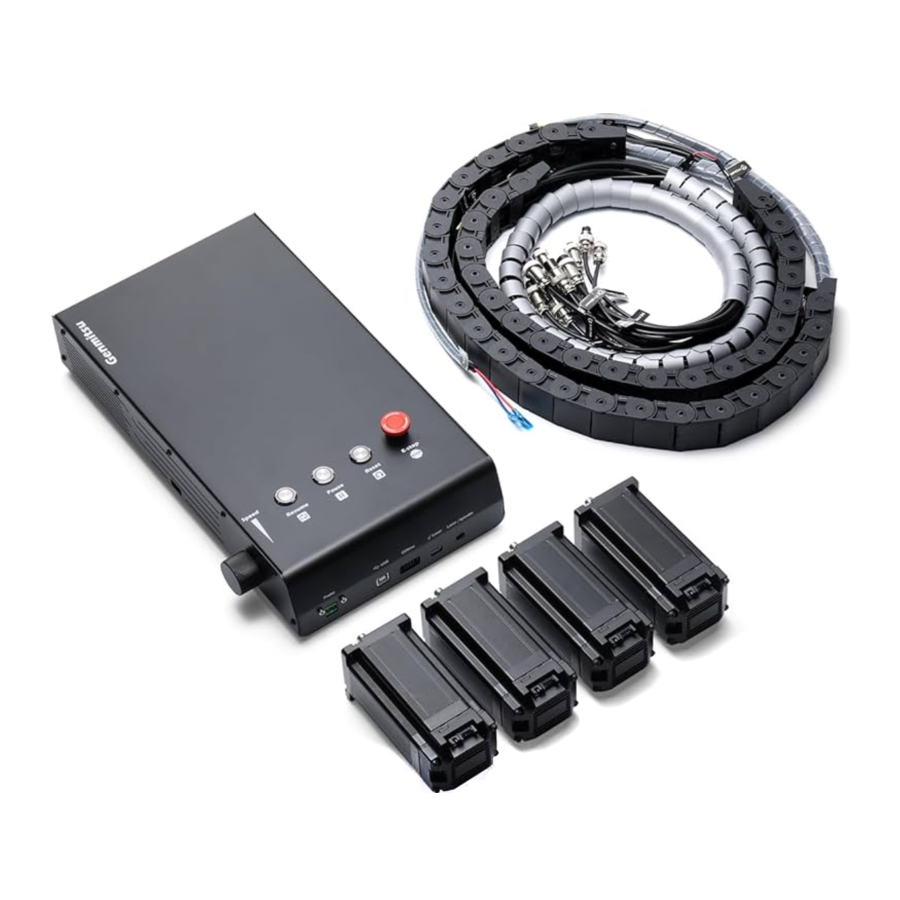
Part list

Installation Guide
Remove X-Axis and Y-Axis Drag Chain
Remove all Axis motor wiring, unscrew the X-axis drag chain and Y-axis drag chain fixing screws, remove the drag chain and keep the screws for backup

Remove X-Axis Motor
Loosen the top bolts and socket head cap screw on the motor-facing side of the X-axis coupling, remove the 4 X-axis motor screws for backup, and remove the X-axis motor.

Remove Z-Axis Motor
Loosen the top bolts and socket head cap screw on the motor-facing side of the Z-axis coupling, remove the 4 Z-axis motor screws for backup, and remove the Z-axis motor

Remove Y1-Axis Motor
Loosen the top bolts and socket head cap screw on the motor-facing side of the Y1-axis coupling, remove the 4 Y1 -axis motor screws for backup, and remove the Y1 -axis motor.

Remove Y2-Axis Motor
Loosen the top bolts and socket head cap screw on the motor-facing side of the Y2-axis coupling, remove the 4 Y2-axis motor screws for backup, and remove the Y2-axis motor.

The removal is completed as shown

Installation of X-Axis Motor
Install the close-loop stepper motor on the X-axis motor mount, use the disassembled X-axis motor fixing screws to lock the stepper motor, tighten the socket head cap screws and the top bolt on the motor side of the coupling. (If the screws are slippery, please use the spare screws in the kit to replace them)

Installation of Z-Axis Motor
Install the close-loop stepper motor on the Z-axis motor mount, use the disassembled Z-axis motor fixing screws to lock the stepper motor, tighten the socket head cap screws and the top bolt on the motor side of the coupling (If the screws are slippery, please use the spare screws in the kit to replace them)

Installation of Y1 - Axis Motor
Install the close- loop stepper motor on the Y1 -axis motor mount, use the disassembled Y1 -axis motor fixing screws to lock the stepper motor, tighten the socket head cap screws and the top bolt on the motor side of the coupling (If the screws are slippery, please use the spare screws in the kit to replace them)

Installation of Y2-Axis Motor
Install the close-loop stepper motor on the Y2-axis motor mount, use the disassembled Y2-axis motor fixing screws to lock the stepper motor, tighten the socket head cap screws and the top bolt on the motor side of the coupling (If the screws are slippery, please use the spare screws in the kit to replace them)

Installation of Drag Chain
Install the new drag chain by using the disassembled drag chain fixing screw.

Installation is completed as shown

Wiring
Buttons and Interfaces


Please check your voltage selection on the power supply unit before powering on Verify it is switched to the proper voltage for your region

X/Y/Z Asix Motor Wiring

Limit Switch Wiring

Spindle Wiring

Adjusting Lead Screw
Measure the distance Y1 and Y2 from both Y-axis sliders to the fixed plate at the motor end of the Y-axis, calculate the distance difference, and then unplug one of the Y-axis motors from the motor cable. Use the software to control the rotation of one of the Y-axis motors to adjust the distance of the Y-axis sliders to Y1

Email: support@sainsmart.com
Facebook messenger: https://m.me/SainSmart
Help and support is also available from our Facebook Group

Facebook Croup
Documents / ResourcesDownload manual
Here you can download full pdf version of manual, it may contain additional safety instructions, warranty information, FCC rules, etc.
Advertisement

Need help?
Do you have a question about the PROVerXL 4030 and is the answer not in the manual?
Questions and answers