Advertisement
Quick Links
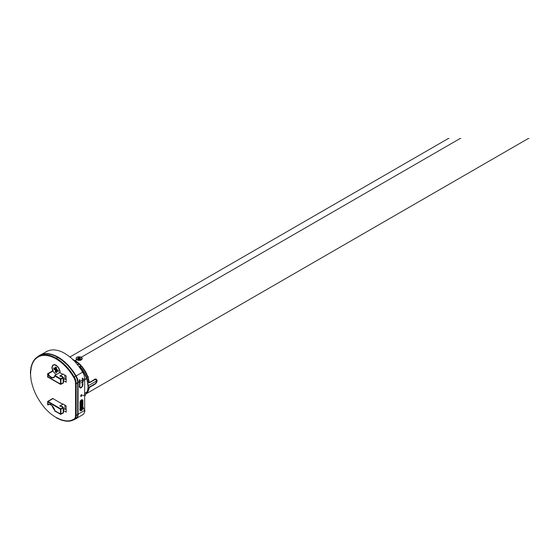
PRODUCT INFO
1
1. Motor Head Button (H)
2
2. LED Indicator Light
3
3. USB-C Charge Port
131°F
Motor Operating
Temperature Range:
14°F
Power Options:
• Standard USB-C charging cable
• Magnetic charging cord with USB-C adapter.
• Fully Charge the motor for 6-8 hours
NOTE: If the USB-C magnetic charging cord & adapter is
desired, leave the adapter plugged into the motor head
for future re-charging convenience.
R-TEC Automation Li-ion DC Motor 1-Way
MOTOR
MOTOR
MODELS
DIAMETER
TORQUE
RTA25L2C1WA
25mm
1.1Nm
RTA25L3C1WA
25mm
2Nm
RTA28L3C1WA
28mm
2Nm
WARNING: Important safety and operation
instructions to be read before installation and use.
1. This product is for indoor use only, do not use outdoors or in humid environments.
2. This motor has a built-in rechargeable Li-ion battery pack with integrated charge
management. Max input voltage: 5V/2A.
3. Fully charge the motor's battery before first use. (6-8 hours). Only use the recommended
R-TEC Automation USB-C Charging Cable to charge the motor battery.
4. When the battery voltage is low the LED light will flicker 8 times and give a low-voltage
alarm when the motor starts.
5. The motor will jog in operation, please do not proceed to the next step until it complete.
6. The duration of button transmission on the remote is 10s. If there is no operation within
10s the remote will automatically exit the current mode.
7. The motor can be paired with max 10 controllers.
8. Do not use motor when charging.
9. Upper&Lower limits cannot be set at the same position, limits saved even power off.
10. Use or modification outside the scope of this instruction manual will void warranty.
11. Installation and programming to be performed by a suitably qualified installer.
MOTOR HEAD FUNTION AT A GLANCE
Motor head H button functions
FUNCTIONS
OPERATION
Control the UP/STOP/
Short press
DOWN of the Shade
Adding/Removing
Hold
Controller
for 2s
Sleep mode, RF
Hold
Control Inactive
for 6s
f.Hot key to the Fav. Position
Hold
Direction Reverse
for 10s
Hold
Reset
for 16s
Fav
Note: The Fav.position setting only can be done after upper&lower limits set.
R-TEC Automation Li-ion Battery Motors
BATTERY
CHARGING
SPEED
Li-ion 2-Cell
USB-C
20/25/30rpm
Li-ion 3-Cell
USB-C
20/24/28rpm
Li-ion 3-Cell
USB-C
20/24/28rpm
JOGGING
LED LAMP
TIME
FLICKERS
NOTE
Can only operate after the limits
/
/
are set and motor is not in sleep
mode
Operation needs be done within
Jog*1
Flicker*1
10s
Hold H button for 6 seconds,
jog twice to make the motor RF
Jog*2
Flicker*2
control inactive; Hold H button
for 2 seconds, the RF control is
active again
All settings saved after direction
Jog*3
Flicker*3
reversed
Fast get to the Fav. point
Jog*4
Flicker*4 All setting deleted
USB-C Charging
BEFORE SET UP: Locate the H button on the Motor. Also check the remote
battery compartment to install batteries or remove the insulation tab before
use. Keep the cover removed to allow access to the programming P or P2
buttons until after set up is completed.
STEP 1: PAIRING MOTOR WITH REMOTE
Before pairing, see remote instructions on how to select the desired channel in order to add your motor(s).
To add a new remote:
H BUTTON
Hold the H
button on the
motor head for
STEP 1
2 seconds
Note: A maximum of 15 motors can be added to one channel.
All motors added to the same channel will operate simultaneously.
To add an additional motor B:
To add an additional motor to the same channel follow the steps above for motor B.
To add an additional motor to a different channel, toggle remote to new channel then
follow the steps above for motor B.
To add an additional Remote B via pre-existing Remote A
Press the
Programming
button on
remote A
labeled either
P or P2
Jog x2
Note: A maximum of 15 motors can be added to one channel.
All motors added to the same channel will operate simultaneously.
STEP 2: CHECK OR REVERSE DIRECTION OF MOTOR
To check direction:
Up
Shade
goes up
To reverse direction if the limits are not set:
Hold Favorite
and Stop
buttons for 2
seconds
To reverse the direction if the limits are set:
Press the
Jog x1
programming
button on the
remote
(P or P2)
Direction reversed
Jog x1
STEP 3: SETTING UPPER & LOWER LIMITS
Up or Down
Adjust to desired
Up or Down
Jog x1
Select
Press the
Jog x2
channel
Programming
button on the
remote labeled
either P or P2
STEP 1
Jog x1
Press the
Jog x1
Press Stop
Programming
button on
remote A
labeled either
P or P2
STEP 1
Remote B has
been added
STEP 1
Down
Shade
goes down
Direction reversed
Jog x1
Up x1
Jog x1
Down x1
STEP 2
STEP 2
STEP 2
Hold Up and
Jog x2
upper position
Favorite buttons
for 2 seconds
STEP 3
Adjust to desired
Hold Down and
Up or Down
STEP 3
lower position
Favorite buttons
for 2 seconds
RowleyCompany.com | updated 06/10/2024
I-RTEC1
Remote
& Motor
are now
paired
on B
Upper
limit set
Lower
limit set
Advertisement

Related Manuals for Rowley R-TEC Automation RTA25L2C1WA


Summary of Contents for Rowley R-TEC Automation RTA25L2C1WA
- Page 1 I-RTEC1 R-TEC Automation Li-ion Battery Motors USB-C Charging PRODUCT INFO BEFORE SET UP: Locate the H button on the Motor. Also check the remote battery compartment to install batteries or remove the insulation tab before use. Keep the cover removed to allow access to the programming P or P2 buttons until after set up is completed. STEP 1: PAIRING MOTOR WITH REMOTE Before pairing, see remote instructions on how to select the desired channel in order to add your motor(s). To add a new remote: 1. Motor Head Button (H) 2. LED Indicator Light...
- Page 2 I-RTEC1 point R-TEC Automation Li-ion Battery Motors USB-C Charging can be done after upper&lower limits set. STEP 4: ONE-TOUCH OR CONTINUOUS-TOUCH MODES OTHER OPERATIONS Continuous Touch One Touch Adjusting Limits Note: One touch mode allows the user to press the remote button once to make the shade operate. UPPER LIMITS Continuous touch mode will require the button to be held on the remote to operate the shade.
Need help?
Do you have a question about the R-TEC Automation RTA25L2C1WA and is the answer not in the manual?
Questions and answers