Advertisement
Quick Links
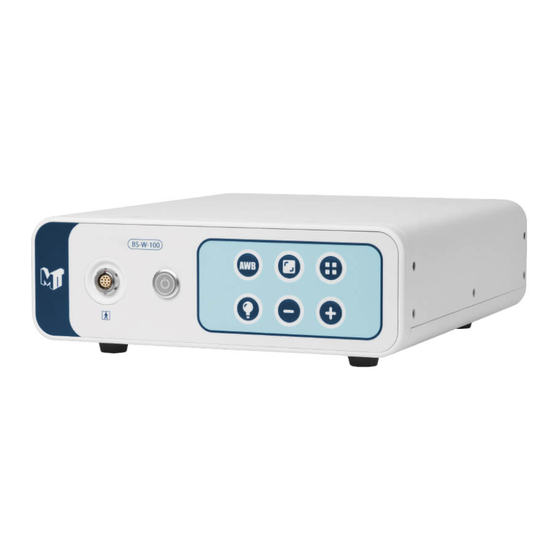
1. Scope Connector - connect eyeMAX™ scope here
2. Unit On/Off button - orange indicates that the controller is off; once pressed, the button will turn from
orange to green, indicating that the controller is on.
3. White balance calibration button - pressing this button will adjust the white balance. Prompts on screen
"White Balancing..." and "White Balance Done" will be displayed on the screen.
Note: Before the white balance operation, aim the distal end of the scope directly at the white object. Press and hold button.
4. Image display zoom-in / zoom-out button - press button to zoom in / out of the image. The zoom-in
operation is divided into three levels, namely "Zoom In 0", "Zoom In 1" and "Zoom In 2", and it is cyclical.
5. Image display frame mode switch - press this button to adjust the display frame mode of the image.
There are seven frame modes. See Table 7.4: Frame mode in IFU for details.
6. Increase brightness adjustment button - Press this button to increase the brightness of the LED lamp.
The brightness is divided into five levels. The interface prompts "LED Power 1" to "LED Power 5". If it
disappears after a short pause, it means that the adjustment is completed.
Note: The highest LED brightness is power 5. See table 7.3 in IFU for details.
7. Reduce Brightness adjustment button - Press this button to reduce the brightness of the LED lamp.
The brightness is divided into five levels. The interface prompts "LED Power 1" to "LED Power 5". After a
short pause, it disappears, indicating that the adjustment is completed.
Note: The lowest LED brightness is power 1.
8. Light on / off button - press this button to turn the light on / off.
REFERENCE GUIDE
1
2
3
8
EXCEPTIONAL
ENDOSCOPIC SOLUTIONS
4
7
5
6
Advertisement

Related Manuals for Micro-Tech eyeMAX

Summary of Contents for Micro-Tech eyeMAX
- Page 1 ENDOSCOPIC SOLUTIONS REFERENCE GUIDE 1. Scope Connector - connect eyeMAX™ scope here 2. Unit On/Off button - orange indicates that the controller is off; once pressed, the button will turn from orange to green, indicating that the controller is on.
- Page 2 CONNECTING THE SCOPE Power the unit on and confirm the Connect the eyeMAX scope by lining the Confirm connection is secure and the eyeMAX™ logo is displayed on the screen. red dot on the scope connector and the scope image is displayed on the screen.
Need help?
Do you have a question about the eyeMAX and is the answer not in the manual?
Questions and answers