
Summary of Contents for AET NX Series
-
Page 1: Table Of Contents
Installation Manual of NX Series Content Chapter 1 Rack Installation 1 1.1 About the Rack 1.2 Install the Rack 1.2.1 Install All-in-One Rack 1.2.2 Install the Rack Frame 1.3 Install the Wall Mount Rack Chapter 2 Cabinet Installation 6 2.1 Introduction 2.2 Install the Cabinets... -
Page 2: Chapter 1 Rack Installation
Chapter 1 Rack Installation 1.1 About Rack There are two types of racks for installing our full-color LED products: all-in-one rack and wall mount rack. The wall mount rack is used for installing front-maintenance cabinets only. The rack models vary depending on the project scale and installation environment, so the rack illustrations in this manual are for reference only. - Page 3 Normally the rack frame will be finished before shipment. * If it’s too long for transport, the rack frame will be cut in two. Then this needs to use straight line connector to con- * nect them back together. Straight Line Connector Figure1-2 Connect the Straight Line Connector Step 2 Place the rack frame together and use connection rails to fix all the rack frame.
- Page 4 Step 3 Place the lower beam to the rack frame. Place the Lower Beam Lower Beam Figure1-4 Place the Lower Beam Step 4 Finishing the all the rack. Figure1-5 Finishing the Rack...
-
Page 5: Install The Wall Mount Rack
If the lower beam is too long for transport, it will be cut in two. Then it needs to use straight line connector to con- * nect them back together. Figure1-6 Connect the Lower Beam Use the gradienter to measure each vertical component and ensure they are vertical and on the same plane. *... - Page 6 Step 2 Install the rack to the base rails with L-shape corner joint. Figure1-8 Install the rack Step 3 Install the lower rails to the rack with L-shape corner joint. Figure1-9 Install the Lower Rails...
-
Page 7: Chapter 2 Cabinet Installation
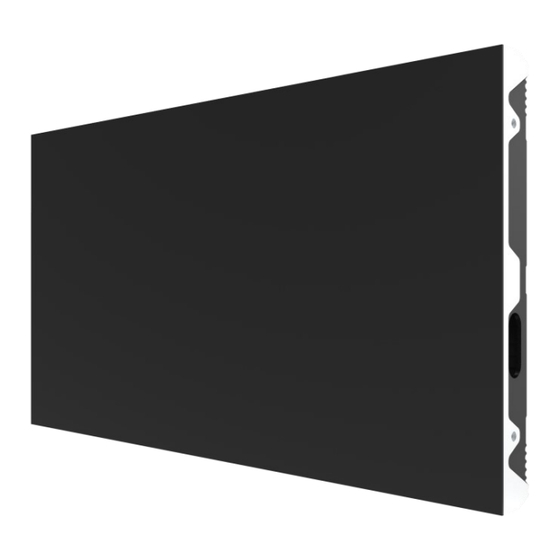
Chapter 2 Cabinet Installation 2.1 Introduction About the Cabinet A cabinet is a basic unit for LED engineering installation in which LED modules are neatly mounted on a metal sheet (die- casting aluminum) box, with a built-in independent receiving card and switching power supply, an engineering installation structure, and independent display. -
Page 8: Cabinet Connection
2.2.1 Cabinet Connection Align two cabinets with the locating studs and connection holes. Lock the cabinets together with M8 socket cap screws through connection holes. Connection holes Between Cabinets Connection holes For Cables Connection holes With structure Figure2-3 Locating Studs and Connection Holes on the Cabinet Figure2-4 Cabinet Connection... -
Page 9: Install Cabinets Into The Rack Frames
2.2.2 Install Cabinets into the Rack Frames After the rack frames are well installed (see Chapter 1 Rack Installation for details), perform the following steps to install the cabinets into the rack frames: Install the first cabinet from the lower middle part and it’s recommend that connect 2 cabinets first and then install into the rack frame. - Page 10 Figure2-8 Cabinet Installation from middle to the left and right Figure2-9 Cabinet Installation from middle to the left and right...
- Page 11 Figure2-10 Cabinet Installation from bottom to the top Figure2-11 Cabinet Installation from bottom to the top...
-
Page 12: Install Cabinets Into The Wall Mount Rack
2.2.3 Install Cabinets into the Wall Mount Rack The installation of the cabinet into wall mount rack is actually the same as all-in-one rack. Figure2-12 Install cabinets into wall mount rack Figure2-13 Install cabinets into wall mount rack... -
Page 13: Chapter 3 Cable Connection
Chapter 3 Cable Connection 3.1 Power Cable Connection After all the cabinets well installed, connect the power cable as the specific connection diagram. Here is an example as following picture: Figure3-1 Power Cable Connection... -
Page 14: Signal Cable Connection
3.2 Signal Cable Connection Connect the signal cable as the specific connection diagram. Here is an example as following picture: Figure3-2 Signal Cable Connection... -
Page 15: Introduction
Chapter 4 Module Installation 4.1 Introduction About the module A module is the most important part of LED screen, which contains led pixels and driver ICs. Connecting with the hub board, the module can show then contents that send from the input source. 4.2 Module Installation The module installation should be after all the cabinets and cables completed.
Need help?
Do you have a question about the NX Series and is the answer not in the manual?
Questions and answers