Table of Contents
Advertisement
Quick Links
Advertisement
Table of Contents

Summary of Contents for Zentron ZEN Q50
-
Page 2: Table Of Contents
8.OPERATION GUIDE ........................................................9 8.1 Switch Palettes ........................................................9 8.2 Lens Focus Adjustment ....................................................10 8.3 UI Zoom ..........................................................10 8.4 ZENTRON L1(LRF) ......................................................11 9. SHORTCUT MENU ........................................................13 10.MAIN MENU ........................................................... 16 11.HOW TO ZERO? ........................................................23 12.HOW TO USE ZEN LINK APP? ................................................... 25 13.FIRMWARE UPGRADE ...................................................... -
Page 3: Warnings
WARNINGS ⚫ Do not use in high temperature environments exceeding 50°. When used in extremely cold environments, the battery life of the device will be reduced. This is normal and does not indicate a malfunction of the ⚫ device. ⚫ When the device is idle for a long time, the battery should be removed. -
Page 4: Description
OLED display, providing a clear and smooth image when observing or aiming at targets. 2.MAIN FEATURES ⚫ Compact and lightweight A strong and durable synthetic magnesium-aluminium body that also reduces the weight of the ZEN Q50 to 400 grams ⚫ Top configuration 50mm f1.0 Lens 640*512 12µm Detector (NETD≤30), High-resolution 1280*1024 OLED display ⚫... -
Page 5: Specifications
3.SPECIFICATIONS 4 / 28... -
Page 6: Packing List
4.PACKING LIST Packaging bag Packaging box ZEN Q35/Q50 Eyeshade Rail USB-C Cable Dust cloth Quick guide User manual 5 / 28... -
Page 7: Components
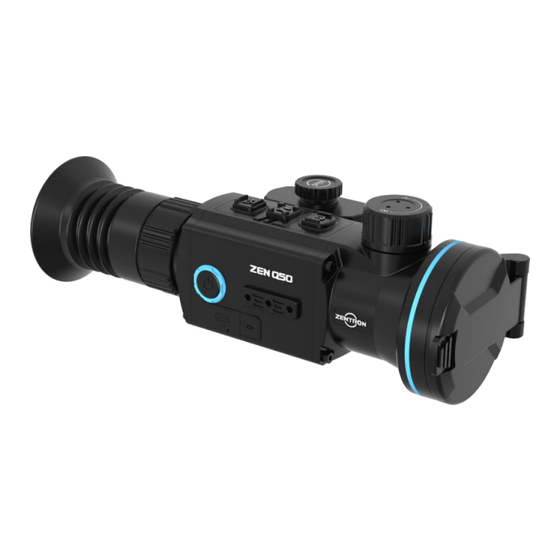
5.COMPONENTS 1. Eyepiece 2. Power button 3. Palettes button 4. Menu button 5. Capture button 6. Battery 7. Lens focus knob 8. Objective lens 9. Type-C port 10. Mic 6 / 28... -
Page 8: Buttons
6.BUTTONS Icon Button Press Long press Zoom Switch Zoom Menu Shortcut menu Main menu Capture Take a picture Start/stop recording video Power Standby mode/Wake up device Power on/off Zoom+Menu Switching Favorite Palettes Capture+Menu Switch Reticle Battery icon and remaining battery level Remaining power below 10% 80% remaining battery power 10%-20% remaining battery power... -
Page 9: Home Screen
7.HOME SCREEN 1. NUC Shutter A=Auto Shutter B=Manual Shutter C=External 2. Electronic compass status red indicates calibration required, green indicates normal 3. Electronic compass 4. PiP 5. Reticle 6. Zoom 7. Profile 8. Displays remaining power 9. WiFi 10. Bluetooth 11. -
Page 10: Operation Guide
8.OPERATION GUIDE 8.1 Switch Palettes Short press the Palettes button to quickly switch palettes. 9 / 28... -
Page 11: Lens Focus Adjustment
8.2 Lens Focus Adjustment When using the device, if you find the image blurry, you can rotate the Lens focus knob until the image becomes clear. 8.3 UI Zoom When you use electronic zoom to 4 times, you may not be able to see some status icons on the screen. You can long press the Capture and Menu buttons at the same time to activate the UI Zoom function, and the UI interface will become more compact. -
Page 12: Zentron L1(Lrf)
8.4 ZENTRON L1(LRF) Zentron L1 LRF integrates seamlessly into thermal scopes or other optical gear using laser beams for accurate distance measurement, This enables precise aiming and shooting, particularly at longer ranges. 11 / 28... - Page 13 12 / 28...
-
Page 14: Shortcut Menu
9. SHORTCUT MENU Palettes In order to have a better screen display effect, you can choose different Palettes according to different usage environments. After exiting the menu, press the Palettes button to toggle the Palettes with star markers. ⚫ Press the menu button to enter the shortcut menu. ⚫... -
Page 15: Screen Brightness
PiP(Picture in Picture) When the PIP function is turned on, a small enlarged window will be displayed at the top of the main screen, making it easy for the user to observe and aim at the target. ⚫ Press the menu button to enter the shortcut menu. ⚫... - Page 16 NUC Shutter When you select Auto Shutter, the device will automatically perform the NUC Shutter operation at regular intervals, and a countdown will appear on the screen before performing the operation. When you select Manual Shutter, long press the Palettes button to perform NUC Shutter operations. When you select External, you need to close the lens cover first, and then press and hold the Palettes button to perform the NUC Shutter operation.
-
Page 17: Reticle Color
Reticle Color You can choose different Reticle Color according to your preference. The default option is automatic mode. When you select different Palettes, the color of the Reticle changes automatically. ⚫ Press the menu button to enter the shortcut menu. ⚫... -
Page 18: Laser Calibration
Bluetooth When Bluetooth is turned on, the rangefinder module can be connected. ⚫ Long press the menu button to enter the main menu. ⚫ Press the up and down buttons to move to the Bluetooth option, and then press the menu button to select it. ⚫... -
Page 19: Image Quality
Image Quality In order to achieve the image display effect to your satisfaction, you can adjust image quality parameters such as Denoise, Contrast, Sharpness, and Brightness. You can also select Reset to restore default settings. ⚫ Long press the menu button to enter the main menu. ⚫... - Page 20 Compass Calibration As shown in the picture on the left, when you see the icon pointed to by the arrow turn red, it indicates that you need to perform a Compass Calibration operation. Otherwise, the position displayed by the electronic compass will be inaccurate.
- Page 21 Profile Each Profile can save a Zeroing setting. After selecting the Profile, the profile just selected will be displayed on the status bar of the main screen. ⚫ Press the menu button to enter the shortcut menu. ⚫ Press the up and down buttons to move to the Profile option, and then press the menu button to select it. ⚫...
- Page 22 ⚫ Confirm Zero: Once you consistently hit the target at your desired distance, your thermal scope is zeroed. Confirm this by shooting a few more rounds to ensure consistency. Pixel Correction You can calibrate bad pixels in the screen. ⚫ Press and hold the menu button to enter the main menu.
- Page 23 Language The device currently supports two languages: English and German. ⚫ Press the menu button to enter the shortcut menu. ⚫ Press the up and down buttons to move to the Language option, and then press the menu button to select it. ⚫...
-
Page 24: How To Zero
About Viewing device information and upgrading firmware. 11.HOW TO ZERO? Step 1 Shoot the target at a range of 50m,100m or 300m depending on your shooting preferences and the capabilities of your firearm. 23 / 28... - Page 25 Step 2 As you can see, the point of impact on the target was off by a fair margin. Select the ZEROING function in the menu, center the RETICLE on the bullseye, and turn on the freeze switch! Step 3 Press the up and down buttons to move the X- and Y-axis coordinates until the RETICLE is...
-
Page 26: How To Use Zen Link App
12.HOW TO USE ZEN LINK APP? Search for ZEN Link in APP Store or Google Play Turn on the device WiFi, remember the SSID of Click on the connected device in the ZEN Link and click download. the WiFi, use your mobile phone to find the App to view the real-time screen of the device WLAN named by the SSID, the default password and control the device. -
Page 27: Firmware Upgrade
13.FIRMWARE UPGRADE After the mobile phone is connected to the Click “Firmware Update”. Click the "Check for updates" button and the device, click the settings button of the system will automatically update if the latest connected device. version of firmware is available. 26 / 28... - Page 28 27 / 28...
Need help?
Do you have a question about the ZEN Q50 and is the answer not in the manual?
Questions and answers