Table of Contents
Advertisement
Quick Links
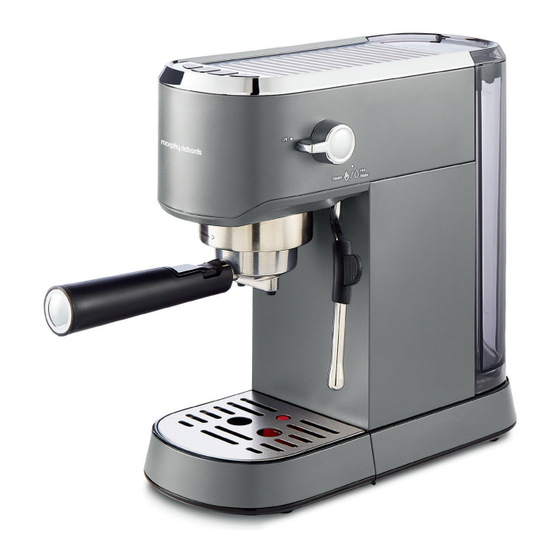
SIGNATURE
Compact Espresso Maker
Model No.
172024/172025/
172026
CM172022MUK Rev3 Signature Compact Espresso Maker IM.indd 1
CM172022MUK Rev3 Signature Compact Espresso Maker IM.indd 1
User Manual
Please read and keep these instructions for future use
3 Year
Guarantee
*
Upon registering your product
*
at morphyrichards.co.uk
19/09/2024 17:05
19/09/2024 17:05
Advertisement
Table of Contents

Subscribe to Our Youtube Channel
Related Manuals for Morphy Richards SIGNATURE 172024


Summary of Contents for Morphy Richards SIGNATURE 172024
- Page 1 3 Year Guarantee Upon registering your product at morphyrichards.co.uk SIGNATURE Compact Espresso Maker Model No. User Manual 172024/172025/ 172026 Please read and keep these instructions for future use CM172022MUK Rev3 Signature Compact Espresso Maker IM.indd 1 CM172022MUK Rev3 Signature Compact Espresso Maker IM.indd 1 19/09/2024 17:05 19/09/2024 17:05...
- Page 2 HEALTH AND SAFETY The use of any electrical appliance requires the following common sense safety rules. Please read these instructions carefully before using the product. • WARNING: This appliance incorporates a heating element which is subject to residual heat after use. •...
-
Page 3: Health And Safety
HEALTH AND SAFETY • For care and cleaning, refer to the relevant sections in these instructions. • If the mains cable is damaged, it must be replaced by the manufacturer, its service agent or similarly qualified person in order to avoid a hazard. •... - Page 4 HEALTH AND SAFETY cut-out, this appliance must not be supplied through an external switching device, such as a timer, or connected to a circuit that is regularly switched on and off by the utility. • This appliance is not intended to be operated on an extension cable or by means of an external timer or a separate remote control system.
-
Page 5: Mains Cable
• The use of attachments or tools worktop. not recommended or sold by Morphy Richards may cause fire, • Ensure that the appliance is electric shock or injury. used on a firm, flat surface. -
Page 6: Electrical Requirements
HEALTH AND SAFETY TREATING SCALDS • Run cold water over the affected area immediately. • Do not stop to remove clothing. • Get medical help quickly. ELECTRICAL REQUIREMENTS Check that the voltage on the rating plate of your appliance corresponds with your house electricity supply which must be A.C. (Alternating Current). -
Page 7: Product Overview
PRODUCT OVERVIEW On/standby button Filter holder lock Drip tray full indicator position One cup button Small one cup filter 10. Brewing head (for single shot use) Two cup button Removable drip Larger two cup filter Steam button tray grid (for double shot use) Espresso cups holder Steam wand Filter holder... - Page 8 PRIMING THE COFFEE MACHINE Ensure the water tank (8) is filled up to the Without placing any filters (17/18) into the MAX line. Assemble the espresso coffee filter holder (19), place the filter holder into the machine as above, ensuring the removable brewing head (10) and turn until at a right angle drip tray (15) is in place.
- Page 9 PREHEATING (OPTIONAL) For a hot espresso, we recommend preheating the appliance before following the instructions on the next page. Preheating ensures the filter holder and cup are warm enough to enhance the coffee flavour. Place the coffee filter (17/18) into the filter Fill water tank (8) up to the MAX line.
-
Page 10: Re-Filling The Water Tank
RE-FILLING THE WATER TANK If the water tank (8) runs dry, after re-filling it may require two or more presses of the one cup and/or two cup buttons (2/3) for water to flow through the system to make an espresso. USING YOUR COFFEE MAKER Your espresso coffee machine uses espresso ground coffee and comes with two suitable... - Page 11 RE-FILLING THE WATER TANK When the one cup and two cup buttons (2/3) stop pulsing, place your cup(s) on the drip tray. Press either the one or two cup button to dispense the set amount: approximately 40ml for one cup and 80ml for two.
-
Page 12: Using The Steam Wand
USING THE STEAM WAND 100ml-200ml Press the steam button - the button will Pour 100-200ml of chilled milk into a jug. pulse until the machine is up to steam temperature. When the button stops pulsing, the steam wand is ready to be used. 10mm 10mm Place the steam wand (12) into the milk,... -
Page 13: Usage Warning
NOTES ON USING THE STEAM WAND If the unit is switched on with the steam control dial (6) on, all buttons will flash. The steam control dial must be turned to the off position. If you want to make another coffee after using steam, ensure the steam control dial (6) is in its off state and the one cup and two cup buttons (2/3) are pulsing, the unit is cooling down. -
Page 14: Standby Mode
After using the steam wand (12), the water in the boiling chamber will be too hot to brew coffee without burning the grinds. The water will be the correct temperature when the one cup and two cup buttons (2/3) illuminate solidly. The two cup and one cup buttons will not function until they are illuminated solidly. - Page 15 CLEANING YOUR ESPRESSO COFFEE MACHINE 1. Disconnect the appliance from the mains supply. 2. Make sure the appliance has completely cooled down. 3. Simply wipe the steam wand (12) and exterior with a clean, damp cloth. Use a pin to clean the nozzle head and air holes in the sleeve. Do not use any abrasives or metal scourers as this will damage the finish on the unit 4.
- Page 16 DESCALING Your machine will need to be descaled regularly for better tasting coffee and maintenance. When the machine is turned on after 500 cycles, all the lights will flash 5 times- don’t worry, you can still use the machine normally afterwards! To descale, follow the instructions below: 1.
-
Page 17: Making Coffee
MAKING COFFEE Your espresso compact machine allows you to create a variety of coffee drinks, helping you to create the coffee shop experience in your own home. The diagrams on this page are a simple guide showing you the percentage of ingredients that make up each of the drink types. To see how to create the perfect espresso and frothy milk, scan the QR code on the sticker on your water tank and take a look at our online tips. -
Page 18: Troubleshooting
TROUBLESHOOTING Problem Reason Solution Water is dispensing from Steam control dial Rotate the steam control the steam wand (12). (6) is open. dial (6) so it is closed. Heater block is not Conduct a preheating The coffee temperature hot enough before process, see ‘Preheating is too cold. -
Page 19: Product Recycling
PRODUCT RECYCLING For electrical products sold within the European Community, at the end of the electrical products useful life, it should not be disposed of with household waste. Please recycle where facilities exist. Check with your Local Authority or retailer for recycling advice in your country. - Page 20 Your standard 2 year guarantee is extended for an additional 1 year when you register the product within 28 days of purchase with Morphy Richards. If you do not register the product with Morphy Richards within 28 days, your product is guaranteed for 2 years.
- Page 21 Exclusions Morphy Richards shall not be liable to replace or repair the goods under the terms of the guarantee where: 1. The fault has been caused or is attributable to accidental use, misuse, negligent use or used contrary to the manufacturer’s...
- Page 22 NOTES CM172022MUK Rev3 Signature Compact Espresso Maker IM.indd 22 CM172022MUK Rev3 Signature Compact Espresso Maker IM.indd 22 19/09/2024 17:05 19/09/2024 17:05...
- Page 23 NOTES CM172022MUK Rev3 Signature Compact Espresso Maker IM.indd 23 CM172022MUK Rev3 Signature Compact Espresso Maker IM.indd 23 19/09/2024 17:05 19/09/2024 17:05...
- Page 24 CM172022MUK Rev3 @morphyrichardsuk #loveyourmorphy morphyrichards.co.uk Morphy Richards 9 Cabot Lane, Poole, Dorset, BH17 7BY, UK CM172022MUK Rev3 Signature Compact Espresso Maker IM.indd 24 CM172022MUK Rev3 Signature Compact Espresso Maker IM.indd 24 19/09/2024 17:05 19/09/2024 17:05...
Need help?
Do you have a question about the SIGNATURE 172024 and is the answer not in the manual?
Questions and answers