Table of Contents
Advertisement
Quick Links
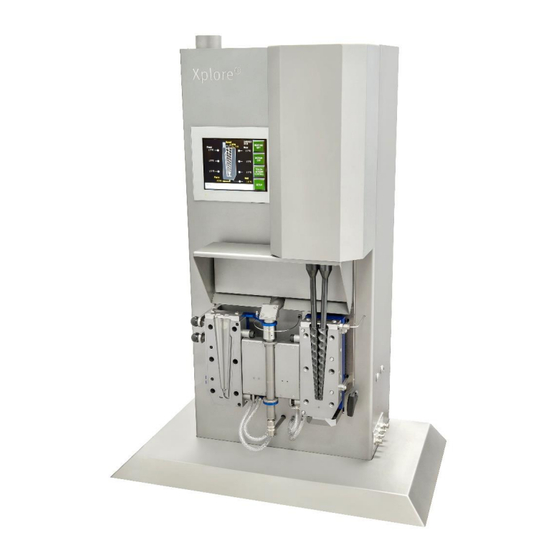
User Manual of Xplore MC 5 and MC 15
Supplier:
Specifications of the user manual:
Xplore Instruments B.V
Urmonderbaan 22
6167 RD, Geleen
The Netherlands
Model 2016
Xplore Instruments B.V.
Sittard-Geleen
The Netherlands
service@xplore-together.com
:
Date: July 2016
Version: 1.1
Phone: +31 46 476 33 88
Fax:
+31 46 476 33 89
E-mail: info@xplore-together.com
www.xplore-together.com
Advertisement
Table of Contents

Related Manuals for Xplore MC 5

Summary of Contents for Xplore MC 5
- Page 1 User Manual of Xplore MC 5 and MC 15 Model 2016 Supplier: Xplore Instruments B.V. Sittard-Geleen The Netherlands service@xplore-together.com : Specifications of the user manual: Date: July 2016 Version: 1.1 Xplore Instruments B.V Phone: +31 46 476 33 88 Urmonderbaan 22...
- Page 2 Foreword This manual describes the Xplore MC 5 and MC 15 Micro Compounder (5 and 15 ml batch volume, respectively). The information in this manual is important for a proper and safe functioning of the instrument, so you should carefully read this user manual from beginning to end. Xplore also recommends that all new users (operators, installers, maintenance people and if necessary cleaners) receive training, for which this manual can serve as the basis.
- Page 3 Xplore Instruments B.V Phone: +31 46 476 33 88 Urmonderbaan 22 Fax: +31 46 476 33 89 6167 RD, Geleen E-mail: info@xplore-together.com The Netherlands www.xplore-together.com...
-
Page 4: Table Of Contents
Steps for Safe Lifting and Handling ......................25 3.1.12 Instructions..............................25 3.1.13 Safety Measures for Working with Dangerous Substances ..............25 3.1.14 Ergonomics ..............................25 OPTIONS AND EXTRAS FOR MC 5 AND 15................. 26 ® O ........................26 ATCH PTION ........................26 OUNTER OTATING C ................ - Page 5 EPLACEMENT ARTS 10. SCRAPPING; ENVIRONMENT ..................86 11. KEY WORD LISTING ....................87 Appendices: Appendix 1: Declaration of Conformity Xplore Instruments B.V Phone: +31 46 476 33 88 Urmonderbaan 22 Fax: +31 46 476 33 89 6167 RD, Geleen E-mail: info@xplore-together.com The Netherlands www.xplore-together.com...
-
Page 6: Warranty
Xplore. Only copies for private use can be made. Xplore reserves the right to make changes at any time without direct knowledge of the customer. The content of this user manual can also be changed. - Page 7 Back to table of contents Xplore Instruments B.V Phone: +31 46 476 33 88 Urmonderbaan 22 Fax: +31 46 476 33 89 6167 RD, Geleen E-mail: info@xplore-together.com The Netherlands www.xplore-together.com...
- Page 8 The nameplate of the micro compounder is on the instrument. The following information is reported on the plate: Figure 1: Nameplate Nieuw typeplaatje Back to table of contents Xplore Instruments B.V Phone: +31 46 476 33 88 Urmonderbaan 22 Fax: +31 46 476 33 89 6167 RD, Geleen E-mail: info@xplore-together.com...
- Page 9 A number of pictograms are placed on the instrument to warn the user against risks which may still exist, despite the safe design. ATTENTION: Regularly check if all pictograms are in the proper place on the instrument; if not, replace them. Table 1: Pictograms on the MC 5 & 15 Pictogram Description Position on the Instrument Warning: On the outside of the door providing access to Danger at or near parts under tension.
-
Page 10: General Safety Rules
Example: You will find a warning for danger in Chapter 2.1.2. BEFORE GETTING STARTED WARNING OF DANGER: When working with the MC 5 or MC 15, you must keep in mind: There is a risk of burning due to the high temperature of the compounder barrel and the subassemblies. -
Page 11: The Most Important Risks
WARNING OF DANGER: Do not smoke, eat or drink in proximity to the Xplore Micro Compounders. provide sufficient lighting at the workplace (at least 200 lux during production, 500 lux during repair or maintenance activities, for example); make sure the workplace is clean and safe (ARBO = Occupational Health and Safety) and do not leave tools lying around. - Page 12 WARNING OF DANGER: The micro compounder and the safety features described in this manual cannot be expanded, adapted, or altered without prior written permission from Xplore. WARNING OF DANGER: Repairs or maintenance to the electrical circuit or subassemblies: First shut off the main power supply of the instrument. Never open the door to the electrical compartment yourself;...
-
Page 13: Introduction
With the MC 5 and MC 15, it is possible to directly fill the cylinder of a mini-injection moulding instrument (IM 5.5 and IM 12, respectively,) so that test bars can be moulded at once. -
Page 14: Target Group
(personnel trained by Xplore is recommended). WARNING OF DANGER: Installation, periodic maintenance and performance of repairs may only be done by persons who are technically competent, unless otherwise indicated. -
Page 15: Instrument Specifications
INSTRUMENT SPECIFICATIONS Principal Dimensions MC 15 MC 5 Height : 1050 mm : 830 mm Width : 750 mm : 700 mm Depth : 450 mm : 400 mm Screw length : 172 mm : 107 mm Total volume : 16.5 ml : 5.5 ml... -
Page 16: Options And Configurations
Transport The Xplore MC 5 or MC 15 has been placed and secured on a pallet frame as part of the transport crate. It is advisable to keep this crate for future moves. -
Page 17: Description Of The Micro Compounder
Barrel retaining bolts. Exit die. Recycle valve. (see paragraphe 8.) Rear barrel half. Front barrel half. Plaatjes aanpassen Xplore Instruments B.V Phone: +31 46 476 33 88 Urmonderbaan 22 Fax: +31 46 476 33 89 6167 RD, Geleen E-mail: info@xplore-together.com The Netherlands www.xplore-together.com... - Page 18 A warning for these parts is provided by a warning pictogram on the outside of the electrical compartment. Even though these parts are substantially safe to touch, the utmost caution is warranted. Xplore Instruments B.V Phone: +31 46 476 33 88 Urmonderbaan 22...
-
Page 19: General
The compounder motor has a maximum current limiter. All function-interlocking covers of the MC 5 and MC 15 are provided with a double function interlock switch. The function interlock stops all moving parts located behind this cover if one or more covers are opened. -
Page 20: Emergency Stop
TIP: After the change-over, lock the handle once again! Keep the screws not being used in a safe place so that they cannot be used unintentionally? Xplore Instruments B.V Phone: +31 46 476 33 88 Urmonderbaan 22 Fax: +31 46 476 33 89 6167 RD, Geleen E-mail: info@xplore-together.com... -
Page 21: Covers And Safety Features
The compounder screws are shielded by the barrel which opens up and by a cover mounted on the barrel (only for co/counter option). Before placing the screws of the MC 5 or MC 15 into movement, the following preparations Xplore must be done: ... -
Page 22: Protection Against Hot Parts
Release the hinged cooling plate and press the element against the barrel. Pull on the hand grip, which presses the rear cooling plate against the barrel. Lock the elements by securing the hand grip behind the lip of the hinged plate. Xplore Instruments B.V Phone: +31 46 476 33 88 Urmonderbaan 22... - Page 23 If the barrel becomes too hot, e.g., due to the friction created, automatic cooling is effected by pressurized air. Thus, always make sure that pressurized/cooling air is connected to the instrument. Xplore Instruments B.V Phone: +31 46 476 33 88 Urmonderbaan 22...
-
Page 24: Safety During Maintenance/Repair/Shutdown, Etc
Make sure the cooling water and pressurized air are disconnected before performing maintenance activities. WARNING OF DANGER: Make sure the barrel is cooled down to a safe temperature before performing maintenance activities. Xplore Instruments B.V Phone: +31 46 476 33 88 Urmonderbaan 22 Fax: +31 46 476 33 89 6167 RD, Geleen E-mail: info@xplore-together.com... -
Page 25: Steps For Safe Lifting And Handling
3.1.11 Steps for Safe Lifting and Handling The Xplore MC 5 and MC 15 are placed and secured on a pallet frame as part of the transport crate. It is advisable to keep this crate for future moves. The design is such that fork-lift blades or hoisting gear can be easily shoved under the frame. -
Page 26: Options And Extras For Mc 5 And 15
The batch volume can be chosen between 3 ml, 7 ml and 15 ml. In a similar way the MC 5 can be downsized to 2 ml with the Vari- ®... -
Page 27: Setup; Installation
Check the instrument for possible damage. If damage is found, this must be directly reported to the supplier, whether or not the warranty is invoked. Xplore Instruments B.V Phone: +31 46 476 33 88 Urmonderbaan 22... -
Page 28: Installation
Electrical connection 208 -240 V + ground – 50 / 60 Hz Required power 3 kW at 230 V - 50 Hz (MC 5: 1.8kW) Minimum connection diameter : 12 AWG or 2.5mm² Connect the instrument to the pressurized air supply (cooling) -
Page 29: Setup
The compounder consists of an electrically heated barrel (up to 400 ºC) (optionally to 450 ºC), in which two self-cleaning screws can rotate with an adjustable speed of 5-250 rpm (MC 15) or 5-400 rpm (MC 5). The parameters can be set up via a Touch Screen or PC, which control the PCB (see Section 6.2). -
Page 30: Working With The Instrument
6. WORKING WITH THE INSTRUMENT OPERATION WARNING OF DANGER: Working with the MC 5 and MC 15 should only be done by authorized persons. Shutdown and fault analysis should only be done by technically competent persons (see Section 2.1.2) TOUCH SCREEN The Compounder is based on a multi loop microprocessor-controlled control system. - Page 31 6.2.1.1 Operation by Means of the Touch Screen Module: After turning on the mains voltage, the control system will first perform a diagnostic test, during which the Xplore logo and the software versions are visible. Figure 6: “Start-up Screen” Nieuw logo Xplore Instruments B.V...
- Page 32 After a few seconds, the “main screen” appears (Figure 8), showing the complete status of the MC 5 or 15 instrument. The system starts up in such a way that everything is at a standstill and ready for use. Screenshots met Amperage in hele hoofdstuk...
-
Page 33: Adjusting The Temperature Set Point
“main screen,” where the heating can be activated by pressing the “heating off” button, so that this shows “heating on” and lights up bright green (see Figure 11). Xplore Instruments B.V Phone: +31 46 476 33 88... - Page 34 By pressing the return button, you go back to the “main menu,” where you can activate the motor by pressing the “Motor off” button, so that this displays “motor on” and lights up bright green (see Figure 12). ATTENTION: Xplore Instruments B.V Phone: +31 46 476 33 88 Urmonderbaan 22 Fax:...
- Page 35 The data can now be entered only by the computer. In the “PC Control” mode, the setpoints have to be controlled from the computer. Now, no changes are possible with the Touch Screen (see Figure 13). Xplore Instruments B.V Phone: +31 46 476 33 88 Urmonderbaan 22...
-
Page 36: The Mounting Of The Screws
Co-rotating screws. Also see Section 3.3.6 CAUTION: Install the correct screws after the change-over! Thus, use a special left screw in the Counter option! Xplore Instruments B.V Phone: +31 46 476 33 88 Urmonderbaan 22 Fax: +31 46 476 33 89 6167 RD, Geleen E-mail: info@xplore-together.com... - Page 37 Now heat up the barrel and further tighten the compounder barrel bolts crosswise with 30 to 40 Nm for the Micro 5cc and 60 to 70 Nm for the Micro 15 cc. This is best done with a torque wrench. Xplore Instruments B.V Phone: +31 46 476 33 88...
-
Page 38: Filling Of The Compounder
Be careful of any warm or hot viscous material which might still be on the seal plug. Clean this plug with a steel brush so that it is more easily put back later on. WARNING OF DANGER: Beware of hot parts, use heat-resistant gloves!! Xplore Instruments B.V Phone: +31 46 476 33 88 Urmonderbaan 22 Fax:... -
Page 39: Filling Of The Hopper And The Compounder
3. Make sure the nitrogen purge is on and working, if being used. 4. Fill the funnel with viscous material, full volume ca. 15 ml (or 5 ml for MC 5) 5. Set the screw speed at the desired value, 6. -
Page 40: Putting The Seal Plug In Place
Mount the hopper in order to fill the compounder again and repeat the cycle. TIP: The viscous material can easily be oxidized at high temperature. Use the nitrogen purge if necessary. Xplore Instruments B.V Phone: +31 46 476 33 88 Urmonderbaan 22 Fax:... -
Page 41: Software
Wizzard”, which ensures that the entire installation is flawless. It is possible to run the new version together with an older version of the Xplore Software on your PC, but it is recommended that you don’t use the two software versions at the same time. - Page 42 InstallAware Wizzard Welcome and Version After choosing “Next” you will find the following screens. License agreement, change to accept Xplore Instruments B.V Phone: +31 46 476 33 88 Urmonderbaan 22 Fax: +31 46 476 33 89 6167 RD, Geleen E-mail: info@xplore-together.com The Netherlands www.xplore-together.com...
- Page 43 Accept License agreement Customer information and preferences Change the user name to your requirements and change the organization to the correct one if needed. Xplore Instruments B.V Phone: +31 46 476 33 88 Urmonderbaan 22 Fax: +31 46 476 33 89 6167 RD, Geleen E-mail: info@xplore-together.com...
- Page 44 Extract the drivers for your new device (Compounder) Driver installation Wizard After clicking “I accept this agreement” the drivers will be installed. Xplore Instruments B.V Phone: +31 46 476 33 88 Urmonderbaan 22 Fax: +31 46 476 33 89 6167 RD, Geleen E-mail: info@xplore-together.com...
-
Page 45: Xplore Pc Software
XPLORE PC SOFTWARE For the connection to the PC, the Xplore Micro Compounder has a USB port. In the touch screen, you can select whether to operate the Xplore Micro Compounder with “Touch Screen Control” or with “PC Control”. The Xplore Micro Compounder can only be switched on in “PC Control”... - Page 46 Upon starting, the “no communication“ screen will appear, showing that there is no communication with the Xplore Micro Compounder. “Waiting for communication, screen” Screen depending on software version installed. Xplore Instruments B.V Phone: +31 46 476 33 88 Urmonderbaan 22...
- Page 47 “Not Connected” indication at the bottom “Micro Compounder Connected / start program, screen” Screen depending on software version installed. If the Xplore software program has detected an Xplore Micro Compounder, you are asked to continue the program by pushing the button “OK”. Xplore Instruments B.V...
-
Page 48: Entry Field
“Xplore About, starting screen” From this window, the entire program can be run by means of the tabs at the top. In the different windows the program can be closed by clicking on the “Exit” button, after which the program will stop. - Page 49 -Process status This screen shows the relevant processing data of the barrel and mixing screws; it is almost a copy of the touch screen of the Xplore Micro Compounder. Selection of processing data is done in the Settings screen below.
-
Page 50: Process Status Screen
7.3.1 Process status Screen In the “Status” screen, you can see all current processing values of the Xplore Micro Compounder, and also see the current setting values (click on right mouse button), if needed. This screen is nearly identical to the touch screen of the Xplore Micro Compounder, only the push buttons for operation of the “Heating,”... -
Page 51: Settings Screen
In the Settings screen it is possible to control the heating, the force, and the speed of the Xplore Micro Compounder if the touch screen is set at PC mode. If the touch screen is set to PC control all settings made in this screen are directly send to the Compounder, and the Compounder is fully controlled via this screen. - Page 52 When “Force controlled” is selected, it is possible to set a maximum motor speed (RPM) that will not be exceeded. When the motor is turned on the Xplore Micro Compounder will adjust the speed to a value for achieving the set force on the Compounder, but the speed will not go higher than the set maximum speed.
-
Page 53: Program Screen
Mid and Bottom setting are adapted absolutely (with a fixed offset) with respect to the Top setting. The offset is determined by the setting before switching on “Gradient T”. 7.3.3 Program Screen “Program screen” Xplore Instruments B.V Phone: +31 46 476 33 88 Urmonderbaan 22 Fax: +31 46 476 33 89 6167 RD, Geleen E-mail: info@xplore-together.com... - Page 54 The settings of a cycle can be saved under a name which you assign for re-use, by means of the “Save” button. With the “Load” button, previously saved cycles can be loaded again. The process cycles are saved with the extension *.Xplore; these files can be saved freely in the windows screen in any desired directory.
- Page 55 The following screens, generated by the software, illustrate the course of the process cycle. “Preheating” “Command turn heater on” “Process preheating finished” “Filing finished” “Process has finished” “Program has finished” Xplore Instruments B.V Phone: +31 46 476 33 88 Urmonderbaan 22 Fax: +31 46 476 33 89 6167 RD, Geleen E-mail: info@xplore-together.com The Netherlands www.xplore-together.com...
-
Page 56: Cleaning Screen
Layout of the cleaning cycle: subtab “Preheating”: the conditions for the preheating phase can be set here; these are: -The desired temperature -The type of temperature control. Xplore Instruments B.V Phone: +31 46 476 33 88 Urmonderbaan 22 Fax: +31 46 476 33 89 6167 RD, Geleen E-mail: info@xplore-together.com... -
Page 57: Graph Screen
After finishing an experiment, this graph can be saved by means of the “Capture” button, it is saved as a .Bitmap file, so that it can later be inserted in documents. These files are saved under My Documents in the directory My Xplore and the name used for the file can be freely chosen. - Page 58 The following screens illustrate some options of the graph screen: “Comment placing in the graph” “Comments in graph 1 – 4 – 2 – 3” “comment lines” “Saving XLS file” Xplore Instruments B.V Phone: +31 46 476 33 88 Urmonderbaan 22 Fax: +31 46 476 33 89 6167 RD, Geleen E-mail: info@xplore-together.com...
-
Page 59: General Use Of The Compounder
4. Make sure cooling air is present. 5. Respond to any faults and reset them. 6. Perform functional tests (emergency stops; see Section 3.3.5). 7. Start the desired movements on the operating panel. Xplore Instruments B.V Phone: +31 46 476 33 88 Urmonderbaan 22 Fax:... -
Page 60: Stopping, Emergency Stop, Shutdown And Isolation
For some countries the Xplore Micro Compounder is equipped with a separate red emergence stop button. This button can be reset by turning it clockwise. -
Page 61: Cleaning
WARNING OF DANGER: Wear work gloves when taking out the screws, due to sharp edges at the inside of the screw barrel. Xplore Instruments B.V Phone: +31 46 476 33 88 Urmonderbaan 22 Fax: +31 46 476 33 89 6167 RD, Geleen E-mail: info@xplore-together.com... - Page 62 If the barrel is open, the screws cannot be placed in operation! Do not turn off the main switch when cleaning. The temperatures can only be read on the Touch Screen when the power is on. Xplore Instruments B.V Phone: +31 46 476 33 88 Urmonderbaan 22...
-
Page 63: Cleaning Without Cleaning Compound
ATTENTION: When using brass brushes, tiny particles remain behind on the screws and in the barrel, which may adversely influence test results. Xplore Instruments B.V Phone: +31 46 476 33 88 Urmonderbaan 22 Fax: +31 46 476 33 89 6167 RD, Geleen E-mail: info@xplore-together.com... -
Page 64: Cleaning With Cleaning Compound
ATTENTION: When using brass brushes, tiny particles remain behind on the screws and in the barrel, which may adversely influence test results. Xplore Instruments B.V Phone: +31 46 476 33 88 Urmonderbaan 22 Fax: +31 46 476 33 89 6167 RD, Geleen E-mail: info@xplore-together.com... - Page 65 10. Remove the hopper and then cool the compounder by setting the heating back to 220 degrees Celsius. 11. Now let the compounder cool down while running to 220 degrees. 12. Fill the compounder completely with the low temperature cleaning compound. Xplore Instruments B.V Phone: +31 46 476 33 88 Urmonderbaan 22 Fax:...
-
Page 66: Cleaning Of The Compounder
2. If necessary, apply more grease to the notches if there is too little there. 3. First position the screw on the drive unit. 4. Press the screw upward and forward so that it fits well into the barrel. Xplore Instruments B.V Phone: +31 46 476 33 88 Urmonderbaan 22... - Page 67 Xplore Instruments B.V Phone: +31 46 476 33 88 Urmonderbaan 22 Fax: +31 46 476 33 89 6167 RD, Geleen E-mail: info@xplore-together.com The Netherlands www.xplore-together.com...
-
Page 68: Cleaning Of The Barrel
It is advisable to place a rubber mat on the floor in front of the Compounder. If the Valve is not working it has to be cleaned for proper work. Xplore Instruments B.V Phone: +31 46 476 33 88 Urmonderbaan 22... - Page 69 By means of the pliers which is normally used to open the barrel, it is possible to remove the valve in a simple way from the barrel. (Picture 5 and 6) Xplore Instruments B.V Phone: +31 46 476 33 88...
- Page 70 The complete disassembled valve is showed in picture 8, to be able to disassemble to this point you have to follow the next steps because we have in the newer systems a different kind of handle installed on the MC 15. Xplore Instruments B.V Phone: +31 46 476 33 88 Urmonderbaan 22...
- Page 71 After having removed the handle from the valve unit the complete valve can be cleaned. The valve is fitted with 4 four round springs check the position before taking the springs off.(see pictures 12,13,14) Xplore Instruments B.V Phone: +31 46 476 33 88 Urmonderbaan 22...
- Page 72 Barrel for this you have to open up the Barrel again. (See next pages) For the older version machines we have a slightly different handle. (See picture 10 and 17) Xplore Instruments B.V Phone: +31 46 476 33 88 Urmonderbaan 22 Fax: +31 46 476 33 89 6167 RD, Geleen E-mail: info@xplore-together.com...
- Page 73 By turning the positioning pins, the end position of the valve handle can be adjusted. (Picture 18 and On the inside of the Barrel this end position can be checked. (Picture 20 and 21) Xplore Instruments B.V Phone: +31 46 476 33 88 Urmonderbaan 22 Fax:...
-
Page 74: Cleaning Of The Valve Of The Mc5 Barrel
8.3.6 Cleaning of the Valve of the MC5 Barrel The MC5 is fitted with different kind of valve, in this chapter you find the information on the MC5 valve! Xplore Instruments B.V Phone: +31 46 476 33 88 Urmonderbaan 22... - Page 75 If the Valve is not working it has to be cleaned for proper work. Start by removing the top Allen bolt, the adjustment assistance, with an Allen wrench and remove this part see picture 1 and 2. Xplore Instruments B.V Phone: +31 46 476 33 88 Urmonderbaan 22...
- Page 76 By means of the pliers which is normally used to open the barrel, it is possible to remove the valve in a simple way from the barrel. (Picture 7) (Picture used is the picture from the MC15) Xplore Instruments B.V Phone: +31 46 476 33 88...
- Page 77 To be able to disassemble the actual valve you have to remove the handle of the valve. After removal of the handle the valve can be taken out of the barrel and completely cleaned. Xplore Instruments B.V Phone: +31 46 476 33 88...
- Page 78 (The force needed to achieve this is very little don’t use force) The correct pressure is reached when the handle turns smoothly from one end to the other. (Picture 15/16) Xplore Instruments B.V Phone: +31 46 476 33 88 Urmonderbaan 22...
-
Page 79: Closing Of The Barrel
The cause(s) and solution(s) for each fault are given. There are faults which can be easily solved, and faults which require a certain technical skill level. A distinction is drawn between them. (Also check 9.6) Xplore Instruments B.V Phone: +31 46 476 33 88 Urmonderbaan 22... -
Page 80: General Faults
(see Section 2.1). If there is a “B” for operator under “solutions,” then the operator himself can resolve the fault; if there is a “T” for technically competent person, then the service department has to be brought in. If you cannot resolve the fault, contact Xplore Tel: +31 46 4763388. Fault... - Page 81 Software does not Software does not find any compounder Let the software scan again work or does not start Xplore Instruments B.V Phone: +31 46 476 33 88 Urmonderbaan 22 Fax: +31 46 476 33 89 6167 RD, Geleen E-mail: info@xplore-together.com...
-
Page 82: Technical Faults
If faults occur in the Compounder that are not mentioned in the preceding section, or if you do not have sufficient instructions, these faults should be remedied by technically competent persons or contact the Service Department of Xplore: Xplore Instruments BV... -
Page 83: Maintenance
Monthly maintenance should only be done by technically competent persons (see Section 2.1.2). 1. Check the parts of the water cooling for lime build-up and remove this if necessary. Xplore Instruments B.V Phone: +31 46 476 33 88 Urmonderbaan 22... -
Page 84: Maintenance Of Electrical Installation
1300 work hours Verify and inspect ground connections 1300 work hours Replace carbon brushes of the Motor 3 to 4 years Xplore Instruments B.V Phone: +31 46 476 33 88 Urmonderbaan 22 Fax: +31 46 476 33 89 6167 RD, Geleen E-mail: info@xplore-together.com... -
Page 85: Electrical Drawings And Scheme's
ELECTRICAL DRAWINGS AND SCHEME’S Drawing of the compounder see attachment REPLACEMENT PARTS Replacement parts should be ordered from: Xplore Instruments B.V. Arendstraat 5 6135 KT Sittard The Netherlands Fax: +31 46 4763389 : service@xplore-together.com Xplore Instruments B.V Phone: +31 46 476 33 88... -
Page 86: Scrapping; Environment
In either case, the customer/user is responsible for hauling away these parts. Recycling Most parts of the micro compounder are made of steel / aluminium. These parts can be scrapped as old metal. Xplore Instruments B.V Phone: +31 46 476 33 88 Urmonderbaan 22 Fax:... -
Page 87: Key Word Listing
Drive ball bearing Point of fastening for the mixing screws. Emergency stop Device on the Xplore Micro Compounder making it possible to make the entire switch Xplore Micro Compounder voltage-free in an emergency situation. Indicates that the Xplore Micro Compounder is designed so that the operator can Ergonomics work in a proper manner. - Page 88 Temperature regulation via computer, difference between zones is displaced in temperature relative value. regulation Condition in which the touch screen must be set in order to operate the Xplore Run Mode Micro Compounder. Safety distance Distance such that no further risk exists.
-
Page 89: Appendix 1: Declaration Of Conformity
(parts/clauses of) national technical standards and specifications have been used. NEN 1010 Geleen, L.W.G. Rijks Appendix 1: Declaration of Conformity Xplore Instruments B.V Phone: +31 46 476 33 88 Urmonderbaan 22 Fax: +31 46 476 33 89 6167 RD, Geleen E-mail: info@xplore-together.com... - Page 90 Xplore Instruments B.V Phone: +31 46 476 33 88 Urmonderbaan 22 Fax: +31 46 476 33 89 6167 RD, Geleen E-mail: info@xplore-together.com The Netherlands www.xplore-together.com...
Need help?
Do you have a question about the MC 5 and is the answer not in the manual?
Questions and answers